Bigmick Posted July 24, 2015 Share Posted July 24, 2015 Well I said I had another few to do, this is the Young Miniatures Firefighter, 1/10 scale resin bust of an American Firefighter. My aim was to have this finished by September but clean up was so easy I've started it. So, what's in the box. After the Nuts Planet busts I wondered what other manufacturers had to offer, it seems pretty much the same. The resin is reasonably soft which makes sawing off the casting blocks and sanding a breeze. The only thing I did find was wrong was the BA cylinder (breathing apparatus) and yes its a cylinder, as I was told when I joined the Fire Brigade " milkmen have bottles, the Army has tanks, we have cylinders", it should have a domed top as per the new lightweight types made from aluminium with a spun fibreglass layer, what's been cast here looks like a diving cylinder, anyhoo, I cut off the casting block, used CA to glue it to the flat base, built up the joint with CA and resin sawdust and started sanding. I then drilled the underside, fitted some brass rod and fixed it in my Dremel, using a sanding stick to get a nice smooth curve, looks better now. So, where to make a start, I had an idea for the helmet, luckily had some fluorescent yellow enamel in the paint box, I've got some self adhesive which I was going to use to have a couple of stickers with peeled corners, but it's way too thick, I also wanted a tribute to the 343 brother Firefighters who lost their lives in the 9/11 attack. Base coat of matt black, a couple of thinned coats look better than one thick one, dilemma again was keep it resin soaked red leather or black, I painted the patched that would be fluorescent with matt white and the helmet shield. The numbers on the shield were from the decal box, lettering hand painted with a 10/0 brush and REALLY big magnifying glass. That's it for the moment, definitely more to follow. Regards. Mick. 3 Link to comment Share on other sites More sharing options...
Bigmick Posted July 24, 2015 Author Share Posted July 24, 2015 Oh, forgot the helmet, the casting block wasnt really a pain, just had to take a bit more care. 4 Link to comment Share on other sites More sharing options...
giemme Posted July 25, 2015 Share Posted July 25, 2015 Goodness gracious, lettering hand painted ... Anyway, I'm ready for this too Ciao Link to comment Share on other sites More sharing options...
phildagreek Posted July 25, 2015 Share Posted July 25, 2015 Looks good! Link to comment Share on other sites More sharing options...
Mr Modeller Posted July 25, 2015 Share Posted July 25, 2015 Excellent start, this looks a great figure and will make a nice tribute to the brave guys who tragically lost their lives whilst selflessly doing their duty on 9/11 - well done you and I will certainly be watching this 'til the end!! Kev Link to comment Share on other sites More sharing options...
Bigmick Posted July 29, 2015 Author Share Posted July 29, 2015 I managed to progress a little more, the torso is now done, as is the helmet, again all paints are Vallejo, except the rubber hoses that had a quick coat of Tamiya rubber black and the buckles that were painted Tamiya semi gloss black, but as everything has had a coat of Windsor and Newton artists matt varnish in a rattle can it's no longer satin, oh well I'll have to pick out the buckles with a light brush of clear. The BA cylinder was originally going to be yellow, but I would have had to have made some form of cover as the original cylinder colour is either natural as in spun fibreglass and resin, or grey. I tried with a coat of German uniform grey, which has the right green tint, then use thinned ivory over the top in washes to simulate the spun fibres, anyways it didn't work, so painted the cylinder grey, easy option. The contents gauge had the dial painted with a couple of coats of white, painted on the red and green quadrants and cylinder contents lines, when this had dried it had a coat of Tamiya clear, then a wash of khaki to simulate smoke staining (tar, hydrocarbons, carbon etc) which perspex and clear plastic picks up really fast, the same wash went on the flip down eye shields on the helmet, our helmet visors would start to go yellow after a couple of wears in the hot house and even bubble and go opaque, or "fizz" as we call it, if exposed to temperatures over 500 degrees, yes we go into buildings that hot, last fire house training session I was in the room flashed over and the reflective stripes on my tunic melted as did the top of my helmet, best estimate 800 degrees. The tunic isn't massively over weathered and dirtied as dirty kit is washed as soon as possible, we work on the old "one wash, one wear, one spare", the same goes for the yellowing, that's heat damage which if overly done would mean the tunic has been burnt, this wouldn't be allowed to be worn as it would no longer be fully protective. So here's the pictures, hopefully the head will be done tonight and everything brought together. Regards. Mick. 5 Link to comment Share on other sites More sharing options...
giemme Posted July 29, 2015 Share Posted July 29, 2015 Amazing! And thanks so much for the insights ad the detailed explanation! Ciao Link to comment Share on other sites More sharing options...
sean Posted July 29, 2015 Share Posted July 29, 2015 Amazing! And thanks so much for the insights ad the detailed explanation! Ciao What he said, wonderful stuff again Mick, Sean Link to comment Share on other sites More sharing options...
Bigmick Posted July 29, 2015 Author Share Posted July 29, 2015 (edited) Bit more on the head, as usual eyes first, this is the first Young Miniatures bust I've done and you can see the difference, I think I've been spoilt with the Nuts Planet offerings, this one I've actually got to make my own demarcation lines for things like the eyes. Anyways, first was marking the position of the iris with a mix of chocolate brown and black, this was infilled with chocolate brown, overpainted with flat earth then I painted the highlight reflection with a mix of flat earth and white. The sculpt of the eye area means there's a small ledge, from the front the iris doesn't look round, almost an hours work on both eyes made sure they were. Then came the base coat, I'm still learning about how to paint flesh so don't listen to what I say lol, this was medium flesh tone, left to dry for half an hour before the washes started. First wash was flat base and white which made him look like an anemic zombie, so I made a mix of flat flesh, flat red and white, as I did on Lord of Lions, and overpainted everything again, this looked wrong so started more washes, firstly of heavily diluted red, then washes of flat earth, again heavily diluted, I've started painting the wash stage outdoors as I get a much better idea of the tones and how the washes are building up. So, this is as far as I've got for the moment, given a coat of Windsor and Newton matt varnish to protect what I've done and to make myself stop playing with it, more washes to follow, then the flash hood around his neck and the fold down Nomex collar from the helmet. Regards. Mick. Edited July 29, 2015 by Bigmick 3 Link to comment Share on other sites More sharing options...
Bigmick Posted July 29, 2015 Author Share Posted July 29, 2015 That's him finished, I'll take some better pictures in daylight tomorrow, now, where did I put that 101st Airborne bust. Regards. Mick. 5 Link to comment Share on other sites More sharing options...
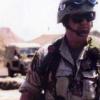
Bigmick Posted July 29, 2015 Author Share Posted July 29, 2015 And yes, you do get dirty and sweaty and tired. Regards. Mick. Link to comment Share on other sites More sharing options...
DAG058 Posted July 29, 2015 Share Posted July 29, 2015 Awesome work! I wish I could paint figures, huge respect for your skills. Link to comment Share on other sites More sharing options...
giemme Posted July 30, 2015 Share Posted July 30, 2015 Great job (as usual, I must say now). Looking forward to daylight pictures Is that you in the last pic? Ciao Link to comment Share on other sites More sharing options...
Bigmick Posted July 30, 2015 Author Share Posted July 30, 2015 Thank you again for the comments guys, much appreciated and yes Giemme that's me having a quick rest between BA jobs 2 Link to comment Share on other sites More sharing options...
Billydick Posted July 30, 2015 Share Posted July 30, 2015 Brilliant Mick, just Brilliant !! BillyD Link to comment Share on other sites More sharing options...
colin Posted July 30, 2015 Share Posted July 30, 2015 Another outstanding one Link to comment Share on other sites More sharing options...
FrancieT Posted July 31, 2015 Share Posted July 31, 2015 Excellent. Link to comment Share on other sites More sharing options...
Bigmick Posted November 10, 2015 Author Share Posted November 10, 2015 Well I had a result, I took him to the IPMS Nationals at Scale Model World and got a commended, pretty darned happy with that. Regards. Mick. 1 Link to comment Share on other sites More sharing options...
giemme Posted November 10, 2015 Share Posted November 10, 2015 Ciao Link to comment Share on other sites More sharing options...

Recommended Posts
Create an account or sign in to comment
You need to be a member in order to leave a comment
Create an account
Sign up for a new account in our community. It's easy!
Register a new accountSign in
Already have an account? Sign in here.
Sign In Now