Maverick231 Posted December 3, 2014 Share Posted December 3, 2014 Hey folks! The other day I returned home from what I thaught was a horrible morning to be greeted by a huge box with 2 very nice Ruskies in it . As you can tell I was very happy once I opened the box and had a look . In the next few days once XH558 has been completed the TU-16 will be started followed by the 2 Mig's. 3 Link to comment Share on other sites More sharing options...
Tomjw Posted December 3, 2014 Share Posted December 3, 2014 I'll be following this one, thats for sure. Looks like this could be very interesting. Cheers, Tom Link to comment Share on other sites More sharing options...
Radleigh Posted December 3, 2014 Share Posted December 3, 2014 Subscribing.... Link to comment Share on other sites More sharing options...
Maverick231 Posted December 4, 2014 Author Share Posted December 4, 2014 Tomjw - thanks mate its always nice to have your support, interesting could be a very good word for these builds . These two are with out doubt the most adventurous kits I have ever built so it will be a major learning curve for me! Radleigh - Thanks mate watch this space . There will also be a third Ruskie joining the party in the form of an Italeri Mig-29UB, I wanted to paint her into Polish markings but now I want Russian markings because of the Cold War SIG. 1 Link to comment Share on other sites More sharing options...
Maverick231 Posted December 4, 2014 Author Share Posted December 4, 2014 After a tuff time moving house(thanks to a curtain letting agent), I decided to try and find out my 3rd Russian aircraft. So here are the 3 sisters: I will start these birds very soon. 1 Link to comment Share on other sites More sharing options...
Maverick231 Posted December 6, 2014 Author Share Posted December 6, 2014 I need some advice. Would it be possible to use the same green in the TU-16 that is applied in this Lightning cockpit: Link to comment Share on other sites More sharing options...
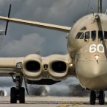
Flankerman Posted December 6, 2014 Share Posted December 6, 2014 Here's a couple of photos of a Tu-95K-22 Bear wot I took during a visit to Engels in 2007..... Colour photos of Tu-16 cockpits are pretty rare - but I suspect they would be similar to the Bear. Ken 2 Link to comment Share on other sites More sharing options...
Robin-42 Posted December 6, 2014 Share Posted December 6, 2014 I think you will find the Tsukuda Mig only has a passing resemblance to the real thing if it is the same kit reboxed by Revell. Every photo I looked at showed a major flaw when I compared it to the kit .Mine is scheduled for a single high speed test if I get around to it. 1 Link to comment Share on other sites More sharing options...
HOUSTON Posted December 6, 2014 Share Posted December 6, 2014 Oooh I am seated cross legged on the floor thinking this is great build to follow. Way to go Maverick. Neat start. Great photos too from Flankerman.y 1 Link to comment Share on other sites More sharing options...
Maverick231 Posted December 7, 2014 Author Share Posted December 7, 2014 Flankerman - Thanks for the help mate. By the looks of it I could get away with using the interior green, black and grey as the background for the instruments. Robin-42 - Thanks for the heads up mate, having looked through the forum though this thread shows me a pic of the completed model: http://www.britmodeller.com/forums/index.php?/topic/234930325-tsukuda-172-mig-31/#entry1814161 I dint think its too bad to be honest with you. At £4 for the kit I couldnt really say no . Good luck on your build mate, please let me have a look at the progress as Id love to compare. HOUSTON - Thanks mate. I hope you enjoy the build, I do plan on startibg very soon, that is why I started the thread to give me a kick up the rear to start . As soon as progress is made pics will be posted . Link to comment Share on other sites More sharing options...
Maverick231 Posted December 8, 2014 Author Share Posted December 8, 2014 Last night saw the start of my first ever Russian kit, the TU-16. I primed the interior parts for the cockpit, painted the cockpit floor, instrument panel and the door way. I have glued the Instrument Panel in place. Here is a pic of the Panel: Once the glue has set I will take a pic of the 2 joined together. I know the colours are not right but the panel doesnt match any pics I have found so I did the best I could with what I had and I think it will be hidden from view anyway. This is my first ever attempt at detail in the cockpit. Without a fine tip brush it can be very difficult. Link to comment Share on other sites More sharing options...
Tomjw Posted December 8, 2014 Share Posted December 8, 2014 A good start. I always go over the top in cockpits whether they will be seen or not. I guess I just enjoy doing it. Looking forward to seeing more. Cheers, Tom. Link to comment Share on other sites More sharing options...
Maverick231 Posted December 8, 2014 Author Share Posted December 8, 2014 Thanks Tom . Yeah I enjoy it too, Its my first time but I know what you mean. More progress coming soon...... 1 Link to comment Share on other sites More sharing options...
James G Posted December 8, 2014 Share Posted December 8, 2014 Nice progress..I'll be watching with interest. Link to comment Share on other sites More sharing options...
Maverick231 Posted December 11, 2014 Author Share Posted December 11, 2014 Today I have done alot of work on the Badger. I have assembled the whole cockpit and finished the paint work inside the nose section. The nose and cockpit have been glued together: The fuselarge interior has finished being painted and the engines have been glued to the fuselarge: Also the bomb bay and the 2 bombs she will carry have been assembled and painted. And I used the last of the new mixed paint I had to paint the gear wells as the colour matched the Mig-21's wheel well colour: Im hoping to carry on tonight but who knows if I will get chance . 1 Link to comment Share on other sites More sharing options...
Maverick231 Posted January 15, 2015 Author Share Posted January 15, 2015 Ok so progress has at last been made on the mighty Badger! The fuselarge has been glued together along with the bomb bay, nose wheel bay and both gun turrets are in loose so they can be turned. Here is a pic with the nose dry fitted to give a demonstration of the length of the TU-16: I wanna get the nose glued in place tonight and add the filler but Il update you all on that when its been done. 1 Link to comment Share on other sites More sharing options...
Maverick231 Posted January 15, 2015 Author Share Posted January 15, 2015 Ok so the wings and tailplanes have been added: 2 Link to comment Share on other sites More sharing options...
Maverick231 Posted January 25, 2017 Author Share Posted January 25, 2017 Hey folks! Rather than starting a new thread I decided to revive my old thread. After nearly a year of laying dormant the TU-16 makes a move! After observations and alot of working out I've decided to put all except one of the doors in the closed position so alot of filler was needed, more filler was needed for the wing and gear lumps, all the moving surfaces have been put on, the 2 wing mounted weapon pilons have been drilled and glues and now after a little more sanding she will finally be ready for paint after this pic was taken: Last night I spent some time in the paintshop. Masking off the open holes with tissue and bits of tape really does the job! Low tech with max results! When the TU-16 Badger is complete she will be the first big build I've ever completed next I line to the MiG-31! Here is a shot of her paintwork nicely finished and stored in a dust free cabinet: 1 Link to comment Share on other sites More sharing options...
John_W Posted January 25, 2017 Share Posted January 25, 2017 Nice, she is a big beast. I still think the Soviet Airforce must have had as many tailgunners as pilots. Perhaps it was somewhere to put the conscripts who couldn't do anything else. 1 Link to comment Share on other sites More sharing options...

Recommended Posts
Create an account or sign in to comment
You need to be a member in order to leave a comment
Create an account
Sign up for a new account in our community. It's easy!
Register a new accountSign in
Already have an account? Sign in here.
Sign In Now