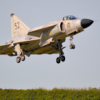
Engineer66 Posted September 19, 2014 Share Posted September 19, 2014 (edited) Hi chaps, Thought it was about high time I posted a wip. I've built many 'out of the box' models over the years, and not finished just as many! I've decided that I really need to 'up my game' a wee bit having seen the quality of work on here. So thought if I post a thread on here I might get the encouragement to complete it, and some helpful pointers to keep me heading in the right direction. For my this performance I've decided to go with Revell's 1/48 A-10. I picked it up a few months ago for half price, so decided to spend the difference on some aftermarket, we'll that was the plan, but I ended up spending more than I saved! I have the Aires resin cockpit, True Details wheels, Eduard exterior etch and Master pitot and cannon. From what I've discovered the Revell kit is the most accurate in outline, but does have raised panel lines. So this years learning points will be: First time using aftermarket First time working with resin First time working with etches First time re-scribing panel lines Good thing I've chosen the A-10, it's an ugly blighter, if I make a right horlicks of it I can't make it look any worse! Wish me luck Al Edited to add pic. Edited November 13, 2014 by Engineer66 5 Link to comment Share on other sites More sharing options...
Paramedic Posted September 19, 2014 Share Posted September 19, 2014 Good thing I've chosen the A-10, it's an ugly blighter, if I make a right horlicks of it I can't make it look any worse! One of the most beautiful a/c ever! Good luck mate and looking forward to seeing it, A-10s are always nice to see. Link to comment Share on other sites More sharing options...
goggsy Posted September 19, 2014 Share Posted September 19, 2014 I'll look forward to this. I never get why people refer to the A10 as ugly; it's unusual looking, especially around the engines, and utilitarian but then so are many aircraft of its generation. It's essentially a flying gun platform just like the AC130, and apart from the engines and tail is a fairly similar shape, but people don't go on about the herc being ugly. Not trying to pick a scrap or anything but just musing on the subject. Link to comment Share on other sites More sharing options...
Engineer66 Posted September 19, 2014 Author Share Posted September 19, 2014 Thanks Paramedic, Too true Goggsy, I do like the look of it, it was built for a purpose and it does that purpose very well indeed, it just looks different to the norm. I have fond memories of them from air shows in the 80's and 90's and sitting on top of the moors at Osmotherley watching them go 'through the Gap' at low level. Al 1 Link to comment Share on other sites More sharing options...
goggsy Posted September 20, 2014 Share Posted September 20, 2014 I spent much of my childhood in the Lake District watching these doing their thing along with F111s from Upper Heyford. Great days. Link to comment Share on other sites More sharing options...
shawty82 Posted September 20, 2014 Share Posted September 20, 2014 Very brave incorporating all those new areas of modelling! Good luck, especially with the Aires resin, sure you'll do great Link to comment Share on other sites More sharing options...
Engineer66 Posted October 20, 2014 Author Share Posted October 20, 2014 OK, its been a while, longer than i thought! Finally managed to make some progress a start on the A-10. Here's the kit pit alongside the Aires replacement, worth the investment methinks... I began by removing the moulded detail on the insides of the kit parts in order to fit the new tub, which seems to fit quite well, considering it wasn't for this kit. Then I started looking at the moulded detail in the nose gear bay I think it needs to go and be replaced by something a little better... first job was to re-make the thingumajig that looks a bit like a handbrake, shown here with a standard number 9 blade, and one of my 'specials' (a number 9 after 2 minutes with the grinder) and now it's on with removing the raised detail. Al 1 Link to comment Share on other sites More sharing options...
Fighting 84 Posted October 20, 2014 Share Posted October 20, 2014 Off to a great start! I have one of these in my small stash, so I will be following your build closely. Depending on how it goes for you, I may opt for some of the same AM parts you did. I am mostly curious to see how the rescribing goes. I am not sure if I ever want to try to go down that road myself... But I will keep an open mind on the subject! LOL Link to comment Share on other sites More sharing options...
skipy Posted October 20, 2014 Share Posted October 20, 2014 That new cockpit was worth every penny. The revell one is frankly awful. Link to comment Share on other sites More sharing options...
tempestfan Posted October 20, 2014 Share Posted October 20, 2014 By the looks, I think the basic plastic is classic Monogram, or am I wrong ? The apparent size difference of the tubs is striking. Link to comment Share on other sites More sharing options...
Engineer66 Posted October 21, 2014 Author Share Posted October 21, 2014 It is the old monogram kit from 1986, re boxed and with new decals. Typical monogram, good outline, but raised panel lines! Link to comment Share on other sites More sharing options...
Tomjw Posted October 21, 2014 Share Posted October 21, 2014 I like how this is shaping up. Think I'll come along for the ride. Tom. Link to comment Share on other sites More sharing options...
Engineer66 Posted October 30, 2014 Author Share Posted October 30, 2014 Evening all, Thought it was about time I posted an update on this 'ere thread. First let me apologise for the lack of updates, but I work daft shifts and have four days in a row where I can't do anything meaningful or worthwhile. This is then followed by four days off where I can be a tad 'creative', (lists from SWMBO permitting!). However these four days coincided with the school holidays, so family has to take priority. Anyway to progress... After test fitting the excellent pit from Aires I made a discovery, the kit pit is a bit shallower, meaning that the gear bay is deeper, and yes you've guessed the kit bay no longer fits! We'll out came the scalpels and sanding sticks etc and the raised detail was removed. After spending some time on t' interweb I managed to come up with some decent pics of the interior of the nose bay, so set about glueing small bits of plasticard together to try and create something close to the real deal. There should be a couple of pictures here, but for some reason photobucket has decided not to let me in! As soon as I get the issue sorted I'll post a rather blurry, poorly lit and difficult to make out camera phone picture of progress to date! Have a good evening Al Link to comment Share on other sites More sharing options...
Engineer66 Posted November 1, 2014 Author Share Posted November 1, 2014 (edited) Ok I've beaten photobucket into submission, all I need to do now is work out how to add photos on the mobile version of the forum ! Ha! success, dont use the mobile version, wait until you get home and use a proper computer! Anyway, here are a couple of photo's of work on the nose gear bay so far... The countersunk holes in the rectangular 'ballast weights' will eventually have Grandt Line bolts in them, but i'm waiting until the bay has been painted as they are a different colour. I also still need to add various bits of plumbing and wiring, hopefully I'll get that done ealy next week when I'm off again. Cheers Al Edited November 1, 2014 by Engineer66 1 Link to comment Share on other sites More sharing options...
Engineer66 Posted November 13, 2014 Author Share Posted November 13, 2014 Evening all, Time to post an update on this 'ere project of mine... I don't have a great deal to show other than a very large pile of dust from the endless hours of sanding to get the resin pit to fit into a fuselage it wasn't designed for! I don't really think a picture of the dust pile is a good use of Photobucket's limited allowance (I'm a cheapskate and am using the free account ) So here's a couple of pic's of something I've been ruining my eyesight on for the last few days, it's the front nosegear 'up lock' and gear door closing mechanism with a 5p piece for scale. apologies for the poor photo's but i couldn't be bothered to get the SLR out so used my phone instead: First an exploded view, please, nobody sneeze! and now assembled... And just as an aside, I picked up one of these 'sticky, picker-upper pen thingies' from my local art shop. Why did I not buy one of these before, its absolutely brilliant, no more firing carpet monster food out of a pair of tweezers! Every self respecting modeller should own one! See ya' all later when I've regained my sanity and eyesight ! TTFN Alan 1 Link to comment Share on other sites More sharing options...
Engineer66 Posted December 9, 2014 Author Share Posted December 9, 2014 Evening all, Progress so far: Not a lot!I haven't had time to do much on the A-10 lately due to other commitments, however I have managed to open out the grills on the side of the fuselage and thin the side walls down which was much easier than my original plan of making and fitting a new panel! I'll fit some mesh behind these later. I also had a go at opening up the other ducts on the cockpit sides, but due to damage when I was opening them up I ended up cutting a square hole and putting some sheet in the back to make the 'ramp'. I have also managed to make a new panel to replace the vent panel on the lower LHS of the cockpit exterior with some better looking slots, and a new panel for the revised circular vent in front of it. I've just dropped them in place in the picture below to see how they look, and I don't think they look too bad, I just need to clean up the slots a bit more on the larger panel and then work out how to recess it into the side of the aircraft.I also need to work out how to deal with the faired 'bullet' shaped vents (one is visible on the far right of the photo above the AOA vane) as well, at the moment I am thinking of sanding them off and replacing them with some 'crash molded' versions' any suggestions? The two strips of white plastic in the air vent to the side of the ladder door are just to correct a mistake I made when cutting out the grill, a bit too much enthusiasm on my part! that's it for now. Cheers Al 1 Link to comment Share on other sites More sharing options...
IanW Posted December 9, 2014 Share Posted December 9, 2014 Wow, great detailing! I've never heard of those 'sticky pens' before -lookslike I'll have to try and find one over here in NZ! Cheers, Ian Link to comment Share on other sites More sharing options...

Recommended Posts
Create an account or sign in to comment
You need to be a member in order to leave a comment
Create an account
Sign up for a new account in our community. It's easy!
Register a new accountSign in
Already have an account? Sign in here.
Sign In Now