kingpin141 Posted September 12, 2014 Share Posted September 12, 2014 I needed a break from the Afghan dio i'm doing and fancied something completely different. Step forward Airfix's 1/350 Lusty. I've got White Ensigns Air Wing photo etch coming but I just couldn't wait. Inspired by Ex WAFUs gobsmackingly good Ark build to find more detailing to add I've had a crack at an engine. I cut out the engine cover on one side and blacked with some plasticard. The engine itself is the fore grip off a 1/35th MP5. For the engine cover I cut a tiny piece out of an X-ACTO pack. I am officially happy. I've also started to file/sand/trim/cut the sponsons to a more appropriate shape and size 4 Link to comment Share on other sites More sharing options...
phildagreek Posted September 13, 2014 Share Posted September 13, 2014 Talk about fiddly! Link to comment Share on other sites More sharing options...
bootneck Posted September 13, 2014 Share Posted September 13, 2014 Those are seriously small elements you are working on, nice work and looking forward to the finished model. Mike Link to comment Share on other sites More sharing options...
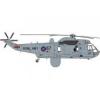
kingpin141 Posted September 13, 2014 Author Share Posted September 13, 2014 First up I put a grubber up on the engine just to see how it looks. Judge for yourselves. Next up my first crack at a Junglie. The sponson and support strut were basically cut, filed, sanded etc to about the right teeny tiny shape. The resulting hole was filled and I used a piece of photo etch fret as the strut. And finally a Cab having a severe identity crisis 1 Link to comment Share on other sites More sharing options...
kingpin141 Posted September 14, 2014 Author Share Posted September 14, 2014 Does anyone know where I can get some 1/350th docks etc? Link to comment Share on other sites More sharing options...
kingpin141 Posted September 15, 2014 Author Share Posted September 15, 2014 With the Afghan dio almost done I can finally have a proper look at the Lusty. She's a big bugger. I had to clear me desk just to put it down. I'll need a bigger shed when someone releases the Queen Elizabeth. I mocked up the hanger to see what I've got to work with. I intend to light her hanger deck, island and quarter deck. I'll be using a cheap LED set and fibre optic out of an old Xmas tree. The battery pack will have to live in the forward hanger and route the optics from there. If I can I want to make the forward lift removable so I can change the batteries as and when. The fit of the rear lift lowered is terrible. Sits far too high. 5 minutes later. It's far from perfect but better than the original. The view through the lift well. Eventually I want to make a dock and have her along side so I can light her up like Blackpool pier. Link to comment Share on other sites More sharing options...
Murdo Posted September 15, 2014 Share Posted September 15, 2014 The man's mad I tell you! Mad! Cracking work so far mate. Link to comment Share on other sites More sharing options...
Ex-FAAWAFU Posted September 16, 2014 Share Posted September 16, 2014 Hoorah! Someone else as bonkers as me! Link to comment Share on other sites More sharing options...
kingpin141 Posted September 16, 2014 Author Share Posted September 16, 2014 I've been sat staring for a while, trying to work out how i'm going to light her. What I've come up up with is this. With the battery pack going in the forward hanger I'm going to cut out a piece of hanger wall from the marked A area. This will then be used as the forward hanger bulkhead. Not only will the battery pack be there but the 5 LEDs and the bundles of optic strands too. Hopefully with the wall out there will be enough room to fit them in. After looking at the bridge and how it goes together. The only way I can see of doing it is up lighting it. The strands will come up at B then up into the bridge. I'm torn between lighting it red for night ops or green from all the cool electronic displays I'm going to pretend are in the real ship. I'll put some chrome tape on the ceiling to hopefully make them a bit brighter. For the hanger I'll just route the strands along the top of the hanger and some more to go to the quarter deck. 1 Link to comment Share on other sites More sharing options...
kingpin141 Posted September 17, 2014 Author Share Posted September 17, 2014 After a happy evening with the tape i've mocked her and had another "stare". And I've completely changed how i'm going to light her. The battery pack Can't live in the hull as I wont be able to get to the switch without taking the lift off. Seeing as how she will be in the water the pack will go in the base. Also instead of 5 LEDs and really long strands, more LEDs and shorter strands. With one or more LEDs lighting each area. 15 LEDs should do the trick. I think i'm still going to shorten the hanger to give me some more room to play with. I'm going to put a mirror at the front of the hanger and make it look longer that way. This is the extent of the infamous hull warp. Cue a huge sigh of relief. She will be populated with crew being busy. In this area will be a crew member being violently ill over the side. This would be me on my first night at sea. My one and only time thank god. And finally this has arrived. I am resisting the urge to get started on them until im actually ready. Which, I fear, will not be for some time yet. 1 Link to comment Share on other sites More sharing options...
kingpin141 Posted September 17, 2014 Author Share Posted September 17, 2014 Here be the missing pic. Sorry about that Link to comment Share on other sites More sharing options...
kingpin141 Posted September 20, 2014 Author Share Posted September 20, 2014 I've been sat staring again and had another change of plan. I'm lowering the hanger deck head down onto the top row of stowage racks where to white card is. This gives me room to route the optic strands. The stowage racks looked empty so some quick cutting later we have this. Another detail i'm going to add is tool control just forward of the seakings nose. the view through the lift Because the strands wont bend sharply 'm going to have to bring them in at an angle from the back, hence the need to lower the hanger. Here is the first test Link to comment Share on other sites More sharing options...
Jockster Posted September 20, 2014 Share Posted September 20, 2014 I'm liking the effect, kingpin, have you considered SMD LEDs? I'm wiring them into the roofs of both Lusty and Big 'E'. They look like industrial lights as they are 1mm x 2mm in size. Don't worry about the hull warp, it all straightens out when the hangar and deck are fixed into place. The only area of concern really is very front starboard corner of the flight deck where it sits in the hull. A little bit of file and fit and file and fit sorts it out. Enjoying the way you're thinking! :-) :-) Link to comment Share on other sites More sharing options...
kingpin141 Posted September 20, 2014 Author Share Posted September 20, 2014 I'd love to use them Jockster but lack of budget and no talent whatsoever with electronics means i'm restricted to cheap LED strings. But I can file them down to make them slightly more manageable. 1 Link to comment Share on other sites More sharing options...
kingpin141 Posted September 20, 2014 Author Share Posted September 20, 2014 Another plus point of working on a none existent budget is it stretches me creatively. Makes the final outcome even more satisfying. Link to comment Share on other sites More sharing options...
Jockster Posted September 21, 2014 Share Posted September 21, 2014 I use both my friend, LED strings from the poundshop because it's a nice easy very inexpensive lighting rig and SMD LEDs on eBay at under a fiver for 100. I'm no good with electronics either so mostly trial and error for me. (I must get a book on simple electronics). I also get the poundshop LED torches and strip them down too! :-) Link to comment Share on other sites More sharing options...
kingpin141 Posted September 23, 2014 Author Share Posted September 23, 2014 Evenin all. This is a catch of of me last few nights work. First up. Tool control has been added to the hanger. Hopefully it work be lit with an AEM at the counter. The stowage boxes has been painted. It's Vallejo sand partially mixed with brown so that when its painted on it look a bit like wood. I've knocked up a Merlin with some of the photoetch. Putting the wipers on is a step beyond my capabilities. I've been experimenting with the lighting. I cut a section out of the overhang under the hangers rear bulkhead. For the forward hanger i lay a piece of really thin plasticard along the top stowage shelves and put the LEDs on that. This be the result. Must get a white set of lights. 1 Link to comment Share on other sites More sharing options...
kingpin141 Posted September 24, 2014 Author Share Posted September 24, 2014 Another fun evening playing with LED's. I was going to use fibre optics for the bridge and the (Insert correct name here. I have no idea and i'm buggered if I can find out) below it, but I cant find the fibres. So LED's it is. Two for the bridge and one for the ?. And this is the result. 4 Link to comment Share on other sites More sharing options...
crennis Posted September 30, 2014 Share Posted September 30, 2014 Great effect but not sure the bridge needs lighting...On a tour of Lusty one dark Tyneside evening a few years back, the poor AB tasked with showing us around didn't have a clue where the Bridge light switch was resulting in us "looking" around aided only by the limited light spilling in from the pylon on the dockside. Link to comment Share on other sites More sharing options...
kingpin141 Posted October 2, 2014 Author Share Posted October 2, 2014 Hi Crennis. I'm not going for 100% accuracy. I served on the Invince and can't remember seeing the bridge brightly lit either. but then I never had to go up there. My primary concern with this is that it looks "cool". No one can ever accuse me of being a rivet counter. From previous experience even people who don't like models always go "Mmmmmmmm shiny" when you turn the lights on lol. 1 Link to comment Share on other sites More sharing options...

Recommended Posts
Create an account or sign in to comment
You need to be a member in order to leave a comment
Create an account
Sign up for a new account in our community. It's easy!
Register a new accountSign in
Already have an account? Sign in here.
Sign In Now