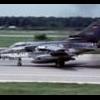
Filler Posted January 11, 2013 Share Posted January 11, 2013 Ok then, in at the deep end. I am going to attempt to build the NASA F-15B #836 from the Dryden Flight Research Center, as it was during 2006’s Gulfstream Aerospace, Quiet Spike research project. Here's a photo of the real thing (hope it's ok to post this picture as believe it or not, I didn't take it). I will be using this 1:48 Hasegawa TF-15 Eagle Bicentennial Bird kit. I’ve not taken sprue shots as I expect that many of you are pretty familiar with Hasegawa’s Eagles. To go with the kit I have ordered a set of NASA decals via eBay but they’ve not arrived yet though. So still crossing my fingers that there’ll be some appropriate sized NASA logos on the sheet when it arrives. I’m in the process of getting hold of some further decals for the ‘836’ on the vertical stabilisers and the Gulfstream logo to go on the spike. And finally on the decal front I’ve just ordered some gold stripe decals by Microscale via Hannants. I’m hoping these will do for the gold edge to the blue sections as I really don’t fancy trying to mask and paint them. Then, arguably the most important feature of this aircraft is the spike and this I have 3D modelled and had printed at work. Just got it this afternoon and I’m quite happy with it but it’s definitely going to take some careful effort to get it nice and smooth. And as for fitting it – shudders! Finally, I will probably get some Aires exhausts (turkey feather type) to replace the kit ones. Not bothering with AM seats as I’ll be going closed canopy. This project is likely a bit much for a novice modeller so I do have plans B, C and D (which used to be plan A) for in the event of this going to pot. (Sorry if I've been a bit wordy) 2 Link to comment Share on other sites More sharing options...
Dazzio Posted January 11, 2013 Share Posted January 11, 2013 I found loads of pictures of this plane from the Dryden website last night. Was thinking about making this, but it'll be my plan F and in 1/144. Will be watching your build with great interest Kind Regards, Dazz Link to comment Share on other sites More sharing options...
SaintsPhil Posted January 11, 2013 Share Posted January 11, 2013 Wow this will be one to watch! The probe looks smart, maybe repeated coats of Mr Surfacer would smooth it out? As for fitting it looks like you can just lop off the end of the nose and butt the probe up, but best to reinforce the joint with something... Link to comment Share on other sites More sharing options...
Marlin Posted January 11, 2013 Share Posted January 11, 2013 Never seen that one before. It's looks very interesting. /Bosse Link to comment Share on other sites More sharing options...
Radleigh Posted January 11, 2013 Share Posted January 11, 2013 I love anything NASA, Nice work on the 'stick'. Link to comment Share on other sites More sharing options...
DaveJL Posted January 11, 2013 Share Posted January 11, 2013 An interesting project! Dave Link to comment Share on other sites More sharing options...
Dan Posted January 11, 2013 Share Posted January 11, 2013 Air to air Jousting! Wonder why it never caught on? It's an interesting one for sure this and I will be following, best of luck 1 Link to comment Share on other sites More sharing options...
sean Posted January 11, 2013 Share Posted January 11, 2013 Interesting indeed, I too shall be following this build closely, good luck, Sean Link to comment Share on other sites More sharing options...
racedees Posted January 11, 2013 Share Posted January 11, 2013 Nice work on the stick. Can't wait to see it build. Link to comment Share on other sites More sharing options...
Filler Posted January 13, 2013 Author Share Posted January 13, 2013 48 hours in and not a lot to show yet. Apart from non-modelling distractions I am taking a somewhat long winded approach as in an effort to lessen the chances of me making a hash of this I am building two other kits (Monogram AH-1S Cobra and Academy F-16C both 148 OOB) as technique practice. The Cobra is taking point. Anyway, the other 2 kits aren't helping much when it comes to the Quiet Spike. The 3D printed piece had me pretty impressed, initially, but the filling and smoothing task is proving tricky. It prints in layers and imagine filling dozens of fine seam lines - a bit like the edge of a deck of cards. Largely through lack of experience I wasn't sure what type of filling material to use, Miliput White, Squadron Green, Tamiya White, Mr Dissolved Putty or Mr Surfacer 1200 (I have a lot of gear for someone who has only built 2 kits in the last 20 odd years!). I plumped for brushing on Mr Dissolved Putty. Nice stuff but it didn't look as successful as I'd hoped for. So a gentle rub down was followed by a coat of Tamiya Fine Surface Primer. That did improve things after a bit more gentle sanding. Biggest concern is losing the shape. Tomorrow I think that I'll maybe spot a few bits with either Mr Dissolved or Mr Surfacer 1200 and then apply another coat of TFSP from the rattle can. Might see if can get my mate in the development office to sneak me another spike. I'm sure I've already learned enough to make a better effort a second time around. Link to comment Share on other sites More sharing options...
Stinger 9 Posted January 14, 2013 Share Posted January 14, 2013 Pardon my ignorance but what was the purpose of such a massive spike? Regards, Montgomery 1 Link to comment Share on other sites More sharing options...
Dazzio Posted January 14, 2013 Share Posted January 14, 2013 It was used to investigate the suppression of sonic booms. Basically instead of the usual 2 booms, they tried making 3 booms as that (in theory) wouldn't let the windows rattle as much on the houses below. Good start tho, wouldn't know where to start with that spike personally!! That's it in a nutshell. Kind Regards Dazz Link to comment Share on other sites More sharing options...
SaintsPhil Posted January 14, 2013 Share Posted January 14, 2013 A start is a start! I'd be inclined to go with the Mr Surfacer, if you go too thick and loose the shape you can remove it with nail varnish (the stuff that contains acetone). In fact maybe thats something to try, a good thick coat of mr Surfacer then smooth with a cloth soaked in nail varnish. Should give a much smoother finish than sanding! Link to comment Share on other sites More sharing options...
Filler Posted January 14, 2013 Author Share Posted January 14, 2013 A start is a start! I'd be inclined to go with the Mr Surfacer, if you go too thick and loose the shape you can remove it with nail varnish (the stuff that contains acetone). In fact maybe thats something to try, a good thick coat of mr Surfacer then smooth with a cloth soaked in nail varnish. Should give a much smoother finish than sanding! Thanks, that sounds like a good idea. I'll try that if I can get another spike and I might as well give it a go now with the current spike. Pardon my ignorance but what was the purpose of such a massive spike? Regards, Montgomery Sorry, should have explained its purpose in my initial post. Just to expand slightly on what Dazzio said, it was a test project instigated by Gulfstream Aerospace with the ultimate aim of producing supersonic business jets that could whizz around the states. Here’s the wiki page for more information. Link to comment Share on other sites More sharing options...
Dazzio Posted January 14, 2013 Share Posted January 14, 2013 If it makes your life any easier Filler, the wiki does say that the probe was telescopic. I guess you could make a smaller one, it you are doing the wheels down?? Kind Regards Dazz Link to comment Share on other sites More sharing options...
Filler Posted January 14, 2013 Author Share Posted January 14, 2013 I did consider that, as retracted it ends up at 14ft as oppossed to 24ft when extended. So it would be easier to cope with but, I just think that it looks a lot more impressive when extended (this is getting a bit like a Finbar Saunders strip from Viz). I am still doing it wheels down as there are plenty of pictures of it on the ground with the spike extended. It even made a landing with the spike extended in January 2007. regards Phil 1 Link to comment Share on other sites More sharing options...
Dazzio Posted January 14, 2013 Share Posted January 14, 2013 That's fair enough, at least it's an option if the extended version defeats you. I have got a picture of the same plane (836?? Tail number) with the MTD minus the probe but with the same paint work it had as the Quiet Spike, also another option. Kind Regards Dazz Link to comment Share on other sites More sharing options...
Stinger 9 Posted January 14, 2013 Share Posted January 14, 2013 (edited) I did consider that, as retracted it ends up at 14ft as oppossed to 24ft when extended. So it would be easier to cope with but, I just think that it looks a lot more impressive when extended (this is getting a bit like a Finbar Saunders strip from Viz). I am still doing it wheels down as there are plenty of pictures of it on the ground with the spike extended. It even made a landing with the spike extended in January 2007. regards Phil Thanks Dazz and Phil for the information. It does fire the imagination thinking about the what might happen if those two great actors John Holmes and Ron Jeremy got together. One can't help liking the Finbar Saunders analogy. What a pity the discussion is not about large flaps or massive bomb doors. Finbar would be in his element. Regards, Montgomery Edited January 14, 2013 by Stinger 9 Link to comment Share on other sites More sharing options...
Filler Posted January 19, 2013 Author Share Posted January 19, 2013 Time for a progress update, or should that be lack of progress? Well, it’s not being going well since I started last weekend. The original spike was printed horizontally and it proved very difficult to fill and sand/smooth without losing shape. Plus, with hindsight, I was probably being a bit hasty. So I asked my colleague if he could print me another spike but this time printed vertically. This was better as it provided a more consistently round shape but, there was a trade-off. The final section of the spike is only barely 2mm in diameter and printed this way makes it very weak and I goes a bit deformed in the last 10 mil or so. With this second spike I was going quite well but was still making my way through various filling materials with mixed results and then, disaster! I dropped it and ended up with three sections. Super-glued it back together but after more filling & sanding work I was losing the shape anyway – plus I broke off the end a second time. So I had two more made and this time I’m taking it slowly and carefully. I hope I don’t have these problems when I come to use some AM resin as that will prove very expensive if I have to use 4 sets of a resin part to get it right! Some pics Not great focus but horizontal print with caked on dissolved putty Vertical print, more caked on putty and snapped! A naked vertical print spike showing the 'rings' that make it very fragile and the out of focus deformity at the end Better progress today; careful fine coats of Tamiya fine primer sanded gently with 1200 grit Tamiya finishing paper. Also, before that a almost paste like smear of fine Milliput in an attempt to add a little more strength to the fine end of the spike. In other news I have received my Aires exhausts, Microscale gold stripe decals (in 2 sizes) and a pair of Aires ACESII seats (which I’m not sure I have the bottle to try and use yet). My Gulfstream and 836 decals are in progress with Parkes682Decals but worryingly, the NASA decals I ordered from stateside haven’t appeared yet after a fortnight. Not looking good. Anyway, on with the quiet spike! Oh, PS. In the not unlikely event that I balls up the task of chopping the end off the nose of the F-15, I might need to get a replacement. I guess the only way I can do that is to buy another kit but, as the Hasegawa kits are expensive, especially D's and DJ's, is there another Hasegawa F-15 kit that has the same nose/cockpit molding as the D/DJ kits? I was hoping that the C's and E's might be the same as they occasionally crop up for less than crazy D/DJ kit prices. 2 Link to comment Share on other sites More sharing options...
Filler Posted January 25, 2013 Author Share Posted January 25, 2013 At last, some positive progress with the old spike. Finally managed to get it primed and smooth without snapping it and it even looks more or less round still! So the spike goes on the back burner for a bit now as I actually take the sprues out of the box!! First they were all washed and dried and I've cut off the cockpit parts and primed with Halfords grey primer and even applied some Gunze Aircraft Grey with the airbrush. Despite still planning on a closed canopy, I've decided to have a go at the Aires resin bang seats (the photo-etch parts look truly frightening!) However, surprise surprise, I have a question. Anyone who has used these before, do you need to remove the blocks in the bottom of the kit office that the kit seats are mounted on/around? Still got decal issues. The NASA ones ordered from the States on ebay have still not arrived despite it being 14 working days since I bought them. I did contact the seller 2 days ago to ask about usual delivery times but got no response. Not promising. And on top of that potential show stopper, I did receive my made to order decals for the project today but one of the two markings I ordered look a bit rough. The size if fine but the numbers are a little thin (kind of not as bold as they should be) but more disappointing is that the outline of the numbers is notably rough (the other set might be the same but I can't see as they're white). I feel as though I should tell the supplier and ask them to try another set but I'm a bit of a wimp when it comes to complaining. Off to London for the weekend now so no building on this momentum. 2 Link to comment Share on other sites More sharing options...
Matcham11 Posted January 25, 2013 Share Posted January 25, 2013 Wow! Very interesting project! Robin Link to comment Share on other sites More sharing options...
geedubelyer Posted January 26, 2013 Share Posted January 26, 2013 Wow! Very interesting project! Robin I agree with Robin, very interesting. This is the first time I've seen this aicraft. Good job smoothing out the boom. That must have been an onerous task The end result looks great though. Link to comment Share on other sites More sharing options...
HOUSTON Posted January 27, 2013 Share Posted January 27, 2013 That is quite a sexy hot looking aircraft and I am SO gonna enjoy this. I have seen this one before ..can't recall where but it was back in USA.. I look forward to it and great neat start to the most interesting project that I have seen so far.. Link to comment Share on other sites More sharing options...
Filler Posted January 29, 2013 Author Share Posted January 29, 2013 Thanks for all your enthusiasm and encouragement with my build but it looks to be going a bit belly up. It was never going to be easy for me but before the even really tackling the anticipated tough challenges of producing the spike, carrying out the surgery to fit the spike, painting a large area of gloss white and applying the gold stripe around the blue, it appears that I have been derailed by the decals. A few issues with some I had custom made have cropped up but the critical NASA logos haven't appeared after over 3 weeks since ordering and the seller appears unwilling to communicate with me over there failure to arrive. Good old ebay! I might persevere with the build in the hope that I can at some point in the future get the necessary decals to finish it but the prospect of finishing it for the GB is looking a bit gloomy at the moment. And that matches my mood as it has come on top of an expensive lesson in ebay today after buying a Herk that was certainly not as described. Link to comment Share on other sites More sharing options...
SaintsPhil Posted January 29, 2013 Share Posted January 29, 2013 That's a pity on the decals front and the herc for that matter! Don't give up though, surely all is not lost. Like you say carry on with the build, take your time and an answer to the decal issue will present itself, they always do! As for the white if you're an airbrusher try the Aclad white primer it's the dogs for spraying white. You can always use a gloss coat to getatt paint gloss don't forget! If you're not there are plenty of good rattle cans that'll do the job. As for your eBay issues, if you paid by PayPal raise a dispute! I've never lost money on there so far thanks to PayPal! Phil Link to comment Share on other sites More sharing options...

Recommended Posts