Marcdb71 Posted March 13, 2012 Author Share Posted March 13, 2012 I know exactly what you mean.I think that you have to keep them quite subtle when you do them, you certainly don't want them to be the first thing you notice when you look at a model. Thanks on the advice guys have given them a light rub down with 8000 & 12000 micromesh hopefully with paint on they wont be so in your face but noticeable! Link to comment Share on other sites More sharing options...
tank152 Posted March 13, 2012 Share Posted March 13, 2012 Thanks on the advice guys have given them a light rub down with 8000 & 12000 micromesh hopefully with paint on they wont be so in your face but noticeable! Well yours don't look to bad. Link to comment Share on other sites More sharing options...
Marcdb71 Posted March 25, 2012 Author Share Posted March 25, 2012 Just a small update for now got the cockpit sprayed with xtracolor rlm66 &drybrushed with steel/silver Also sprayed & mig pigment the exhausts Got the undercarriage legs done struts done with Alclad chrome removed the hair on that one & finally got the engine insert done & paint chipped That's it for now should hopefully get more done during the week!!!! Link to comment Share on other sites More sharing options...
jacksdad Posted March 25, 2012 Share Posted March 25, 2012 Love the detail work Marc. That's coming along nicely. Steve Link to comment Share on other sites More sharing options...
Marcdb71 Posted March 25, 2012 Author Share Posted March 25, 2012 Thanks Steve will be working on the instrument panel tonight then should be able to close fuselage up.. Link to comment Share on other sites More sharing options...
mick Posted March 25, 2012 Share Posted March 25, 2012 good progress Link to comment Share on other sites More sharing options...
tank152 Posted March 25, 2012 Share Posted March 25, 2012 Great work so far. That engine plug looks superb, I like the part No you've added, Thats a nice touch. Link to comment Share on other sites More sharing options...
Marcdb71 Posted March 31, 2012 Author Share Posted March 31, 2012 Just a small update decided to do the gun barrel blast tube's to replace parts F8 & F9,got a piece of 5mm plastic tube & filed the four corners with a needle file. tried to replicate from pictures in the walk around of the D9 really pleased with how they turned out. Just waiting for brass tubing to turn up so I can do the gun barrels. Link to comment Share on other sites More sharing options...
Mottlemaster Posted March 31, 2012 Share Posted March 31, 2012 Like the look of the guns . Are you useing the Albion Alloys tube ? Just got a pack and makes metal guns an affordable option. Alistair Link to comment Share on other sites More sharing options...
jacksdad Posted March 31, 2012 Share Posted March 31, 2012 Nice touch Marc. With this whole GB bookmarked for future reference this is one of the builds I will probably dip into regularly. Steve Link to comment Share on other sites More sharing options...
Marcdb71 Posted March 31, 2012 Author Share Posted March 31, 2012 Like the look of the guns . Are you useing the Albion Alloys tube ? Just got a pack and makes metal guns an affordable option.Alistair Yes i am just checked my order thought i'd ordered brass instead i ordered aluminium tubes, oh well never mind still do the same job. Link to comment Share on other sites More sharing options...
Marcdb71 Posted April 1, 2012 Author Share Posted April 1, 2012 Painted & just drybrushed the seat Decided to shorten the stance of tail wheel cut off locating tabs & used plasticard drilled with 2mm drill cut out & superglued in place about 3mm lower down than original then cut piece of plastic superglued & pinned front locating tab, cut off fork then drilled & pinned for the MDC fork. Dry fitted the fork haven't decided wether i want tailwheel turned left or right yet. Thats it for now going to rivet the wings today! Link to comment Share on other sites More sharing options...
Marcdb71 Posted April 1, 2012 Author Share Posted April 1, 2012 Rivetted the left wing. Link to comment Share on other sites More sharing options...
Marcdb71 Posted April 9, 2012 Author Share Posted April 9, 2012 Got IP done kit dash with MDC decals & eduard zoom set bezels only Wheel bay ready for glueing into wing Should hopefully get fuselage closed up today & wings together. Thanks for looking. Link to comment Share on other sites More sharing options...
Marcdb71 Posted April 9, 2012 Author Share Posted April 9, 2012 Cockpit done just dryfitted into fuselage cant really see alot of the IP Got to say really enjoying this build & watching everyone's builds they are truly inspirational glad to be part of it. Link to comment Share on other sites More sharing options...
tank152 Posted April 9, 2012 Share Posted April 9, 2012 Great IP, although you have to wonder why we all bother spending so much time on things we never really see when the kit is built. It is I find, one of the most enjoyable parts of the build though. Link to comment Share on other sites More sharing options...
Marcdb71 Posted April 9, 2012 Author Share Posted April 9, 2012 Great IP, although you have to wonder why we all bother spending so much time on things we never really see when the kit is built. It is I find, one of the most enjoyable parts of the build though. Totally agree with you really enjoyed doing the cockpit, on another note can't find the joystick so went on hannants ordered a couple of resin replacements & another hasegawa 1/32 d9 which they've got on special save a 1/3 off the RRP. Have got the fuselage & wings together just got to mate them together. Link to comment Share on other sites More sharing options...
mick Posted April 9, 2012 Share Posted April 9, 2012 great looking pit Link to comment Share on other sites More sharing options...
turnerdad Posted April 9, 2012 Share Posted April 9, 2012 Coming on very nicely, the IP is superb. I'm just starting the rivetting on mine too, I've got a long way to go but I definitely agree that it adds a lot of interest and scale realism. Link to comment Share on other sites More sharing options...
Marcdb71 Posted April 9, 2012 Author Share Posted April 9, 2012 Got wings glued to fuselage had a torrid time trying to get them to mate properly quite a bit of sanding & dry fit to get them right think the problem was down to me & not the kit, Will get some photo's done 2morow as I have rest of week off. Hope to get somewhere with it this week. Link to comment Share on other sites More sharing options...
rowmk9 Posted April 9, 2012 Share Posted April 9, 2012 I must say the level of the work in this group build is astounding me, and your build Marcdb71 is no exception. I love the cockpit detail Link to comment Share on other sites More sharing options...
jacksdad Posted April 10, 2012 Share Posted April 10, 2012 As others have said, great IP. And yes I also enjoy doing cockpits even though you can hardly see anything on a 190. Steve Link to comment Share on other sites More sharing options...
Marcdb71 Posted April 12, 2012 Author Share Posted April 12, 2012 Getting somwhere now she's all together & riveting finished hope to get some paint on her by this weekend just got to sort out the front coaming. I appologise for the many photo's just glad to finish the rivets Link to comment Share on other sites More sharing options...
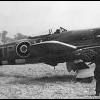
Marcdb71 Posted April 12, 2012 Author Share Posted April 12, 2012 Forgot to post these are the marking's i've chosen yellow 11 from the eaglecals 21. Link to comment Share on other sites More sharing options...
Kahunaminor Posted April 12, 2012 Share Posted April 12, 2012 Great work on the rivetting! That is something I am yet to tackle. Nice choice on the color scheme. Regards, Link to comment Share on other sites More sharing options...

Recommended Posts
Create an account or sign in to comment
You need to be a member in order to leave a comment
Create an account
Sign up for a new account in our community. It's easy!
Register a new accountSign in
Already have an account? Sign in here.
Sign In Now