damian Posted July 22, 2008 Share Posted July 22, 2008 (edited) Hi All! I'm not building the F-1AZ camo, there I've said it... The reson is that when I "salvaged" my second Mig box and opened it I was greeted with an assembled fuselage from a year ago where I had nipped off the back end and inserted the burner can from a Hornet to make a Super-21 Now no money means no new MiG kit so i'm making do. This means that I'll be going for the grey scheme or if I can twist Richard's arm a MiG-21SA(M) in the air superiority scheme worn by our F-1CZs. Here's an example of the scheme I'm talking about My background story is that after the Atlas Aircraft Corporation reversed engineered the Mig-21MF to make the Mig-21SA in the late 70's they set about an improvement program to keep the machines in the front lines. Flash forward to the 90's and the MiG-21SA is starting to show its age. The SANDF want to keep the plane in service as it is fairly rugged and good at zoom climb intercepts. So with this in mind a requirement is handed down by the SANDF for a point defence interceptor using the MiG-21 as a core design. Denel comes up with a modernisation plan with the MiG and is awarded the contract. They strip out the Tumanski engines and replace them with F404s. The radar set is scrapped in favour of a cut down AN/APG-66 dubbed the AGP-66SA, a newer HUD is added and a mil-std data bus and transmitter/receiver are added for data sharing. Added to this is the "MiG combat wing" which gives the MiG tip rails and the ability to launch AIM-9s and AIM-120s. This resulted in the MiG-21SA (M) (M= modernised) which wore grey air superiority schemes befitting its point defence role. My A/c will be based out of FAPE for local interception duties Pics will be up tomorrow of my doings D ps. I believe that the late f-1AZ camo is the sweetest on planet earth, better than even SEA or Euro 1! Edited August 28, 2008 by damian Link to comment Share on other sites More sharing options...
Simon Platt Posted July 23, 2008 Share Posted July 23, 2008 Woohoo! Can't wait, especially seeing as my attempt at getting started on something seems to have been dashed for now ... Link to comment Share on other sites More sharing options...
bexwh773 Posted July 23, 2008 Share Posted July 23, 2008 This sounds interesting Bex Link to comment Share on other sites More sharing options...
damian Posted July 24, 2008 Author Share Posted July 24, 2008 (edited) This one is now officially on hold. The sandinf went well with prestick used to bolster the clear parts while the various bits were sanded off. The problem was when polishing the front windscreen disintegrated into 4 parts because it was damn thin to begin with and I made it a wee bit thinner. After 2 hours of trying to build a solution I've binned all the atempts. The only way this sucker will get built is if Academy or a fellow modeler sends me clear parts... Now for a language I rarely speak... - This is why I rarely weild the Afrikaans language. I suck at it... Don't ask what it means, it expresses my sentiment well though :banghead: D * edited for bad Afrikaans, both language and syntax... Edited July 24, 2008 by damian Link to comment Share on other sites More sharing options...
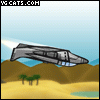
damian Posted July 24, 2008 Author Share Posted July 24, 2008 After sleeping it off I'm a wee bit calmer now. Still mad at myself though Here is how the MiG-21SA (M) will look like once complete Now to find another MiG D ps. Thanks Richard!!! Link to comment Share on other sites More sharing options...
damian Posted July 24, 2008 Author Share Posted July 24, 2008 SORTED!!! My little bro working in a toy store and is bringing a 1/48 Academy MiG-21PF home for me I'll use the clear parts (possibly front fuselage too) off of that kit revitalise the MiG-21SA(M)... Pics to come soonish... D Link to comment Share on other sites More sharing options...
model_madness Posted July 24, 2008 Share Posted July 24, 2008 WOW, Doen it ek se! Link to comment Share on other sites More sharing options...
damian Posted July 25, 2008 Author Share Posted July 25, 2008 Ok some progress at last!! Here are some of the things that's different between the two Academy MiGs: * Front fuselage halves, including the area where the hump joins up' internal moulds of installing the 'pit and the profile for installing the clear parts; * IP and its coaming; * Clear parts...duh 1. Overview shot of what i've done so far. I need to repaint the new 'pit and the IP but thats getting modded 2. Building up the MF hump to join up with the PF front end, I want the bulkier humpbacked look and doing it this way will allow me to build a Franken MPF once I've sourced MF clear parts. Perhaps a RAF or CAF machine will be in order for that one? 3. Putty is on the spine hump and curing and the IP is being modded. I'm going to try and cut the MFD and JTIDS (smaller screen on the right) frames out so that will be fun 4. The only part coming over from the front of the MF for now, the seat. Still need to do a bit more weathering and painting of placards Phew...a long way to go but at least there's a destination now! D Link to comment Share on other sites More sharing options...
Fmk.6john Posted July 25, 2008 Share Posted July 25, 2008 Some nice kitbashing so far D. JB. Link to comment Share on other sites More sharing options...
Vlamgat9 Posted July 25, 2008 Share Posted July 25, 2008 Not sure about those AA-2 Atolls... Surely V-3Bs/Cs would be more appropriate? Link to comment Share on other sites More sharing options...
damian Posted July 25, 2008 Author Share Posted July 25, 2008 Not sure about those AA-2 Atolls... Surely V-3Bs/Cs would be more appropriate? She'll have neither. What she will have is wingtip AIM-9Ms and either AIM-7s or AIM-120's under the wings this is 'what-if' after all D ps. its AIM-9s because I don't have enough Matra Magics in 1/48 for this AND my French A-4EF Link to comment Share on other sites More sharing options...
damian Posted July 26, 2008 Author Share Posted July 26, 2008 Hi All!! Some progress shots from today 1. I like how the enlarged hump looks on the plane 2. Wings together with "filling" for my gear doors 3. JHM dooromatic process used here to scratch build some doors. Going to add a small bullet fairing to each... 4. Just got to figure out which is going to be the easiest way to blend this in... 5. Another closer look at the join 6. Slightly head on view, will be adding an IFR probe to the stb side of the hump ala Cheetah C IFR All for now! All comments and crits welcomed!! D Link to comment Share on other sites More sharing options...
damian Posted August 1, 2008 Author Share Posted August 1, 2008 Hi all! Got more cap so I can now show off my progress! Only a little was made as the CAA exams I wrote took up alot of my free time... 1. JHM dooromatic™ doors installed! Went ALOT easier the second time around 2. F404 burner can grafted into place and the PSR on it done! 3. My patriotic pilot! Tried something a little different here with the helmet, still need to work on my fine brush skills as I smudged the red a little... 4. Top down view of his flag helmet... 5. His new "office space" added to this is the unseen upgrades for fly-by-wire controls and a side stick controller instead of a center column 6. PSR work on incorporating the enlarged spine continues, once done the bottom seam will be tackled! What I don't have a pic of is the intial "weapons trials" I don't know whether to mount the AIM-9s on tip launchers ala F-16 or over wing ala Jaguar. The tip launchers look different while the overwing ones keeps the "slim" Mig profile. Well still got time to make a final decision! D Link to comment Share on other sites More sharing options...
damian Posted August 3, 2008 Author Share Posted August 3, 2008 You'll all be glad to know that I've gone overwing for the mounts. Thats all I got done with my CAA exams this week Pics will come once I'm done with my PSR on the fuselage... D Link to comment Share on other sites More sharing options...
Simon Platt Posted August 4, 2008 Share Posted August 4, 2008 Needs a steady hand to paint the SA flag on the helmet. Well done! Best of luck with the exams Simon Link to comment Share on other sites More sharing options...
damian Posted August 5, 2008 Author Share Posted August 5, 2008 Well after the exams and the flying got a little model time today I've managed to get the PSR on the fuselage and tail done and the tail piece installed. I've mocked up the wings with the 'Winders I'll be using to show you the overwing launchrails! 1. Overhead shot: 2. Port side: 3. Front 3/4 shot: 4. Head on (mostly): The rest of the loadout will be gasbags under the wings along with either AIM-7 Sparrows, AIM-120 AMRAAMs or Meteors and some form of gun.At this point I don't know whether I am going to install the GsH gun that is to be installed on the MF, go with the gun pod for the PF, install the a gun pod from a Hawk or scratch buils my own vulcan style cannon just yet. Still to add to the kit is the fuselage mounted u/c doors, IFR probe, ECM blisters, GPRS antenna, blade areials for the updated coms suite and chaff/flare launchers. All coment and crits welcomed with open arms as always! D Link to comment Share on other sites More sharing options...
hatchet Posted August 5, 2008 Share Posted August 5, 2008 Looks good D! Link to comment Share on other sites More sharing options...
Mike Posted August 5, 2008 Share Posted August 5, 2008 Bloody hell Damian! How many threads? Come on lad. Pick one & I'll merge them down to one... you're starting to take over the board with Migs! Link to comment Share on other sites More sharing options...
bexwh773 Posted August 5, 2008 Share Posted August 5, 2008 Ow do Damian, Im glad you went with the over wing winders, I think they wouldve looked quite wrong on the wingtips Looking very good so far my friend, Ive never built any Migs, and not really thought about it either, but, seeing this one is getting my Whiffing Urges going into overdrive!!! Bex Link to comment Share on other sites More sharing options...
Mike Posted August 5, 2008 Share Posted August 5, 2008 If you like you can top this one and leave the two in What-if and in progress running D Which part of ONE seems to be causing you the problem? Don't forget that the majority of people view the forums via the "View New Posts" button, so no matter where it is, people will see it, and if there's more than one of it (or 3!), they'll see them all & get brassed off with you for filling up the new posts listing! You will be burned at the stake as a heretic, and you won't be able to model in hell, because the plastic melts & the paint dries too quickly. It's for your own good, you know! Link to comment Share on other sites More sharing options...
Mike Posted August 5, 2008 Share Posted August 5, 2008 Thread nicely de-duped now... Could you de-dupe your posts now please Damian, so the thread stays nice & tidy? Once again, I thank you Link to comment Share on other sites More sharing options...
damian Posted August 5, 2008 Author Share Posted August 5, 2008 Which part of ONE seems to be causing you the problem? Don't forget that the majority of people view the forums via the "View New Posts" button, so no matter where it is, people will see it, and if there's more than one of it (or 3!), they'll see them all & get brassed off with you for filling up the new posts listing! You will be burned at the stake as a heretic, and you won't be able to model in hell, because the plastic melts & the paint dries too quickly. It's for your own good, you know! I'm African we don't have an understanding of this "one" thing of which you speak only many. See our wars, children and viruses! Thankyou sir for pruning my needless posts! D Link to comment Share on other sites More sharing options...
Mike Posted August 5, 2008 Share Posted August 5, 2008 Good riposte! Link to comment Share on other sites More sharing options...
damian Posted August 5, 2008 Author Share Posted August 5, 2008 Ow do Damian,Ive never built any Migs, and not really thought about it either, but, seeing this one is getting my Whiffing Urges going into overdrive!!! Bex All I can say Bex is go for it! The Academy MiGs are wonderful little builds and if you glue the front halves to their respective sides BEFORE joining the two halves together you won't have much PSR to do, oh and not snapping the clear parts too D Link to comment Share on other sites More sharing options...
bexwh773 Posted August 5, 2008 Share Posted August 5, 2008 Thanks Damian, youre a star Bex Link to comment Share on other sites More sharing options...

Recommended Posts
Create an account or sign in to comment
You need to be a member in order to leave a comment
Create an account
Sign up for a new account in our community. It's easy!
Register a new accountSign in
Already have an account? Sign in here.
Sign In Now