
Search the Community
Showing results for tags 'Hurricane IIc'.
Found 10 results
-
Hi, I am building the newest Hurricane mk IIc from Arma Hobby and I need some help with LKoA paint scheme (blog). Arma Hobby chose black/OG/DG: However, my interpretation of LKoA is quite different. I am a little unsure about lighter tone on DG (rudder, rear fuselage, elevator, ends of the wings). In my opinion, it's not definetly "brush strokes" effect, because in this case we should see them at the front of the fuselage and on the other aircraft. Of course, OG put on DG is only my proposal, but maybe someone saw something similar on other RAF planes and know answer. I'm open to discussion, feel free to share your view.
- 11 replies
-
- 2
-

-
- Hurricane IIc
- LKoA
- (and 1 more)
-
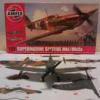
 Hi folks, I have received a box in the post from @GrzeM at Arma Hobby containing an early example of their new Hurricane IIc kit, and I'm building it. The parts on the frames are exquisite, and known subject matter experts have their fingerprints on the kit so it should prove to be accurate. It's not until one tries to build it that we see how it really is though. If the parts all fit properly, then it's just my own skills that might let it down, but let's begin and we'll see how it goes... Attractive night fighter box art The box includes detail fit instructions and decals for 3 distinct schemes; a night fighter in Special Night (i.e. matt black), a Temperate Land scheme and a Day Fighter scheme option The wings come in a single top and bottom half with good use of under-gating to help the careful modeller minimise or eliminate damage to the exterior surfaces of the parts The kit features raised and recessed rivet detail The rivet detail is extremely fine, which should look superb with subtle highlighting effects over a lightly airbrushed finish. Fire-hose airbrush users, aerosol can users and brush painters will need to take care not to drown the subtle detailing. Internal detail is likewise very fine. The tail surfaces feature very subtle doped fabric waisting between the ribs, but the kit has not attempted to portray fabric texture which in my personal opinion is a very good thing as even the best I've seen has been grossly overscale. Another view of the interior parts and tail surfaces. The fuselage features more excellent surfacing to portray doped fabric shrunk over stringers, whilst metal panels feature beautifully fine raised rivets. Internal view of the fuselage parts. Ejector location is thoughtfully placed to avoid spoiling anything you're going to be able to see. The surface detail on the radiator parts is excellent. Clear parts are crystal clear. Instructions are given in Polish and English. There is one small sheet of corrections/additional notes which I shall cross reference. I've since this photograph gone through the instructions with a highlighter pen picking out the detail fit notes for the chosen scheme. Lastly, canopy masks are included in the kit. On to construction then... The gating isn't bad, but it's slow going as the surface detail is so nice I'm trying really hard not to cause the need for filling and sanding. Construction starts with the wheel wells. There is absolutely nothing wrong with the fit, but the joints circled in red will fall apart without glue so full dry fitting to check the wing closes up requires a couple of blobs of blutac or some other solution of your own devising. On my one here, it does all fit though. I did find that despite care, part A47 (landing light insert) on my example did not let the wing halves close up properly... There is a sheet with correction notes enclosed which says to remove this stiffener behind the landing light which I had already done. I tried part A47 (landing light insert) the instructions say goes in the starboard wing over in the port, and it fit perfectly. Likewise part A48 actually fits the starboard wing perfectly. I marked up the instruction sheet to remind me what I intend to do. I suspect there is a typo on the instructions or maybe something happened between the 3D modelling and the final parts layout and numbering, but swapping the lights over achieves a perfect fit on both sides. Here's that dry fit I wanted to check before painting... All good, I am happy to report. The leading edge at the wing root is nicely designed, leaving minimal seam clean-up along the leading edge. The wing faring joint is where the joint is on the real thing so no work needed there. So far, I am impressed. A base coat of aluminium (my C05 aluminium enamel) airbrushed... I think this may be a kit where excessive paint thickness on internal parts may give some issues, but so far the location of parts has been good but not tight, so perhaps no need to worry there? Still, it's good practise not to plaster the kit parts in thick paint. As you'd expect by this point with the wheel well assembly glued in to the top half of the wing, it closes up nicely and remediation work along the leading edge should be minimal. There are some areas of slight softness where sharp corners should be on the leading edge around the guns and landing lights. I believe this specific kit Grzegorz sent me may be pre-production, and perhaps this can be fixed for the main production. As it is, I can deal with it but in the interests of showing integrity having had a nice kit arrive at the door courtesy of Arma Hobby, I'll continue to mention anything I find so you don't all think I'm a shill So far, I really like this model kit. Thanks for reading!
- 86 replies
-
- 40
-
-
- Arma Hobby
- Colourcoats
- (and 1 more)
-
Originally I intended to build this one as a Russian two-seat artillery observer, which would also take care of the problematic fuselage spine. In the end I just made a (relatively) quick build of it. It did receive some new wheels, a new prop and the cockpit was reworked. Cheers, Luka
-
Hello One and all... This is my 2nd Hurricane IIc build. It represents Lt. Stewart “Bomb” Finney’s 1 Squadron SAAF plane. It is coded AX*Z HL885 with the Dual nose art of the Springbok on either side, and “Oops” on the port rudder. Thanks to @rob85 for coming through with the decals. I have no WIP for either build as these were fill in builds during other projects. Questions, comments, and or thoughts ? Dennis
- 15 replies
-
- 32
-
-
- 1 Sq. SAAF
- Hurricane IIc
- (and 1 more)
-
Hello Everyone... This is the first of two Hurricane IIc’s Ive been working on since Late November. It is night intruder LK*A BE500 of 87 squadron piloted by W/CDR Smallwood. It represents the aircraft after the rushed re-paints for Operation Jubilee in August 1942. Ive had a lot of good help from many people including Mike @72modeler trying to get this one right. I do hope you think it looks right. There isn't a WIP for this or the other Hurricane they were fill-in builds while working on other projects. Questions, comments, and or thoughts ? Dennis
- 6 replies
-
- 23
-
-
- 87 Sq. Night Intruder
- Hurricane IIc
- (and 1 more)
-
Here I present my latest, a Hawker Hurricane IIc by Airfix and was a therapeutic 'test' build on a spare kit from the stash. From the start it was going to be a 'wheels up' subject as I plan to put the occasional aircraft on the ceiling of the future 'Man Cave (Mk II)' and being an Airfix kit, it came with pilot! The kit was built OOB and was very a good build with little or no problems, which surprised me some what. Cockpi was a little basic but was enough when you're stuffing a figure in the pit. Fuselage halves were joined and wings added, no filler in sight. Undercarriage and wheels fitted with no problems, nice and flush. I've never been happy with disks as dynamic props, so I ditched the blades and made a solid spinner, looks miles better to me. Everything was primed, and here comes the test, and painted using Colourcoat enamel paints. Paints were thinned 50/50, applied at 15psi and were lovely. Finished off using the kits decals for L8957, 34 Sqn, RAF SEAC, India, 1943/1944. The 'fluffy' stuff is some synthetic stuffing to simulate clouds. Stuart
- 16 replies
-
- 30
-
-
- Hurricane IIc
- 1/72
- (and 1 more)
-
 Time to return to a long-running project I've been doing on and off over the last 5 years, namely Aircraft my Father Fixed. I started this project with this topic back in 2012: Aircraft my Father fixed! As you can see in that thread I've build quite a few of the aircraft so this thread is a bit of a re-tread as I'm going to build another Hurricane IIc from my Father's time with 5 Sqn in Burma. The reason being is that Fly came out with a IIc Trop kit which is better than the conversion I was forced to do in the original build (Here if you are interested). I also want to get the colour scheme right this time but more importantly build a diorama depicting a story my Father told me when I were a nipper... One night when they were all resting in their tents, everyone was woken by a loud CLANG! Rushing out of their tents they saw a red-faced ground crewman in the cockpit of a Hurricane and the aircraft's bombs lying on the ground under the wings! Turns out he'd accidentally hit the bomb release switch and released the bombs by accident. Thankfully the bombs didn't fall far enough to fuse themselves! So my aim is to try to depict that scene - how well I achieve that aim will have to be seen! To start with here is the box of the Fly kit Lots have been written about the surprise appearance of these kits last year, but I'd just liek to say its great to see new kits in differing scales of important aircraft. Next, the obligatory sprue shot The brown styrene sprues are from the kit, the other bits are the extras I'm adding. These include Montex canopy masks, HGW fabric seat belts (although these MAY get saved until I do the Hurricane IId when it gets released...) plus some figures etc that I'll describe individually below. The kits comes with a small PE fret which contains radiator grills, cockpit details and some seatbelts The bombs come from the spares box, in particular from the Tamiya Spitfire IX from a few years back Next, is the figure of a pilot in shorts and bush hat, I can't for the life of me remember where I got this from but for several years I've been looking for figures appropriate to this diorama Next another figure with a bush hat, the flash has obscured the title but it says "LRDG no.2 Into the Sun". I'm going to replace the head as I don't like the heavily bearded look. I've ordered some "expressive" heads from Hornet that will be used to depict the appropriate reactions of the participants. Next is a selection of legs, torsos and bush hats donated by the Airfix 1:32 Australian Infantry set. The white one is from the Airfix 8th Army multipose set, which is 1:32 while some of the other figures are 1:35 - careful positioning around the diorama should mitigate the discrepancies between the scales. The white figure will be the one standing in the cockpit looking shocked. The grey figure will have arms and hands adjusted to looks shocked and may have the head replaced. The final figure is from Ultracast and will need some modifications and a replacement head I'll also add some bits and bobs including some boxes and various bits from these The base will be an old picture frame, suitably treated with claycrete and vegetation etc etc
- 33 replies
-
- 8
-
-
- RAF 5 Sqn
- Hurricane IIc
- (and 1 more)
-
 I have been working on this one on and off for a couple of months, using a part-built Revell Hurricane IIc which I bought and tidied-up, and decals from the venerable old Esci Hurricane/Kittyhawk sheet. Given a choice of three or four conflicting profiles and no photograph I could find, I decided to please myself and stick with the kit-supplied spinner, painted in the undersurface colour (for which I chose Azure Blue), use Middle stone for the base colour of the nose and wing leading edges, and then use Dark Green to supply the pseudo-Italian style squiggles and rings (hence "sand and spinach" from the colour or "Spaghetti" from the shape.) I replaced the broken-off aerial mast with one cut from sprue but other than that and the decals it is built straight out of the box. I'm fairly happy with it. Underside: Topside: Head-on: "In December 1941 the squadron moved to Egypt for defensive duties, before in June 1942 beginning to fly offensive sweeps over the Western Desert in support of the 8th Army. The most dramatic incident in this period came during the German retreat after El Alamein. On 13 November Nos.213 and 238 Squadrons were moved to a desert base 180 miles to the east of Agedabia, and well behind enemy lines. Over the next two days they destroyed or damaged nearly 300 enemy vehicles, before withdrawing on 16 November before the Germans could react." (Rickard, J (pending), No. 213 Squadron (RAF): Second World War, http://www.historyofwar.org/air/units/RAF/213_wwII.html)
- 19 replies
-
- 17
-
-
- Western Desert Air Force
- Hurricane IIc
- (and 5 more)
-
 Hi all I've just been reading Desmond Scott's book 'One More Hour'. There is a pic of him on his Hawker Hurricane IIc, coded 'Q'. 'O'? Are there any other pictures of it so that I might find out the last code letter and serial number? He appears to have been flying with 3 squadron from Martlesham Heath in 1941. Thanks in anticipation. M.M.
 -
Its finished! I haven't posted much during the later stages of painting because it was pretty standard fair - Klear, weathering, klear, decals, klear, matt varnish, last bits of weathering. Original build thread here: http://www.britmodeller.com/forums/index.php?/topic/234934871-132-revell-hurricane-iic-5-sqn-burma-1944-45/ The only construction elements were adding the undercarriage legs and wheels, although that was not simple nor straightforward as the modifications needed to fit with the GMF Resin wheelbays meant a lot of realigning, detaching the doors from the legs, rebuilding the extra door panels and general alignment issues. I also manage to break off the pilots step two or three times and had to eventually rebuild it as the hoop got swallowed by the carpet monster. Since taking these photos I've realised I've forgotten to attach the pilot's rer-view mirror and the pilot tube under the wing doh! Anyway here are the photos of the completed diorama... I'm very happy to have finished but somewhat frustrated that there are still numerous faults with the model. The vast majority of these come down to the awful Revell kit. This really is a bad kit and IMHO if you own it, use it as landfill as its nothing but junk! The GMF additions help, but generate their own issues, not least with the interaction between the Mk II nose and the cockpit interior. They really need to sort that out. Anyway, here it is - I doubt if it will win any prizes, but its an interesting diorama and I am happy with it for all its shortcomings I know I will definitely produce a better model later in the year when I do the 1:32 Hobbyboss Spitfire Vb trop converted into a Vc trop as would have been used when my Dad was with 81 Sqn in Algeria in 1943! Watch for that one later this year


