Search the Community
Showing results for tags 'Great War'.
-
WWI US Infantry Acrylic Paint Set (3024) ICM via H G Hannants Ltd ICM have recently released their own brand of acrylic paints on the market, and are creating some kit specific sets to go with their major releases, of which this is one. The set arrives in a cardboard box with six screw-capped bottles inside, each containing 12ml of paint. The bottles are clear Polypropylene, and are capped with cylindrical tops with knurled sides, and a one-time security seal that you break on first opening. A label on the side gives you basic information about the colour and code, a little information regarding application in English and Ukrainian and a bar-code. This set provides the major colours to assist you in painting the figures of the new WWI US Expeditionary Force boxed set from ICM themselves that you can find here, and you will find the following colours in the box: 1059 Green Ochre 1055 Deck Tan 1061 Green Brown 1050 Saddle Brown 1008 Deep Brown 2002 Satin Varnish The paint is thick in the bottle, with plenty of headroom between the surface of the paint and the lip of the neck. I dropped a glass stirring ball into each bottle, and they took a few seconds to disappear beneath the surface, indicating their viscosity. On the rear of the pack is an example of the usage of these colours using the kit mentioned above, by reproducing the drawings of the figures with arrows showing the appropriate colour swatches for each part. During testing, I used Ultimate Acrylic Thinners to dilute the paint to spray through my Gunze PS770 airbrush, which has a 0.18 needle chucked in. The paint dilutes well once it has been mixed thoroughly, and sprays well through my airbrush, which has a smaller than usual needle that is a good test of the finesse of the pigment grind of any brand, some of which don’t spray very well though anything less than a 0.3mm needle. There were no problems with blockages at all, and the coverage was excellent after my usual ad hoc dilution method, which was probably nowhere near the 40-60% thinners or water that’s suggested on the pack. Apart from the varnish, the other paints all dry to a matt finish. In past tests, the Satin Varnish worked very well diluted with water, sprayed over the spoons that were also partially taped up to perform two functions at once. The satin patina that resulted is exactly what was expected, and the tape lifted no paint at all, despite my best efforts to do so. Bear in mind that the spoons were prepped by a buff with a very fine sanding sponge to give them the best chance of adhesion. Using a brush, the colours cover well two coats with minimal brush marks visible. Conclusion The paints were excellent through the airbrush with nothing in the way of drama during the testing process, including the Oily Steel and Satin Varnish. There is a little less paint in the bottles than some brands, but a shade more than others, so it’s about average. That is more than offset by the very reasonable price they’re asking for the set, even at RRP. Highly recommended. Available in the UK from importers H G Hannants Ltd. Review sample courtesy of
-
WWI German Infantry in Armour (35722) 1:35 ICM via Hannants Ltd. WWI was a meat-grinder that chewed up millions of soldiers on all sides over the course of the conflict, and during the early years Germany, like many of the other combatants tried to minimise its casualties by using armour that bore a close resemblance to the gear worn by medieval knights from the Middle Ages. The German Trench armour consisted of the standard or armoured helmet, and a frontal cuirass-style chest-piece with curved tops that took the weight on the wearer’s shoulders, and articulated lower sections over the stomach and groin, all of which were linked together by canvas straps, and with cushioned felt pads between the sections to prevent metallic scraping noises as the soldiers walked around the battlefield, stopping them from drawing too much attention to themselves. The armour was made to withstand a rifle bullet at a reasonable range, but it was cumbersome, heavy and restricted the wearer’s movement, leaving his arms, legs and face exposed to enemy fire, so it wasn’t a total solution. They were intended for use by all types of soldiers, and over half a million were issued, but because of their cumbersome nature they tended to be worn by soldiers in fixed or stable positions, such as machine gun teams or snipers. The Kit This is a brand-new figure set containing four figures and their armour, plus a huge quantity of weapons, packs, pouches and other equipment for use with or around your figures. It arrives in a small top-opening box with the usual captive inner lid, and inside is a figure sprue in grey styrene, two sprues of accessories, plus another four smaller sprues on which the cuirass armour, armoured helmets and a different style of lower armour are found. The four figures are built as normal with separate arms, head, legs and torso, although some surface details have been flattened off to accommodate the armour, with moulded-in curved shoulder-supports that link up to the armour panels on the torso of the figure. All the figures are stood upright and are holding rifles in various poses, one also holding a grenade ready to launch it. The armour just slips over the front of the figures, and a choice of standard or armoured helmets go over their heads, leaving most of their faces exposed, with flat tops to their heads and chinstraps for the helmets moulded-in. The accessory sprue has been available separately before (35678), and is filled with the following list of parts, all twice over: MG08/15 machine gun Tankgewehr M1918 anti-tank gun Mauser 98a carbine Mauser 98 rifle Mauser 98 rifle with M98/05 bayonet M98 bayonet M98/05 bayonet M98/05 bayonet with scabbard M1914 bayonet M1914 bayonet with scabbard Mauser rifle pouches Bergmann MP18/I submachine gun Luger P08 pistol (artillery model) with butt-stock holster Luger P08 pistol (artillery model) with butt-stock holster Luger P08 pistol (artillery model) Luger P08 pistol Luger P08 pistol holster Mauser C96 pistol Mauser C96 pistol with butt-stock holster Mauser C96 pistol butt-stock holster Stielhandgranate grenade Kugelhandgranate grenade Assault knife Shovel Pickaxe Pickaxe in case Small shovel Small shovel in case with M98 bayonet Small shovel in case with M98/05 bayonet Wire cutters Axe in case Mess tin Canteen Binocular case Binocular Flashlight M1916 steel helmet Respirator canister and filter Clearly, the four men would be unlikely to be able to even stand if they were festooned with everything from the sprues in addition to the weight of their armour, but there is plenty that would be left over for your WWI German infantry spares box for future use. Conclusion Whilst far from the most unusual WWI figure set we’ve seen yet, these guys must have been brave just to poke their heads over the parapet weighed down by armour that only covered their core, staggering forward into withering fire, and it’s hard to believe that they were absolutely real, just like their Allied counterparts. An interesting addition to anyone’s figure collection. Highly recommended. Available in the UK from importers H G Hannants Ltd. Review sample courtesy of
-
Brewster Body Shield US Infantry (35720) 1:35 ICM via Hannants Ltd. WWI was a meat-grinder that chewed up millions of soldiers on all sides over the course of the conflict, so when the US finally joined the war, methods had already been sought to reduce casualties, but the Americans brought the Brewster Body Shield with them to try to reduce casualties from the over-the-top frontal attacks that were common. The armour consisted of a frontal helmet and cuirasse-style chest-piece, both of which were snugged to their wearers by leather straps, and cushioned to reduce discomfort and chaffing as the soldiers walked around the battlefield. The armour was made from chrome nickel steel, and could withstand a rifle bullet at a reasonable range, but it was cumbersome, heavy and restricted the wearer’s movement and left his legs and most of his arms exposed to enemy fire, so wasn’t a total solution. There were other more modular designs that found more favour in terms of comfort, but none were particularly successful, mostly due to the weight and heft of the materials available then at the time. The Kit This is a brand-new figure set containing four figures and their armour, plus a huge quantity of weapons, packs, pouches and other equipment. It arrives in a small top-opening box with the usual captive inner lid, and inside are two main sprues, plus another two smaller sprues on which the armour is found. The four figures are built as normal with separate arms, head, legs and torso, although some surface details such as ammo pouches have been flattened off to accommodate the armour, with moulded-in straps that link up to the armour panels, both on the torso and heads of the figure. Three of the figures are stood upright and are holding rifles in various poses, while the fourth figure is kneeling with a pistol, so is likely to be an officer, but it’s hard to tell under all that steel. The armour just slips over the front of the figures, and the helmets have eye-holes, with moulded-in covers that could swing down on the real thing to protect the wearer’s eyes, although how they would find their way around is a valid question. The accessory sprue is filled with rifles with and without bayonets, pistols, even a Lewis gun, axes, a pick, shovels, bayonets, daggers, mills bombs, water bottles, ammo pouches by the dozen, satchels, binoculars, more pistols in holsters, a trench periscope and a few other parts that defy description. Clearly, the four men would be unlikely to be able to even stand if they were festooned with everything from the sprues in addition to the weight of their armour, but there is plenty that would be left over for your WWI spares box for future use. Conclusion This has to be the weirdest WWI figure set we’ve seen yet, and looks more like a renegade prop from an old low-budget 60s sci-fi movie, despite being absolutely real. An interesting addition to anyone’s figure collection. Highly recommended. Available in the UK from importers H G Hannants Ltd. Review sample courtesy of
-
Guess what I'm going to build now!!! So I'm lucky enough to be able to wrap my dirty fingers around the new BE2C from LUKGRAPH. Here are a couple of thoughts and photos. The BE2C is one of those iconic aircraft of the Great War which has not been represented on a 1/32 scale yet. Thie workhorse of the RFC is finally here. The kit is in my opinion the best model by Lukgraph - so far. Well-detailed, with crisply casted resin parts and with a lot of painting schemes, it's going to be a true joy to build. There are both 3D-printed and resin parts, a PE fret, a huge decal sheet and a superb instructions booklet. The 3D printed engine, bomb racks and wicker seats are simply gorgeous! Well done Łukasz! Here are the shots:
-
WWI Belgian Infantry (35680) 1:35 ICM via Hannants Ltd At the beginning of WWI, Germany demanded free passage through Belgium, and when they refused, they invaded anyway, commencing hostilities with the Belgian forces on the 3rd August 1914, with Britain declaring war on Germany the day after due to treaties between them. In the early days, there was a distinct lack of understanding of the type of conflict the various combatants were heading toward, and uniforms and equipment was still reminiscent of days gone by, with bright colours and soft helmets, plus swords carried by officers and cavalry riding horses into the face of withering fire from machine guns. The Belgian forces fought bravely against the German onslaught for a month but they and their Allies ended up pulling back, leaving most of Belgium under German occupation for the rest of the war. This figure set arrives from ICM in a small top-opening box with their usual captive inner flap, and within are three sprues of grey styrene and a single sheet of instructions, printed on glossy paper in colour. The largest sprue holds the four figures, while the two smaller ones contain lots of accessories and weapons to assist in personalising the finished articles. The four soldiers are dressed in dark blue tunics with lighter blue trousers, and are all striking a crouching pose as if they were under fire. The officer with his sword is aiming his pistol from a kneeling position with his free hand supporting some of his weight, while two of the troopers are aiming their Belgian-made Mauser M1889 rifles from the kneeling position with large packs on their backs. The final figure is cocking or reloading his rifle with a fresh stripper-clip of 5 x 7.65mm rounds. The figures are broken down sensibly to improve the detail and hide the seams as far as possible once complete, while the tails of the tunics that are hanging loose are moulded as separate parts, as are their caps, some of which can be exchanged for metal bowlers akin to the French WWI type. The instructions consist of a page of sprue diagrams with a colour chart, and a full side of colour drawings of the figures on the other side, with their parts and colours called out around them. To avoid too much confusion, the colours letters are printed in red boxes that correspond with the chart overleaf, which should keep you cool due to the constant flipping of the page. The colour key has colour names in Ukrainian and English, plus ICM’s own brand-new paint system as well as Revell and Tamiya. Conclusion There aren’t many sets of WWI Belgian soldiers out there, so this one is a welcome sight, and with ICM’s excellent sculpting and moulding, they should make up well. Highly recommended. Available in the UK from importers H G Hannants Ltd. Review sample courtesy of
-
Hello again This new project is more to my liking than the last one I prefer the time up to Washington treaty in shipbuilding. Great thanks to HB for diving into that era lately, please keep them coming. Unlike my last build this one is going to be a bit more advanced. Ze German destroyer was just slap together and paint, here we'll have more fun. For now just the first cuts, with Sophie looking over my workers, Fluffy, the bugger, went missing, so she's not a happy camper and introduced quite harsh regime in the shipyard Thanks for following
-
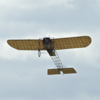
Was a bit hesitant to post (started one week ago), since time is running out, but here goes. The kit, Airfix’s new Be2c augmented with some dedicated Eduard goodies which happened to be on discount This is the second Airfix Be2c in this group build, so I will build the other option. As opposed to the aircraft shown on the box cover, this one was never near shooting down any baby killer: See the funny sticks on the struts? Those are Le Prieur rockets; primitive fireworks which were succesfully used in France to shoot down balloons. An attempt was made to equip zeppelin-hunting nightfighters but no interception ever materialised. The Be2c had to be lucky to be in the right place (the blimps could outclimb them without even trying) and the rockets had an effective range shorter than its intended targets. For a very interesting read on the early night fighters, I recommend this article: http://www.century-of-flight.net/Aviation%20history/airplane%20at%20war/nocturnal%20defence.htm
- 24 replies
-
- 2
-

-
- Night-fighting Be2c
- Great War
-
(and 1 more)
Tagged with:
-
ICM's Ford Model T AFS ambulance with a Resicast Ford driver. German 77mm is a Shapeways casting designed by a friend in Illinois. Ambulance is built OOB with only addition is the white field and cross added to the front. Kit was a pleasure to build, no flash, parts all fit perfectly. Used Tamiya and Vallejo paints. Tree stumps donated from my back yard. Don't tell Mrs. D. I borrowed her coffee grinder to make the ground cover.....
- 11 replies
-
- 26
-

-
Group Build Dates: 21 July to 11 November 2018 --- I'm a little surprised that I haven't seen this suggested already... but, we'll be commemorating the end of the Great War in 2018, and I feel we should think about a group build, so... Land, sea and air, models of any military or support equipment or personnel used by any country involved in the Great War, 1914 to 1918. Standard Group Build rules, and No what ifs What do you think guys? {edit 12 Mar 2017} Title changed from 1918 - 2018, 100 years after the end of WWl to Eleventh Hour GB: 1918-2018, commemorating the end of WWl Thanks to TigerTony66 for suggesting the Eleventh Hour {/edit} Yes, I know it's the armistice, and the war didn't end until 1919, but ... General Theme GB Robert Stuart - host Wyverns4 - co-host Arniec Kallisti Blastvader Murdo JackG Ozzy CliffB Basilisk Wez whitestar12chris Blitz23 Jb65rams charlie_c67 PlaStix jrlx stevehed Grey Beema Sgt.Squarehead 825 TonyTiger66 Sabre_days limeypilot Bonhoff alancmlaird SleeperService stevehnz Ray S Plasto Corsairfoxfouruncle krow113 sampanzer planecrazee Peter Lloyd John D C Masters
-
Hi all, I seem to have started yet another thing - this irresistible little Fokker. I was just having a look at the bits, and then I was cleaning them up, and then I seem to have put some together and filled the gaps. No paint yet though: I was a bit dozy and glued the fuselage halves together before painting the sidewalls. I was thinking "I'll just glue the bulkhead to one side, and then the seam, and then I'll be able to take it apart for painting" - obviously not true... The seam has been filled with CA and I added a strip of thin styrene to the back of the cockpit coaming rather than try and fill and neaten the seam there (it moves the gap to the top where it's easy to deal with). I also filled a sink mark on the fuselage top above one of the alignment pins. It should be possible to paint it from the inside, at least the cowling panel is just resting on top. I have glued the struts in place, and also removed the thick turnbuckle-looking things and drilled a selection of rigging holes into the apex. It seems solid, let's hope I can thread it properly as it's rather complex. The wings are one piece, with protruding spars that lock into a box behind the seat. I found this was a bit wobbly (as were the locating pins/sockets at the front) so cut most of that off and added 0.5mm wire pins front and back which should let me set the wings level, and indeed insert them after painting. I built up the undercarriage on the upturned taped-up fuselage so I could use the locating points as a jig. It worked fine, the UC has much better location pins and holes than the Tiger Moth and the whole thing feels pretty solid. The engine is one piece and sadly the mould was misaligned, so I'm not sure how much of the fine fin detail remains after fixing that. It's glossy because I cleaned up after sanding with Extra-Thin, but that may have been a mistake - the soft Airfix plastic goes very squishy almost instantly so it's probably been rounded off a bit. I've also thinned the cowling edges a bit as they were pretty chunky, and made a new MG barrel and drilled out the missing top row of slots on the cooling jacket, but forgot to photograph that bit. Cheers, Will
-
I'm just asking for information and floating something, a thought, I've been pondering for a couple of weeks. On the 11/11 next year it is 100 years since the end of the Great War. Has anyone suggested a group build to tie in with this date? If not, it seems like it would be a very poignant and fitting GB? All best regards TonyT
-
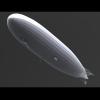
I've been posting this on ARC, but figured I might as well cross-post over here since the Britmodeller crowd is a little less jet-centric. Okay, so yes, I am scratchbuilding a 1/144 Zeppelin. LZ66/L 23 - a Q-Class Zepp - to be specific. Why this particular airframe? Because it was shot down by Lt. Bernard A Smart flying a Sopwith Pup, which I also intend to model. It should add an interesting story to the model and give a better sense of scale - you don't really realize just how massive the Zeppelins were until you see that iiiiiitty-bitty airplane beside it. In 1/144, it's about 4' long, 20" around. More than six square FEET of filling and sanding. Ask me how I know. I had briefly considered doing them both in 1/72, but the Zepp would have been 8' long, almost a foot in diameter, and I'm not quite that insane. (but, ohmygod would it would be sooooo awesome!) The build has its roots in a paper model designed by Thorsten Brand. http://jleslie48.com/zep/model_parts/Pclass_description.pdf http://jleslie48.com/zep/model_parts/ His model is a P-Class; the Q-class was a revised design that added an extra cell to the balloon for an increased payload and ceiling. My primary reference is actually just his P Class Description PDF. I ended up re-drawing everything in CAD for my plastic version. My basic game plan was fairly simple: Make a bunch of bulkhead sections (ribs) along the appropriate station numbers. Align these along a central spine, with reinforcing spars closer to the surface, then skin the whole shebang with styrene sheet. Step 1 in this whole process was to draw the balloon's profile in Solidworks. Thorsten's profiles list the station numbers (in metres), and the cross section shows the basic proportions. Dividing the profile into individual stations gave me the cross section at each location. I sketched out the cross section in CAD, then re-sized it to fit the height of the envelope at each station. For most of the balloon, this was a simple copy/paste/resize; at the back, I had to make some tweaks to match the tailplane geometry, where some facets blended out. The final step for the bulkheads was to add my spine and spar markings. A suitably sized layout was sketched (1/8" spar holes, 5/8" square spine), then copy/pasted in the middle of each bulkhead. I also took the time to make a sort of 'ruler' - a big ol' rectangle with the bulkhead stations marked off, eliminating the need for fiddly measuring come assembly time. With my 36 bulkheads sketched out, I now had exact widths of each skin panel at each station. By lining these up with the correct station spacing and going back to my profile, I was able to chop the profile into individual station sections and measure the exact length of the full skin panel, accounting for the projection - one of the handy features of Solidworks. This allowed me to set the bulkhead spacing accurately for the skin; it might be 5 scale metres between station 1 and 2, but because of the curvature it's 7 linear metres of skin (for instance). By plotting the width at each bulkhead, and the (actual) distance between each bulkhead, I had a guide for the skin outline. Then it was a simple matter of connecting the dots; using Soliworks' 'snap spline to points' feature gave me the exact curvature needed. This provided a 'master' skin panel, which was copied, pasted, and then it too was tweaked to match the tail geometry. It also gave me exact locations for each bulkhead, allowing precise location on the model. The last step was to trim off the tips of each skin panel. Aligning these perfectly would be a hassle, and I had other plans. Now, line up all 19 skin panels (in the correct order!), and the covering template is done. (profile for deriving all those measurements at top, finished skin below. The rectangle just above the skin segments is my spine template - just line the bulkheads up with the lines around the spine. The vertical lines on the skin sections again show the bulkhead locations.) The final step for the envelope was to make tailplane templates. This was a simple matter of tracing over Thorsten's drawings in CAD, then ensuring they were the correct scale dimensions. Templates finished. I also duplicated each bulkhead - I was using .020" styrene sheet - good for the flexible skin (and easy to cut), but a little flimsy for the skeleton. Doubling it up to .040" would give more rigidity. Next came print prep. The CAD templates were laid out and saved as .DWG files, then opened up in Illustrator (Illustrator won't open CAD files directly). My first step here was to offset the edges of the bulkheads, to account for the thickness of the skin. Next, I filled in the skin, bulkheads and tailplanes to give me precise cutting lines: cut right along the edge of the part (rather than somewhere in the middle of each line). Finally, the layout was tweaked to fit on 4 x 3' sheets and saved as PDF files, ready for printing. TL;DR: Math. Just lots of math.
- 108 replies
-
- 5
-

-
- scratchbuilt3d
- CAD
- (and 6 more)


