Search the Community
Showing results for tags '72'.
Found 17 results
-
 After the type 20 (link) here are the 1/72nd Bernard S.72 & 74C.1 & S.74 resin kits Source: http://master194.com/forum/viewtopic.php?f=55&t=110514 Released - Bernard S.72 in design - Bernard 74 C1 & S.74 V.P.
 -
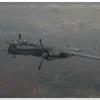
 The last few years I’ve been on a bit of a WWII Pacific modelling spree and I felt it was time for a change. Why not build one Lightning when you can get two at twice the effort? As it turned out, both kits would require more effort than I had anticipated. RS Models P-38F This kit is part of my ‘Hellcats over the Pacific’-themed collection. Hellcats was a Macintosh flight sim from the early 90s, at the time a very realistic game. I racked up 100s of hours in it. My goal for this theme is to build all the planes in the game in 1/72 in color schemes related to the Guadalcanal and Leyte campaigns around which the game is centered. I picked the F-model for this theme because I think the early variants of the P-38 are the best-looking ones. On opening the box first impressions are favorable. Nicely detailed parts, subtle engraving. However, on putting it together it appears almost none of the parts fit without serious sanding or fettling. Not a single seam escapes the filler/sanding/filler/sanding treatment and this obliterates much of the detail, requiring re-scribing. Getting the tail booms aligned is a major challenge and I never got it quite right. It doesn’t help there are no locating tabs to strengthen the joins, I really should have used some plasticard here. The boom to wing joins must have split at least a dozen times during this build. Landing gear bays are a lousy fit and require much filler to blend in with the rest of the plane. Also pay attention to the parts numbering on the tail booms as they are handed which is not entirely obvious anymore after you’ve removed them from the sprue. What else? Canopy requires blending in with filler, oil coolers need drilling out, cockpit tub needs thinning on the underside, prop spinner diameter is a smaller than the nacelle, main gear attachment points are spurious, cannon and machine gun holes need drilling out, gear doors are a bad fit… I found out some of these things after painting which caused a lot of grief. Final assembly off the small parts took me five nights. Painting was straightforward, I used Gunze acrylics, and some water colors to do a panel line wash. Added a mix of light grey and Tamiya smoke to dirty up the radiators and exhausts. RS have squeezed in five very attractive decal options on a tiny sheet. The decals are nice and thin but they settle down very quickly and then refuse to move, even with decal solutions. Get them as close as you can to the right place when sliding them off the sheet. Not a world beater but altogether I’m happy with the result. It took me two years from start to finish to get it done, a considerable time of which it spent on the shelf of doom because it was so much work to get the airframe together in an acceptable fashion. Not an easy kit but with patience still a worthy addition to the collection and as far as I know still the best F available in this scale. Hasegawa F-35 Lightning II The perfect companion to the original Lightning! I was actually slightly disappointed when opening the rather massive box, at first glance I thought this was a quick-build kit. Rest assured it is not – Hasegawa has struck a superb balance between detail and ease of build. The cost of this is of course that the weapons bays are closed and cannot be opened. Building up the main airframe is a single short evening of work. A few small dabs of Mr. Surfacer are required to hide some small seams but that’s it. So how did it take me two years to finish such a simple kit? Hear my story of woe… From the start I struggled, as many others have, with the Have Glass coating. I thought my problems were solved when I read about Hataka’s Have Glass paint. I got a bottle at ESM2018 and proceeded in good spirits with the painting. The Hataka paint and I did not get along very well; no matter what thinner I used, it clogged up my airbrush. After spending an entire evening on it I got a good coat on it. I took a step back, looked at the finish and immediately had my doubts. The paint looked to me far too metallic. Looking at some photos of the real thing you can find pretty much anything between flat grey and shiny metallic so I decided to push on, against better judgement. The second hurdle was the RAM coating. Hasegawa provides some of the RAM paneling as decals but it has you spray the larger areas yourself. I tried to find a grey paint in my stash as close as I could to the decal grey and then spent two nights masking. I sprayed the grey, took off the masking and I was utterly dismayed. The colors clashed horribly. I left the kit for a few days to see if I could convince myself it was acceptable but I couldn’t. I removed the paint with thinner and the kit moved to the shelf of doom while I considered the next step. Over the next few months I looked at a lot of photos of the plane and other peoples’ models and read about paint mixes to mimic the Have Glass coating. I also found out the newer F-35s rolling of the production line had significantly toned down RAM strips, which made for a vast improvement in its appearance in my eyes. So back to the workbench it was. I had decided my way of doing the Have Glass would be to take FS36118 and add some silver into the mix. I prepped the kit for spraying. Before my first attempt I had sprayed the wheel wells in white and stuffed them with blu-tac. However due to the cleaning the white paint had been damaged and I had to remove the blu-tac before respraying. Disaster struck. The blu-tac had hardened and was almost impossible to get out. As a result, the back of the gear well came loose and disappeared into the kit’s innards. I tried to get it out but it was impossible to fit back in place without opening up the fuselage. I tried to open it wide enough to at least get the part out and the whole kit exploded into a dozen pieces – and not along any of the original mating surfaces… One of the top wings got torn clean in half, as did the stabilizer. The right intake was in smithereens and all the mating surfaces where a shambles. I don’t think such an easy-fitting kit has ever been subjected to so much violence, despair and tears by anybody over the age of 8 as this poor F-35. I spent 10 minutes being very angry and sad with myself, then took out the glue and started over. I got all the bits together apart from a tiny piece near the stabilizer, which I filled with card. Lots of gluing, filling and sanding later and the kit, minus some lost engraved detail, went back to the spray table. I applied my metallized 36118 and again took a step back. And again, I didn’t like what I saw. By mixing in silver with the grey, you put metallic parts into the paint but it doesn’t recreate the sheen you see in some photos. You just add glitters to what is otherwise a non-metallic surface. I spent another evening looking at photos (like the one below) and came to a realization that the sheen only appears in sunny conditions and even then it’s not always visible. As such, I argued, it is not dissimilar to the shine you get from sunny reflections on a polished or gloss surface, which you don’t try to mimic in paint either. I figured I could do without any of the metallic effect completely and still get a convincing model. I resprayed the kit in straight 36118. I decided not to use any of the RAM decals as they were the wrong color compared to the lighter shades of grey visible on some areas of the newer paint scheme and masked the lot. I added some white to the 36118 to paint these areas. On removing the masking I found the difference to be too subtle so remasked most of the areas, added more white and resprayed. I finally got a finish I liked. Decaling was quick and easy. I used FlevoDecals promotional sheet for F-001, the first test model of the Dutch Airforce, but changed the 1 and 0 around to make it into the recently delivered F-010, which of course sports the muted RAM taping. I used the Hasegawa decals sheet to source the stencils. All the other parts went on very quickly. The gear is nicely detailed and sufficiently complex to look convincing but still easy to put together. On mounting the canopy I found the sil part interfered with it getting a good fit with the fuselage. I could probably have avoided this by test fitting earlier in the build process but I solved it by just getting rid of it entirely. It’s not visible anyway with the canopy closed. So there we are. Two years of on and off building, filling, sanding, masking, spraying, stripping and cursing ends with a double Lightning strike.
- 10 replies
-
- 22
-

-
Most modellers will have one or two kits lying around that never made it to completion. The majority of those kits languish on shelves or in boxes, unloved and forgotten. However, a select few end up in a worse state: They become experimental subjects, exposed to all sorts of toxic substances and chemicals. Enter my Matchbox Tempest II. This kit started life happily enough on the shelf of a toy store in the early 90s and was picked up for a few quid by my dad and early-teens me. She was destined for, lord knows what really. We only built planes that had seen service with the Dutch forces at that time. It was probably the similarities to the Seafury that did it, because a few years later I set out to turn it into exactly that. A valiant effort was made, unassisted at the time of course by internet references and just a few Seafury photographs in a book. It was quite a modification I recall: I moved the oil cooler from the starboard to the port wing, set out to add a propeller blade, changed the shape of the gear doors... The kit made it to the painting stage, and that is where it stalled. It sat on a shelf in its Dark Sea Gray / Sky livery for years. I went to college, started working and for about ten years didn't do much in the way of model building. In 2009 I picked up the hobby again and I completed many of the old kits that had been left in various stages of completion. However, a few years older and wiser and with the help of the internet I realized that my Tempest-to-Seafury conversion had been somewhat misguided. I'd missed some obvious differences which are hard to correct, like the mid-wing section and resulting changes in the gear well positions, elevated cockpit as well as a few other things. Rather than dump the kit, it ended up as an airbrush test model and over the next ten years it accumulated layer after layer of paint. Still, the Tempest II remained an attractive plane to me and I found myself looking forward to actually building one, so I set out to buy another kit. However, like some other Matchbox kits, this one actually commands a rather hefty price tag. I didn't want to spend 15-20 pounds on it so I started considering renovating it. I'd never tried paint stripping with oven cleaner before but it went very well and within a day or so my poor Tempestfury was clean. Only after doing the cleaning did I realize I had done quite a lot of work on the tail as well, Changing it back into a proper Tempest II would prove to be more work than my original conversion to a Seafury. I'd also lost most of the parts apart from the main airframe, so they would have to be sourced elsewhere. Not wanting to spend the money on another Matchbox kit, I got the cheapest Tempest 72nd scale I could get my hands on in Telford last November. The kit would serve as donor for the prop, landing gear, doors, wheels and canopy. I got hold of the ancient Revell tooling, but this turned out to be a bit of a mistake. The prop and spinner are a single molding and after removing the flash it does look rather anemic. The main gear and doors are single piece moldings as well but look ok once the ejector towers (I didn't know they could squeeze two in on such a small part!) were removed from them. The canopy only looks vaguely Tempest-like and is a lousy fit on the Matchbox kit, but hey, I wasn't building a show winner here and with some plastic card and putty I faired it in. I used the rudder from the Revell kit (despite it being short shot, needing more card) as the original had so much material removed to make it more Seafury-like. More plastic card was employed to restore the tail fillet and move the oil cooler back to the port wing. The gun ports were filled, redrilled and Albion Alloy tubing inserted to clean them up a bit. The only completely unusable parts from the Revell kit were the main wheels. They have a sort of non-descript hub cap, rather than the spoked hub design of the original. There are resin aftermarket wheels for the Tempest but I stole a set from an Academy Typhoon. At some point I will have to fork out the dough for a new set. Or maybe use the Revell wheels on the Typhoon I couldn't find the decals anymore but then I didn't look too hard for them; the original kit only offered Indian marking for the Mk II which I wasn't interested in building and they'd in poor shape anyway, so I invested in an Xtradecal sheet with Tempests and selected the most colorful option, MW800/HF-V from No.54 Squadron, flown by Squadron Leader Frank Jensen during the Victory Day Flypast on June 8th 1946. So there she is, almost 20 years in the making: Matchbox's Tempest Mk II. Not the quickest, neatest or most efficient build I have ever done, but I feel really good when I look at her and see her all cleaned up and finally reaching her intended purpose.
- 13 replies
-
- 36
-
-
- Hawker Tempest
- 72
- (and 1 more)
-
This is a placeholder for my build. I will be building the 1/72 Hasegawa kit with Hawkeye RAAF decals and a couple of update/conversion sets. Pictures soon....
-
This is a report of a very personal project I started on about a year ago, and which I recently finished. It is a tribute to my great-uncle, Willem Pieter Adriaan Ditmar, and a gift to his nephew, my father, Eric Willem Roubos. Historical background In the very early morning of 26th of February 1942, Catalina Y-63 was flying over the Banka Strait, north of Sumatra. The PBY had been flying through the night on a recon of the area and its commander, Willem Ditmar, had to decide to turn back to base or continue the patrol and risk an almost certain encounter with Japanese forces. Ditmar chose the latter. The PBY was part of the forces of the MLD (Marine Luchtvaart Dienst) the Air Force of the Royal Dutch East-Indies Navy which had been involved in a struggle with the Japanese for a number of months now, since a Japanese invasion of the Dutch colony was imminent. At 6:40 in the morning, while the plane was flying just under low cloud cover to avoid detection, the PBY was jumped by two groups of three Ki-27 'Nate's' of the JAAFs 12th Air Brigade. A fight ensued, during which the gunners on Y-63 succeeded to shoot down two Ki-27s. However, the numerical superiority of the Japanese proved too much. Co-pilot Noë was hit, the plane went into a dive and was only with great difficulty brought back under control. Severely damaged the plane landed on the water, where Ditmar ordered his crew of 6 into the life boats. Y-63 sinks within seven minutes, raked with bullet holes from continued strafing. The Japanese fighters disappear and Ditmar and his crew, with the injured pilot, manage to reach the Noordelijke Gebroeders Island and eventually, on March 3, Sumatra. From there, with canoes rented from the locals, they reach Anjer on Java on the 6th. To their dismay they learn that the Japanese have landed on Java and control most of Java, including the area they have just arrived at. Ditmar and his men leave the injured pilot with a local official for treatment and continue their journey to Batavia, hoping to avoid the Japanese troops. The remaining six men split into two groups. One group is captured by locals and all three men are murdered. Ditmar's group is spared this fate but is betrayed by locals and handed over to the Japanese. Willem Ditmar was sent to a POW camp in Siam (Thailand) to work on the infamous Burma railroad. He survived the war and rejoined with his wife and his two daughters, who had been detained in Surabaya not knowing for more than three years if Willem was still alive. After the war he became the most decorated Dutch officer in the East-Indies theatre and returned to work for the Royal Dutch Navy and later for the Dutch government in South East Asia in various capacities. He died in Bangkok in a traffic accident in 1982, remaining a legend in our family. This story is based on several post-WWII publications, especially the report by mariner Gerard A. van Schooten, crew member of the Y-63, and on personal communications from family members. The Kit Academy’s PBY-5 has been around for quite some time. I think it’s still a fine kit and the only serious option if you want a PBY-5 (Revell has an antique molding which is out of production). The lines of the PBY-5 are captured well, the fit is generally excellent and the recessed detail is quite good, if a bit soft in places. The fuselage is covered in rivets, but they are quite restrained and look good under a coat of paint. The kit does disappoint when it comes to the finer details, a general issue with Academy kits of this vintage: Interior detail is minimal, the engines are very basic and the propellers are nothing like the real thing. As this was to be a special project I decided to shell out the extra cash on some aftermarket parts to correct these areas. I acquired the QuickBoost replacement engines, props and cowlings, Eduard’s photo-etch (for PBY-5A, but many items are of use) and MiniWorld brass .50 machine guns for the blisters. Construction Yes, it starts with the cockpit! Eduard’s photo-etch really improves this area as it really is quite bland. The cockpit floor requires carving up to make the parts fit and the I substituted the horizontal bar on which the yokes sit by an n-shaped piece of wire that more accurately represents the real thing. There is a gap behind the bulkhead which allows you to see into the void of the fuselage, but nothing can be seen with the cockpit window in place so I left it. The observer position has a few PE parts to spruce up the machine gun supports. After installing the six small side windows I closed up the fuselage. Fit is pretty good with the exception of the area behind the cockpit. I had to use some Mr. Surfacer 500 here and rescribe the lost detail in the area. The wing assembly consists of six pieces which form a middle segment containing the engine nacelles and two outer segments. They go together very well with just a hint of Mr Surfacer 500 required to remove the seams between the segments. I taped off the area to avoid losing the fabric detail while sanding the seams. The nacelles require a bit of filler as well and a few swipes with a sanding stick. The triangular pieces that form part of the float areas on the wing tips were another matter: They left huge gaps with the wing tips and needed quite a bit of filler to get a smooth result. At this point I had to start considering the build sequence. I usually put as much of the model together before I start painting, but the floats and wing supports were rather fragile pieces and I estimated their chance of snapping off at some point during later construction work was 100%. They also got in the way of masking, so I decided to paint the wings and fuselage separately and put them together only after decaling. I drilled some holes for the antennas and aerial wires ( I always forget to do this and end up having to do it after painting – the pine vice will slip and…), then added the PE corrugated ‘shield’ in the nose. After some fettling I pushed it in a it just stuck – no glue required. To the paint shop! Painting First step was to do the preshading. I have only used this technique a few times and I find it a very easy way to add some interest to a model. On a big kit like the Catalina it is a great way to break the large surfaces, so I set to work and an hour later I had a rather patchy and fearsome looking amphibious creature (I know, the PBY-5 is not amphibious…)! On towards the real painting then. All my references on the Catalina indicated that the MLD planes had ‘milky white’ undersurfaces. Unfortunately, this is not a color any brand carries in their range, so I made my own by taking a fresh bottle of Gunze flat white and adding a few drops of yellow to it (my thanks to FlevoDecals for suggesting this). My milky white needed about three thin layers to cover the preshading just enough to shine through (I’m afraid it doesn't show up very well in the photos). This was followed by masking off the white, and it was at this point that my references started to fail me. Although there are many photographs available of MLD PBY-5s, I have been unable to find a picture of my subject, Y-63. This wouldn't be such a problem if the MLD had been consistent in painting its Catalinas, but my references showed they were anything but. Among the differences are the demarcation between white and grey, the color used to overpaint the orange triangles, the color of the prop hubs, the exhausts, the antennas and the painting demarcations on the floats and surrounding areas. Almost no MLD Catalina is exactly the same, and without photographs it is impossible to know which combination of options Y-63 featured. However, it also meant nobody could prove me wrong if I were to guess, so that’s what I did. Undoubtedly someone will sent me a photograph of Y-63 after reading this and prove me wrong on all counts! After making my choices, it was on to painting the upper surfaces. My references told me to use ‘Dark blue-grey’, the MLD description of the color. I hit the internet and the consensus was that Dark Blue-grey was actually identical to the well-known Dark Sea Gray, so that’s what I used. On removing the masking I was unhappy with the demarcations on the fuselage to I spent quite a bit of time remasking and respraying, but the end result was very satisfying. I left the finish slightly patchy to allow for the fact that these planes were used in tough conditions. Next up was masking the overpainted orange triangles on the upper wing surfaces and the orange rudder. I sprayed these with Dark Sea Gray with some black in it (yes, I’m aware this is cheating – I should have used lightened DSG on the whole plane and ‘fresh’ DSG on the triangles…). The little V-shapes on the fabric area of the wing were masked and sprayed yellow. On Revell’s PBY-5 kit these are supplied as decals in red but on a number of my photographs they very clearly have a light color that really contrasts with the dark color of the wing, so I decided on yellow. I think it looks goods, it adds some color to the plane but at the same time blends in pretty well. I polished the surface with a 6000 grit micro mesh cloth, then applied a few light coats of Future on the areas that would receive decals, which are few. Both Dutch Decal and FlevoDecals have sets that include the PBY-5, but FlevoDecals very importantly adds a full set of serial numbers, so it was easy to go beyond the included versions and create Y-63. These are some of the best decals I have worked with; there is virtually no carrier film around them. I only used some MicroSol and they settled beautifully into the panel lines and rivets. The horizontal stabilizers were also painted in this stage. Test fitting had shown they fit very well, and as they are large I decided to leave them off until the end of the build so they would not get in the way. I neglected to attach the cowlings before painting the wing assembly. Silly, as I had to respray the demarcation a few times to get it to line up exactly with the nacelle that is attached to the wing. While I had acquired QuickBoost’s cowlings, I ended up not using them as their diameter is about 2mm smaller than the nacelle! Photographs clearly show they are the same width. I don’t know how an aftermarket part can get it so wrong. I ended up using the kit parts, rescribing the very soft detail on them and they ended up looking perfectly fine. In future I will do a bit more research before buying what is supposedly a ‘direct replacement’ upgrade part… Construction continued With the main assemblies completed I returned to the smaller parts. Still lots to do! The floats required a lot of clean up: The idea is that you insert the thin supports before you glue them together, catching them between the float halves. This I felt was a recipe for disaster, and in addition would make cleaning up the very obvious seam a major pain. However, my solution was far from perfect! I cut off the vertical main support from the floats themselves. This allowed me to clean up the seam on the floats, as well as the sink marks on the supports. So far so good, but it did leave me with a nasty butt joint to attach the two together again. They would break a number of times throughout masking and attaching them to the wing in the days ahead… On studying a movie I found of the PBY-5s in use with the MLD I noticed that they carried not the rather standard single .50 cal in each blister (which I had acquired already) but a dual .303 Browning setup. The .50 cals went in to the spares box. It was an opportunity to reuse some of the PE Eduard had kindly provided to spruce up the kit parts (in combination with plastic card), and I got some Master brass .303 barrels to make the dual setup more convincing. I used a similar combination of Eduard PE, card and Master brass for the front gun. The Eduard PE for the blisters is really meant to represent .50 cals but no one will know. Right? Right. Ok – there is no way around it – you are gonna have to attach that wing to that fuselage! I’ve never been lucky with models that feature spindly supports, and this kit would be no exception. It started off fairly well – the fuselage fits perfectly into the central recess in the wing. Pleased with myself, I forgot to do the obvious (can you guess what it is?) and went on towards the part I dreaded most: The supports. I started on the starboard side. Not a problem – perfect fit! Port side then, and that’s where it all went wrong: Both supports were too short by over 2mm. I slapped myself for not checking alignment after gluing the wing on top of the fuselage. I checked, corrected, checked, corrected, checked, measured, corrected, in the process breaking off all four of the supports again. After finally getting the right alignment I decided that it would be a good idea to let the glue set for a night before continuing. The next day I attached the supports again. Starboard, again, not a problem. Port? Would you believe it? Still a 2mm gap! I checked alignment again, and, satisfied that that was not the problem, proceeded to flood the gap between the supports and wings with a mix of superglue, Mr Surfacer and Tamiya liquid cement. My concoction created a permanent bond (probably the strongest on the entire model!), and after two days of sanding, cleaning, respraying, and more sanding, cleaning and respraying, I was very proud and happy with my now winged Catalina! Final Construction Quite a lot of this really. Main challenge were the cowlings – the use of the resin engine means you can’t use the mating surface on the nacelles as they are too deep and I had to rely on gluing the circumference of the cowlings instead. This, it turned out, was a lousy idea as the weight of the resin engines meant the thin mating surface did not provide enough strength to glue them properly to the nacelles. I decided to create a new mating surface using the back of the resin engine blocks. For this I had to remove the half-circle shaped areas on the nacelles, and by building up the layers using thin plastic sheet I finally got a nice, big, smooth mating surface. All my efforts had resulted in some spilled glue so some more respraying was required. A final piece of aftermarket I used were Red Roo’s fishtail exhausts. These are cast in resin and look quite good, although they are not as crisp as some Czech items of this kind. I had to sand the attachment points quite a bit to get a good fit to the engine nacelle. The fishtails are a bit of conjecture from my side again; I know from photos that some MLD PBYs had them, and they make the plane look a bit different, so there we go. Other bits and bobs went on quite easily; stabilizers, antennas, wires, machine guns, blisters, turret, fuel ejection pipes. I sprayed the entire kit with a mixture of 80/20 Vallejo matt and Future, and removed the Montex masking (great item, no-brainer on a kit like this) on the clear parts. The final items on the to do list were the PE wind shield wipers (attached with Future) and some Little Cars lights to represent the landing lights. They were taped over with clear cellotape to represent the glass. After some touch up I had a completed PBY! Conclusion Academy’s PBY-5 is still an excellent kit. With a bit of aftermarket it can be turned into a great kit, and it really has no significant vices to speak of. I really enjoyed this build from start to finish. After a long car and boat journey from Norfolk to The Netherlands, the revived Y-63 made it to my parents' house where it currently has a place of honor in the living room. I'm very happy with the result and so is my dad! References Bosscher, P.M. (1990) De koninklijke mariene in de tweede wereldoorlog. Part 3. Van Wijnen, Franeker, 490 pp. Geneste, W.J. J. (1992) MLD-er met twee bronzen kruizen. Mars et Historia 26(3): 57-61 Meijer, H. (2008) Voor dapperheid onderscheiden. Nieuwsbrief Vrienden Legermuseum 16(1): 12-13 Postma, T, Visser, G., Van Schooten, G.A. (????) De Catalina Y 63 door de Jappen neergeschoten. http://www.visser-maritiem.nl/Catalina%20Y%2063%20%20(1).html Womack, T. (2006) The Dutch naval air force against Japan: the defense of the Netherlands East Indies, 1941-1942. McFarland & Company, Jefferson, NC, 207 pp.
- 32 replies
-
- 27
-
-
Hi All, A long time in the making, she fought me along the way, and, I ended up putting her to one side and finishing something. But she is now 'over the line' and, while my modelling skills weren't up to the challenge, I am happy she is finished. The last in my Nachtjager series I'm keen to do something more colourful I based the camouflage on the first picture and the kit instructions. It looks to me as if the light coloured 'splotches' (wonder what the German is for that!) were applied in the field so I painted the basic splinter camo, applied the decals and then sprayed the splotches, hope it looks all right. Complete OOB and while I would like to say it was a pleasure to build, I can't. Perhaps I'm a bit jaded after 7 odd German Nightfighters Thanks for looking and sorry about the photos, best I can do I'm afraid. Cheers, Shane
- 8 replies
-
- 19
-
-
- 72
- nightfighter
- (and 1 more)
-
It’s done. It took 18 months, the sniffing of copious amounts of CA glue, bankrupting myself on the bills for filler and Tamiya primer and the printing and reprinting of many, many decal sheets, but I finally have a completed 1/72 model of my favourite airplane of all time, the DeHavilland DH-106 Comet I. It is certainly not the most perfect model I have built, but I’m extremely pleased with the result, especially when I think back of all the challenges I’ve had to deal with in building it. I won’t repeat everything I wrote in my WiP progress thread (here), but this was one of those Murphy’s Law builds. For starters, the kit itself, made by the now defunct Fliegerhorst of Germany, is crap. I paid (or rather my parents did, as it was a birthday gift) over 100 euros for it, and there can’t be a model kit that is worse value for money than this one. The resin parts were warped, badly moulded, full of pin holes, detail was non-existent and the panel lines of inconsistent depth and crispness and completely missing in some areas. This is the first kit where I’ve actually broken parts on purpose to make them fit. After gluing the parts together, the misalignment between them required the use of insane amounts of CA glue and subsequently the use of a file with a coarseness only associated with crude woodworking to deal with the seams. But I persevered! So after covering most of the room in resin dust (I did use a mask and I wet-sanded almost everything) out came an object that did look suspiciously like a Comet. Of course, application of primer highlighted many, many imperfections and it also showed the panel lines either had not survived the onslaught, of were of such ragged and indistinct quality that they needed rescribing. I am terrible at rescribing, but I like to think that doing it on this kit (in most cases, four of five times for every panel line) has improved my skill somewhat. I think this stage took the longest to get to a level where I was satisfied. Painting went quite well – at least initially. I used Humbrol Polished Aluminium from a rattle can and it went on very well. I moved on with the white section for the roof, which also went on very well. However, after removing the masking tape I found out that Humbrol’s paint didn’t like masking tape, and I had to redo the silver, then cover it with a layer of future before I could move on. In the meantime, I had discarded the lousy decals that Fliegerhorst had included because they were the wrong color. My dad used them as a base to make new ones on the computer, and I applied these to the kit. Stupidly, I didn’t properly check the alignment of the fuselage bands and after thinking about it for a day, I decided to remove them. I hadn’t come this far to screw it up like this! Removal of the decals necessitated reapplying most of the paint. Naturally! In the end, a lot of trial and error to get the decals just right was required and my dad has printed probably close to 20 A4 sheets to get to where we wanted to be, with variations in color, windows painted black or grey, smaller and bigger sizes… I probably have enough left for 10 more Comets, but they’ll all be slightly different! Home stretch then…. I had replaced the front wheel bay and landing gear with some nice resin and metal parts intended for a Nimrod, which gave some much needed detail in these crucial areas. I also tried ordering resin wheels intended for the Nimrod but this didn’t work out so I polished up the kit wheels as best I could. I added some pitot tubes, a light wash to the moving surfaces, a few coats of future and satin finish and that was it. It all sounds a bit negative when I reread this, but it wasn’t like that. I did have a lot of fun building this kit and seeing it progress over time, and it’s most definitely my favourite model. Now if only I had a safe place to put it…
- 45 replies
-
- 61
-
-
- Dehavilland
- comet
- (and 2 more)
-
I have a soft spot for Grumman's cats. From the cute Wildcat, to the butch Hellcat and all the way to the flashy Tomcat, I think the company has built some of the best looking fighter aircraft in history. Over the summer I started a double-build of the venerable Hasegawa kits of both these planes. It's taken quite some time to finish them, but here they are. Both kits are built straight out of the box, apart from the Sidewinders, which come from the Hasegawa Weapons Set III. Colors are Gunze acrylics and Tamiya white primer. In particular the Tiger is really a candidate for a new tooling, it has raised panel lines, most of which disappear after you have taken care of the fuselage seams. Apart from that it goes together very well, I only needed some filler on the intakes, which are a slightly dubious fit. The main landing gear is a bit of a vague fit, but doable with some trail and error. The decals had yellowed but I was lucky to get another set from a fellow BM-er. Unfortunately no aftermarket decals are available for this kit. It's decidedly underrepresented by both kit manufacturers and aftermarket companies. The Cougar is slightly newer and has the traditional Hasegawa panel lines, very fine, a bit too fine on the underside, I struggled to get the wash to adhere to them. This kit also needed some filler around the intakes and the rear wing to fuselage joint, which requires quite a lot of filler to smooth out. Apart from that, it's an easy build. This was also an older boxing and in this case the decals had both yellowed and cracked. The Cougar also isn't a popular aftermarket subject, but PrintScale do a nice sheet with some Panthers and Cougars, which I used. I believe Sword do a modern tooling of the Cougar but as far as I'm aware not the fighter version. I'm very happy to have these lovely 50s cats in my collection. Hopefully we'll get some modern toolings of both, which will be the perfect excuse to build some more of them.
- 22 replies
-
- 29
-
-
Last build of the year, and it was a quick one. I picked this kit out of the stash for two reasons; firstly I needed a guinea pig to test the new Vallejo Metal acrylics. Secondly, the kit had lots of loose parts, all floating around in one of Italeri's open-ended boxes, and I had already lost one of the horizontal stabilizers. Since I read some reviews of this kit I was already aware of some of its pitfalls, namely an ill-fitting intake, badly fitting transparencies and zillions of rivets. I dealt with the first two issues but left the last one alone. My previous experience with Vallejo's paints was not too good; in my experience they spray beautifully but take very long to harden, if at all. However, some good press on the new Metal acrylics made me decide to give them a shot. I've posted my experiences with them in this topic. Sufficient to say I found them quite good and I will use them more often going forward. I used some Humbrol Polished aluminium on the maintenance panel and airbrakes and Gunze Metalcote on the intake ring to break the expanse of silver. I've seen MiGs build as a patchwork of different shades of metal, but I couldn't find much evidence for this in pictures, though in fairness I didn't look very hard The kit itself was for a long time the best MiG-15 on the market, but it has of course been completely blown out of the water by Eduard's new kit. At first I considered doing a double-build of the kits to compare them, but on inspecting the parts, it was a foregone conclusion and I decided it would be better to build the Italeri kit as a test bed for the paint and then do the Eduard kit later, and do it justice. I didn't use any aftermarket with the exception of some Albion Alloys tubing for the gun barrels.
-
This is my most recent completion, Sword's Ki-84. I like the Frank a lot, it has clean lines and good looks, a true fighter aircraft. Some years ago I built Hasegawa's excellent but dated kit, and I've been looking for an opportunity to build another one. When I came across Sword's pre-production version (I believe the c variant), I had to have it. Sword's kit is a popular candidate for best short run kit in these great 'What is the best xx-scale kit?' topics. As such I was curious to see how well it built. I found it to be a typical modern short run kit - nice detail, good use of resin parts (engine and wheel bay) but also somewhat spurious fit in areas (gun cover, engine cowling, wing root). All in all it built rather well but due to general hamfistedness it did take me a bit longer to complete than it should have. I drilled through the top of the wing when widening the locating holes for the gear... not my finest hour. None of the kit's issues are difficult to resolve, the only slightly problematic area is the canopy; this seems to be a bit wider than the cockpit area it sits on, resulting in a small step. I filled this with Perfect Plastic Putty but it's still noticeable, especially when compared to Hasegawa's old but perfectly-fitting kit. Sword gives you a choice of two color schemes, an unpainted aluminium plane and a 'Medium brown' with green mottling. I visited Nick Millman's blog 'Aviation of Japan' to get a line on the shade of brown I needed, and using the color swatches I found I created my own using some RAF Dark Earth as a base, mixed with Tamiya Red Brown and Olive Drab. This was applied over a coating of Humbrol Metalcote Polished Aluminium. The mottling was sprayed using Tamiya's IJA Green. I used some IJA Grey for the control surfaces, but I feel the shade is too green when I look at it now - if someone can verify what this shade should look like I'd love to hear it. Sword's decals worked well but the set has one curious omission. It appears that the lines around the front and rear of the wings are red on an unpainted surface and yellow on camouflaged surfaces. Sword provides sufficient red decals to do to the unpainted variant, but for the camouflaged variant the yellow lines around the front of the wing are missing. I stole these from a Hasegawa sheet I have, but this created another problem, a mismatch between the yellow shades of the lines. In the end I therefore used all Hasegawa decals. After decaling I saw that the yellow on the wing leading edge had a decidedly greener tint than the rather orangey yellow of the lines. Oh well. I was going to weather the plane quite severely, to try out some new techniques, then realized it was in use with a test squadron, and thought better of it - I suppose these guys must have taken some care of their mounts and/or wouldn't have used it for long. I picked some W&N water colors to apply a wash, a toothpick to scratch the paint around some of the panels in order to allow the bare metal to show through, and a combination of pastels and washes to create some staining. I used a couple of minor after-market items on this build; canopy mask by Eduard, tubing for the pitot and gun barrels from Albion Alloys, a lens for the landing light from Little Cars and EZ-line type thread from some eBay seller. In summary, a satisfying result from what is undoubtedly a very good kit of this important and beautiful aircraft. It joins its nemesis, the F6F, in my growing collection of 'Hellcats over the Pacific' - inspired builds.
- 11 replies
-
- 20
-
-
On April 14 1945, on a dark and foggy morning, a Consolidated B-24H Liberator named the 'Hookem Cow' took off from Horsham St. Faith in Norfolk and headed for France. Shortly after take-off the number 2 engine caught fire and the plane struggled to maintain altitude. Near the village of Hainford it hit a power line and crashed, killing 5 of the crew and injuring the remaining two. The 'Hookem Cow' belonged to the 458th Bomb Group, 754th squadron of the USAAF. The men killed in action were the last of their unit to lose their lives in the air war over Europe. During the past two years I have lived in Hainford, unaware of the fate of the 'Hookem Cow'. I did know that East Anglia used to be home to what the locals still call 'the friendly invasion', the deployment of thousands of Americans to quiet Norfolk and Suffolk to risk their lives over occupied Europe. Many of the airfields are still around. I've used the basis of the ‘Hookem Cow’ many times myself; it’s now known as Norwich International Airport. Many of the concrete bomber dispersals are still there, and you see them passing by your airliner window on your way to or from the runway. The place must have looked quite different all those years ago. Being a modeller, I often thought about building some of the planes that used to be based here, but somehow I didn’t get round to it. So when I read in the parish news that there was to be a memorial erected in the village hall to remember the crew of this plane, it all came together. This was a great opportunity to do something for the village my wife and I love so much, to share my enthusiasm for model building with others, to build something with a story behind it and to make a contribution to a memorial which honors some of the men that paid the ultimate price for our freedom. I wrote to the editor, offering to build a model of the 'Hookem Cow' to be displayed next to the memorial. She kindly put me in touch with Ed and Kevin, the chairman and treasurer of the village hall, and we discussed the project. They were very enthusiastic and in turn pointed me toward the man whose initiative this was, Trevor Hewitt. It turned out that I lived not a mile away from one of the most wonderful aviation museums I've ever visited, the New Farm Aviation Heritage Collection, which Trevor runs. I met him at the museum and I was stunned to see the vast collection of items he had collected over the years from aircraft that had crashed in the area, as well as many other great memorabilia and aviation items. If you are ever in the area, please visit! Trevor provided me with lots of information on the 'Hookem Cow', and combined with my own internet research and some really useful comments from the folks here on Britmodeller in a number of B-24 topics that I temporarily hijacked, the project was underway. As is often the case when you start doing research, you find out that things are not as clear cut as you'd hoped. First of all, there were of course no decal sets available that covered the 'Hookem Cow'. The plane had nose art on both sides, but luckily, some good photographic material was available. I sent this off to my father, who has expanded his modelling hobby by creating his own custom decals. Being as enthusiastic about the project as I was, he wasted no time to reproduce the nose art and other 'Cow'-specific decals for me. The second challenge was that the 'Hookem Cow' was a Ford-built B-24H, and the nose section is not available in model form as far as I could determine. I was going to use the Academy B-24J kit, which I already had in my stash, but this kit omitted the bulged navigator windows, the slanted bombardiers window and the correct A-15 front turret. Since I had the kit earmarked for another build anyway, I decided to shell out the cash for the Hasegawa B-24 as its replacement in the stash - this kit has the bulged windows and an additional A-15 turret, which I both pilfered from the box. This solved two out of three issues. The most difficult one was the slanted window. I decided to try plunge moulding for the first time to make this, using the standard vertical-ending window as the mould, so this was faired in using some filler and superglue, and I made about a dozen casts using some clear plastic sheet from Squadron intended for this purpose. The results were a bit mixed, most of the casts came out rather cloudy, but I selected the best one and cut it to shape. To make the Hasegawa turret fit the kit, a lot of excess material from both the turret and the nose area needed to be removed, in fact almost all of it without actually cutting it away completely. The Ford 'S curve' in the nose I made with a file in about two minutes - though this was after I made it in the wrong place first and had to fill the hole with plastic card, CA glue and sand it back to normal! The rest of the kit is a relatively straightforward build; wings benefit from some thinning at the trailing edges, and the nacelle areas on the wing parts require some filler. The panel lines at the top of the fuselage don't line up at all and require rescribing. The horizontal tail surface has major gaps with the fuselage on the underside, but it's easily filled. I used Eduard masks for the Academy glazing and Montex masks for the Hasegawa clear parts. After priming the kit with Tamiya fine primer, I sprayed it with Humbrol Metalcote Polished Aluminum from a rattle can. I like the finish this gives but it does require a coat of Future before masking it and doing other areas like the anti-glare, de-icer boots and moving surfaces. I used a combination of the printed Cow-specific decals, which worked great, and the generic Hasegawa decals which, though they are the newer kind, didn’t budge even after applying DACO medium setting solution. A coat of Future sealed everything in. Before I fit the fuselage halves together, I had filed out two holes in the bottom and glued in two nuts; Trevor had told me the kit was to be presented in a wooden display case, and would have to hang on the wall vertically. I drilled holes in the base plate, and used two long bolts to secure the plane to it, adding pieces of dark green-sprayed plastic tubing to hide the threads. This worked out very well and it is invisible due to the way the kit is presented. I managed to finish the kit the night before the unveiling of the memorial. We fitted it into a very nice and solid display case and it was installed between the two main cases of the memorial; one containing parts of the plane and metal items from the crew's equipment, and the other containing photographs of the crew. I really like the way Trevor designed the memorial; the parts are carefully selected and despite their small size bring the plane and its crew back to life. The ceremony itself was quite impressive; there was a huge turnout and the village hall was full. After a reading of accounts of the accident from surviving crew members, a letter was read from one of their family members back in the States. The names of the crew were read out, followed by the poem 'Epic of the 458th'. After the memorial was blessed and prayers were said, a number of floral tributes were laid, followed by The Exhortation and the Kohima Address. I had not experienced a ceremony such as this before, and I found it quite moving. I think it’s very important to remember the loss of these men’s lives, who fought for our liberty so long ago. We should never forget what happened, and memorials such as this in places that are used by everyone and are seen daily help us doing that. I’m very grateful to Trevor, Kevin and Ed to allow me to be a part of this. I hope I'll have another opportunity to do it again somewhere.
- 25 replies
-
- 48
-
-
- consolidated
- liberator
- (and 2 more)
-
I managed to complete my Christmas holiday Spitfire double build inside the two-week period I allocated to it! I started this build as distraction from a difficult kit I've been working on for over a year, and as such I wanted an easy kit. I made it a double build when I realized I couldn't pick which kit to do, and as I expected them to be pretty much shake'n bake. I was also quite interested to see which one would be my favourite. The Airfix kit is built as the early Mk.I that's included in the box, I just love the white/black wing scheme. This also allowed me to do a tiny bit of a conversion on the Tamiya and build it as a MkIIa, using the spares from the Airfix kit: Coffman starter, Rotol prop and fishtail exhausts. This MkIIa was the personal plane of Prince Bernhard of The Netherlands, husband to Crown Princess Juliana. When Holland was occupied by the Germans in May 1940, the royal family fled to Britain, where both Juliana and Bernhard, as well as Queen Wilhelmina, worked tirelessly to support the war effort against the Axis. Bernhard took a great interest in military matters and involved himself with soldiers and pilots that had fled to Britain as well, and he played a large part in creating the 322 (Dutch) squadron. He also had a reputation for being a playboy and he enjoyed driving sports cars and flying aeroplanes. As for my verdict on the kits: Very, very difficult to pick a favorite. The Tamiya has the best surface detail, the Airfix is (apparently) more accurate, Tamiya has slightly better fit, Airfix is considerably cheaper and in the series 2 boxing gives you lots of useful spares. Bottom line, it depends on what you value most. For me, the Tamiya's better surface detail puts it slightly ahead of the Airfix. Apologies for the quality of the pictures, there wasn't as much light as I really needed.
- 28 replies
-
- 24
-
-
The Curtiss Hawk 75 was developed as a private venture by the Curtiss factory in the early 1930s. A number of versions with different engines and armaments were produced for different countries. By September 1939 the Dutch government had speeded up the modernization of its air force and ordered the Hawk 75A-7, which was equipped with the Wright-Cyclone R1820 1200hp engine. After the fall of The Netherlands, the planes were rerouted to the Dutch East Indies. The Hawks engaged Japanese invaders from December 1941 but were withdrawn from service in February 1942 due to engine issues. However, its more famous descendant, the P-40, served with much distinction in the Indies during and after the war. Since I’m on something of a Pacific Air War modeling spree, the P-36 / Hawk 75 has been on my list for some time. I’ve had the DB/Airwaves conversion nose in my stash for over 20 years, and I was always impressed by the quality of the part; it’s nicely detailed with recessed panel lines and flawless casting. The Revell/Monogram kit to be used for this conversion represents an A-4 and it’s old… raised panel lines, little interior detail, few parts. However, what’s there, is pretty good. Fit is decent and the transparencies are very clear. Installing the nose was a relatively simple job, but for some reason I misread the instructions, ignored common sense and used 2-component glue instead of CA to mate the new engine to the fuselage. This resulted in endless cycles of filling, sanding and priming. In the end I gouged out the 2-component glue and refilled with CA. I never did get the join quite right, but only I will notice (I hope). One issue caused by the nose job was that it removed the front on the cockpit. This resulted in a less than optimal mating surface for the windscreen, so this required some cutting, filling and blending. In turn, the sliding part of the canopy would not fit in the closed position, so I left it open. I added a QuickBoost gunsight and some tape seatbelts to spruce up the cockpit a bit. Since the nose has recessed panel lines, I decided to rescribe the entire kit. This was quite easy as there are only one or two curved panel lines, the rest are on flat surfaces. Even for me this was a relatively easy job – I’m useless at rescribing! Apart from the nose job, some other minor conversions were required. The Dutch planes only had the inner wing guns, so I removed the outer ones and the shell ejection chutes. Then I removed the inner ones as well as they are quite crude – and replaced them with Albion Alloys tubing. Same for the pitot tube. The propeller hub needed replacing as well as it’s the wrong shape. I cut off the original and replaced it with a reshaped piece of sprue. Finally, the Dutch planes had the lower portion of the gear doors removed, so this required some cutting and carving of the original parts. Painting was done with a layer of Tamiya fine primer followed by two coats of Games Workshop Runefang Steel, my NMF color of choice at the moment. It dries quickly and hardens very well, it’s easy to mask and does not pick up any nasty finger prints. The ailerons and elevators were sprayed in the same color with some grey mixed in to give a slightly faded look. Decals are from FlevoDecals ML-KNIL set 72012, which went down very well, as usual with decals from this manufacturer. I really like their sets, being a Dutch guy they are really indispensable to building my collection. I’m very happy with the final result; it’s a good-looking plane, and I’m very happy to have finally done this conversion, which has languished on the shelf for so long.
- 15 replies
-
- 17
-
-
The Mitsubishi A5M Claude is best known as the predecessor of the A6M Zero, but it was a very capable plane in its own right. I've always liked its looks, especially the curves of the rear fuselage are a thing of beauty. I picked up the Nichimo kit for a few quid while on holiday in Japan a few years back. I had never seen it before, and it was being rereleased at that time. It's an old kit, but it has some modern features. The flaps are separately molded, and the kit has recessed panel lines. Fit is ok, I needed some filler in the usual areas at the wing roots and rear wing to fuselage joint. Quite a few of the parts had extensive mold lines and flash, this was particularly an issue on the propeller, which was left a bit thin after all the carving I had to do on it. The main challenge on the kit was the windshield; it had a lot of flash, and after cleaning it I realized some of the flash wasn't in fact flash - this left a huge gap between windscreen and forward fuselage, which required filling. I used white primer, followed by red on the tail and locations of the hinomarus, subsequently masking those off, resulting in nicely sprayed markings in those areas. However, I forgot to do the hinomarus on the fuselage, and used the decals for those, which luckily had a similar shade of red. The rest of the kit was sprayed with Games Workshop Runefang Steel, which is my favorite NMF paint now; it hardens very quickly and doesn't pick up finger prints. I gave it wash with some dark grey water colors. All in all a relatively easy build, and one that looks pretty good next to much more modern kits.
- 12 replies
-
- 16
-
-
- Mitsubishi
- A5M
- (and 3 more)
-
This is were I got to with my Haseagwa P-3C in Project Magnet RP-3D colours some time ago It had been on the shelf of doom until yesterday when I decided to start some masking and painting. Still some way to go with more masking, but I am all enthused to get this one done (so I can start another Orion or 3)
-
With Christmas just around the corner, it's time to relax a little, and what's true in real life is true in model building: I've spent most of the year on a rather tough build (which I hope to complete during the holidays as well), so it's time for something easy. I've been looking forward to building Airfix' new(ish) Mk.I for a while, especially after getting hold of the I/IIa boxing. Since I also have the Tamiya in my stash, I thought they would make a nice double build. I will build the kits mostly out of the box, with some minor alterations. The Airfix kit will be built as the early Mk.I that's included in the box, I just love the white/black wing paint job on it and the wooden prop. Since I'm not using the IIa specific parts, I will use these to convert the Tamiya to a IIa by adding the Coffman starter, the Rotol prop and the fishtail exhausts. I will be building this plane: This was the personal plane of Prince Bernhard of The Netherlands, husband to Queen Wilhelmina. When Holland was occupied by the Germans in May 1940, the royal family fled to Britain, where both Wilhelmina and Bernhard worked tirelessly to support the war effort against the Axis. Bernhard took a great interest in military matters and involved himself with soldiers and pilots that had fled to Britain as well, and he played a large part in creating the 322 (Dutch) squadron. He also had a reputation for being a playboy and he enjoyed driving sports cars and flying aeroplanes. This particular Spitfire Mk.IIa was his personal plane, and he must have flown it a number of times, though this little landing mishap seems to be someone else's fault. FlevoDecals have kindly issued a Dutch Spitfires set that includes this plane. The photo was apparently taken in spring 1942 so the plane will already have the ocean grey camo I think. It also seems to have fishtail exhausts. Box contents, in dark grey Tamiya, light grey Airfix. On first inspection, the differences are quite obvious. Airfix panel lines are not comparable to Tamiya's, being slighly too large for my taste, not as bad as on earlier kits but certainly not as good as their more recent efforts. Tamiya's on the other hand are so petite they may disappear under too much paint. We will see what looks best after completing the build! A word on accuracy: I am not a rivet counter but I have heard the Airfix is pretty much spot on. When comparing, I find the Tamiya kit is slightly narrower at the cockpit and tail and about 1,5 to 2mm shorter in the area behind the cockpit. For me it's not big deal but your mileage may vary. After market - after taking the picture I decided to skip the Eduard zoom set for the Tamiya kit in order to compare the kits more fairly. I have chosen to use the QB seat, which is lovely, on the Airfix kit. Initial construction of course starts with the cockpit. Pretty similar, with Airfix detail just slightly cruder than Tamiya and the former settling for a decal for the instrument panel where the big T supplies a moulded panel. The decal may actually be better visible after closing the fuselage. I drilled out the lightening holes in the rear oval bit, but used a diameter which was slightly too large, so the headrest area on the Airfix kit broke... Seats from left to right: QuickBoost, Airfix (not used), Tamiya. Tamiya's seems slightly too wide - maybe I should have used the QB item on that kit instead... Fooled around a bit with Photoshop as the pic was a bit too dark. I used gunze interior green with some black mixed in to create RAF interior green, followed by a dark wash and a drybrush with interior green, picking out the instruments with black and red. Both kits are very good in this respect. After a good few hours the fuselages go together. No issues at all on the Tamiya kit, which by the way also allows you to put the halves together and then install the cockpit from below. On the Airfix kit, I removed the upper locating pins to get a better fit, but I still need some filler in the area just in front on the cockpit. Apart from that, fit is pretty good. To be continued!
- 15 replies
-
- 2
-
-
- supermarine
- spitfire
- (and 3 more)
-
Here is my (very) long term project, started some 3 years ago if I recall correctly. In that time I have not progressed far due to glaring shape issues and the desire to onpen it up and display some internal detail. Here is a box shot ..and here is a shot of how the model stands at the moment. My main short term aim is to get the interior complete so I can button it up and start on getting the external shape right. Then I can get to work on the main wheel wells and finally the engines. Some progress will follow shortly.