Search the Community
Showing results for tags 'royal navy'.
-
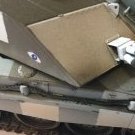
The Build log is here https://www.britmodeller.com/forums/index.php?/topic/235070426-1350-hms-kent-county-class-cruiser-1941/ Thanks are due to Richard Dennis @dickrd and Jamie Duff @Jamie @ Sovereign Hobbies for their considerable input into the Colour scheme, which differs substantially from previous interpretations. I've made extensive use of 3 D printed items from https://micromaster.co.nz/ which IMHO have set new standards in small scale detailed realism HMS Berwick, a sister vessel to HMS Kent along soon Thanks for looking Rob
- 33 replies
-
- 71
-

-

-
- Trumpeter
- Micromaster
- (and 1 more)
-
Hi everyone This is my Revell 1/72 EH-101 Merlin HM.1 representing the aircraft ZH860. The Kit had incredibly good detail, it had raised rivets along the sides of the aircraft but not the top or bottom. The fit was very good and required minimal filling and sanding. I drilled small holes into the stairs (if that is what they are called) at the side to try copy how it looked in pictures. The decals where good and conformed well to the surface detail. For weathering, I used panel liner to make the rivets more visible and oil paint to add small oil leaks and exhaust stains. I also used it look like it had been at sea for a while. Thanks for looking
- 9 replies
-
- 38
-
-
-
- Royal Navy
- Merlin
- (and 1 more)
-
 I started building this Seafire as part of the Spitfire and Seafire Group Build but unfortunately ran out of time. At last I have managed to finish it. Supermarine Seafire NN341/3A 886 NAS 3rd NFW Lee on Solent June ‘44 Lt RM Crosley ‘D’ Plus 1, Wednesday 7th June ’44. “Lo and behold I saw another one like the first (Crosley had tried to stalk an aircraft a few minutes before), heading in a straight line for Deauville. This time I determined to take a good overtaking speed to make sure what he was, quickly. The top of the cloud was about 2000 feet below me and with 18 pounds of boost, everything shaking and clattering at about 360 knots on the way down, I was catching up fast. I still wasn’t sure whether he was one of ours. I got in behind him, very close indeed before I saw the black crosses on the side of his fuselage. I skidded behind him again as best I could without wasting time. He still had not seen me, but there was not much time left as I was going too fast for comfort and was overtaking him. I pressed the gun button at about 150 yards range for about two seconds, seeing many hits with the cannon on his wing and port fuselage. I pulled up to the left to avoid hitting him. I also felt as if he might have a number 2 up-sun of me, ready to pounce. I still could not understand how anyone could be so stupid to fly alone in full view of everyone above him and towards a beach-head crowded with our own fighters, unless he was a decoy”. “I reversed the pull up and had a look for him. I just caught sight of him, end on, before he hit the ground at the edge of the cloud cover, 3000 or 4000 feet below”. “I flew back weaving all the way expecting a furious German to come at me at any moment”. “On landing I found that I had only used 20 cannon rounds per gun”. RM Crosley ‘They Gave me a Seafire’. Kit:- Special Hobby 1/48 ‘Eyes of the Fleet’ boxing. Paint:- Xtracrylics, Tamiya. Decals:- Kit & generic Xtradecals set. Thanks for looking in..
- 8 replies
-
- 32
-
-
-
- FAA
- Royal Navy
- (and 1 more)
-
Hi all I’m almost done with my first ship build, the Tamiya 1:350 HMS King George V. It’s been a brilliant build so far, but due to my relative inexperience In the World of ship modelling I’m not really sure how to go on from here in terms of weathering and finishing the model. Could anyone give me any tips as to how to continue from here? Cheers Luke Rutter
- 8 replies
-
- 3
-
-
- WW2
- Battleship
- (and 1 more)
-
Hi guys n gals. Gonna dive in. I started a Dynavector 1:48 scale Scimitar a month ago. Lockdown and Corona Builds have slowed me down in my usual build speed what with doing dishes mopping the floors vaccuuming and cooking for the Boss so she lets me do nothing but sit with planes well I’m still new to posting here so I’ll try and figure out how to post wip pics.
- 60 replies
-
- 2
-
-
- Supermarine Scimitar
- Dynavector
- (and 1 more)
-
 This is one of my older models - HMS "Zinnia" build with the help of the WEM photo-etched set. The model took silver medal from the European Championship Class "C" in 2014
- 7 replies
-
- 32
-
-
- Royal Navy
- 1/350
- (and 1 more)
-
Hi guys, I will be building the Airfix 1/48 Buccaneer in Royal Navy colors. There will be some extra decals for it from Xtra decals and a few foto etch sets plus 2 resin bangseats from Neomega and some resin intakes. I will put on some pictures at a later date. Cheers,
-
Now this is a bit different. I picked this up several years ago on a visit to Hannants at Colindale as I noticed one of the liveries provided was for a Royal Navy glider. I recalled that I had it a few days ago and thought if I could dig it out of the stash it would be a quick build and get done now I'm almost finished my other contributions. It's only got 11 parts and a canopy, pretty much one colour, no etch, no resin and only 4 transfers to go on. So it was found in a pile on the top shelf and out it came. A simple simple set of instructions on one page. The colour call outs are in Czech but google translate helped out and the two I couldn't translate aren't used anyway. Simple sprue, the big problem is a number of fairly big ejection pins including one on each wing. Small but comprehensive transfer sheet and tiny clear sprue with a canopy and something else which doesn't appear on the instructions.
- 17 replies
-
- 2
-
-
- Royal Navy
- AZ Models
- (and 1 more)
-
On 20.11.1941 Lt P N Charlton flying Hawker Hurricane I (Trop.) W9327 OL*W of the Royal Navy Desert Fighter Flight intercepted and destroyed three Ju87s. Later in the same flight Charlton was hot down by a 'friendly' Tomahawk, later awarded DFC by RAF. This is my representation of Charlton Hurricane. I must thank and both @Beard and @tonyot for their help with the general appearance of this aircraft. Kit is the Airfix 1/48 Hurricane MkI(Trop.) boxing, paint is Xtracrylics, decals came from the kit or from Xtradecal generic set, the Squadron codes were sprayed using templates I made. I hope you like these rather cruel photographs.. On the shelf with Sea Hurricanes and a Martlet MkII Thanks for looking in..
- 20 replies
-
- 46
-
-
-
- FAA
- Royal Navy
- (and 1 more)
-
 Hi all. I'm new to this community and this is only my second thread, the first being on the intros section, but thought I'd jump straight in with a completed build. I was half way through this when I joined up and the build was being documented elsewehere and I thought I'd post here for your amusement and / or pleasure. Hope you like it. If I can get to grips with this photo hosting I'll see if I can't share a build or two.
- 8 replies
-
- 26
-
-
- Royal Navy
- fleet air arm
- (and 1 more)
-
Seeing all the great Models in the group build persuaded me to get involved, as I have never done a group build before, any advice would be appreciated. I decided to use the old sky wave 1/700 scale kit, that comes with 2 O& P class destroyers in . ( the kits an old one as I'm returning to the hobby after a while, and I had to start on the stash some time 🙂 ). The plan was to do one of the models as HMS Oribi, almost straight from the box with the addition of a WEM etch set A bit of research later showed that the 'R' class was slightly longer than the proceeding O & P class ships, so one of the models was lengthened at the Bow. Otherwise the O,P,Q, and R classes were almost identical visually deck detail cleared, and etch railing going down Now back to the day job, hopefully I will have an update soon
-
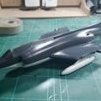
Hi all and taking the plunge with this one, Esci's lovely Sea Harrier FRS1 That second plane in the pattern looks a bit close! Esci Sea Harrier FRS1_box by Dermot Moriarty, on Flickr Inside the box.. Esci Sea Harrier FRS1_contents by Dermot Moriarty, on Flickr Esci Sea Harrier FRS1_contents_2 by Dermot Moriarty, on Flickr The plan is OOB but will try to display in a diorama.. Thanks for looking and enjoy your builds Dermot
- 43 replies
-
- 14
-
-
- royal navy
- esci
- (and 1 more)
-
 Not one, but TWO new facsimiles of 1942 Royal Navy camouflage documents are now available! Similar in nature to our previous facsimile of C.B.3098 1943 edition but using the earlier Western Approaches, 507A and C and MS & B camouflage paints, Confidential Admiralty Fleet Order 679 from April 1942 and 2146 from October 1942 have never been seen except by those who have been to The National Archives at Kew, London for many decades. C.A.F.O. 679/42 contains 51 full-colour camouflage designs for destroyers and smaller ships in Western Approaches, Admiralty Dark and Admiralty Light type designs, whilst C.A.F.O. 2146/42 builds upon this adding 17 Dark-Medium type designs for the same classes of ships to use. These contain the following classes: Town destroyer, V&W destroyer, S destroyer, A&B destroyer, E&F destroyer, Tribal destroyer, J&K destroyer, Hunt destroyer, Egret sloop, Flower corvette, Halcyon minesweeper, Mersey trawler, Gem trawler and Isles trawler. https://www.sovereignhobbies.co.uk/collections/royal-navy/products/royal-navy-camouflage-c-a-f-o-679-42-sea-going-camouflage-designs-for-destroyers-and-small-ships?fbclid=IwAR0jJUqHz86AoAQsfwydXc72IJ9BXbpWg4p6jTTw5344g-N_5nB4jqlqYS0 https://www.sovereignhobbies.co.uk/collections/royal-navy/products/royal-navy-camouflage-c-a-f-o-2146-42-dark-medium-tone-camouflage-designs-for-seagoing-ships?fbclid=IwAR3cS-ZKtdwDghoypf99hhzYP-zXudNkUKjbzbpEimOnNssQ6jfvtdoHA3k
 -
Hull Red seems to differ from navy to navy. The German color, at least in WWII is based on RAL 8013 and has a very definite brownish hue to the red. Is the Royal Navy color similar or is it a brighter red? I am mainly interested in the period from HMS Dreadnought to the end of WWII. Thanks
-
My latest finished build is the Hasegawa 1/48 Royal Navy Sea King for a group build. Used: Eduard interior/exterior set UMP Primer MRP and Tamiya paints UMP and Tamiya washes Uschi van der Rosten rigging wire Thanks for looking
- 54 replies
-
- 85
-
-
-
 Budge up, shove up a bit, move down...... Room for one more upstairs? XV590 was an FG.1 of 892 Naval Squadron which was zapped by it's hosts on a visit to NAS Oceana. in 1978 I believe. OK, I've now seen that @FortyEighter is also building this bird, but who can have enough of the rivalry between these two closely-linked navies and the fun and games that go on in service life. Well I've found a few reference pics on t'interweb, so plan to build it as close as I can to those pictures, so no fuel tanks, no armament, just empty inner pylons. My only difference is that I don't intend to fold the wings on this build as I'm slow enough as it is so really would like to finish the build before you pack up the finishing line and start man-packing it back to BM Towers, (you'd never guess the effect on a particularly competetive and sporty, but slow over the distances Master FC, when this happened at a Inter-house Cross-Country event at Junior-High school now would you?!! Saying that my pals thought I'd gone for quick cup of tea as I lived on the race route but alas no!!) https://2.bp.blogspot.com/-K2OpUVzB33o/WQgBPDXJCpI/AAAAAAAAZD0/V4M1ZpYlgfUVBTLbgUXvV0NpsRpVkwk7QCLcB/s1600/col1.jpg https://2.bp.blogspot.com/-oNp5fFdwTV4/WQgBPcTZN0I/AAAAAAAAZD4/sIaqyFXh8iAhiGf4APnTbATPYNLoREn6gCLcB/s1600/col2.jpg This has nothing to do with my other 'Toom refurbishment that is ongoing, which I showed a sneak peek of in my recent Sabre build, that is short of said tanks at all no - hrumph for even suggesting such a thing!!! Despite the lovely Claire at Revell UK having sent my request to Germany for some spares to finish this build some 3 or 4 months ago I'm still waiting. If you're reading Mr Revell Germany, can you send me some spares please, however you don't need to send a set of tanks now!!!! Anyways onwards and upwards to the next victim. It's quite an old boxing of the Hasegawa 1/48 FG.1 that has an in-box scheme for an unzapped XV590 anyroads. As you can see there are some goodies to add. The decals were obtained from @theplasticsurgeon a while back but I was aware that one of XV590's serials was the only thing missing from the sheet before purchase but with the box-art scheme being what it is we may be able to work around this (more on this in a bit). Let's have a quick peek in the box then shall we? Now as you can see in the second from last piccy, the kits decals are not so good. I will be trying to obtain another sheet or just stencils from another source before we get to that stage, but that's a problem for another day! As per Modelling Law we started in the cockpit (I didn't really but don't want to be burnt on the stake for doing the intakes first!). The Eduard etch instructions have you trim a fair bit off the kit pieces as well as just removing the surface details. Well after following those we got to this: and here's the etch we're going to add once we're primered and base coated. Yes I know it's for an FGR.2 but it's close enough for me. If anyone can point to any massive flaws in my plan to use this please speak now or forever hold your peace!! OK, I didn't really start by cutting up the intakes for Alley Cat's seamless set now did I? I love deniable modelling! OK, I have already broken off the pitot like things that go inside the intakes (they were between the compressor fans until they met my thumbs for fingers) so we'll resort to he kit ones that are good enough in my view - well the have to be now don't they!! Anyone notice the schoolboy error? The starboard side was cut out with a Dremel, but I was using my razor saws and my Xuron sprue cutters on the port side when I plain forgot just how brittle older Hasegawa plastic is and it shattered and split and needed a fair bit of attention from Mr TET to fix. Photos are post the fix so hopefully we might get away with it. Anyways here's a dry fit of the intakes.... Quite pleased with that so far. Right time to get shaking those old Halfords Primer maraccas and will give the cockpit some grey and the intakes some white coverage. Okilly-dokilly Modelerinos, untill the next thrilling installment it is then.......... Be good out there, Chris
- 35 replies
-
- 11
-
-
-
- 1/48
- Royal Navy
- (and 1 more)
-
Royal Navy Signal Flags Eduard 1:200 (53232) Quite a few maritime kits these days provide a selection of flags and pennants that are printed on paper. These can look ok, but generally always have a tired well worn look, like they’ve been left in the sun for a few months. Eduard have now countered this look with the release of this pre-painted steel set. The 36 flags are beautifully painted and will look great either as a coded message from a halyard, or even on a ship dressed overall. Unlike the 1:350 set this set in 1200 does not contain Pennants or alter course pennants which s a disappointment. Conclusion This is a very nice and easy to use set which would add a dash, or even a lot of colour depending on how many you use. Please note however these flags are based on the 1937 Royal Navy signaling Handbook so for use on ships from that time up until the new, revised handbook was issued during the war, where the flags for P and Q were swapped over. Review sample courtesy of
-
Morning All, I didn't mean to start this kit, its been in the stash for a while now waiting for me to build up some skills, and nerves. I was waiting for the canopy to dry before masking on a 1/48 Spitfire and had the glue and airbrush out, and I thought "let's have a look" The next thing I know the hulls been glued together... How'd that happen? I blame SWMBO, saying I need to reduce the stash, as if that's going to happen! I cannot say enough good thinks about Flyhawks kits. I've got the Aurora, Niad and Legion in the stash. They're superb examples of modern manufacturing. The go together easily, smart box layout to avoid breakage and can fit all budgets with the basic or the kits with extras. So on with what I've done. This is the upgrade kit, with photo etch included, I'll be leaving that lot till a bit later. Aurora can be either full hull or waterline. If normally go with waterline but I thought I'd have a look at what she was like with her bottom attached. 5 pieces, a bit of glue and you have a full hull and decks! Primed with Tamiya extra fine primer and then a blast of Lifecolour 507c all over. I masked off the boot topping, Vallejo model air black I think, then tried to get a good B20 substitute. I have the Lifecolour B20 but it looks far to grey. So I mixed up some Model air PRU faded blue and EDSG. After this flurry of activity I got fully carried away and started applying the AK interactive enamel weathering range to her. This is where I got to before I actually stopped and looked critically at her I really wasn't happy with the fake B20, and the Lifecolour grey kept flaking off every time I masked over it. I quite like most of my weathering, but I think I went a bit too heavy. So... Off it all came and start again. I used Vallejo model air sky grey and Tamiya XF-18. Vallejo hull red and model air black for the boot top. Gloss coats addedd in between everything. I think the sky is too light, but that can be corrected with weathering, and I think the xf-18 needs lightening up, again a bit of weathering should do this. Weathering to come on the hull. Whilst I was waiting for some of the layers to dry I made a start on the wooden decks, something I've never done before. Tamiya deck tan and wooden deck tan with a wash of AK interactive deck wash. I think I did about 5 coats of each colour, done in streaks, then gave it a wash with the AK. Think it needs lightening up, and a light spray to bring it all together. Very happy with it so far tho! We, that's a lot of waffle from me with only a few pics, double painting, and only 5 of the 200+bits glued together! This could take a while! Oh, and while I was taking a couple of these pics this morning, I couldn't help put some of the larger parts on, just to see... She enjoyed her little tour round the house, firing off broadsides as she went. We're all 6 years old at heart aren't we? That'll do me for now, up next, finishing off the deck, weathering the hull, working out if I'm going to put her in a seascape or on a pedestal(really should have done this earlier) and onto the really small fiddly bits, oh and pe..... Thanks for looking in. Geoff
- 62 replies
-
- 13
-
-
Royal Navy Signal Flags Eduard 1:350 Quite a few maritime kits these days provide a selection of flags and pennants that are printed on paper. These can look ok, but generally always have a tired well worn look, like they’ve been left in the sun for a few months. Eduard have now countered this look with the release of this pre-painted steel set, which supersedes the etched brass set previously available. The forty five flags and ten pennants are beautifully painted and will look great either as a coded message from a halyard or two or even on a ship dressed overall, although it would have to be modelled for a calm day as, even though the metal is quite thin I doubt you’d be able to replicate a flapping flag too easily. To use, just cut the chosen flag from the sheet and wrap it around your favourite rigging material. Conclusion This is a very nice and easy to use set which would add a dash, or even a lot of colour depending on how many you use. Please note however these flags are based on the 1937 Royal Navy signaling Handbook so for use on ships from that time up until the new, revised handbook was issued during the war, where the flags for P and Q were swapped over, and is where the phrase “Mind your P’s and Q’s” comes from. So, research is your friend when it comes to modelling. Review sample courtesy of
-
Fairey Firefly F.I Mission Load April '45 - Help Required
Grey Beema posted a topic in Aircraft WWII
Fairey Firefly F.I - Mission load out I am trying to figure out what would be the likely load-out configuration of a Fairey Firefly F.I on an ASR escort mission in April 1945. On the 12th April 1945 two Fireflys flew escort to a US Navy Mariner searching for a downed Pilot after raids by the Fleet Air Arm on Northern Formosa during Operation Iceberg Oolong. During the Escort mission the two Fireflies engaged with five Ki51s, shot down two each and shared the fifth. One of the two aircraft (DV119/S281) was piloted by S/Lt JP Stott with Lt B Ward as Observer, flying from HMS Indefatigable with 1770 NAS. With two enemy aircraft confirmed destroyed and 3 confirmed shared destroyed (two from earlier in the year) S/Lt Stott became the top scoring Firefly pilot. I am currently building S/Lt Stott’s aircraft (1/48 SH Kit) and would like it as it would have looked that day. It is highly unlikely that I will find a dated photograph of DV119 showing the load out, so I am trying to use some logic to figure out how the aircraft would have been configured. 1770 & 1771 NAS had been involved in the air attacks earlier in the month during Operation Iceberg. My understanding is that they were RP armed and used for Flak suppression during the attacks. I would assume that for the raids on airfield of Northern Formosa (11-13 April) from which Special Attack Squadrons (Kamikaze) were believed to be operating the Fireflys would be RP armed. I know that, even with bad weather, Avengers and Corsairs operated over Formosa on 12th April but I don't know if the Fireflys were part of the attack. Down to my dilemma then. If the Fireflys were either part of the attack or scheduled to be part of the attack on 11th would they have had the RPs fitted? If the Fireflys were RP fitted and the next day you wanted to fly, a probably unplanned, Escort mission, would you have dropped off the RP Rails and blast plates and possibly add long range tanks or would you have left all the RP gubbins there because you might need RP capability later in the day? Any thoughts? I would guess it's down to how long it takes to fit Blast plates and RP rails. Thanks in advance.. -
This is my 1/72 Fujimi Phantom dating from the 1990s, but built earlier this year at about the time the new Airfix version became available. The fit of parts was quite good and probably would have been regarded as good when it was released. I would have liked to fit the extended nose leg but it didn't seem to be correct given the absence of crew and dropped flaps.
-
 Hello, dear friends and colleagues! Let me present my yet another model Blackburn Shark Mk.II by Eastern Express. This kit is the repack of the "old school" Frog model. The kit offers wide choice of varieties – with floats, on wheeled chassis, with folded wing or in-flight configuration – and leaves you rather pleasantly impressed. For its time the model seems quite respectable and can be transformed into a perfect replica if you give it a certain effort. As far as I know, this model of Shark aircraft hasn’t got any alternatives nowadays. The main drawbacks are the following: horrible engine which you must change undoubtedly, empty cockpit (though this feature is characteristic for all models of that time) and wrong number of ribs on the wings which can be seen while imitating the sagging of canvas. I managed to deal with the first two problems but the last one was resolved only partially – I didn’t have neither energy nor desire to remake the whole wing. The model has been made out of the box and materials at hand such as plastic sheets, wire of different gauge, fishing line, cotton buds tubes, hand-made sprues. From aftermarket I used only the Вrengun sight for the tail gun. The model was totally rejointed, riveted, remade the engine, added a cockpit interior, detailed the wings and fuselage. Cross-bracings and aerials are made of fishing line, guns – of wire and a drawn cotton buds tube, navigation lights – of drawn colourful party picks. All in all, the building produced positive impression and turned out to be useful experience for me. Colouring – enamel and acrylic paints Revell, Humbrol and Tamiya, lacquers Tamiya. I tried to highlight the sagging of canvas with paints and some graphite chips, so part of ribs and primary wing structures are merely hand-drawn. Accentuation of jointing – Tamiya panel line wash, oil paints. Toning – oil and water-color pencils. So, nothing out of the ordinary. Decals from the kit turned out to be of very high quality in spite of their age. I liked working with them, they are thin, very good to attach and don’t flake while masking. The result is the torpedo bomber 820 Naval Squadron K8471/652 from HMS Courageous air group as in 1937. Pleasant viewing! Thanks for watching!
- 69 replies
-
- 121
-
-
-
- Royal Navy
- FROG
- (and 1 more)
-
Here is my recently completed Astute Class Submarine using the 1/350 HobbyBoss kit. Pretty straight forward kit that's almost 'toy like'. Went together with no real problems and painted using mainly Halfords Satin Black from a can, kit decals were used and are I based on the earliest boats when I trial. Mounted on usual base and a few figures from Tamiya were added for scale. WiP: Stuart
-
 USN Ensign Flag Modern and Royal Navy Ensign Flag WWII (Steel) 1:700 Eduard Eduard released a set of WWII-era US Navy ensigns a couple of months ago. Now they havde added a set of modern USN flags and a set of WWII-vintage Royal Navy flags in the same glorious 1:700 scale. On the US Navy fret are two large and six small flags, while on they Royal Navy fret there are four large and five small flags. Each flag is pre-painted and has small tabs to aid attachment. I'm not sure how easily these flags can be manipulated in order to give them a more 3d shape - at least without causing the paint to flake off - but they should still look better than decals. USN Ensign Flag Modern Royal Navy Ensign Flag WWII Review sample courtesy of
 -
Here I present my latest build, an OOB build of a Vanguard Class SSBN using the Bronco kit. The only bit of work needed was the mating of the hull halves. Primed using Halford's grey primer, German tank grey for lower hull and Halford's satin black was used overall. The sub was 'Kleared', decaled and coated with Tamiya satin varnish. Das Boot was masked to leave the deck exposed, with VERY low tac masking over the two decals and painted with Humbrol matt black and the sonar array was glossed with Klear. Five masts were fitted into fin and a couple of Tamiya figures were added to complete build. WIP here: Stuart
- 13 replies
-
- 22
-
-
- Royal Navy
- Bronco
- (and 1 more)
.thumb.jpg.b4a5069fd2c2dd5708ce1694345c5b11.jpg)
-01_compress20.thumb.jpg.876237f478e7de3cb420ca2f41976d87.jpg)