Search the Community
Showing results for tags 'hawker'.
-
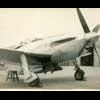
Hawker Hurricane Mk.Ia, pictures from the Finnish Air Force museum, hanks to Sergey.
-
 Tempest Mk.II Gun Bays (648638 for Eduard/Special Hobby) 1:48 Eduard Brassin After everyone finished jumping up and down with glee at the release of Eduard’s new Mk.II Tempest in 1:48 with its cylindrical cowling and massive radial engine, the detail hounds started to wonder what extras would be around. So far we’ve had a number of sets, and now we have the Gun Bay set. The gun bays on the model are moulded closed, so the first thing you'll need to do it cut the wing apart, making a T-shaped hole in each upper panel, following the panel lines shown in the instructions. You'll also need to chamfer the inner side of the landing light blister inside the lower wing, or your bays won't fit. On first looks, this set appears identical to the Mk.V bays, and to a great extent that is correct, but for the rear lip on the trailing edge of the wing, which has been changed, presumably to make construction easier. The whole bay frame is moulded as a single part per wing, and is given a PE floor with the lower wing internal structure depicted. The two ammo boxes fit into the top of the T each side of the cannons, which are added after, and plumbed in with some small resin parts. The rear of the bay is a mixture of resin and PE parts to obtain the correct thickness of the trailing edge once the bay is offered up to the underside of the upper wing. It fits within the hole, recessed to give a more realistic look and thickness to the bay edges, which are then lined with PE parts that replicate the lip and fastener locations, with the front sections inlaid with more PE to depict the hinges so that the new resin bay doors can be attached folded forwards, while the aft section is loose and usually laid upside down on the wing when removed. A CAD image shows their correct orientation, and Mr Hobby paint codes are called out throughout construction to aid paint choices. Highly recommended. Review sample courtesy of
 -
I understand most Hunters only had Navigation Lights (Red, Green, and White in the Tail). Red & Green (probably ?) on, but Tail blinking? Pattern/Sequence? At least some of the Swiss Hunters (MK58 - Export version of the FG9) were fitted with an ACL (Landing Light - A swing down type), about half-way along the underside of the Fuselage. I wish to fit such a light to a Turbine Powered model I have, but apart from a few long distance photographs cannot find any details. Help please... Cheers, JimR
-
RP-3 60lb Rockets for Tempest Mk.II (648641 for Eduard/Special Hobby) 1:48 Eduard Brassin This set arrives in a familiar shallow Brassin cardboard box, and contains eight resin rocket bodies with moulded-in fins, eight launch rails, a sheet of Photo-Etch (PE) brass and a small decal sheet, which anyone with the set for Mk.V Tempest will recognise immediately, as it is a rebox with a new name. The rockets need their exhausts drilling out with a 1mm bit, and are then decked out with numerous PE fittings that facilitate their attachment to the rails later on. The rails are handed, so take care when installing them, then glue the rockets in place and attach the launch command wire to the back of the rocket and the rear of the pylon. Strangely, Eduard still shows the tails hanging down from the wing in their CGI rendering, which is only the case on the ground when they have been fitted to the rails but aren't yet plugged into a socket. Remember this though, and you'll be fine. As usual the paint codes are in Gunze shades, and the decals are also shown in place on the same diagram. Review sample courtesy of
-
Tempest Mk.II Cockpit (648639 for Eduard/Special Hobby) 1:48 Eduard Brassin Eduard’s new Hawker Tempest Mk.II in 1:48 has been received with great excitement and more than a little bit of drool by many modellers, as it represents the pinnacle of injection moulded kit design at the moment, and a well-loved aircraft to boot. You can always improve on perfection though, and using resin to produce parts of excellent fidelity by creating masters using 3D CAD software and 3D printing is the perfect medium to create even more detailed parts for your model. A great many modellers will be perfectly happy with the detail in the base kit, but if you’re a stickler for detail, fancy the challenge of increasing the fidelity of your cockpit, or just felt like getting one, this set is just what you’re looking for. Arriving in the deep rectangular cardboard box that larger Brassin sets use, inside are three Ziploc bags containing fifty-five resin parts, a fret of nickel-plated pre-painted Photo-Etch (PE) brass, a small decal sheet with instrument dials, and a slip of clear acetate with shapes printed in black ready for cutting out. It is cushioned by a thick sheet of grey foam, and a thick instruction booklet printed in colour on both sides of A4 sheet, folded in half. It’s easy to get confused with these individual leaves fluttering about the desk, but Eduard have numbered the steps, and if you put a couple of staples in the left margin (landscape format), you’ll be able to keep them in sequence. The detail is orders of magnitude better than the already excellent kit cockpit, and the sensible breakdown of parts and their attachment to casting blocks will make the task much easier than it otherwise may have been. Finally, the method of casting that Eduard have developed means that bubbles are almost unheard of in their sets, which is another area of concern removed. If you’re familiar with the cockpit of the Tempest, you will know that it is a framework with the floor suspended in the lower fuselage, so construction begins with the side frames, which have many detail parts added to the frames, plus the side console on the left and right, both of which are substantially different in terms of form and function from each other. The colour call-outs are made in Gunze codes throughout, which makes the task much more pleasant too. The side frames are then linked by the addition of a section of the wing spar and a number of cross-braces, including a scrap diagram to assist with placement of the parts. Two instrument boxes are placed low down on the side frames, then the floor is begun, starting on the central section with control linkages and brackets for the floor “foot trays”, and a slot for the control column, which has two choices of grip. The rudder pedals glue atop the cross-beam and have an adjustment wheel added to the centre, and is then glued in the front of the floor arrangement, which is itself inserted into the framework and integrated with more scrap diagrams holding your hand. The seat is next, with adjustment lever and lower mounts added first, then the PE lap belts in full colour. It gets inserted into the rear of the framework, then is boxed-in by a cross-brace that has the top seat mounts, another cross-brace with fabric cover, then a fuselage structural frame at the rear. The fuel tank is placed straddling the frame in front of the pilot, with the instrument panel sitting right up against it, and festooned with decals and some PE controls, adding a compass with another decal in the bottom centre. The pilot’s back armour panel is glued to the cockpit sill insert along with a Y-shaped section of the shoulder belts that sits behind a rail that the straps drape over later on. The gunsight has two clear acetate parts attached, one of which can be fitted flat down or angled, with a PE cover over the top, and a piece of 0.3mm wire from your own stores leading away from the unit. It is inserted above and in front of the instrument panel on a two-legged bracket that slots into slots in the top of the panel. Before the fuselage can be closed up, the sidewalls, which already have moulded-in ribbing from the box, are detailed with more resin and PE, including an additional decal. Finally, the fuselage can be closed up around the new highly detailed cockpit, with the addition of the kit’s styrene front bulkhead, then the cockpit sill insert and the two shoulder belts are added into the top of the newly minted fuselage. Conclusion When you break it down, it seems a much easier process, and the improvement in detail is excellent. It’s probably not suitable for novices, but anyone with some experience of resin construction should manage perfectly well, and the results will be well worth the effort. Very highly recommended. Review sample courtesy of
-
Tempest Mk.II Early (82124) 1:48 Eduard The Tempest was the successor to the Typhoon, both penned by the incredibly talented Sidney Camm and his team. The Tempest was split into a number of parallel sub-projects to prevent it stalling in the event that any of the possible engine options ran into difficulties or were cancelled. The Tempest II was designed from the ground-up to be powered by a radial engine, and ended up using the Centaurus that had originally been destined for the failed Tornado project, a fact that initially caused some teething troubles until the engine mounts were replaced and some other tweaks made. The aircraft was very similar to the more well-known Mk.V from the firewall back, but with the huge cylindrical cowling it bears more than a passing resemblance to a Sea Fury. Due to the state of the war as it reached service, the initial orders were successively cut back, even though the aircraft's massive power delivery and more streamlined front section resulted in a faster aircraft. Under 500 airframes were eventually built, some as pure fighters, while the rest were converted to fighter-bombers, as the needs of the war shifted once the Allies dominated the skies. In service, the Tempest Mk.II was found to be an excellent aircraft, and was the fastest prop-driven fighter of WWII at low altitude, even faster than its sibling, despite the heavier Centaurus engine, which was more than compensated for by the missing weight and drag of the chin-mounted radiator. It was also rugged, could take plenty of punishment, and could be thrown around the sky by a competent pilot despite its thin wing, and some airframes were converted for use as fighter bombers. After the war the surplus airframes were sold to other nations following retirement from RAF service, with some lingering on as target tugs into the 50s. The Kit This is a reboxing of the Eduard kit that was first seen by us in a Special Hobby box, as it seems that Eduard may well have collaborated with them on this, possibly based on research Special Hobby carried out for their 1:32 range of kits (supposition & poorly educated guesswork on my part). It arrives in the new gold-themed box with a digital painting of a colourful British Tempest II on the lid, plus profiles of the decal options on the sides. Inside are six sprues in blue-grey styrene, two clear sprues, a fret of pre-painted Photo-Etch (PE) parts, two small sheets of kabuki tape masks, two decal sheets large and small, and a glossy instruction booklet in spot colour with full colour profiles at the rear. Anyone that has seen the initial Tempest kits from Eduard will know the quality of the mouldings, and some of the sprues in the box are from the original Mk.V, while two are new, complete with exceptional detail that includes rivets, cowling fasteners, and fine engraved panel lines that are at the pinnacle of current injection moulding technology. Construction begins with the pilot’s seat, which is assembled from back with two side parts, plus the adjustment mechanism that is fixed on the right, with the PE lap belts added, leaving the shoulder harness until later. The seat is fitted to the rear bulkhead, which has the floor slotted into it, the rudder pedals and the control column put in place, complete with the three-faceted instrument panel, which has the choice of painting a detailed styrene panel, adding four instrument decals applied to a simplified panel, or using the pre-painted PE parts with their glossy dials that attach to a mixed PE and styrene frame and consist of two layers for the best detail. This fits to the front of the sidewall frames, which both have additional PE and styrene details glued on, plus the cross-member that supports the compass, which also has its own PE dial. The frames, cross-member and front bulkhead are added to the sides and front of the cockpit, and the instrument panel installs on two pegs on the cross-member along with the port side console. When closing up the fuselage there is a styrene engine front and spacer that inserts into the front cowling lip, then the fuselage halves need a coat of paint in the cockpit sides, plus a few small parts in the port side, and a bit more paint in the tail wheel bay and its two-part bay former, then you can glue them together. Attention shifts to the wings, starting with the wheel bays, the roof of which is moulded into the underside of the upper wing halves. The bay walls are boxed in with individual panels, plus a few ribs and stiffeners, all of which is painted in interior green on both sides, with a splash also applied to the full-width underside of the bays and the radiator intakes, which also has a radiator core inserted into the starboard wing root. The wings and fuselage are brought together and joined by the front cowling lip, which also gets the interior green treatment, and in the top of the nose, just forward of the canopy, a choice of a styrene louvered intake or a PE replacement for the filters fitted to tropical-converted airframes. The tail of the beast has the fin moulded-in, to which you add the rudder and the elevator fins and flying surfaces that are all able to be posed deflected if you choose. The ailerons are also posable, and are made up from two parts each, one in each wing as you’d expect. If you look at the cockpit aperture it is far too large at this stage, until the sill insert is added along with a number of parts on the rear deck and the gunsight under the front edge. It’s time to insert a pair of clear nav-lights in the wingtips, a pair of leading-edge inserts for the twin cannons, their tiny barrel stubs, and finally the exhaust stubs peeking out from behind the cowling on each side. They’re not hollow tipped, but at that size only a sharp-eyed viewer will notice. The tail wheel is first to be added, made from a two-part styrene wheel, slipping it between the yoke, which attaches to the strut, then inserts into the depression in the bay roof. The bay doors are attached to the sides with small tabs, and an actuator fits in the rear of the bay behind the wheel. The main gear has the smooth styrene wheels with Dunlop in raised lettering on the sidewalls. These slide onto the axles of the struts, and have the captive gear bay door glued to the opposite side, then the completed assembly slots into the bay roof, and would benefit from some brake hoses from your own supplies of lead wire. The retraction struts are fitted later, along with two additional bay doors. While you’re fitting the wheels, you fit the identification lights, two tiny clear parts behind the spent cannon brass chutes, another in the mid-fuselage, and two tiny parts under the fuselage level with the wing leading edge. The crew access stirrup has a replacement PE opener added and a short aerial with PE alternative are arranged around the trailing edge of the wing, then that big prop is made up. The prop has all the blades moulded into a central boss, which is trapped between the back-plate and spinner cap before being slipped over the drive-shaft. You get the choice of open or closed canopy that uses the same parts, beginning with the windscreen glued to the front of the cockpit, then the canopy with a separate frame can be glued closed against the windscreen, or slid back to get a better view of the interior. The final airframe elements are a couple of gear-down indicator lollipops that glue into their depressions in the inner wing panels, and another choice of PE or styrene aerial just behind the canopy. You have another choice ahead of you, which is to have a clean aircraft, one loaded with additional fuel tanks, or a set of eight unguided rockets, four under each wing. The tanks and their short pylons are all moulded in clear, and there is a decal for the indicators on the side of each pylon. The rockets have separate tails and a PE igniter lead, and a detailed guide to their correct painting, each one glued into its own set of slots, which you should probably have drilled out from the inside earlier. Remember that one. Markings You get a generous six decal options on the two sheets, with a few choices of colour schemes, but mostly differing by the individual and personal markings they wear. You also get a sheet of kabuki tape masks for the canopy and tailwheel, plus the walkways at the root of the wing. From the box you can build one of the following: MW835 W/Cdr Charles H Dyson, Wing Commander Flying Southern Sector, RAF Middle Wallop, Hampshire, UK, April 1946 MW416 S/Ldr Henry Ambrose, No.26 Sqn., RAF Fassberg, Germany, May 1947 MW833 No.183/54 Sqn., RAF Chilbolton, Hampshire, UK, June 1946 MW849 No.247 Sqn., RAF Chilbolton, Hampshire, UK, September 1945 MW417 No.26 Sqn., RAF Wunstorf, Germany, 1947 MW423 No.33 Sqn., RAF Changi, Singapore, August 1949 Decals are by Eduard, which is a guarantee of good registration, sharpness and colour density, with a thin gloss carrier film cut close to the printed areas. Conclusion It’s a highly detailed kit right out of the box, made better by adding some rather nice PE for the cockpit and a well-appointed decal sheet with plenty of options. The Tempest II didn’t get a fair shake of the stick in service, so make sure you buy plenty so they get some belated attention. If you just can't get enough detail, check out the aftermarket sets that have been released in conjunction with this and future editions of this kit here. Very highly recommended. Review sample courtesy of
-
AviS is to release 1/72nd Hawker Cygnet kits. - ref. BX72044 - Hawker Cygnet with Anzani engine Sources: https://www.hannants.co.uk/product/BX72044 https://www.aviationmegastore.com/hawker-cygnet-with-anzani-engine-avis-models-bx72044-scale-modelling/product/?action=prodinfo&art=181280 -ref BX72048 - Hawker Cygnet with ABS Skorpion Engine Sources: https://www.aviationmegastore.com/hawker-cygnet-with-abs-skorpion-engine-avis-models-bx72048-scale-modelling/product/?action=prodinfo&art=181281 https://www.hannants.co.uk/product/BX72048 - ref. BX72050 - Hawker Cygnet with Bristol Cherub III engine Sources: https://www.hannants.co.uk/product/BX72050 https://www.aviationmegastore.com/hawker-cygnet-with-bristol-cherub-iii-engine-avis-models-bx72050-scale-modelling/product/?action=prodinfo&art=181282 V.P.
-
Tempest Mk.II Hi-Tech (SH48214) The Last RAF Radial Engine Fighter 1:48 Special Hobby The Tempest II was one variant of the Typhoon replacement, both penned by Sir Sidney Camm. The Tempest was split into a number of parallel sub-projects to prevent it stalling in the event that any of the possible engine options ran into difficulties or were cancelled. The Tempest II was designed from the ground-up to be powered by a radial engine, and ended up using the Centaurus that had originally been destined for the failed Tornado project, that initially caused some teething troubles until the engine mounts were replaced and some other tweaks made. The aircraft was very similar to the well-known Mk.V from the firewall back, but with the huge cylindrical cowling it bears more than a passing resemblance to a Sea Fury. Due to the state of the war as it reached service, the initial orders were successively cut back, even though the aircraft's massive power delivery and more streamlined front section resulted in a faster aircraft. Under 500 airframes were eventually built, some as pure fighters, while the rest were converted to fighter-bombers, as the needs of the war shifted once the Allies dominated the skies. In service the Tempest Mk.II was found to be an excellent aircraft, and was the fastest prop-driven fighter of WWII at low altitude, even faster than its sibling, despite the heavier Centaurus engine, which was more than compensated for by the missing weight and drag of the chin-mounted radiator. It was also rugged, could take plenty of punishment, and could be thrown around the sky by a competent pilot despite its thin wing, and some airframes were converted for use as fighter bombers. After the war the surplus airframes were sold to other nations after their retirement, with some lingering on as target tugs into the 50s. The Kit This is a reboxing of the Eduard kit with some additions in the shape of resin parts to turn it into the Hi-Tech edition we have here. It arrives in a dark blue themed box with a painting of a British Tempest II on the lid, plus profiles and details of the included resin on the sides. Inside are six sprues in two shades of blue-grey styrene, two clear sprues, a Ziploc bag of resin, a small fret of Photo-Etch (PE) seatbelts, a sheet of kabuki tape masks, a large decal sheet, and a glossy instruction booklet with spot colour and full colour profiles at the rear. Anyone that has seen the initial Tempest kits from Eduard will know the quality of the mouldings, and some of the sprues in the box are from the original Mk.V, while two in a slightly different shade are from the forthcoming Eduard Tempest II, complete with exceptional detail that includes rivets, cowling fasteners, and fine engraved panel lines. The added resin improves the detail in the engine compartment, which allows the modeller to open up the port side of the engine to expose the Centaurus engine, plus the additional resin wheels with thick chunky tread on the tyres for rough field operations. Construction begins with the pilot’s seat, which is assembled from back with two side parts, plus the adjustment mechanism that is fixed on the right, with the PE lap belts added, leaving the shoulder harness until later. The seat is fitted to the rear bulkhead, which has the floor slotted into it, the rudder pedals and the control column put in place, complete with the three-faceted instrument panel, which has four instrument decals applied once it is painted. This fits to the front of the sidewall frames, which both have additional details glued on, plus the cross-member that supports the compass, which also has its own decal. The frames, cross-member and front bulkhead are added to the sides and front of the cockpit, and the instrument panel installs on two pegs on the cross-member along with the port side console. You can’t close up the fuselage just yet, and the choice of open cowling requires the engine side and resin front to be assembled, plus the spacer and drive axle stub, which can be left loose so you can spin the prop. If you’re leaving the cowling closed, there is a styrene engine front and spacer that takes its place. To pose the cowlings open, the port side of the fuselage is removed carefully following the panel lines, which allows the crisp detail of the resin to show through. The fuselage halves need a little paint in the cockpit sides, plus a few small parts in the port side, and a bit more paint in the tail wheel bay and its two-part bay former, then you can glue them together once your choice of resin engine or styrene front is inserted. The closed cowlings don’t need the panels cutting out of course. Attention shifts to the wings, starting with the wheel bays, the roof of which is moulded into the underside of the upper wing halves. The bay walls are boxed in with individual panels, plus a few ribs and stiffeners, all of which is painted in interior green on both sides, with a splash also applied to the full-width underside of the bays and the radiator intakes, which also have a radiator core inserted into the starboard wing root. The wings and fuselage are brought together and joined by the front cowling lip, which also gets the interior green treatment, and in the top of the nose, just forward of the canopy, a choice of a solid panel, or a louvered intake for the filters fitted to tropical-converted airframes. The tail of the beast has the fin moulded-in, to which you add the rudder and the elevator fins and flying surfaces that are all able to be posed deflected if you choose. The ailerons are also posable, and are made up from two parts each, one in each wing as you’d expect. If you look at the cockpit aperture it is way too large at this stage, until the sill insert is added along with a number of parts on the rear deck and the gunsight under the front edge. It’s insert time now, with a pair of clear nav-lights in the wingtips, a pair of leading-edge inserts for the twin cannons, their tiny barrel stubs, and finally the exhaust stubs peeking out from behind the cowling on each side. They’re not hollow tipped, but at that size no-one will really notice. The tail wheel is first to be added, using either the resin one, or a two-part styrene alternative, slipping it between the yoke, which attaches to the strut, then inserts into the depression in the bay roof. The bay doors are attached to the sides with small tabs, and an actuator fits in the rear of the bay behind the wheel. The main gear has the same choice between smooth styrene wheels and knobbly resin wheels with some serious detail. These slide onto the axles of the struts, and have the captive gear bay door glued to the opposite side, then the completed assembly slots into the bay roof, and would benefit from some brake hoses from your own lead wire supplies. The retraction struts are fitted later, along with two additional bay doors. While you’re fitting the wheels, you fit the identification lights, two tiny clear parts behind the spent cannon brass chutes, another in the mid-fuselage, and two tiny parts under the fuselage level with the wing leading edge. The crew access stirrup and a short aerial are arranged around the trailing edge of the wing, then that big prop is made up. The prop offers a choice of blade types for the various decal options, which are both trapped between the back-plate and spinner cap before they are slipped over the drive-shaft. The open cowling variant gets its two resin replacement covers, plus three tiny resin clasps, and a curved support for the top one, which has a scrap diagram showing you the correct angle that they should be opened to. You also get the choice of open or closed canopy that uses the same parts, beginning with the windscreen glued to the front of the cockpit, then the canopy with a separate frame can be glued closed against the windscreen, or slid back to get a better view of the interior. The final airframe elements are a couple of gear-down indicator lollipops that glue into their depressions in the inner wing panels. You have another choice ahead of you, which is to have a clean aircraft, one loaded with additional fuel tanks, or a set of eight unguided rockets, four under each wing. The tanks and their short pylons are all moulded in clear, and there is a decal for the side of each pylon. The rockets have separate tails, and a detailed guide to their correct painting, each one glued into its own set of slots, which you should probably have drilled out from the inside earlier. Remember that one. Markings You get a generous five decal options on the large sheet, with a wide choice of colour schemes and operators. You also get a sheet of kabuki tape masks for the canopy and wheels, plus all those tiny lights in the underside of the wing. From the box you can build one of the following: HF-X, MW774, No.183 Sqn., RAF Chilbolton, August 1945 5R-V, PW533, No.33 Sqn., RAF Kuala Lumpur, Malaysia, 1949 EG-X, PR733, S/L R E Mooney, CO of 16 Sqn., RAF BAFO Fassberg, West Germany T-, A139 (ex PR809), No.14 Sqn., Royal Pakistan Air Force (RPAF) M, HA557 (ex MW704), Royal Indian Air Force (RIAF), late 1950s Decals are by Eduard, which is a guarantee of good registration, sharpness and colour density, with a thin gloss carrier film cut close to the printed areas. Conclusion What a highly detailed kit! Only made better by adding some rather nice resin parts and a well-appointed decal sheet. The Tempest II didn’t get a fair shake of the stick in service, so make sure you buy a lot of them so they get some belated prominence. Very highly recommended. Review sample courtesy of
-
Hawker Hurricane Mk.I 1:48 Airfix A05127A If one was to asked to give the name of a British fighter that took part in the Battle of Britain, the Spitfire would undoubtedly be the most common answer. However, the aircraft that provided the backbone of the defence in that infamous battle was the Hawker Hurricane. Designed in 1935, it was quite a step forwards to the existing front line RAF fighters of that era, key features being a fully enclosed cockpit, retractable undercarriage, 8 guns, powerful V12 engine and most notably, a single cantilever wing as opposed to a biplane configuration. Despite its revolutionary look though, the design and manufacturing techniques were old school, a steel frame with fabric skinning so in reality, it was very much a progressive rather than evolutionary design. This however was to provide useful in manufacturing and in the face of battle. The Hurricane was easy to produce, repair and maintain. This is in comparison to the birth of the Spitfire which used completely new manufacturing techniques which whilst offering performance, hindered early production. Early Hurricane Mk.I’s went through a series of design enhancements. Initial aircraft had fabric wings which limited the dive speed whilst the spin characteristics were a concern for test pilots. This was remedied by the addition of a strake below the rudder that became a key characteristic of the Hurricane. The fabric wings were also changed by 1940 for new metal skinned ones which increased the dive speed by some 80mph. Other notable improvements on the Mk.I were the addition of 70lb of armour plate for the pilot, self sealing fuel tanks and a 3 blade constant speed propeller. The availability of 100 octane fuel early in 1940 gave the Merlin an additional 30% boost power available compared to the power available on 87 Octane which was a significant when one needed to open the taps as wide as they would go!. With aircraft entering service in 1938 with the RAF and a few exports, the first blood was achieved on 21st October 1939 when a squadron of Heinkel He115’s were bounced by 46 Sqn looking for ships in the North Sea. The engagement resulted in 4 aircraft downed with more being claimed by 72 Sqn Spitfires. France was to prove more challenging for the Hurricanes as opposition was encountered by the more lethal BF109E’s. What became the Battle of France was to prove a bloody battle as a result of what the Luftwaffe were able to put up. With the German forces pushing forwards, the RAF and ground forces were forced to retreat to UK soil which paved the way for the Battle of Britain where the Hurricane achieved its legendary status alongside the Spitfire. Of the 2700 victories claimed during this battle by the RAF, nearly 1600 ware at the guns of the hurricane. Whilst the Hurricane soon became outdated a front line day fighter in Europe, it went on to see considerable success in other campaigns throughout the war. With the addition of bombs and cannon, it became an effective ground attack aircraft. It has its history firmly rooted in the battles of the Mediterranean, Russia and the Pacific, not to mention early night fighting over Europe where many aces earned their status. The Kit This is a re-release of Airfix's new tool from 2015. This is a good new tool kit featuring fine panel lines and subtle fabric effects though to this reviewers eyes maybe a little too subtle? The Sprues give a wide variety of parts including the fuselage insert for the Sea Hurricane, normal and tropical air filters; and both de Havilland & Rotol props. Full gunbays are provided for the wings but to make use of these the modeller will have to cut the wing access panels off. Another potential downside is the moulding of the machine gun ports into the wing rather than using an insert. Construction starts with the cockpit which is of a tubular design like the real thing. First up the seat is assembled and set to one side. The left frame fits onto the parts which will form the inside of the main wheel well. The boards for the rudder controls fit to this .Additional tube parts then fit in along with the main control column. The right side frame then fits in and the seat can be attached. A pilot figure is included if the modeller wishes to use it. On the underside the of cockpit a few parts for the wheel well go in. Work then continues on this area but now on the main single part lower wing with additional structures for the wheel well going in. The landing light then goes in also. This whole structure can now fit onto the main single part lower wing. If the modeller does not want to install the internal gun bays then the next nine steps of the instructions can be skipped as these deal with the bays. 4 machine guns, their ammunition boxes, and feed trays are provided for each side along with the internal structure you will see here. Once all of this is in (or not) the left and right upper wings can go on. Inside the fuselage the instrument panel and engine firewall go in. The fuselage can then be closed up and fitted to the complete wing sub-assembly. The front and rear under fuselage sections can then be added. On the main wings separate ailerons are provided. Under the main fuselage the prominent central radiator is built up and installed. To the rear the vertical tail, tail planes and rudder all go on. The rudder and elevators being separate parts. The tail wheel is also added at this stage. Airfix as seems to be normal for them now offer separate parts for retracted and lowered undercarriage. If lowering this then two parts legs with separate retraction struts are offered with three part wheels here the hubs are a separate part. We are now in the finishing stages of the model. At the front the exhaust go on, followed by the propeller assembly. To the instrument panel the gun sight is fitted and then the canopies can go on. If the modeller wished to open the main canopy then a second bigger part is provided to sit over the fuselage, Last up the landing light covers, nav lights and aerial mast go on. Decals The decal sheet is from Cartograf so should post no issues, it has two options; V6665, RF-J. 303 (Polish) Sqn, RAF Northolt September 1940 - Aircraft flown by Sgt. Tadeusz Andruszkow. LK-1, No.87 Sqn, RAF Exeter, August 1940. Flown by Flt Lt Ian Gleed. Research has indicated this aircraft might have had brighter red areas on the tail and roundels and these are provided. Conclusion This is a welcome re-release from Airfix. Recommended. Review sample courtesy of
-
 Kovozávody Prostějov (KP) is to release in 2021 a family of 1/72nd Hawker Tempest kits. Source: http://www.modelarovo.cz/novinky-kovozavody-prostejov-na-1-q-2021/ - ref. KPM0219 - Tempest Mk.V - Wing Commanders https://www.aviationmegastore.com/hawker-tempest-mkv-wing-commanders-kovozvody-prostejov-kpm72219-scale-modelling/product/?action=prodinfo&art=175515 - ref. KPM0220 - Tempest Mk.V - Clostermann https://www.aviationmegastore.com/hawker-tempest-mkv-clostermann-kovozvody-prostejov-kpm72220-scale-modelling/product/?action=prodinfo&art=175516 - ref. KPM0221 - Tempest Mk.V - Srs.1 https://www.hannants.co.uk/product/KPM72222 https://www.aviationmegastore.com/hawker-tempest-mkv-srs-1-kovozvody-prostejov-kpm72221-scale-modelling/product/?action=prodinfo&art=177481 - ref. KPM0222 - Tempest Mk.V - 486.(NZ) SQ https://www.aviationmegastore.com/hawker-tempest-mkv-no-486nzsq-kovozvody-prostejov-kpm72222-scale-modelling/product/?action=prodinfo&art=175517 - ref. KPM0226 - Tempest Mk.II - Export - ref. KPM0227 - Tempest Mk.II/F.2 - ref. KPM0228 - Tempest F.2 - Silver Wings V.P.
- 177 replies
-
- 14
-

-

-

-
- Kovozávody Prostějov
- Tempest
- (and 1 more)
-
Zvezda is to release in 2021 a new tool "easy-build series" 1/72nd Hawker Hurricane kit - ref. 7322 Source: https://vk.com/doc6108131_578170851?hash=b62de4a6f84263e904 V.P.
-
Hi all May I present the latest build, the Italeri/Hasegawa Typhoon. I posted a WiP which is here for anyone interested: https://www.britmodeller.com/forums/index.php?/topic/235081953-italerihasegawa-typhoon-ib/. I think i'll leave WiP to those that are doing something more adventurous with their kits in future as I don't think i offered much in mine but I think it helped me finish the build a bit quicker if nothing else (1 month)! This kit threw a few things at me but unusually it was mainly the painting (I had to re-do the fuselage stripes as put them in the wrong place and i had a very interesting reaction with MRP paint to hairspray). Anyway i managed to work my way round this and if anyone else has experienced this effect when spraying hairspray over MRP (this also had MRP gloss coat on) then please let me know if there's anyway of getting round this MRP/Hairspray reaction! Keen to use hairspray chipping with MRP in the future! Anyhow back to the end result! And here she is in the display case with the others! Onwards to the next built (already started): Thanks for looking!
- 33 replies
-
- 55
-
-
I have always preferred old kits from the Sixties and Seventies to the modern toolings (not that there is anything wrong with them) and following on from my recent old-tool Airfix Phantom I decided to finish one old kit, started another to keep it company and they were joined by an ATF Battle of Britain GB kit. All three were supposed to have been completely OOB with no aftermarket stuff and brush-painted throughout. As it turned out, the first of the three (Hawk) was completed as intended. The Harrier was half and half and the Hurricane was airbrushed. Matchbox 1/72 HS.1182 Hawk (PK-27) This was an original 1975 release. It was a straight-forward OOB build with brush-painting throughout. Unfortunately, the canopy cracked (see 2nd picture) during a construction period of more than three years where it kept being shoved in a cupboard! I like to think that perseverance paid off in the end. Airfix 1/72 Hawker Siddeley Harrier GR.1 (266) This is a red-stripe boxing from 1969. Built OOB except for kit decals that weren't useable. I used Xtradecal roundels and fin flash whilst other decals came from the old Airfix GR.3 kit which to be honest were shocking. Airfix 1/48 Hawker Hurricane Mk I (A04102) A 2005 re-boxing of a 1980 kit, this was built OOB but with added rhinestone lights and ejector slots drawn on wings. Not sure what my next "therapy" build will be but I have a feeling it might be an ancient Airfix floaty thing. Dave
-
Hurricane Update Sets (for Airfix) 1:48 Eduard This is a welcome release for anyone with an Airfix Mk.I Hurricane. Eduard's range of sets are here to improve on the kit detail in the usual modular manner. Get what you want for the areas you want to be more of a focal point. As usual with Eduard's Photo-Etch (PE) and Mask sets, they arrive in a flat resealable package, with a white backing card protecting the contents and the instructions that are sandwiched between. Upgrade Set (491104) Two frets are included, one nickel plated and pre-painted, the other in bare brass, with a small slip of acetate for the gunsight glazing. A complete new layered instrument panel and compass are the primary parts on the painted set, with a new seat that utilises the kit adjustment mechanism; rudder pedals; control column details; sidewall equipment; gunsight with clear acetate lenses; radiator fronts; shell guide covers for the wing mounted machine guns; straps for a receiver in the gear bays, plus additional small skin components and hoses; replacement gun bay covers with inserts for the surrounds; cooling flap on the radiator; actuators for the rudder and trim flap; loop under the access stirrup, and two grab handles on the canopy, one inside and one outside of the glazing. Zoom! Set (FE1104) This set contains a reduced subset of the interior, namely the pre-painted sheet that are used to improve on the main aspects of the cockpit, as seen above. Whatever your motivations for wanting this set, it provides a welcome boost to detail, without being concerned with the structural elements. Seatbelts STEEL (FE1105) These sets are Photo-Etch (PE) steel, and because of their strength they can be etched from thinner material, which improves realism and flexibility in one sitting. Coupled with the new painting method that adds perceived extra depth to the buckles and other furniture by shading, they are more realistic looking and will drape better than regular brass PE. This set comprises four parts, a Y-shaped section draped over the seatback, shoulder restraints on a plate that attaches to the base of the head armour, and of course the two lap belts that affix to the sides. It should be noted here that Eduard have shown the Y-shaped part incorrectly placed, when the two upper ends should attach to the back of the shoulder buckles, and the lower end of the Y should disappear through the cut-out low down on the seat back. If you correct this error your belts will look more accurate. Review sample courtesy of
-
Source: https://www.facebook.com/ArmaHobby/posts/3462056447158021 Considering it'll be most probably a WWII period a/c and in 1/72nd this will be uninteresting to me... My (Polish) wishes - 1/48th plastic kits from: TS-8 Bies, TS-11 Iskra & PZL-130 Orlik. V.P.
-
 Hi comrades! Two questions on the Hunter FGA.9 This small dent exists on both sides of the tank? Or only on the outboard of the tanks? And what was the main intakes color in middle sixties on the silver bottomed Hunters? Thanks in advance!
 -
Hi all. Here is my third and last "Corona-Modell" as I´m back at work since last week.😁 It´s the "Expert Set" edition of the very nice Arma Hobby kit in 1/72 scale. Only weak points are the guns and exhausts. I choosed the all black BE500 LK - A, flown by 87th Sqn. Ldr. Denis G. Smallwood. Daniel
- 17 replies
-
- 43
-
-
-
- Hawker
- Nightfighter
- (and 1 more)
-
Well for my quarterly (or so) photo session I pulled out a bunch of completed kits finished this year. I've just posted a couple of them on another forum and was working out the ones appropriate for Britmodeller when in a case of Serendipity I realised the title for he FW190's in the other post applied just as equally to 2 of the subjects with a British theme. The 1st is a RAAF tropical trials Typhoon. It is a Brengun kit and represents 1 of 3 aircraft sent to the Middle East to test out a Tropical filter. They were operated by 451 Squadron RAAF and the kit has been modified by a conversion set made by Red Roo. This consists of a tropical filter in resin and decals for all 3 Tropical airframes. The main issue with the kit is a number of panel lines having mould damage which need rescribing. I also had trouble with the wing to fuselage fit and the canopy. The latter has been replaced by a Falcon vacform. The fishplates on the fuselage come from a Brengun etch set.
-
Models by 109ace has the project to release a 1/48th Hawker P.1052 resin kit. Source: https://www.facebook.com/groups/1640062399608085/permalink/2608903999390582/ V.P.
-
See post 8 😳: https://www.britmodeller.com/forums/index.php?/topic/235068063-172-hawker-nimrod-by-ibg-models-release-in-2020/&tab=comments#comment-3584921 Among the secret items from the IBG Models catalog 2020 (link) there might be a 1/72nd Hawker Nimrod kit. Source: The RVB Cocardes Nurnberg Toy Fair 2020 report link V.P.
- 9 replies
-
- 5
-
-
-

-
- Nimrod
- IBG Models
- (and 1 more)
-
Tempest Fuselage Fuel & Oil Tanks (4394) 1:48 CMK by Special Hobby We reviewed the resin upper engine set from CMK here, and at the time I hadn't noticed that I also had this set to review too, so aren't I silly? This set arrives in a yellow-themed shallow blister pack with header card and instructions within, and 12 resin parts on six casting blocks within. The kit’s fuselage halves will need to be cut to expose the area, which is covered in diagrammatic form in step one, and while you’re cutting you might as well expose the engine, eh? The oil tank is first to be made up with a small part added to the flat underside, and then two supports are fixed to the sides of the larger fuel tank with its filler caps on the top. These are integrated into the aircraft either side of the cockpit’s front firewall, with the smaller tank resting on the kit’s cockpit sidewalls behind the instrument panel. Forward of the firewall the fuel tank is added, and it is completed by threading the resin hoses through from one side to the other, linking the two area. The fuselage panels you cut out are discarded and replaced with the new resin part that is well detailed and at a more scale thickness than the styrene you remove. On its own or coupled with the engine set it will look superb once installed and painted, giving plenty of scope for a maintenance/repair diorama. Highly recommended. Review sample courtesy of
-
- 1
-
-
- CMR
- Special Hobby
- (and 1 more)
-
Eduard is to release from late 2020 or early 2021 1/48th Hawker Tempest Mk.II kits Source: https://www.eduard.com/out/media/InfoEduard/archive/2020/info-eduard-2020-01.pdf V.P.
-
 Now a little thematic from the Yugoslav territories. The model is old, but I was satisfied with the final result. Here are the pictures, enjoy.
- 3 replies
-
- 11
-
-
- Hawker
- Hawker Hurricane
- (and 1 more)
-
Hello, I am building the Airfix Typhoon. I have a query about the upper wing roundels. The decals scale out to match a 50 inch size roundel. To me this looks too big and it overlaps the edge of the leading edge wing lamp. Wikipedia indicates a 42 inch roundel was used as an exception to the standard on the Typhoon up to January 1945, and then all 2nd TAF aircraft were changed as detailed below: “Type A.1: FromJune 1940: Single and twin engine fighters, light and medium bombers 35 inches. Exceptions: Hawker Typhoon 42 inches, Westland Whirlwind 28 inches. Heavy bombers, transport aircraft 49 inches.” However the same article also says “January 1945 to June 1947: On all 2nd TAF aircraft, Type B upper wing roundels were either converted to 55 inches (140 cm) type C1 roundels or over-painted and 36 inches (91 cm) type C1 roundels painted on. “ https://en.m.wikipedia.org/wiki/Royal_Air_Force_roundels A 55” roundel would be even bigger than the decals supplied in the kit! 58mm in 24th scale. My guess is that the 36 roundel might actually be the best bet, but there seems to be some confusing information out there. That scales out at 38mm in 24th scale. Much smaller than the 53mm kit version. Both card door and bubble kits have the same size decals. This size is repeated in the Eagle Cal decal sets too. Nowhere can I see info which says that a Typhoon carried a standard 50 inch roundel. Surely they can’t all be wrong?