Search the Community
Showing results for tags 'Typhoon'.
-
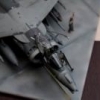
Hi I was able to go up to Biggin Hill last weekend to watch the two Typhoons depart. The 29 sq red tail and the camouflage scheme were there, I think they'd been displaying at Folkestone on the Saturday. A few photos are below:
-
 Hi all and have finished my build for the inflight diorama that Chief Wiggum and myself are concocting of a Typhoon intercepting a Russian Tu-95. Revell's Typhoon in 1/72 with a full QRA loadout. The extra missiles are courtesy of JasonB (thanks) and the pylons from the spares box....(please don't look too closely) Not my best build I'll admit and if there are any gaffes in there apparent to the Typhoon experts, please let me know! will spot some gaffes and happy to have her finished. Will post some pictures of the final diorama once that's done too! All the best, Dermot
 -
 Hi Everyone, Here are some of my photos from the Eastbourne airshow, I've tried to pick my favourites out of the almost 1,000 photos I took, but still this is going to be very photo heavy. If you want to view the full 135 photos, they are in an album on my facebook, linked here : https://www.facebook.com/media/set/?set=a.488656594634727.1073741851.100004711722357&type=1&l=0724244a56 Anyway lets kick off the photos, I hope you like them. I'm trying to persuade my missus to let me go to either Bournemouth or Shoreham airshow (preferably Bournemouth) this weekend. Chinook Jet Provost Breitling Wingwalkers Typhoon Spitfire MiG-15 Grob Tutor Bulldog Sea King Eastbourne's Tamar class Lifeboat (At High Speed) Hawk T.2 Blenheim Norwegian Vampires P-51 Mustang "Ferocious Frankie" Vulcan XH558 Dakota Patrouille Reva The Blades Red Arrows Anyway, thats all of the photos I'm going to post. You can view the rest on the facebook link at the top. These photos were all taken with a Canon EOS 20D DSLR body with a 100 - 400 mm canon lens stuck on the front of it. Boy was that heavy without a tripod, but made life easier when tracking the planes. They have all been edited to improve colour balance etc. Please let me know what you think. All the best, Rick
 -
Last year I built a set of RAF F-16's, and Paul J suggested that a USAF Typhoon might be a good companion project. I agreed and here it is. In the mid-2010's with the USAF's F-15C fleet aging, and the F-22 only purchased in small numbers, an airframe shortage loomed in the air superiority and air defense roles. It was decided to consolidate the remaining 'Golden Eagles' into the two forward deployed Fighter Wings at Lakenheath and Okinawa. That would leave the six continental air defense wings without aircraft. The Eurofighter consortium offered an appealing solution: partner nations (mainly Britain and Germany) could deliver used Tranche 1 jets immediately (thus providing funds for their own Tranche 3 purchases) with an option to purchase new build Tranche 3 jets in a second batch. The the ORANG's 142nd FW was the first to become operational with the 'second hand' Typhoons, designated F-25A's. Later, Tranche 3+ Typhoons with the CAPTOR-E radar and aerodynamic enhancements would be delivered as the F-25C. I'm planning on using the 1/72 Revell kit. Like many, I'm currently working on builds for the Battle of Britain GB, and this guy will have to remain on the back burner for a bit.
- 19 replies
-
- 15
-

-
Operation Trebuchet Revell 1/72 RAF Typhoon 1990 saw the Middle East at the brink of war. Saddam Hussain had invaded Kuwait and declared it Iraq's 19th province. After a tense three months, a US led diplomatic envoy managed to talk Hussain back from the brink of all-out war. A long and bloody Gulf War was averted through diplomatic, rather than military action. But it was not without its price. Iraq faced heavy economic sanctions. The Iraqi government counteracted this by promoting policies which encouraged a more isolated and insular state. Sixteen years later and the trade restrictions on Iraq had placed a huge strain on the country both socially and economically. Furthermore, over the years Saddam had succeeded in enriching Uranium in secret mountain laboratories for the purposes of creating a short-range nuclear missile, although at the time it was not established whether he had successfully weaponised it. Hussain, backed into a corner by his people and the international community began lashing out to his nearest neighbours. The long years of isolation had made Iraq strong and fiercely independent. First, Saddam succeeded in re-taking Kuwait and began threatening Israel with his new nuclear arsenal. The world was held to ransom, a belligerant and jumpy dictator had his finger on a hair trigger. In a secret emergency meeting, NATO and the United Nations voted unreservedly for military action against Iraq before a potential nuclear attack was launched. In March 2006 B2 bombers based at USAF bases in the UK took off to instigate a first strike on Saddam's nuclear facilities. Luckily, they were successful destroying 78% of their targets buried deep in the mountains and paved the way for the ground invasion. As it transpires, Iraq had developed a ballistic missile capable of hitting targets as far away as Austria. Although the missile was unable to carry a nuclear warhead, liberating forces discovered a plan to use the missile to launch a dirty-bomb attack on an unnamed city. Following the initial invasion, the Iraqi Republican Guard faced heavy losses, causing them to disperse an retreat to towns and cities across Iraq. Baghdad and other large cities became fortresses, under siege from coalition troops. Over the first two months it appeared that little ground was being made and the number of civilian lives lost increased by the day. The RAF, who now have squadrons based in Saudi Arabia and recently liberated Kuwait, instigated "Operation Trebuchet". The objective: to start a 72hour barrage of continuous unrelenting air strikes on military targets across Iraq with the view to levelling the remaining military resistance and end the multiple sieges across the country. It was the perfect opportunity to test the mettle of the relatively new Typhoon in a ground attack role. The kit, a 1/72 Revell Eurofighter Typhoon will depict one of the machines involved in this fictional operation being re-armed and readied for the next sortie. I'll be using some aftermarket, so far I've identified the Eduard PE set but this might grow as the kit gets built. I'm hoping to have a play around with the camouflage and insignia as I am a big fan of some of the nose art of aircraft used in the "real" Gulf War. The desert pink will feature, but I may also play around with this to offer a unique what-if twist. For those of you who have seen my previous builds, I'll be using my traditional 6x6 bathroom tile as a base with some sort of diorama involved, possibly even another in-flight... We'll see. It begins....
-
Hi everyone, a few of my photos from Cosford are below. It was a bit dark at times, but had a great day seeing some really enjoyable displays. Steve
-
 Hello, Having stepped into the 1/24 world with the old but good Airfix Hurricane (will get the RFI up shortly, sorry, pause for life and work for a few weeks...) I've started proper work on the Tiffie that I've had in the stash for a while. I've studied/hugged the sprues, read the instructions many times, the Airfix Mag supplement by Chris Thomas from a while back, a Warpaint...Time to get started! This will be a Bombphoon, probably a 440 Sqn RCAF one, maybe the Pulveriser option in the box, we'll see. It will definitely be a 4-blade, Tempest tailplane bomber, with most of the panels closed up, except one cannon bay. Why? I like the lines and presence of the Typhoon, and while I've seen many great detailed builds of the engine etc, it's just what I prefer. Anyway, lots of useful stuff for the spares box too. So...I guess you've seen enough sprue shots etc of this kit, so straight into some pics: Starting the framework: Great fun painting and scratching up the seat in this big scale: Not done figure painting for years, this is just for 'armless fun... Completed cockpit, just Eduard seatbelts added: Cannon bay underway: All brush-painted so far, and while the Eduard belts are a major improvement over the kit items, they're a pain to use as the pre-painted coating flakes when bent at acute angles - a problem on belts! Second time this has happened, will look at fabric ones in future. So far, so good. Very clever engineering, it doesn't all fall together as per Tamiya, but I love it, it takes a bit of planning and proper modelling. Take care, Matt
- 56 replies
-
- 12
-
-
So chaps! After being encouraged by cookie to do a wip on my typhoon (he is a very encouraging chap which is appreciated as i don't always encourage myself.... actually I started my spitfire wip as MG encouraged me.... maybe I need to grow a pair) I was not going to start it until I had finished my Malta spitfire.... but then I ripped a transfer off and got a bit annoyed by it all and decided I would start the early.....so. This I what I will be building Nice kit with great detail... below is the option I am going for I build the old tool tiff from airfix when I was younger and always remembered enjoying it. As far as an aircraft I gave always had a soft spot for this brute... but it's always been overshadowed in my love of the sea fury and tempest as a beefcake ground attack, still it's another one of hawkers great stable gun platforms like my beloved hurricane (she's at the top of the tree IMHO) So here's what I did, not much just a bit of interior painting really.... but hey! It's a start. So I didn't follow airfix's paint guide as a lot of people have questioned it (?) So I have taken from other builds I have watched, hopefully this will make it correct. I will see if I can get the aluminium details done and close the ac up by the end of the week, but please don't hold your breath... its against my health and safety policy. Any help and advice is always welcome so feel free, even though this is not my favourite ac I still love it and want to do it proud and there are a lot of people out there that know a great deal more than me. Cheers all Rob P.s. rockets on and a gun bay open is the plan! I am saving the big boobs. ... sorry don't know where that came from .... I meant bombs for another project
-
Getting rather wet! Kicked off my airshow season in damp style at Abingdon, where massive downpours throughout the afternoon obliterated the flying programme, with the sun making only a fleeting appearance. Despite the general disappointment, we were treated to the RAF's new Spitfire and Typhoon synchro display, which is one of the finest examples of aerial ballet I've seen, pure poetry. Conditions were pretty rubbish throughout the display, making it hard going from a photogrpahy point of view, but I thought I'd share a handful of quick and dirty edits. Abingdon_2015_100 by Shaun Schofield, on Flickr Abingdon_2015_101 by Shaun Schofield, on Flickr Abingdon_2015_102 by Shaun Schofield, on Flickr A more complete set of images from the show may or may not follow in due course... Hope they're of interest! Shaun
-
Hi everyone and sorry for starting this in the wrong thread earlier! So it all started like this - my modelling mate and all round good bloke Barry had bought himself this beastie last year.. https://www.scalemates.com/kits/115168-trumpeter-01601-tu-95ms-bear-h Me, I was at the end of a year of F-14 builds and was deciding what to build next. When I saw Barry's Bear, I dropped him a message along the lines of... Cool kit, nice purchase Just how big is that thing?! Wouldn't it be daft to see it 'intercepted' by a 1/72 Tomcat! We thought no more of it, except for sharing photos of Tomcats intercepting Russian Tu-95s until Christmas came and I happened to get the these two kits as a present..(cheers Daiske) And what with Mr. Putin starting to act the eejit with his flights around the UK, Ireland and Europe, it had all come together lovely. Just like an A-Team plan - an RAF Typhoon meeting a Russian Bear bomber, somewhere over the North Sea. (Source: Wikipedia Commons, public use) So that's our plan - Barry builds the Bear, I build the Typhoon and they both get displayed on a diorama that probably won't fit in either of our cars (damn, just thought about that one). And if that all that wasn't enough, I also planted a seed in Barry's poor head about maybe motorising the engines on the big Russian... More about the engines (and some WIP pictures) later this week. Thanks for looking. Dermot & Barry (who's still thinks I'm a bit of a nutter for this crazy plan)
- 46 replies
-
- 9
-
-
- Typhoon
- Eurofighter
- (and 5 more)
-
 Hi everyone! Here is my Eurofighter Typhoon (Revell 1/72 kit), built completely OOB. Overall it's a nice kit, though clearly not as good in terms of quality as other kits from Hasegawa or Academy. I hope you like it! Best, Ricardo Bonus: bottom detail
- 14 replies
-
- 18
-
-
- eurofighter
- typhoon
- (and 3 more)
-
Typhoon Class Submarine Mikro Mir 1:350 Built primarily for long missions under the polar icecap, the sheer size of the Typhoon, known indigenously as the Akula Class, was simply mind blowing. She was half the length of an Nimitz class aircraft carrier and about 2/5ths its displacement. A submerged Typhoon was said to reach 48,000 tons, while its western equivalent, the almost as long Ohio Class "boomer," displaced "just" 19,000 tons. The Typhoon's massive tonnage comes from the fact that they were basically two Delta Class submarine hulls mated together and built outward from there. They could carry 20 R-39 SLBMs, each with 10 multiple re-entry vehicle (MIRV) warheads. In other words, this submarine could rain two hundred nuclear warheads down on western cities and military installations in a single barrage. Seeing as the ship was designed with Arctic patrols in mind, she could break through the ice and fire all of her missiles while surfaced if need be. Additionally, she possessed six 533mm tubes that were capable of launching Type 53 torpedoes and SS-N-15 "Starfish" cruise missiles, although these were tertiary capabilities in comparison to her primary mission as a nuclear "second strike" deterrent. What made the Typhoons even more threatening was that they were among the quietest vessels ever built by the USSR, and they were fast, capable of hitting around 28kts underwater. In effect, tracking these suckers was a top priority for NATO, and especially the US, and it was not that easy for America's silent service to do so. Additionally, these ships were prime targets on America's nuclear hit lists while in port as they could launch their missiles even while tied up to the dock if the orders to end the world as we knew it were ever given. In the end just six Typhoons were built during the 1980s, and most were withdrawn from service within a decade and a half of their christening. Today a single boat, the first of her class, the Dmitriy Donskoy, is still in service, acting partially as a missile development test boat as she was updated and converted to carry the newest Russian SLBM, the RSM-56 "Bulava." The two other remaining Typhoons that were still in Russia's reserve inventory are being scrapped as the cost of refitting and operating them is deemed too high. In their place, the more streamlined, efficient and cost effective Borei Class, although not necessarily cheaper to build, and its second generation derivative, which were designed around the RSM-56 SLBM, will solidify its grim role as Russia's primary second strike nuclear deterrent. Interestingly enough, before the final decision was made to scrap all but one of the remaining Typhoons, the shipyard that originally built them was floating some pretty wild concepts in an attempt to see that they were refurbished and put back into active service. Some of the ideas proposed were to refit the ships as natural gas, oil and cargo transports capable of delivering large quantities of stores to Russia's most northern outposts. The Model This is my first look at a Mikro Mir kit in its raw state and I have to say initial impressions are pretty good. The kit comes in a colourful top opening box with what looks like an actual photograph of a Typhoon on the lid. Inside there are four hull sections, two smallish sprues and two separate parts for the fin all in a light to medium grey styrene. Also included are two small etched sheets, a tiny clear styrene sprue and a sheet of decals. On initial inspection the details are nicely moulded, but be aware that this is more like a limited run kit and as such will require a bit more fettling and fitting than a model from one of the larger mainstream manufacturers, it is not a shake and bake. This is particularly seen in the fitting of the hull sections which come in separate bow and stern sections for both upper and lower hulls. Some careful sanding will be needed to get all the parts to fit nicely, but try not to sand too much otherwise you will lose some of the moulded detail. Unfortunately the instructions are little on the small side and I found the easiest way to view them was to scan them into the computer and blow them up, certainly helps with identifying where the smaller parts go. The best way to construct this kit will be to glue the bow and stern sections of the upper and lower hulls before attaching the now two halves, (horizontally), together. With the hull sections glued together there are several fittings to be attached to the lower hull, these include the keel strakes, two, what I can only presume are water intakes, each consisting of two halves, the two piece rudder onto which two PE strakes are fitted per side, and two other parts, fitted aft of the water intakes, which I cannot identify. Turning the sub over the upper hull is fitted with the tower/fin, which is provided in two halves, is assembled, with a floor section sandwiched between them about two thirds of the way up the fin. The small brass parts that make up the antenna/periscope wells are fitted before closing up along with the clear parts that make up the front windows. The fin is then topped off with a selection of antenna poles and periscopes, and finished by fitting the PE handrails around the base. The upper rudder is of the same construction as the lower and once fitted into position two similarly unidentifiable parts to those on the underside are glued into place, followed by the two bowplanes. The two propellers are each made up of individual PE blades glued onto the styrene propeller boss, which is then completed by the fitting of four small strakes into the front of the boss. Once assembled, the two propellers can be glued into place. The two single piece sternplanes are fitted with inner and outer PE plates before being glued into position aft of the propellers which are then enclosed by upper and lower cowl sections. Finally two rounded plates are fitted to the outside of each of the aft horizontal planes, completing the build. A small stand is provided to mount the model on, or you can provide your own method of display. Decals The small decal sheet provides quite a lot of markings for the submarine, mostly for the individual hatches and openings, but also for the escape/access hatches which are provided as two parts to improve the opacity of the white sections. There are also depth marks for the bow, amidships and stern plus two Russian Ensigns. Although marked MikroMir, the decals have a Bergamot feel about them which may or may not be a good thing. Once again I scanned the decal placement sheet into the computer which helped a lot in identifying where the decals go. Conclusion This is a very interesting kit in that it may take a little longer to put together, requiring a little more patience and care with the fit, but at the end of the day you will have a very nice, and accurate model of the imposing Typhoon class submarine. Having seen a couple of completed models they really do stand out from the crowd. Highly recommended. Review sample courtesy of
-
 Hawker Typhoon Mk.IB Replacement Masks for Airfix Kit Decals 1:24 Maketar These masks are direct replacements for the markings provided by Airfix in the kit. In addition you get a set of canopy masks and a set of wheel masks. The masks come on four main sheets for the markings and a separate sheet for the canopy and wheel masks. They are available in either vinyl or yellow Kabuki tape. The advantage with the tape ones is that they are lower tack and much easier to reposition if you get things wrong. There are no instructions but then they are not really needed. Recommended for those who don't like decals or if you want the true painted on look for your large scale Typhoon. Review sample courtesy of
 -
Hi All, I'm in the process of building the Airfix 1/24 Hawker Typhoon. I'm not really a fan of the options presented as I want a non personalised, 4 blade, tempest tail, rocket firing typhoon in half d-day stripes. After several weeks of research I think I have decided on either MN526 TP-V or MN880/882 TP-Q. Some of you will know these as the aircraft often shown marked up with Red Squadron markings despite much evidence to the contrary (personally I think the appearance of a different colour is due to the invasion stripes staining the paint) However I can't find any information on which type of dust filter/air intake equipment they were fitted with at the time Given that I've seen drawings and paint scheme diagrams showing everything from red squadron markings to red spinners plus 2 different serial numbers for TP-Q, I don't really trust anything short of photos or eyewitness testimony ( preferably with some sort of diary or maintenance log) I'm awaiting the delivery of some books that I'm hoping might help, but in the meantime I was wondering if any of you have any info on either aircraft or any info on any similar aircraft? Cheers, Siegemaster
-
 The special scheme "Bavarian Tiger" of Luftwaffe Eurofighter EF-2000 Typhoon S 3009 (cn GS004/048) during NATO Tiger Meet 2014. Kit:F-Toys Euro Jet 1/144 EF-2000 Decal:Fully hand-painted with DIY decal
 -
 I'd like to ask your opinion about how acurate is the shape of the new 1/350 HobbyBoss Typhoon Class submarine. Here is the only official (?!) drawing of the biggest submarine that mankind has built so far: http://www.heiszwolf.com/subs/plans/Plans_Typhoon.gif 1. If there are any other sources, I'd like to hear about them. As with my everlasting projects, one was(is) to scratch build a typhoon class in 1/144 gigantic scale. So to have a base to build upon, I've drawed over that plan an AutoCAD file. I should say that even in that same drawing, there are some inconsistencies. The sections and x and y plan drawings were not perfectly matching. Anyway, in such cases, I decided a middle way to match as much as possible to the plan drawings. 2. I'd like to ask what is the length of the sub? I made it to be as 175 m as indicated in Wikipedia. In military-today.com it is said 170-172 m. The HobbyBoss kit lengths 489 mm. a simple calculation results in 171,50 m Even if 175 m is wrong with my drawing, the conning tower is way too big towards fore. So here are some picture I've made comparing the drawing which was plotted in 1/350 scale and the Hobby Boss kit. i. The overall length is not matching ii. The conning tower is too big, too lenghtened towards fore side resulting in moving the missile craddles much forward iii. The flat area around the conning tower is too big too What do you think? It's official, I began to count rivets
 -
In 2013 I managed to finish a fire truck and an astronaut. This year seems to have been the year of the Spitfire with a few 1/72 tanks and a Mk.1B Typhoon thrown in! The year started with the idea of working on my model making skills in order to do justice to the Eduard Mk.IX Spitfire that I planned to make at some point during the year. My practicing began with some 1/72 Spitfires from Airfix and Italeri. Airfix 1/72 Mk.Ia Spitfire (new tool) There are more photos of this Mk.Ia available in the RFI section which can be found here: http://www.britmodeller.com/forums/index.php?/topic/234955941-172-airfix-mkia-spitfire-new-tool-photo-heavy/ Airfix 1/72 Mk.IIa Spitfire (new tool) Italeri 1/72 Mk.IX Spitfire There are more photos of both of these two Spitfires above in the RFI section here: http://www.britmodeller.com/forums/index.php?/topic/234959818-two-172-spitfires-airfix-mkiia-and-italeri-mkix/ The latter two Spitfires were built as part of the 'Less Than a Tenner' GB where I also made the Revell 1/144 Mk.Ia Spitfire: This is my current avatar picture. I then thought I ought to practice on a 1/48 Spitfire but a much cheaper one! - Revell's Mk.XVI: There are more photos of the Revell Mk.XVI here in the RFI section: http://www.britmodeller.com/forums/index.php?/topic/234969553-another-148-revell-icm-mkxvi-spitfire-diorama-b-w-photos-added/ When I actually got around to building the 1/48 Eduard Mk.IXc Spitfire (late), as part of the D-Day GB, it ended up looking like this: More photos of the Mk.IX Spitfire can be found in the RFI section here: http://www.britmodeller.com/forums/index.php?/topic/234967960-eduard-spitfire-lfmkixc-ml135-yod-no401-squadron-as-flown-by-jerry-billing-on-7th-june-1944-b-w-photos-added/ Also as part of the D-Day GB I made a couple of German tanks and a Mk.IB Typhoon. Airfix 1/72 Mk.IB Typhoon (new tool): The RFI for the Typhoon can be found here: http://www.britmodeller.com/forums/index.php?/topic/234968242-airfix-172-mkib-typhoon-new-tool-version-mn526tp-v-france-july-1944-b-w-photos-added-including-one-from-the-sarge/ 1/72 Dragon Panther Ausf G: 1/72 Dragon Tiger 1 Ausf E: The RFI for the two tanks can be found here: http://www.britmodeller.com/forums/index.php?/topic/234968244-two-german-big-cats-in-172-dragons-panther-ausf-g-and-tiger-i-ausf-e-both-with-zimmerit-b-w-photos-added/ Once complete I put the three above into a bit of a diorama: The RFI for the diorama can be found here where there are a lot more photos!: http://www.britmodeller.com/forums/index.php?/topic/234968243-somewhere-in-france-july-1944-typhoon-panther-and-tiger-in-172-b-w-photos-added/ My final completion for the year is Airfix's old (and I mean old!) 1/76 Tiger 1. I bought it thinking it would be lot better than it turned out to be in the box but I ended up upgrading it a bit and I was rather pleased with the completed model. There's a few spares included from my D-Day tank builds and some scratch built parts as well: I haven't done an RFI post for this Tiger yet as I intend to make a base for it soon but the WIP can be found here: http://www.britmodeller.com/forums/index.php?/topic/234971585-airfix-176-tiger-i-yeah-that-old-one-upgraded-a-bit-update-291214/ My current project is to build two 1/48 Mk.Vb Spitfires so they should be my first completions in 2015. I'd also like to thank everyone who stopped by my build threads this past year and supported my builds either with advice, encouragement or, on a couple of occasions, spare parts! None of my builds would have turned out like they did without this Britmodeller community - so THANK YOU! Kind regards, Stix
- 27 replies
-
- 15
-
-

1988 Eurofighter mockup and early Revell JF90 / EFA kit
172flogger posted a topic in Aircraft Modern
Hello, i looking for photos of the Eurofighter mockup which was base for the first tool Revell kit: (1/72 Revell 4356 EuroFighter JF90 / EFA kit with gray box, stairs included and raised panel lines, released 1988) http://www.scalemates.com/products/product.php?id=143650 Is it this mockup from the 1988 the Farnborough Air Show?: http://www.airport-data.com/aircraft/photo/000826990.html Now i found photo of the white-red EFA mockup which is from 1986 year - two years older: http://www.flickr.com/photos/86182676@N00/10743832953 http://www.fightercontrol.co.uk/forum/viewtopic.php?f=18&p=379038 EFA missing small intake at the tail fin. Is this white mockup different article and was really displayed at both 1986 and 1990 Farnborough Air Show? Thanks Lukas -
 You al know how it is. Once in a while, it doesn't matter that the stash is filled to the brim, that there's no more room on the shelf of doom, and the modelling table is filled with 1,2,3 - many ongoing subjects, sometimes you just need to clear everything, and take the latest and greatest purchase and go with the flow. In my case this happened with the enormous Typhoon. I've never built anything in larger scale than 1/48 before, and there was nothing in the stash of that sort either, but it didn't matter. I needed it, badly. It wasn't possible to resist a view like: Trying to battle the AMS didn't work either, which is why I've got the Airscale instrument decals and some Eduard goodies Let's make a start at it then! what could possible go wrong? Well, since my previous attempts at building Typhoons has been less than successful, my track record might not be the best, and its a BIG model! No matter, I'm filled with cheerful optimism, and neither the dreaded crack in the hood (got a new clear sprue from Airfix last week, which was as good as one can hope), or a rather nasty short-shot: will stop me this time. Everything is possible! Lets cut off a few pieces, clean them up! Rear spar is a little bent: Some heavy persuasion with brute force and glue should sort that out later on. I hope :-) Also decided to drill out the holes in the rear form(imf=er, just because I could. Edit: ARRGH! It's post preview one should click on, nothing else! Story continues: Well, all parts were cleaned up an glued together, and after a quick coat of Vallejo black primer, it looks quite ok actually. Quite a lot of parts was left out of the initial assembly, but also primed Citadel chainmail was sprayed next and I hoped that all ejector pin marks on the engine firewall is hidden later on... On to some other fun stuff. The floor boards were drybrushed and received a couple of washes: Main instrument panel was painted too, and prepared for a long session of small small decals from Airscale. A really large sinkmark in the middle of the compass was a cause for concern: but since it will all be painted anywway it was filled and sanded flat. After half of the decals had been added it started to look nice! Finally, all was installed in the cockpit And there we are! I've started the most challenging build ever, but I'm having so much fun! Luckily, I have 3 weeks of christmas vacation coming up and hopefully I'll be able to sneak of to the modelling den more than once, so even with my usual geological modelling pace continues, some progress is expected! //Christer
- 166 replies
-
- 13
-
-
 Just finished......... Note the two crew members aft of the missile tubes...... Battle of the Big Boomers...... Typhoon and USS Maryland - with the new Russian Borei class at the front.... Ken
- 17 replies
-
- 21
-
-
Evening all, Back along, I chose the Airfix Typhoon with the intention of building something nice and easy quickly. Two months later, it's finally done, and to be honest I'm happy to have it off the bench; not the greatest model I'll ever build. Nothing wrong with the kit at all, I just made a bit of a hash of things during construction and lost a bit of interest. Anyway, here she is... Thanks for looking, please excuse the dust and crud on the model, it's something I seem to be having an increasing problem with, no doubt due to the length of time it seems to take me to finish a kit these days.... Cheers, Shaun
- 15 replies
-
- 25
-
-
Typhoon Class SSBN - Hobby Boss 1/350 scale
Flankerman posted a topic in Work in Progress - Maritime
Just when I thought I had enough submarine kits (see :- http://www.britmodeller.com/forums/index.php?/topic/234970734-new-1350-scale-submarines-uss-g-washington-hms-m1-etc/)to be getting on with, up pops the postman with this new kit from Hobby Boss. I ordered it from Hobby Easy on 15 November and it was delivered today (22nd) - 7 days door-to-door - excellent service Despite its size, it is quite a simple kit - the hull is in upper and lower halves with a separate 'sail'. The most numerous parts are the missiles - 24 tubes each in two halves, with 24 X 2-part missiles - plus all the caps and hatches. Alternate etched-brass propellers are provided and the small decal sheet gives markings for the depth numbers and escape hatches - but not the prominent white waterline markings around the whole hull. It's a huge model - 50cm long and 6.5cm wide! This sprue is repeated 4 times - to provide the 24 missiles and tubes etc.... Final sprue with sail (with alternate top) plus the propellers and diving planes (the front ones work!!).... Alternate etched-brass propellers..... I'm not sure about the acoustic tile detail - is it overdone ??? Some photos show the hull completely smooth - other pictures show the tiles - maybe a trick of the light ??? I chose this HB kit over the Micro-Mir version because I wanted to have the missiles on display - I'm not sure what the MM version is like ?? Ken -
 I know I have professed publically my goal to not do anything but get rid of my shelf of doom (oh the shame of it all), but I needed a break from forced kit construction to constructing a kit I wanted to build. (Although, at one point in time all of the kits on the shelf of doom were also ones I wanted to build. Very complicated and disturbing how my mind works sometimes.) So, while I while away the hours sanding and filling the seams on my 1/24 Airfix Typhoon, in between when I need a break I am going to work on this Typhoon. It is Hasegawa’s reboxing of the Revell 1/72 Typhoon with the IdolM@ster decals. (I know, I am in danger of losing my mancard again, but at least this one isn’t pink!!) I have built a few of the kits in the IdolM@ster range so I know what I am getting into. The crazy decal scheme just appeals to me. Here is the box art. And here is the decal sheet which is just as big as the box. Finally, here are the instructions showing the decal scheme from all sides. Even the bottom of the aircraft has its own decorative scheme. I have not decided what to do about the ordinance though. The kit comes with many options. I do not know if the anime version carried any ordinance. Oh well, time to sort that out. Let the construction begin.
- 119 replies
-
- 3
-
-
- IdolM@ster
- IdolMaster
- (and 3 more)
-
Hello once again from Greece! This time I built a Typhoon Mk.Ib Late from Italeri's kit, which is a rebox of Hasegawa's one. Painted with Tamiya acrylics and weathered with artists' oils and airbrush, hope you like it! More info and photos here: http://www.modellingnews.gr/el/%CE%BC%CE%BF%CE%BD%CF%84%CE%B5%CE%BB%CE%B9%CF%83%CE%BC%CF%8C%CF%82-%CE%BA%CE%B1%CF%84%CE%B1%CF%83%CE%BA%CE%B5%CF%85%CE%AD%CF%82/hawker-typhoon-mkib-late-italeri-148
-
At last!!!! Sorry I don't have a great setup for photos and just noticed my bluetac canopy stay is showing oops (I never glue them as they are the 1st to get knocked), had to use our bedroom and some blankets for the backdrop, not really worked, but... Fun build, pain in the posterior but learn't a hell of a lot. 1/32 Revell Eurofighter Typhoon Eduard exterior Aires cockpit Aires Exhaust set Colours used. XF-21 and XF-59 mix 70/25/5 with Orange and white Build thread
- 11 replies
-
- 9
-
-
- typhoon revell
- eurofighter
- (and 1 more)