Search the Community
Showing results for tags 'Sword'.
-
Hi all, here's the first of 2021. It is the Sword kit straight from the box except Eduard etch ejection seat handles and scratch built pitot. Nice kit though not for the complete novice, and the decals are so thin they are very difficult to move once placed. Anyway thanks for looking 20210214_152721 by bryn robinson, on Flickr 20210214_152731 by bryn robinson, on Flickr 20210214_152744 by bryn robinson, on Flickr 20210214_152803 by bryn robinson, on Flickr 20210214_152832 by bryn robinson, on Flickr 20210214_153227 by bryn robinson, on Flickr
- 21 replies
-
- 47
-

-
After some false starts on recent group builds, I thought that I would try to restart in 2021 with this kit, the Sword 1/72: As the kit box clearly states RAAF, it seems ideal for this GB and I have had it for some time. I will be doing the 79 Squadron version which is A58-169 originally ES307 built at Castle Bromwich (kipper tie, no I have just had one thank you). The airframe history is from ADF serials website: 58-169 F.VC ES307 Arrived in Australia on SS Empire Strength 11/04/43.Rec 2AD ex UK 29/03/43. Rec 1AD ex 2AD 23/04/43. Received streamline cowling modification 1AD (sans Trop)23/04/43. Returned to 79Sqn RAAF 06/05/43. Coded UP-X. Rec 1AD ex 79Sqn RAAF 02/06/43. Rec 79Sqn RAAF ex 1AD 06/06/43. Accident 26/06/43 when after having taken off for a one hour gun test flight, could not select undercarriage on landing. Pilot made a wheels up landing at Milne Bay. Pilot; Sgt G A Chomley Serv#418232 was uninjured. (Code name for Kiriwana was Drake Force) Fitted RR Merlin M46 was #93069. Rec 26RSU ex 79Sqn RAAF 22/08/43. Rec 79 Sqn RAAF ex 26RSU 30/10/43. As LZ844 (A58-213) with 79 Sqn RAAF was now also coded as UP-X, ES307(A58-169) also coded as UP-X, was modified with a white overscore below and another above the grey X, with new Volkes Filter in natural metal cowl. RR Merlin M46 #92661. Rec 12RSU ex 79Sqn RAAF 28/10/44. Rec 6AD ex 12RSU 26/11/44. Rec 8OTU ex 6AD 07/01/45. Rec 6AD ex 8OTU 27/11/45. Authorised for write off 22/05/46. Passed to DAP 26/11/47. Struck off 15/11/48. And I think it is this aircraft: From the Australian War Memorial Site. Interestingly there isn't any serial code on the aircraft. The accepted scheme seems to be RAF DE with RAAF Foliage Green painted over the original RAF Midstone with RAF Azure Blue beneath- the repaint for Spitfires originally finished in 'Desert Camouflage'. The Vokes filter from the above text was a refit and in aluminium which is why it light. The underneath appears lighter that Azure blue on the wings and darker almost imperceptible from the upper colours at the rear. Notice also the dark colour of the leg strut. Of course its not a pin sharp photo. I think there are two likely-hoods, the aircraft is painted Azure Blue and the wings are reflecting the sand beneath or the aircraft could have been repainted RAAF Sky Blue in its many trips back to Servicing. I have build the Sword Spitfire Vc before and it goes together quite well, but the cockpit canopy can be a bit iffy possibly.
- 15 replies
-
- 4
-

-
- Spitfire Vc
- 1/72
-
(and 1 more)
Tagged with:
-
Hello everyone! I just finished another model and also the first one this year. The hero is the Reggiane Re 2001"Falco II" in 1/48 from the company "Sword". The model represents a machine from 152a Sqn. Tenente Remo Cazzolii, may 1942. Construction went without any problems, in few places I had to give putty in minimal amount, I made pilot stripes myself. For painting I used Bilmodel Makers paints dedicated to Italian aviation. And now I invite you to the gallery, you can judge.
- 2 replies
-
- 18
-

-
- Reggiene Re.2001
- Sword
-
(and 1 more)
Tagged with:
-
I think this might be the next project to start. Not an easy kit to get hold of these days - managed to find it on ebay a couple of years back. Heard some comments in the past about some tricky parts fit? I've also bought aftermarket intakes / nozzles which seems to be this big issue with the Sword kit. It's going to have to be a rattle can paint finish too, so let's see how that works out!!! Will try to update some pics through the build.
-
Hello everybody! Another model that landed in my workshop is Reggiane Re. 2001 Falco II from Sword in 1:48 scale (SW48012). I know I promised an MC. 202 but there has been a slight adjustment in plans. Falco will be straight out of the box without any fireworks. And the rest will come out during construction. The whole thing looks like this: The little in-box of the kit: And a few details I uploaded the pictures wrong and redid them.
-
Joining you with this Sword 1/72 BAC Strikemaster. This kit cost me £8 at IPMS Avon show in 2015.
- 34 replies
-
- 10
-

-
I've been missing the building with all the painting and decals I've been doing lately so was looking forward to starting this from the stash (even though I have a couple of KUTAs I could restart that need decals, etc.)... It's a second hand kit, but everything seems in order - actually I think there's an extra piece that doesn't belong (the light grey bit at the top middle - oddly seems the same sprue colour). The kit has a couple of resin (I think) bits - the exhaust and pilots seat, and some colour photoetch. I've never built a Sword kit before but this may well be my first and last (more on that below). So the sprues don't contain any numbering (not a deal breaker) but the parts - well, there's no attachment 'pins'/sockets or anything - you have to align them up by eye! I made a start on the nose cone - it says to add weights to them (no amount specified) - I fitted a steel ball bearing in the nose and one in the rear section that attaches to, possibly I'll need to add more weights later, doesn't seem lots but I couldn't fit any more. I fixed them in place with some 2 part epoxy glue. I also decided to glue up the wing halves, but there was some serious injector marks that had to be taken care of first as they were getting in the way. So I can see this is going to be a 'fun' build. The only parts with and locator parts are effectively those stubby wing to fuselage parts and some dry fitting when the wings had dried showed they don't fit (so they'll need some modification)! The tailfin and rear wings also have no good strong attachment points which will be 'fun'. The part I'm dreading first though is getting the fuselage halves together they pretty much fit (a little plastic warpage but nothing some glue and clamping won't fix) but without connecting guide points it's going to be an engineering challenge (I'm thinking of building some bits of inner 'lip' on one side with plasticard to help hold it aligned whilst setting, but that's only half of it - I've also got to align and attach the cockpit (ok there's a tiny lip for that), the front radome/wheel-well part and the intake fan all at the same time so it all lines up. Any tips on this appreciated (I'm half tempted to ditch it / kit bash it with another Lightning kit - e.g. take the decals, PE and resin parts and attach them to another kit). Oh add to that I'm planning to try a BMF and this has all the hallmarks of turning into a nightmare project full of silver gluey finger prints!
- 8 replies
-
- 5
-

-
- Sword
- Lightning F1
-
(and 1 more)
Tagged with:
-
Boosting the Carrier Air Wing with this Sword 1/72 TF-9J Cougar. Performing as a USMC Forward Air Controller. Parts. This is the Vietnam option.
-
Dear All, Further to my previous post on Merlin Seafires and my intention to build all 3 versions,1B, IIC and III I've just managed to buy the Sword Mk III / SW72084 late boxing which, with all Sword Seafire and Spitfire kits, are like hens teeth these days. I've read the excellent review of this kit on Hyperscale by Mark Davies (below) which confirms my initial thoughts that the kit is excellent with the only obvious error being the lack of panel lines on the wings showing the wing fold. http://www.hyperscale.com/2014/reviews/kits/sword72083reviewmd_1.htm Given the lack of wing fold lines and the plethora of spares also included, as apparently these are from their previous Spitfire V model which Sword still left in for some reason, I'm wondering if the kit could also be built as Mk II as well? Would love to hear from anyone who has bought/built this kit who could confirm, along with any build issues that the kit may have, as I'm very much a Seafire virgin and still learning as I go. Regards Colin. Ps. any clues as to where I might find any more of the Sword Seafires for sale as mine was the last and only one left with Kingkit and trawling Google has yielded nothing?
-
Hi all, My first build for this GB will be the 1/72 Sword RT-33 in USAF markings. The USAF got one of these from the Philippine Air Force in 1961, to use over Laos to help provide the Laotian government with intel on the Pathet Lao and the Viet Minh in northern Laos and along the border with North Vietnam. Naturally, this whole project was a bit hush hush, but there's some info in the book "Tactical Reconnaisance in the Cold War" by Doug Gordon. A link to the pages about this subject here. As mentioned, I am using the Sword kit which comes with everything you need, including the decals. Everything is nicely packed in bags, with some PE, which you don't really need much of for this version, some resin like the seat and the wheelbays, and decals for a bright orange and yellow/black Italian jet, a French and Dutch one in NMF, and the one I will be doing. The kit is like a typical limited run kit, and I've seen worse. Detail is decent, and the fit doesn't look to be too bad. I've sprayed the interior bits with some Gunze dark interior green and started painting the details in the cockpit. The rear seat was removed from the RT-33, and some electronics were installed instead. The kit comes as a standard T-33, so in order to turn it into a recce bird, you have to cut of the nose along a panel line, and glue the new clear nose parts in place. I'll probably add some reinforcement on the inside though. That's it for now. I'll have some more work done tomorrow.
- 23 replies
-
- 10
-

-
I'm really pleased with this one. Nice kit, bit tricky in places as no locating pins on most parts but goes together fine and good detail. Part of Sword's Reggiane 1/72 boxing and first one I had attempted so looking forward to the others now. Only one marking option per kit included in the 6 kit boxing, this is Reggiane 2001 of Tenente Agostino Celentano, 150a Squadriglia, 2 Gruppo Autonomo. San Pietro di Caltagirone, May 1942
-
Hi everyone, Not been posting RFIs for a while for various reasons. No time to take photoes, no sunny weather to take good photoes, no time to write articles... Now it's time to change things so I'm presenting here the photoes of my latest model I just finished this week. This is a very well known Jet Provost, but not an Airfix kit which has been invading RFI section recently. I've gone the other way and challenged Sword kit of T.5. Not much aftermarket or scratchbuilding applied. I had Pavla MB mk.4 seats, Reskit wheels (main wheels only as their front wheel is visibly small so I used kit's option), Airdecal sheet is used for The Poachers scheme. Some constuction notes: Canopy requires attention! It is about 1.5 mm too wide at its center. It's okay at both ends though. And more importantly - two canopy parts match each other so this stays usable. My solution was to add plastic stripes to the cockpit insert sides. This made fuselage 'fatter' right where needed. At the same time I hardpressed fuselage at the start and end of the cockpit so no inserts were needed there. On the bottom I did not need an insert either. Exhaust is anemic. It's twice smaller than it should be. Just throw it away and scratchbuild the pipe (so did I) or find a replacement in spares. Resin seats are usable but no harness is provided. So I chose to buy Pavla seats. Also cockpit is too deep. I added quite a bit of plastic to raise seats to appropriate level. For an aerobatic team aircraft you need to cut wingtip tanks and add bare wingtips. Nothing complex. The only nuance - Sword gives us transparent navigation lights but these are useless as they do not fit wingtips at all. I just scratched them myself. Probably single-piece fully transparent wingtips could be a better option for Sword. Instruction sheet is horrible. Sword likes to picture nicer and more detailed parts in the instruction than it gets you for real. For instance, in this kit main undercarriage construction requires photo references. Little transparent navigation lights on top and bottom are provided on the sprue, there are location recesses on the fuselage, but these lights are ignored on the instruction at all! Stencils placing reference is just a puzzle. I used walkaround photoes to put most of the stencils. Techmod decals are thin, nicely printed, very readable. But for some reason they tend to bend over so on my XW360 some inscriptions were painted over by RAFC technicians. Aftermarket Airdecal sheet is superb. I had only couple cracks on a long blue stripes that go from the bottom fuselage and end on the tail. I almost have not torn them and applied almost symmetrically!!! Still makes me think once more whether building civil airliners with their cheatlines is a good idea... Use references for aerials! Looks like these changed over Jet Provost's career. Mine are in line with The Poachers photoes from the 70s but not in line with the instruction sheet. Add enough weight. This is a strong tail sitter! Luckily there is a lot of space in front fuselage. Paints used are Hobby Color FS36440 (H325), Flat Red (H13), white, black etc as appropriate. Blue on the wing tips is mixed from a secret proportion of blues and white which I will never be able to reproduce - seems almost spot on? That is all regarding construction. A bit more photoes: Thank you for watching!!! All the best, Dennis
- 14 replies
-
- 38
-

-
- Jet Provost
- Sword
-
(and 1 more)
Tagged with:
-
What should turn up on my doorstep but a Sword 1/72 Avenger AS.4. Nice kit: very happy with it and construction underway. Sword have had a pretty good stab at the interior but some of the detail is a bit clunky eg shelves 3” thick. Does anyone have any photos of what the interior of the rear cockpits really looks like please? Photos of the other turretless FAA variants (AS.5, ECM.6) equally acceptable! Thanks in advance. PS Have already had a look at the photos of the FAAM Avenger ECM.6 in Walkrounds.
- 8 replies
-
- Sword
- Avenger AS.4
-
(and 1 more)
Tagged with:
-
Good day to all, This is number seven for the year, the Sword F3H Demon. Here are the highlights I found of the kit............... 1. The kit is tricky to assemble. I spent considerable time dry fitting before applying glue and bonding parts and sections together. 2. I added metal and brass rod to shore up and strengthen major sections such as the wings to the fuselage, landing gear, horizontal stabilizers, and weapons pylons. 3. There are no alignment pins for the fuselage and the ones for the wings, pylons, horizontal stabilizers, and landing gear are lacking Or insignificant at best. 4. Plumbers putty and small lead fishing sinkers were used as ballast to keep the Demon sitting properly. 5. Decals were excellent. 6. Care needs to be exercised when snipping parts off of the sprue trees as the individual parts are numbered on the instruction sheet and NOT the sprue tree. 7. I broke the photo etched leading edge wing fences numerous times and had to fabricate one as it turned up missing. I also broke the starboard horizontal stabilizer twice during handling. 8. Weathered using washes, pencils, and paint. Post shading process used. 9. Colors used : A. Mission Models US Camouflage Grey FS36622. #MMP-095 ( base upper surface color ) B. Mission Models Lt Gull Grey FS16440 #MMP-069 ( used as the darker panel lines ) C. Mission Models White D. AK Extreme Burnt Metal for the section aft of the exhaust nozzle E. Tamiya Titanium Silver X-32 for the metal undersides and leading edge of the horizontal stabilizers. F. Tamiya Gun Metal X-10 for exhaust nozzle highlighted with Polly Scale Burnt Aluminum G. Tamiya Chrome Silver X-11 for the intake leading edge H. Model Master Dark Gull Grey for the cockpit I. Misc : Flat Black, Insignia Red, Clear Red, Clear Green, Gloss Black, Radome Tan, and Yellow in various sections All comments are most welcomed. Thank you in advance. Respectfully submitted, Mike Here is a view of the upgraded landing gear. I drilled holes and inserted a small brass rod for additional support. I also drilled through a scrap piece ( blue colored part ) to use as a sleeve for the nose gear to provide added support and strength as well. Originally, gear did not come in contact with the base of the gear well. I felt this needed to be added to help support the airframe with the additional ballast weight inserted into the nose section. Here is one of the upgraded pylons. I did this same method for all four pylons and similar procedures for the wings and horizontal stabilizers. NOTE : The lacking alignment pins on the second pylon.
- 20 replies
-
- 38
-

-
Hallo again The EE Lightning from Sword is a kit, which is not the finest, but good one to advance for a nice model. I built the Lightning already in 1/33 from paper. A long time ago. Now, here I started with getting the main groups of the a/c right done. The wing, very unusual in shape and cross section. Here at the trailing area, where the ailerons are, I had to fill in some styrene, to prevent a remarkable difference, not flush at all. The intake as a group I finished. Here I could do inside all necessary grinding. I will paint the cone, mask it and afterward the rest in aluminum before assembling in the fuselage. Which green was the cone actually? Dark green, bright green? The cockpit is nice from the resin aftermarket. Just to ask you, the experts: The color of the cockpit is actually gray & black. Now, I’ll see how to proceed. Just to add: I will add a bulkhead in mid fuselage at the wing section, to provide more stiffness there. It is simple too soft, and the danger is to crack the glue there! Happy modelling P.S. Which kit you may suggest for the early aluminum fighter version in 48?
-
Hello Here is my 1/72 Sword Grumman TBM-3W in colours of Flotille 6F Aéronautique Navale in 1954. At the time this unit operated around Afrique Française du Nord for maritime navigation surveillance missions. This kit is easy to assemble and the decals came from a Model Art sheet and the kit sheet. Patrick
- 18 replies
-
- 50
-

-
Hello all. During 'Lockdown' I have made a concerted effort to reduce my stash. I have rattled off a number of ships (to varying qualities), a helicopter, a number of other subjects, and it was only a matter of time before I arrived at my favourite subject, the EE Lightning. I have lots built and lots more in the stash, so it was only just that I tackled one. I have built a couple of Sword Lightnings, and that helped me no end and I planned for a number of potential tricky sections. Seeing @giemme building his wonderful two-seater also helped and I have to say I unashamedly borrowed one or two of his ideas, so thansk for that! However, I still had a couple of problems in that I did not get the wing droop quite right despite there being minimal gap at the upper join, and the canopy would not fit closed, although that does help show the interior. I will have to work on that better for the next ones in the future! Anyway, here is the result, I have modelled it as an F.1 of the Leuchars Target Facilities Flight , RAF Leuchars in 1972. It is a really colourful aircraft, and it was flying there when I lived not far from the end of the runway at Leuchars. The specific markings were from Model Alliance (MA-72134), but they were rather translucent, and it shows, even on a silver finish. The other markings came from Sword and some spare Airfix (so it did not read 'Keep Clean of Intakes'). An enterprising manufacturer should print off a series of these placards for all those Sword kits! I was surprised at the amount of etch supplied, there was a couple of bits for the wheel wells which I have not seen in the Sword F.3 and T.4 kits, but no seatbelts. I have to admit I am a bit of an addict when it comes to Lightnings, and I am constantly seeking to try to improve my renditions of them, and I am quite pleased with this one. All the best everyone, and especially thanks to Giemme for indirectly prompting me to do this one. The next thing I need to learn is how to drill out the nub (and not my finger) which holds the pitot tube and will allow me to use a Master pitot instead of the plastic one - the advice is in his thread! Take care all, Ray
- 10 replies
-
- 28
-

-
With one Seafire finished and two just about done, and my 'high speed' Spit on its way, I thought it time to start another in my Seafire stash reduction project. The Mk XVII or Mk17 was a development of the Groffon engined Mk XV which introduced the bubble canopy to the Seafire family. It served post war with a number of front line squadrons and was delpoyed on carriers as well as a number of training and second line squadrons. The kit pretty much follows the usual Sword Spitfire/Seafire approach with a common wing and most other parts with fuselage half mouldings dedicated to that mark. There's also some resin for the cannons and exhausts, with an injection moulded canopy. And a comprehensive instruction booklet. A nice transfer sheet as well with three options, but disappointingly none for a front line Squadron. I think by 1949 1832 Squadron probably was a reserve Squadron. But it's the option I'll go with
-
SWORD 1:72 F-2H-2P Photo Banshee One of my more recent purchases. I'm currently working on Hobby Boss's F9F Panther and thought it could use a friend. Colour schemes. This will be a Navy bird, most likely. Decals. By Eduard, as it seems. It's a short run kit, for sure. Not saying that is a bad thing - I mean the details are pretty nice for the most part, but you can also see that there will most likely be a lot of sanding & fitting included. Interestingly the nose section is a clear part - because of all the camera windows. One way of doing it, I guess. Resin parts included - and they look pretty nice. Sadly, one of the intake fence thingies is bent but I guess it will straighten out with some heating. And also comes with Eduard PE sheet. I have not read or done any research about this kit - but I'm expecting (and looking forwards) to do some actual modelling to make it all come together. But definitely has the pieces fora nice looking kit - we will see how I manage it
-
I really like the austere look of the 1980s-vintage Hawker HS-125 CC.3 in RAF service, painted gloss white overall and a roundel blue cheat line, similar to that shown on the Matchbox cover-art of the CC.2. To do justice to the type requires kit-bashing using two different generations of kit: the 1974-vintage Matchbox of the -600, and last year's Sword model of the -800. Sword's kit offers many details that can be cobbled onto the -600 to turn it into a -700 jet, such as the engines, underwing details, and possibly the landing gear. As others on this board have pointed out, the Matchbox kit isn't bad, but it does have a few problems. I wanted to do a partial interior and pose the finished product with the door posed open invitingly for little VIPs. No crew figures on this one, however.
- 79 replies
-
- 11
-

-
My second contribution will be this Sword Seafire MkIII Two liveries offered, one a D Day spotter of 885 NAS in the temparate day fighter scheme with D-Day stripes and in the more traditional temperate Sea scheme of 809 NAS on HMS Stalker in 1945' presumably in the Indian Ocean. The box is full of plastic. It looks like it's the sprues from a MkV Spitfire with a new fuselage and wings, along with the other parts for a Seafire. The instruction sheet is about 8 pages long but the build looks like other Sword/Admiral/Legato Seafires. A nice transfer sheet, but no D-Day stripes so that will be a challenge. A couple of resin exhausts and for some reason, I reckon a mistake, theres two clear sprues with a couple of canopies and landing lights
-
Second of three Harrier builds. This is the Sword boxing of the T4 trainer finished as WV 268 from 899 Naval Air Squadron in 1992 based at RNAS Yeovilton. The kit is finished in the 899 NAS 50th Anniversary Markings, transfers for which are in the boxing. Overall its a decent kit with some resin and an awful lot of etch. I felt every time I got somewhere I had more etch to stick on, including some which were practically microscopic. The intakes aren't very good as they don't have the dropped down doors, only closed as in flight. I replaced them with a set from Pavla but it took an inordinate amount of fettling and time to get them to fit. I would have preferred Sword had given options for the intakes rather than loads of tiny etch. Painted with Xtracrylix Dark Sea Grey and finished to a Satin finish with Liquitex Satin varnish. With some of his friends
-
Recently completed my 1/72 Sword RF-84F Thunderflash. Went with the RNoAF markings in the kit. The decals in this kit were superb, with loads of miniscule stencil markings. The original engraving was very fine so I re-scribed everything. Added some canopy locking mechanism latches from an Eduard F-16 etched set. Used a little cars lens for the landing light & added the rod actuator for the nose leg. Drilled out the gun ports. Mig acrylics & Vallejo Metal color Aluminium underside with a Mig enamel pin wash. Royal Norwegian Air Force RF-84F 51-17053 AZ-G 717.Esk Sola Norway 1957; RNoAF RF-84F 51-17053 AZ-G 717.Esk Sola Norway 1957 by Martin Laurance, on Flickr RNoAF RF-84F 51-17053 AZ-G 717.Esk Sola Norway 1957 by Martin Laurance, on Flickr RNoAF RF-84F 51-17053 AZ-G 717.Esk Sola Norway 1957 by Martin Laurance, on Flickr RNoAF RF-84F 51-17053 AZ-G 717.Esk Sola Norway 1957 by Martin Laurance, on Flickr RNoAF RF-84F 51-17053 AZ-G 717.Esk Sola Norway 1957 by Martin Laurance, on Flickr RNoAF RF-84F 51-17053 AZ-G 717.Esk Sola Norway 1957 by Martin Laurance, on Flickr Many thanks for looking. Martin
- 21 replies
-
- 33
-

-
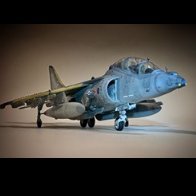
I finished this towards the end of last year, but have only just got around to taking some photographs. Swords excellent rendition on a Harrier T.Mk.4. More or less out of the box, but I did open up the upper auxiliary doors on the intakes as the kit parts were moulded in the closed position, which isn't accurate for an aircraft that is parked up. I used Vallejo Model Air paints and kit decals. I picked this scheme as it was the temporary arctic scheme. I painted all the upper surfaces in the usual green and grey, then overpainted the green with white on the areas visible from above. Hope you like it.
- 13 replies
-
- 30
-




.thumb.jpg.ba34a9f6ddce411193946dbdcc7b5fe8.jpg)


