Search the Community
Showing results for tags 'Revell'.
-
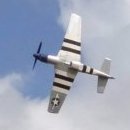
VF-17 "Jolly Rogers" F4U-1A White 3 - Lt Frederick "Big Jim" Streig Bougainville 1944. This is the Revell kit brush painted OOTB. At 1/72 scale it provides a lot of nice detail at a low price. A few fit issues were overcome during the build, and it was an enjoyable project. TFL Cheers Greg
- 12 replies
-
- 27
-

-
Hello all, Laid low with the lurgy at the moment, so I thought I'd get round to updating you on my latest build...the Revell 1/32 Hawk: Note the Argos stock label on it - like many of us probably, I hot footed it down to the local Argos when these first came out as I believe they were one of the only places stocking it. Then it's sat in the stash ever since. That was 2010! About time I made one... I'd also splashed out on the Xtradecal stencil sheet, and their squadron markings sheet, as I didn't want to build a Red Arrows jet: I've always had a fancy for the late seventies RAF trainer scheme, ever since it first appeared in the Airfix catalogue when I was a kid, so I'll be doing this scheme: One difference - the nose ID number 164 will be in white, not black, as I prefer it that way. Luckily I found a photo of this airframe with the number in white, so it will still be accurate. The cockpit is reasonably well detailed, and the instrument decals do their job well enough, settling down well over the raised bezels: The only place the cockpit falls down is on the sidewalls, which are devoid of ANY detail whatsoever. All of this had to be added from scratch: Adding a couple of resin seats completes the ensemble: I'd ordered the early style headboxes on the seats, as you can't get much earlier in the Hawk's career than this! Then it was on to the notorious short-shot undercarriage. I added various bits and pieces to replace the missing compression struts, and also added brake lines and tie wraps: I filed flats onto the tyres, and painted everything up. The wheel centre caps have still to be added here, and according to some references the main wheel rims were painted yellow so I'm still deciding whether to do that with mine: The wheel wells were well detailed OOB, so I just used a wash to highlight things: One notable problem with the kit is that there is no facility to have the flaps dropped, which is how Hawks are ALWAYS parked. I sliced off the flaps from the wings, scratch built them to an aerofoil section, and added the intermediate strip and supports using the mk1 eyeball and much poring over of reference photos. I'm hoping it'll work out ok: Before the fuselage halves could be joined, there was the little matter of all the glaring ports in the fuselage which would open onto the bare plastic interior. There are about five of them, which all had to be dealt with using a short length of tube glued to the inside of the fuselage to give depth, and then blanked off. So, ready to close the fuselage - oops, no, the forward cockpit bulkhead is a completely different shape to the interior of the fuselage at that point! It left a gap of about an eighth of an inch between the halves, which no amount of filler would solve. I had to file off quite a bit of the bulkhead sides to get the fuselage to close: The rest of the seams weren't too bad, apart from the ones on the inside of the intakes - which due to the engineering of the kit means they CAN'T be assembled before adding them to the airframe, and makes sanding inside them that much more difficult... More when I've sorted out the photos, Dean
-
Built a couple of years ago and a foray into 1/32 scale, here is my Revell Fw 190 F-8. I used an Eduard cockpit picked up cheap at a show, Eduard wheels and HGW belts. The kit was a bit of a disappointment after all the excitement of a new large scale Wurger - details are a bit heavy handed and the fit around the cowl was difficult. All in all though, an enjoyable kit. I preferred not to show the engine which, although quite well detailed, was a little heavy handed. The aircraft modelled was found abandoned in Southern Germany at the end of the war. It had originally been built as an A-8 but converted, possibly after battle damage, as an F-8. A couple of photographs exist of the machine with no canopy and, since I prefer the old style canopy and taut antenna wire, I used artistic license and surmised that the canopy was an old style one scavenged from another wreck. Markings were from EagleCals and the RLM 76/75/83 colours were courtesy of Gunge Mr aqueous hobby colour. As can be seen from the photographs, I didn't quite get the circular swirls quite right on the nose. Cheers Malcolm
-
Afternoon all, My second effort for the GB will be Revell's 1/48 Stearman PT-17 Kaydet: The contents and the colour plan for my intended victim As you can see the contents are moulded in bright yellow shiny plastic and although there is some very nice fine detail currently its almost impossible to see: I can't wait to get some boring grey primer on this baby! Cheers, Mark.
-
Here’s my first entry... Looks like a neat little kit. Hope to make start later. Dave
-
At my son's request my next build is Revell's 1:72 Avro Lancaster B.Mk.III. I have just finished building a Shackleton, so it is going to be great comparing the kit's and aircraft. The iconic Lancaster bomber has rapidly become one of my favourite military aircraft, whether it is watching the BBMF displaying or visiting the haunting Mk. I on display in London, the sheer presence of the aircraft is thrilling. Anyway, back to the build! I am planning to build Lancaster B.MK.III, No.100 Squadron from RAF Elsham Wolds, 1945, with landing gear up. It will be a straight from the box build with the exception of Vallejo acrylic in place of Revell and a home made display stand. The box includes, detailed instructions, a set of decals and small clear sprue. There are also 6 white/grey sprues with little to no flash and a nice amount of detailing. Time for the fun to begin.
- 74 replies
-
- 17
-
-
Boeing B17F Memphis Belle Revell 1:72 The B17 Flying Fortress probably doesn't need an introduction, but it's professional to write one so I will ! It's birth originated from a competition with Douglas and Martin to supply a contract for 200 bombers to the USAAF in the 1930's. This was in part due to it's 4 engines configuration that gave benefits such as load capability and engine out performance, which as we know, would prove to be life saving in it's combat career. Early B17's had the slim rear fuselage with no rear turret, however, combat experience with the bomber proved a lack of effectiveness in the daylight offensive role, particularly with the RAF who used it early on in the war, so further development was required to learn from this experience. The E model introduced the more familiar shape with a much larger tail and rear gun position, new flush transparencies and more powerful engines to cope with the extra weight that evolution had brought upon it. From this was born the F model that was modified to increase combat range and payload. The B17 numerically was mostly employed over Europe by US Eighth Airforce in daylight attacks into Germany. It was realised here that the F model had inadequate firepower in the nose area as the German interceptors made good use of head on attacks. This experience brought about the infamous G model with a chin turret to fight off such attacks. The B17 was liked by it's crews due to the amount of punishment it could receive yet still get home. There's many images available showing B17's flying and back at home with huge sections and engines missing as a result of combat. The later variants had no less that 13 guns to fight off enemy attacks. Whilst it can be compared to the Lancaster, in many ways, it was very different. It was more heavily armed, but carried a much lighter bomb load due to it's primary role in daylight bombing unlike the Lancaster fighting it's war mostly at night. The kit The first thing you will notice is the huge box that the kit comes in with it's striking image of the infamous Memphis Belle across the front. Inside there are 8 light grey frets and a huge clear fret wrapped in 4 plastic bags. The fuselage and wing detailing utilises recessed panel lines. On first impressions these look to be a little heavy, but with paint on, they will tone done somewhat. I'm saying this based on completed models of the earlier G models that I've seen. One of the strong points of the modern Revell kits is the vast amount of interior detail you get and this one is no exception. Right through the fuselage, each compartment is nicely populated, the nose, cockpit, bomb bay, radio compartment, waste gun area and tail all have detail candy that not only adds interest, but increases the rigidity of the kit when it's glued together. The amount of detail is reflected in the instruction booklet that has no less than 86 steps to assemble the 235 parts together ! The B17 bristles with guns and turrets, so it's important that these areas are well represented. Revell has succeeded admirably with this. The guns are nicely detailed with dimpled barrels and the turrets all have plenty of detail in them. The wing spar is incorporated into the bomb bay assembly creating a rigid centre box on which to assemble the fuselage around. This is an area in which Revell have been clever in recent years in that you can leave the wings off until the finishing stages of your build then literally just slide them on to the spars at the last stage without having to worry about filler to blend the roots in. Another feature that stands out to me is the detail in the wheel bays. Fuel tanks and super charger ducting is visible. With the flaps dropped, the bomb bay open and the detailed wheel bays, it's almost a shame to stand the finished aircraft the right way up ! The only fault I've come across on my review is that one of the upper wing halves is warped. I don't think it will be a problem when mated with it's opposing half, and I'm not sure if it's a one off. There was a small amount of black residue on the kit that looks like oil or mould release agent, so whether there was an issue in manufacture on this kit I don't know. The Transparencies On the whole, this fret is impressive, but with one big let down that I'll come to shortly. The fret appears to be a universal one in that it provides parts for both the F and G models. Most of the parts are crisply moulded and will allow that glorious detail to be on show where they reside behind windows. The F model didn't have protruding cheek windows like the G did, instead it had flush windows, which in modelling terms are better because they will show off the interior detail better. What I like about the Revell kit in the cheek windows is that they are part of a larger clear piece so that you can fit them without the risk of spoiling them with glue, another well thought out feature. The ventral gun position in front of the tail can be modelled open or closed as can the waist gun windows. What I have noticed is that on the G model, the upper turret appears to sit too high to which there has been debate. Looking at the picture of the assembled model on the instructions here, this doesn't seem to be the case with the turret used on the F model. Indeed, the turret dome isn't as high as the G turret and the proportions look 'right'. Now for my only complaint on the clear components. The nose blister is far too thick. Having built the old Hasegawa one years ago which is excellent in this area, I feel the Revell part is very poor and I'm not quite sure why they let this happen. The nose blister is a prominent feature of the B17 and if fitted as standard, you will get a thick luminous ring around where it mates against the nose (as per their box photo). The only two options I can see here is fit an after market part if available or paint the rear surface to eliminate the luminous glow before fitting (or live with it !). The Decals Whilst the Memphis Belle is historically an important and infamous aeroplane and hence a great scheme to use for Revells marketing, it's quite a dull option as far as building a model is concerned unless you really want to build the Memphis Belle. This is where I'm really pleased with what Revell have done. They've provided a fantastic second option - The Shamrock Special. What I like about this is that it has the USAAF insignia's with the red surrounds and nose art, not just on both sides of the nose, but on the tail as well. I'll be building this option ! The decal sheet is in excellent register and the colours vibrantly printed. If you like your builds to have the stencils added, Revell have catered for you very nicely. Conclusion On the whole, this is a great kit. Revell have continued their trend of applying great engineering to a highly detailed model to provide excellent value for money. The interior is amazing, the open / closed options on gun positions, bomb bay and flaps is well designed and in general, the transparencies allow for the excellent interior to be shown off. Apart from the wing warp, the only let down in my opinion is the thick nose blister, however I've no doubt that this will be a success for Revell. Revell model kits are available from all good toy and model retailers. For further information visit
-
So I have now finished the Golf and I must admit I am pretty pleased how it turned out, its not perfect but after an 11 year break it was a great little model to get stuck into.
-
My latest build, the USS Voyager, it’s the Revell kit. I didn’t use a lighting kit, but some spare LEDs I had hanging around. What do you all think? And without the lights on.....
-
Eurofighter Typhoon T3 1:48 Revell Evening all, I finished this build over Christmas, but with the glorious weather we've been having this past week it felt like a good excuse to break out the camera. I haven't really got much to say about this build; despite the excess amount of flash and variations in panel line thickness, it builds upon into a good representation of a Typhoon. Paints, as usual, are Vallejo and the APU exhaust was done by spraying UMP dark dirt. -Thanks for having a look, see you next time! Best wishes, Sam
-
Some photos of my Helldiver diorama, pulling out of a dive, under fire, hydraulics lagging, fleeing for cover and altitude. This is the beautiful Revell 1:48 kit which I enjoyed very much. I left off the gunners (admittedly very sensible) armour plate in order to give more of a gung-ho feeling to the scene. Thanks for looking! CF
- 19 replies
-
- 40
-
-
So here is my first post in the WIP Section, this is my 2nd model after an 11 year break and I must admit I am really enjoying the build. Primed with Automotive Primer from a Rattle Can: Then spray painted in a Mercedes Pearlescent Black from a rattle can: Engine all done: Underside all weathered, might have gone a bit overboard with the dry brushing: Decals all done on the seats:
-
Hi folk's I,ve only ever built one airliner since getting my second wind in modelling Lufthansa's Airbus from Revell back in 2014.I picked up this kit as a next project back then but never got it started so here is a perfect chance to build what is in my opinion a beautiful if ill fated aircraft,Revell re-boxed ICM's kit which is nicely molded in white slightly grainy plastic with no flash.Now this one will be slow I decided on on morning a week(my rationed time at the bench) to complete the build so I can enjoy the rest in the GB and soak up the inspiration and techniques.The Box Art. Oh and said Airbus.
- 78 replies
-
- 11
-
-
SE5a Revell (Eduard) 1/48 Pheon decals I have never made a biplane but have wanted to model a Wingnut Wings. So I decided to model a cheaper kit and see what results I could reach? I am partially colour blind so used the AK Interactive paint kits, Clear Doped Linen, 3 colours and WW1 RFC & RNAS 4 colours. Rigging line : EZ line (fine) and some V.Fine Uschi van Roten I think Trnbuckles Albion Alloys TB2 1/32 scale but cut in half. Unlike most of my previous kits this was a joy. It’s the first time trying to make wood grain and while it is a bit clumsy the new technique tamya paint, winsor and Newton oils tamya clear orange. The results were satisfactory. Airbrushing: AK Interactive paints thinned with Lifecolor thinners worked ok Mini disaster as the softening decal solution got under the Humbrol varnish (perhaps the layer was too thin) and messed up the large T on upper wing, After remedial airbrushing and varnish I used another “T” from the Pheon range although its not quite the right font – devil rides when needs must. Placing the wings 4 may be 5 attempts and in the end removed most of the lugs from the lugs superglued in 0.3mm dia brass wire, drilled holes in the wings and fuselage. When the fine diameter wires were in all the holes it gave me a semi rigid structure that I could move around and line things up…. I am a retired dentist so used silicone impression material to make an impression of the lower surface upper wing and cast it in quick etting resin – materials I was used to handling when I had a day job. I used this as a jig to glue the struts to the lower wing and then replaced this when things were set with the upper wing and dropped runny superglue through the holes in the upper wing Then over a week set about the rigging. Wingnut Wings SE5a gave rigging instructions were used in the main because I couldn’t find super detail instructions as to where the locating places were. My method of rigging I don’t know whether its novel or a mix of other modellors. Superglue one end, run the turn buckles on, stretch slightly and super glue the other end, then put the turn buckles in the correct positions and superglue them in place. Painting the rigging – didn’t know whether to or not – so as this was an experimental model for me decided to use Mr Metal Color Aluminum. If nothing else it filled in the slight unsightly gap in the turnbuckle brass tube and with a bit of artistic license and a kind eye of the beholder it might look like air foil rigging wires…. Pleased Yes! Beats a nonsensical F40 I finished recently. Any comments good or otherwise gratefully received.
-
Hi all, my second ju 88 build of the year, in the markings of lt. Udo Cordes. 6 (Eis) kg3 Poltava may 1943. By April 1943 he had distroyed 63 locos and by May 1943 he was also credited with 8 bridges, 19 tanks, 32 artillery pieces, 96 trucks and 9 complete trains making him one of kg3s most successful pilots. He was killed with his crew on 15 May 1943.while flying ju 88 c-6 w nr 360366. By this time he had destroyed 81 locos and 2 aircraft. The kit is revell's ju 88 c-6 kit no 04856 Quick boost mg 81's & pitot tube Resin wheels Scatch built radio altimeter aerials Streched sprue radio aerials Aims decals. (as most references state codes are 5k+rt. I changed the 5k+et codes on the aims sheet) All paint are extacolor rlm 02, 66, 65, 70, 71, (humbrol 154 for the rlm 04 theater markings) Weathering was by pastels and mrp exhaust soot. Thank for looking, as always all comments are welcomed. Nick
-
Hello all. I have a number of Grumman products in the stash and had originally decided to enter this GB with a 1/72 Hasegawa F-14 in Iranian colours. However, being a bit thick, I sold that kit a few months ago. It was replaced in a bit of a hurry by Revell's 1/144 A model in the VX-4 Black Bunny boxing, which I will build here as a line bird in classic grey and white. The black plastic will save me a coat of paint for black basing... In addition, I'll be making an attempt at the D 'Super Tomcat' version of the kit, probably the aircraft with the low viz shark mouth on it. A story attaches to this - I was looking after a friend's model shop earlier in the week and things were quiet. Idle hands in a hobby shop... Hmm... There was a D on the shelf, and all the tools I could need; what else could be the result? Of course, as soon as I clipped the first bits off the sprue and started fitting them together the door opened and it got busy, but I now own another small Tomcat, (yes, I paid for it) so I'll build both of them here. No photos yet (haven't added them to my Flickr account), but I'll get them up and on show ASAP. Being simple kits I should be able to complete them in the allotted time...
-
Deciding somebody needed to defend Britain against the Luft-46 menace, I present my take on the Revell Vampire: Untitled by Jon Gwinnett, on Flickr Untitled by Jon Gwinnett, on Flickr Untitled by Jon Gwinnett, on Flickr Untitled by Jon Gwinnett, on Flickr Untitled by Jon Gwinnett, on Flickr Untitled by Jon Gwinnett, on Flickr
-
Hello! Here are a pair of Revell 1:72 Messerschmitt Bf 109G-10s which I finished two years ago. This kit turned out to be a disappointment. I had two boxings, one from the very first issue and one from later on. The first already had some flash and second was worse, both needing plenty of cleaning up. Fit of parts wasn't great either. Besides, the kit has some serious flaws. The modifications/additions I made on each kit were as follows: - The propeller was replaced by a Quickboost resin replacement part with the correct shape. - The kit comes with a short G-6-type tailwheel which is correct for early G-10s but not for both kits I was doing. Replaced by a Quickboost replacement long tailwheel. - The supercharger intake comes moulded solid and is somewhat oversized. Replaced by Quickboost replacement part. I had to make a new baseplate. - The head armour comes moulded solid. Made a new one with a partial clear section. - Added battery box to rear cockpit. - The dotted line on the engine covers are wrong and I used filler and paint to cover them - The big flaw is in the undercarriage bays. The kit has the wheel wells ending at the wing root when they should go further into the fuselage and this causes the undercarriage legs to be too far outboard. I managed to extend them. This required plenty of work which affected the wing root join. - I modified the wheel axles so that the wheels would be slanted outwards instead of sitting in the vertical position. When I first showed photos of these kits in G+, someone pointed out that I had missed the canvas covers of the insides of the wheel wells since I had left them in a metallic unpainted finish typical of late-war Bf 109s. Oh well, next time! Both kits were painted and varnished by brush. Firstly: 5/2105, ZNDH (Air Force of the Independent State of Croatia), Klagenfurt, Austria, 1945. Decals from a Blue Rider sheet. Of the two this is the one I am happiest about. The cockpit parts before assembly. The wheel wells. The top is the unmodified kit part and below my correction. Modified head armour. Added battery box. Quickboost supercharger intake with new baseplate. Secondly: White 4, II/JG7, Luftwaffe, northern Germany, at the end of 1944. This was one of the kit's options. Thanks for looking and, as always, all comments are welcome Miguel
- 15 replies
-
- 27
-
-
- Bf 109G-10
- 1:72
- (and 1 more)
-
Ready for inspection is my 1:72 Avro Lancaster Bomber Mk.III, by Revell. It is a straight from the box build, the only change being that I used Vallejo acrylics throughout, and have build my own stand so the aircraft can be displayed in flight. The kit went together well, the sprues were nice and clean and for once I managed to join the fuselage halves without breaking into an angry sweat. So I would have to say this has been one of my favourite kits to build, and I hope I have done an icon justice. Thanks.
- 12 replies
-
- 37
-
-
This is my take on the Revell 1/50 scale Viking Ship. I know next to nothing about Norse Long Ships, but the model looks a lot to me like the 9th Century Gokstad ship displayed at the Viking Ship Museum in Oslo, Norway. The kit matches that graceful design pretty closely, right down to the hand made look of the clinker-constructed hull planks. After the quick hull assembly was a lot of less-than-exciting parts clean up: 64 shields, 32 oars, a two-part mast and numerous other assorted bits... but this really is a nicely designed kit. The dragon head, for example, is apparently inspired by a real one from the 5th Century – pretty cool: Plus, Revell’s molded-in wood grain detail is phenomenal! I gave the “wood” parts a Tamiya XF-59 Desert Yellow acrylic base coat, and the only color is the Tamiya XF-63 German Grey for the “iron” bits – shield bosses, figurehead mounts, and mast hardware. I let the paint cure for a couple of days, and then did a streaky wash with Grumbacher Raw Umber artist's oil to bring out the wood grain. It was very straightforward project, and with nearly everything the same wood color things went pretty fast. Except for the rolled facial tissue sail, everything on the model was right out of the box – a great relaxation build!
-
Here's my GR-1A that I made from Revell's IDS kit. After market was Eduard PE, Seans wing seals and RAF pylons, Flightpath tanks and pods set and Xtradecal for both markings and stencils. My subject was ZA373 H from 2 squadron. Here's one or two of the shots I was using for reference... And after 9 months of grabbing whatever time I could at the weekends and evenings, here's the result... It's not perfect, but it's better than it would've been thanks to the contributions of some BMers who pointed out some noob mistakes on the WIP thread, so big thanks to all of them. Thanks for looking.
- 15 replies
-
- 31
-
-
As 2018 draws to a close, I thought I'd give you the 'heads-up' for the first aircraft build of 2019. Originally, I bought this kit with the intention of building an FB.5 and got a decal set for it. Me being the 'numpty, I had completely forgotten that I already had one two FB.5 kits in the stash, so this will be an OOB effort with some PE thrown in. The box. The PE. I'm not a nuts n' bolts man but is there anything drastically wrong with this kit as an F.3? Stuart
- 64 replies
-
- 10
-
-
Evening all, here is my recently completed F.3 Vampire from the Revell box. From the off, I decided that this would be built OOB and would be destined for the ceiling and the only addition to the kit was a pilot who got drafted from a nearby F-86. The kit went together well enough but modellers should be aware that the wing/ fuselage join needs some attention to mate correctly. Once mating had been achieved, the wing roots and intake fillets needed a PPP/ sanding routine. Once built, the 'bat' was primed with Halford's primer, coated with Tamiya Silver AS-12 and coated with Klear prior to decals. Finished with the markings of 601 Sqn, Royal Aux Air Force, North Weald, England, July '52. WiP here: Stuart
- 20 replies
-
- 41
-
-
Hello All, About a week and we can start! My contribution is based on the Revells 1/48 C-47 Skytrain "Berlin Airlift" (box 04518). I think it will be a British green c/s but nothing is decide yet. The boxview: The sprues The clearparts And finally the decalsheet Everyone good luck and happy buildings 🙂 Arno
- 1 reply
-
- 8
-
-
- Berlin Airlift
- Revell
- (and 1 more)
-
 I've been dithering about my options, and finally settled for this ... A meteorological reconnaissance B-17 Mk II of 251 Squadron, Coastal Command based in Reykjavík, Iceland.
- 34 replies
-
- 9
-
-
- Revell
- Academy Minicraft
- (and 1 more)