Search the Community
Showing results for tags 'Kitty Hawk'.
-
UH-1Y "Venom" 1:48 Kitty Hawk The Bell UH-1 Iroquois or "Huey" to the majority of people is probably one of the most recognisable Helicopters in the world due to the exposure it had from the Vietnam war. Developed by Bell Helicopters back in 1952 to a US Army requirement for a utility and medical evacuation Helicopter, it first flew in 1956. The Huey was the first turbine powered helicopter to enter production for the US military in 1961. At the time the US Army designation was HU-1, which would later be changed to UH-1. Hu-1 giving rise to the nickname which has stuck ever since of "Huey". The US Marine Corps seems to stick to a "if its not broke, don't fix it!" approach to procurement for a lot of items. They were a leading proponent of the Second Generation Harrier. They did not follow the US Army in replacing their Cobra Gunships with Apaches; they stuck with a modernised twin engine Cobra, the AH-1J, to be followed by the AH-1Q SuperCobra and now even the AH-1Z Viper. They also have kept the venerable UH-1 in the form of the twin engine UH-1N. In 1996 the USMC began a programme with Bell to develop the UH-1Y. The UH-1Y or "Venom" would feature a bigger cabin, four blade main rotor and more powerful engines. Initially the UH-1Y was to be re-built UN-1Ns, however in 2005 the airframe was approved for new production. The Y model aircraft would feature a leap forward from the N which had grown a bit bloated in upgrades over the years. The new helos feature an all glass digital cockpit with a modern FLIR. The uprated engines (GE T700) and four blade rotor will return the UH-1Y to the utility role again. The new rotor blades have been designed to withstand up to 23mm rounds. Overall improvements give the new helicopter a 125% increase in payload, with a 50% greater range. A higher cruising speed and less vibration will also help with crew fatigue. The first UH-1Ys were delivered in 2008 with the USMC scheduled to receive 160 by 2016 to replace all of their N models. The new Hueys have so far been combat proven in Iraq and Afghanistan where they typically fly in conjunction with the SuberCobra. A deadly Bell team if you happen to be on the wrong side of them! The Kit The kit arrives in a well packed box. Like other Kitty Hawk kits I have seen some of the sprues for this one are bent over while hot This runs the risk of damaging parts when the modeller goes to separate them. A box protects the clear sprue, and there is a small photo-etch sheet. Construction starts with the main cabin. The pilots centre console is added, the instruments on this are provided as decals. The two front seats build up from six parts each. The armoured sides are handed so take care to use the right (or left!) one. The centre housing in the cabin is the next part to be constructed. Seven seats are then made up to attached to the centre. Following this two equipment racks are constructed which fit behind the pilots. Each of these has a seat which attaches to the rear. Construction then moves to the cabin roof. The overhead instrument console is added. Once in place the cabin roof is joined to the main cabin part by a rear bulkhead and two side parts. Next the engines are constructed and placed into 5 part engine bays (one for each side). Once the bays are complete they are added to the airframe side parts. Once this step is complete the side parts are closed up around the main cabin. The lower nose of the helo is the next stage of construction. The windows are added to the floor part and then the upper & lower nose parts can be joined. There are a couple of photo etched grills to add to the nose and the aerials (though I suspect most modellers will leave these until last). Once the nose is complete the modeller can move onto the transmission housing. This is of left & right construction with a circular top part. Various photo-etch and plastic parts add grills and intakes to this area. Construction then moves back to the main part of the helo. The area on top of the cabin with the intakes is added in front of the engine housings. The main cabin doors have their glazing added before going onto the main body (though again I suspect these will be left until the end). The nose is then added, along with the main windscreen and the top transmission housing. The engine exhausts complete with photo-etch grills are completed and added to the rear of the engine section. The Engine covers can then be added at this point. They can be left off to expose the engines as needed by the modeller. The front cabin doors are then added along with aerials, windscreen wipers and cable cutters. We then move to the underside of the main cabin. The landing skids are added along with more aerials and airframe fittings, not forgetting the FLIR turret. This then completes the main body. The tail boom sections (left & right) are joined together. The tail planes, tail rotor housing, and the tail rotor are then added. The last touches are to add the tail assembly to the main body, and complete the main rotor assembly. The main rotors attach with upper and lower parts to a central core so this should provide a strong join. The final parts to be added are weapons. A weapons station is provided for each side. Forward firing rocket pods can be used along with door guns. A minigun or .50 cal machine gun can be used on each side. Clear Parts It is welcome that Kitty Hawk put all the clear parts in there own box to protect them. Decals A main decal sheet gives most of the four decal options. A smaller sheet giver you the instruments. 168402 No.6 HMLA-169 USMC. 169406 HMLA-167 Warriors USMC. 8088 US Marine Corps. 168427 HMLA-269 USMC. The decals are well printed, in register and colour dense. It is frustrating that there is virtually no information on the decal options provided. It is noted that the decals for 168402 were selected early on in the development of the kit. Unfortunately in January 2015 this Helicopter crashed in a training accident. Both crew members Maj Elizabeth R Kealy (Peaches), and Capt Adam C Satterfield (Chief) were killed in this accident. Kitty Hawk have left these markings in the kit, and dedicated the kit to all who have paid the ultimate sacrifice. Conclusion This is a great new tool kit of an important helicopter for the USMC and the latest generation of the "Huey". Helicopter modellers have been waiting for new tool kits like this and they wont be disappointed. Highly recommended. Review sample courtesy of and available soon from major hobby shops
-
F9F-8 & F9F8P Cougar 1:48 Kitty Hawk The Grumman Cougar was a development of the companies F9F Panther. In most basic terms the Cougar had a swept wing to the Panther's straight wing. As the US Navy considered the Cougar to be a development of the Panther both had the same F9F designation with cougars starting at F9F-6. The F9F-8 was to be the final fighter version of the Cougar. It had an 8" stretch in the fuselage and the wing was modified to have a greater area and chord. The wing improvements would give better low speed handling, a higher angle of attack, and increased fuel capacity. Other improvements would be ability to carry the new Sidewinder missile, and some were even made nuclear capable aircraft. A total of 601 were delivered to the US Navy. In addition to the fighter versions the F9F-8 would be produced as a reconnaissance aircraft, this would be designated the F9F-8P. For these aircraft the nose would be lengthened by 12 inches to accommodate the camera equipment. All guns, the radar system and armament control equipment was deleted, and there was some re-arrangement of the panels in the cockpit to accommodate this, and the addition of camera controls. Additional ducting was provided to channel hot air from the engine to the camera bays. A total of 110 would be produced. The Kit The kit arrives in a fair sized box, inside which we find 4 sprues of grey plastic, two clear sprues (in their own box), a small photo-etched fret; and two sheets of decals. The four sprues of grey plastic are all bent double, so if you separate them you have eight. I wish they would not do this as there is potential for damage when they do it, and when you have to separate them. The details on parts are good, with engraved panel line detail. There is some flash on the sprues, but none on the parts. The sprues are quite large, and the sprue gates heaver than on other kits. Care will be needed removing especially the smaller parts. Construction starts as with most aircraft kits in the cockpit. The first area of business is to make up the ejection seat. The kit provides both the Grumman seat and the Martin Baker Seat. Now there were two different types of headrest for the Grumman seat, and the MB seat used in the Cougar. There is no mention in the instructions which one to use, so the modeller will have to consult their references. Once the seat is made up it can be installed in the cockpit tub along with the control column and rudder pedals. The instrument panel and front bulkhead are also installed at this point. The instruments on the panel and side consoles are supplied as decals, or as photo etch parts. Two different decals are provided for the instrument panel however the instructions make no note of which one to use for which option. The rear decking, sidewalls and instrument shield are added to finish the cockpit off. Construction then moves onto the front wheel well. This is built up from seven parts and the front landing gear is added (thought this will probably be left till later). The front gear is a two part leg with a conventional left/right tyre to build up. Once the wheel well is complete, this together with the cockpit can be added to the front fuselage and this closed up. The instructions then have you adding the front gear doors and airbrakes to this complete front section, though I suspect most modellers will leave these parts until much later on. The next section deals with the construction of the fighter version nose. If making the photo-reconnaissance version then please skip to the next section. A very good rendition of the fighter nose is in the kit. The four 20mm cannon along with the ammunition containers are all provided in the kit. A lot of this detail will not actually be seen. The nose section can then be closed up around the cannon section and the nose mounted refuelling probe added. If the modeller is going to make the photo-reconnaissance version then the next steps deal with making the camera bays. If making the fighter version then you have already made the fighter nose! The model comes with a quite comprehensive camera fit. The different cameras and equipment racks are built up and added to the camera nose section. The camera nose refuelling probe is also added. A lot more of the camera detail will be seen through the extensive glazing in the kit. The appropriate nose can then be added to the completed front fuselage, and construction can start on the main body of the aircraft. The lower main body is a one art section ith left and right upper parts. The main wheel wells need to be built up and added to the lower section along with the arrestor hook. Parts are then added to the ends of the section where the wings join. These will the insides of the fuselage if the modeller wishes to have the wings folded. Even if the wings are straight then they need to be added as they stiffen the structure. The left & right upper parts can then be added. Construction then moves to the underside of the main body with the addition of the main landing gear. This is a one part main gear leg with a one part main wheel. These are added with a retraction strut. A tail bumper is also added at this point. The construction now moves to the rear fuselage section.This is of conventional left & right construction. The three part exhaust needs to be made and installed before you can close the two halves up. The two part rudder and the tail planes are then added at this point. Once complete the the tail section is added to the complete main body. Once done it's time to turn your attention to the wings. These again are of a conventional upper & lower construction. There is a detailed end plate you need to add which like the main body part not only adds detail if you wish to fold the wings, but also provides some structural properties if you do not. Separate control surfaces are provided for the wings, and a photo-etched upper slat is provided. Final construction steps are to add the wings, in either the folded or open position (note if closing them then there is a small tab which must be removed from the main body). Photo etch wing fences are also added at this point. The forward fuselage part can then be added to the rest of the main body. The canopy is added along with under wing pylons. Fuel tanks, early sidewinders, and rocket pods are available as underwing stores as needed by the modeller. Canopy The kit comes with two canopy sprues. One for the fighter version, and one for the reconnaissance version. Both main canopies look the same so you effectively have a spare. The parts are of excellent quality, clear and distortion free. Decals A large and a small sheet of decals are included with the kit. Markings are provided for 3 fighter versions, and two photo-recon versions. F9F-8 Of VF-61. Grey over White aircraft with large yellow side markings. F9F-8 of VF-121. Overall Gloss Sea Blue aircraft with red markings. F9F-9 of The US Navy Blue Angels Display Team. F9F8P of VFP-61. Grey over White aircraft with some red detailing F9F8P of VFP-61. Overall white aircraft with large high visibility red areas. The decals are well printed, with no register issues and look colour dense. There are no markings for the intake lip areas including the thin white strip for the Overall white aircraft which will be difficult to mask. The main walk area on the wing is provided for only two of the decal options which seems a bit strange. Also the Yellow for the Blue Angles markings looks a little off. Conclusion It is great to see a new tool Cougar released, something some of us US Navy fans have been waiting for. It is also good news that this can be built as either the fighter or reconnaissance version. The instructions are lacking in a few places, however this does not detract from the kit. Recommended. Review sample courtesy of and available soon from major hobby shops
-
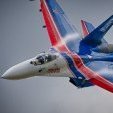
The boxart for this puppy is out, and the kit shouldn't be far behind Not sure what's going on with that weird cross-hatched shadow from the background Bronco, but it's not really of any consequence
-
Finally got this mess finished, a mostly OOB build. Hope you liked it. The kit has good quality material but with major fitting and design issues. It is a step backward from their F-35B release. Expect lots of sanding and filling. Notice how the canopy does not fit . But meh I'm done with it.
-
Hi Has anyone seen the KittyHawk Kaman Seasprite SH2-F? Is it a re pop of the old Matchbox one or a new kit? I have the Matchbox one in the stash and it was good for its day but that was 20 years ago so I'm considering the Kitty Hawk one if its a new tool. Cheers Colin W
-
 After the SA.365F/AS.565SA Dauphin II kit - ref.KH80108 http://www.britmodeller.com/forums/index.php?/topic/234952105-aerospatiale-sa365565-dauphin-ii-148-kittyhawk/- Kitty Hawk is to release the Chinese version from this helicopter, the Harbin Z-9B/C/W "Haitun" - ref. KH80108 (same ref. number as 1st boxing!) Source: https://www.facebook.com/permalink.php?story_fbid=909570175761936&id=736521713066784 V.P.
 -
F-86D Sabre Dog 1:32 Kitty Hawk The F-86D Sabre, or "Sabre Dog" was developed by North American Aviation from the highly successful F-86 Sabre. Surprisingly the F-86D only has a 25% commonality in parts with the "Sabre". Along with other projects at the time such as the F-84F from the F-84E it was easier to get funding for a development of an "existing" aircraft as opposed to a new design! The F-86D was to dispense with guns as its armament and it was designed around the then new 2.75 inch Folding-Fin Aerial Rocket (FFAR) or "mighty mouse" as it was known. These would be housed in a ventral tray which would deploy under the aircraft for firing. The F-86D would feature a nose mounted AN/APG-36 all weather radar in the nose which would force the engine air intake to be relocated under the nose. Compare to the original Sabre the F-86 would be longer and wider. A clamshell canopy was introduced in place of the rearwards sliding canopy of other models. Thrust was provided by a General Electric J47-GE-17 which featured afterburning, this would later be replaced by an uprated J-47GE-33. A total of 2504 D models would be built. The design would be exported with the Mighty Mouse replaced by four 20mm cannons under the F-86K designation. The D model design would later be upgraded with new electronics, better wings (in the form of extended wingtips & leading edges), with an uprated engine. This would be designated the F-86L. In all the USAF, Japanese Self Defence Forces, Royal Danish Air Force, Hellenic (Greek) Air Force, Philippine Air Force, Republic Of South Korea, Republic of China (Taiwan), Turkish Air Force, and The Yugoslav Air Force would use the F-86D. The Kit The Kitty Hawk F-86D is the first time this iconic aircraft has been kitted in 1:32 scale. The kit arrives in a smaller box than you would expect, however it is crammed full of parts. You get seven sprues of light grey parts, a clear sprue (thoughtfully packed in its own card box for protections), a small PE fret and 2 sheets of decals. Shockingly enough the construction starts with the cockpit. The first item to be made up is the ejection seat. This is a complex affair with a total of 11 parts being used. The seat looks to be a good representation of the unique seat made for the Dog. Following construction of the seat, the electronics area behind it is assembled and attached to the main cockpit tub. Decals are provided for the panels in the cockpit, though the modeller can choose to paint them if they wish. Following this the control column and rudder pedals are installed. The next step is to complete the front landing gear and its wheel well. This is formed on the underside of the engine intake trunking. The wheel retraction gear forms part of the walls of the well and these are glued to the underside of the trunking. The well for the mighty mouse rocket tray which sits behind the wheel well is then constructed along with the rear section of the intake trunking. The two sections of trucking with their sub assemblies attached are then joined up. Construction then moved onto the engine. Even though most of it will not be seen a full engine is provided in the kit. The engine is a model in its own right. The forward inlet cone and fan are constructed. The individual burner cans (8 of them) are constructed and then added to the engine section. The rear fan section can then be constructed. The front engine system is then attached to the intake trunking and the completed cockpit from earlier attached to the top of the trunking. As mentioned a lot of the engine will not be visible. It could be left out as model in its own right, however it seems to provide a lot of structure for the supporting fuselage, and if left out the modeller would need an intake blank and rear blank as well. Next the instrument panel is built up. Again decal is supplied if the modeller does not wish to paint this area. The instrument panel is attached to the front fuselage sections which are then closed around the completed engine/trunking section. A rear bulkhead mounts the engine section inside the fuselage, while the cockpit mounts the front section. Next in the construction sequence is the building of the main wheel wells. These are 5 parts each, and once built they attach to centre section of the underside for the main fuselage section. This section and a front underside section are then attached to the previously constructed main fuselage section. The next item to be constructed is the mighty mouse rocket tray. This can be shown in the deployed or retracted position, though it would be a shame to hide the detail in what was the main armament of the Sabre Dog. If the modeller wants to display the model with the nose radome open than a radar scanner is provided for this area, and needs to be built next. The rear engine section can then be added to the now nearly complete front fuselage section. The rear fuselage sections 9left & right) then join around the engine section. Construction then moves onto the wings, tail-planes, and vertical tail. These are of a convention upper/lower for each side, with left and right for the tail. The main wings feature separate flaps, and the all important leading edge slats. At this time the main landing gear units are also constructed. These items can then be added to the fuselage. Finishing touches are adding the landing gear, pilot entry steps, and rear mounted airbrakes. The radio gear shelf is added into the large canopy and canopy rails added also. Drop tanks are provided, along with rails for sidewinders, for those options which were so armed. Canopy The large clamshell canopy is one of the distinguishing features of the F-86D and Kitty Hawk have done it proud. For a large clear part it is clear and free from distortion or moulding problems. As mentioned a nice touch is that the clear sprue is packaged in its own separate box. Decals Decals are provided for 6 examples. 82nd Fighter Interceptor Squadron, USAF. 325th Fighter Interceptor Squadron, USAF - The "Sabre Knights" Aerobatic team. 181st Fighter Interceptor Squadron, Texas Air National Guard. Japanese Self Defence Forces Republic Of South Korea Air Force Republic Of China Air Force There is no manufacture listed for the decals. They are matt, well printed, in register and look colour dense. Kitty Hawk give the modeller a split decal for the tail/rudder but surprisingly don't give a multi-part decal for the national insignia which go over the air brakes. All of the decal options feature the National Insignia over the airbrake. This will be difficult but manageable to cut the decal out for this, however a split decal would have been appreciated. Similarly the USAF and US Insignia for the wings are not cut where they overlap onto the leading edge slats, though this will be a lot easier to fix. Conclusion Many of us have been waiting for a Sabre Dog to be made in 1:32 scale, and this kit does not disappoint. Highly Recommended. Review sample courtesy of and available soon from major hobby shops
-
Kitty Hawk is to release a 1/32nd Vought OS2U Kingfisher kit - ref.KH32016 Now 1/32nd and not 1/48th as initially announced. Source: https://www.facebook.com/736521713066784/photos/a.736556396396649.1073741827.736521713066784/900453140006973/?type=1&theater V.P.
- 38 replies
-
- 1
-

-
- 1/48
- Kingfisher
- (and 3 more)
-
Hi This is my recently completed Kitty Hawk JAS 39C Gripen. Much can (and has) been said about this kit and it certainly has it's fair share of faults, specially if you want to make a Swedish example (as you don't get any useful Swedish markings for a JAS 39C, only a JAS 39A test airframe). The biggest fault (except the decals) i think is that you don't get any kind of intake trunking, so there is just two big holes into the model. So I scratch built full length intakes to the engine. The fit of my kit was generally rather good, the only major use of filler was required around the nose to fuselage mating area. But I have seen examples of this kit where the fuselage halves have been heavily warped. I wanted to make an aircraft that took part in the 2011 Libyan campaign (FL01), codename operation Karakal operating from the Italian base Sigonella. And as such I needed to arm my kit accordingly. But you don't get any of the required weaponry in the kit, so the AM to the rescue. The load out consist of the following: Maestro Models: SPK39 recce pod and IRIS-T (RB 98) missiles Eduard Brassin: AIM-120B Amraam (RB 99) MODEL-CZ: Fuel tanks Dr.Pepper Resin: AN/AAQ-28 LDP Litening Pod It also requires that a full set of countermeasures is loaded as well. The fuselage mounted chaff/flare dispensers (BOP/C) come from A.M.U.R.REAVER (Modern USAF Chaff/Flare Dispensers set) The dispensers (BOP/B) in the NATO pylons and the MML launchers with BOL where scratch built and cast in resin. I also threw a lot of additional resin and what not into this kit. Aires cockpit, wheel wells and exhaust Eduard pe detail set CMK corrected wing racks Master pitot tubes SAC landing gears The decals was a mix of the kit decals (stencils) and Two Bobs gripen decals. Painted with Lifecolor FS36373 and Modelmaster FS36173. Best regards Johan
- 19 replies
-
- 24
-
-
AH-1Z Viper 1:48 Kitty Hawk The original Bell Cobra from which this latest model was developed shares rotors, engine and transmission with its stable-mate the UH-1 Iroquois, or Huey as it is more colloquial known. It was also known as the HueyCobra in acknowledgement of that fact, but the early Cobras had only one engine. A later development added an extra engine, which became known as the SuperCobra, and it is this AH-1W that was the basis for the newly named Viper, which is sure to confuse people due to it also being the unofficial name for the F-16 Falcon. Sometimes known as the Zulu Cobra, it stemmed from a few failed attempts to reinvigorate the airframe in the 80s and 90s, but has become a more cost-conscious programme that has included the UH-1, offering compatibility of parts, a common tail boom, four-bladed rotor and engine package, and some of the controls, including software for the avionics. Unbelievably, there are over 80% of the same components in each type. At time of writing, deliveries are ongoing, scheduled to finish in 2019. The Kit Another complete new tooling from the Kitty Hawk stable, that holds plenty of promise for lovers of Marine Corps aircraft, and helo modellers in general. It arrives in one of KH's standard sized boxes, with a dramatic painting on the top, and examples of the included schemes on the sides. Lifting the lid reveals a relatively low sprue count for a KH release, but as the fuselage of this beast is streamlined and painfully skinny, that's not surprising. There are four sprues in the box in a grey styrene, plus a clear sprue in a separate card box within the package, showing that they have been listening to the moans about crushed clear parts, which don't react well to stress. There is also a small but useful fret of Photo-Etch (PE) brass, a ball-bearing for a nose-weight, and two decal sheets. The instruction booklet has colour & markings diagrams on the glossy cover, but there is a separate single-sided sheet of glossy paper with another rendition of one of the schemes, which seems to have been printed in a less bluey-grey than that in the booklet. It is a typical kit from the Kitty hawk stable, showing the same design cues and moulding style as their previous releases, including a few over-energetic ejector-pin hits, and one of those annoying folded-over sprues. All that aside, the detail looks good, and there has been a lot of sensible use of the PE to depict the numerous vents found on the outer skin of most modern helicopters. The ball-bearing nose weight is a considerate extra too, and should ensure your Viper stays level on its skids. There's a bit of flash here and there, but for the most part that is limited to the sprues, and of course with this being amongst the first pressing, it might have taken a wee while to get the mould pressures just right. Construction starts with the cockpit, which has a long basic tub to which all the parts are added, such as the crew seats, control sticks, instrument panels and crew armour panels. There are a couple of ejector pin marks on the backs of the seats, but as each one sits against a big chunk of equipment, they should go unseen. The instrumentation of the Z is of the modern glass MFD type, and is depicted by raised detail on each pilot's panel, with a decal placed over each on to ease painting. Even the sub-panels on the edge of the coaming have their own decals, as do the other areas of the panel, so there will be very little detail painting left to do. Seatbelts are decals too, but you can always lay those on some tape and cut them out to give them a little depth, or wait until Eduard get in there with their PE sets. Next up are the engines, which sit either side of the fuselage in semi-recessed pods. Detail is included for the engines and their bay, which should look very nice with the addition of some wiring made from lead wire. You get an engine front, engine body, as well as engine rears, which should be faintly visible through the intake/exhaust apertures. The engine bays are inserted from inside the fuselage halves, after which it can be closed up around the cockpit, and the first round of PE vents added into pre-cut recesses. The intakes are two-parts each, and fit on a peg into the side of the fuselage, while a myriad of small bumps and lumps are fitted around as part of the sensor suite. The cannon is fitted within a small turret under the nose, and this is made from a front and rear part, into which you place the ball-bearing nose weight. I'd recommend a bit of Milliput in there to prevent it from rattling during handling, or at least a bit of epoxy to keep it still. The barrels are individually moulded, as are the triangular supports and the base. Another part affixes to the ends of the barrels, and this has recessed muzzles moulded in. The FLIR turret that forms most of the nose is built from a two-part clear orb, which sits within a gimbal mount within the nose, and this is added to the front of the fuselage along with the gun turret and yet more sensor blisters. Two avionics bays are moulded open on the fuselage sides, and these are supplied with basic black boxes to put inside as well as separate fuselage panels if you want to leave them open. The same applies to the engines, which have two part panels (with PE vent) that can be installed opened or closed. Having the option of posing them open or closed is a step in the right direction, and shows that KH have been listening. At this point you can add the skids, which are made from separate struts and skis, the wings/weapons platforms, and their end caps. The exhausts are made up from a main section that includes both exhaust stubs (split horizontally), into which a couple more PE panels are dropped, and the single part exhausts with their heat dissipating baffles cap them off neatly, with no seams left visible inside the lip. The canopy is quite a large greenhouse, and is made up of five parts, all of which are nicely moulded with minimal distortion. The main section is the windscreen and canopy roof, which is moulded as one, and is fitted first to enclose the cockpit and provide the hinge-points for the pilots' doors. Each side of the canopy is in two parts, with the pilots exiting on opposite sides, so only one part on each side capable of hinging open. The front seat exits to the port, while the back seat goes out starboard side. The port rear and starboard forward panels are fixed, although I guess they can be jettisoned in the event of a landing that results in the aircraft lying on one side or the other. Next up is the rotor and tail boom, which you will probably see again on the UH-1 kit that is coming in due course. The new four-blade rotor improves lift and manoeuvrability, as well as doing away with some of the more complex aspects of traditional layouts. The rotor head is quite simple as a result, and assembles around a cross-shaped former, each arm of which has two holes in to mount the blades. This part has been badly stressed on ejection from the mould on my copy, but as it will be hidden this doesn't really matter. The blades fit to the top of the former, and the separate inner section on the underside seals the former within the assembly. A small actuator rod is added to the blades, which fits into a corresponding depression in the top of the top-cover over the drive-shaft, which can be left capable of rotation with careful gluing. If you want to be able to remove the blades for storage, just leave off the little retaining cap when you install it. Then the blades can just rest on the top of the housing, making them both easier to store, and more resilient to damage. The tail boom is split into two parts vertically, with a half bell-shaped housing at the fuselage end fixed later, avoiding an annoying seam-hiding exercise. More sensors, antennae and PE grilles are added, along with the rotor head for the tail-rotor, which is made up from two sets of paired blades, and a short axle, which fits into the rotor head. The rear stabilisers fit into holes in the sides of the fuselage, and a set of chaff and flare dispensers are slotted into their angled recesses near the front of the boom. A PE plate fits between the exhausts before the tail is added, the rotors are installed, and a few last PE grilles are glued within their recesses on the starboard side, and that's the main build finished. No attack helicopter would be complete without a shed-load of armaments, and KH are pretty generous on the whole with the munitions they supply. In this kit you have the following: 2 x AIM-9L Sidewinders 2 x 70mm HAP rocket pods 8 x AGM-114 Hellfire missiles on 2 x rail adapters The Hellfires have alternate rounded and tapered heads, so you can model the laser or radar guided options. Markings There are two schemes included in the box, although you could be forgiven for thinking there were three on first glance. I think the extra sheet was printed because someone forgot to put the paint call-outs on the grey machine though. From the box you can build one of the following: US Marines No.615 HMLAT-303 – Medium Sea Grey (FS318C/637) over Light Grey (FS36495). US Marines No.640 HMLAT-303 – Black/Red/Gold bands on the upper surfaces over Light Grey (FS36495) (HMLAT stands for Helicopter Marine Light Attack Training) The decals are well printed on the whole, although on the loviz sheet there is a slight mis-registration of the black on the slime-light decals. Other than that, they are well done, with a gold to red fade on the more colourful sheet. The aforementioned instrument decals extend to fourteen separate decals, which should result in a nicely detailed cockpit. Conclusion A modern tooling of the Cobra's ultimate form in 1:48 is welcome, and Kitty Hawk have put some effort into the task, including slide-moulding the fuselage and tail boom halves to ensure full coverage of detail on the main parts. A full complement of weapons, and some very carefully protected clear parts round out the package nicely, although another decal scheme from an active unit would have been appreciated. Very highly recommended. Review sample courtesy of and available soon from major hobby shops
-
For the sake of clarity and after the release of the Kitty Hawk Bell AH-1Z Viper (http://www.britmodeller.com/forums/index.php?/topic/234943269-148-bell-ah-1z-viper-super-cobra-by-kitty-hawk-released/) I've decided to open a new dedicated thread for the future KH 1/48th Bell UH-1Y Venom - ref.KH80123 Source: http://scalemodels.ru/news/6428-vertoletnye-anonsy-Kitty-Hawk-Models-1-48.html Source: http://www.arcforums.com/forums/air/index.php?showtopic=276651&view=findpost&p=2627492 V.P.
- 16 replies
-
- 2
-
-
- Kitty Hawk
- UH-1
- (and 1 more)
-
Another Glen Coleman - subliminal or anodyne ? - message in the Kitty Hawk Facebook. Source: https://www.facebook.com/736521713066784/photos/a.736556396396649.1073741827.736521713066784/850409331678021/?type=1&theater To be followed V.P.
-
After its 1/48th kit, Kitty Hawk is preparing a 1/32nd Lockheed F-94C Starfire. Source: https://www.facebook.com/736521713066784/photos/a.736556396396649.1073741827.736521713066784/822266477825640/?type=1&theater To be followed V.P.
-
In a message on LSM forum about a future 1/32nd SEPECAT Jaguar project, the Kitty Hawk's rep, Glen "Kagnew" Coleman, says the company has some 1/32nd French projects in the pipeline for 2015-2016. Most logical contenders should be 1/32nd Dassault Mirage F-1C/CT/CR & B as there's already some 1/48th kits from this French fighter in the Kitty Hawk catalogue. But alternative subjects might be 1/32nd Dassault Mirage III/5 or Rafale C/B/M... To be followed. Source: http://forum.largescaleplanes.com/index.php?showtopic=53067&p=617140 V.P.
-
After the 1/48th kits ( GR. link & A. link ). On LSM forums, the Kitty Hawk's rep, Glen "Kagnew" Coleman, confirms the company 1/32nd SEPECAT Jaguar family project. Of interest are also the words "1/32 French projects before we get into it". To be followed. Source: http://forum.largescaleplanes.com/index.php?showtopic=53067&p=617140 V.P.
-
New criptic message in the Kitty Hawk Facebook with as subject the North American P-51H/F-51H Mustang. 1/32nd? Most probably: http://forum.largescaleplanes.com/index.php?showtopic=53056&p=614540 Source: https://www.facebook.com/permalink.php?story_fbid=816112241774397&id=736521713066784 To be followed but I'm not interested in a 1/32nd P-51H. I would have preferred a F-82 Twin Mustang family, in 1/48th of course! V.P.
-
Kitty Hawk is preparing a 1/32nd North American T-28 Trojan family for 2015. Sources: https://www.facebook.com/736521713066784/photos/a.736557876396501.1073741828.736521713066784/811973858854902/?type=1&theater https://www.facebook.com/736521713066784/photos/a.736556396396649.1073741827.736521713066784/812667008785587/?type=1&theater V.P.
-
Another - subliminal or anodyne ? - message today in the Kitty Hawk Facebook. Source: https://www.facebook.com/736521713066784/photos/a.736556396396649.1073741827.736521713066784/808051749247113/?type=1&theater The following message with a Vought XF5U-1 "Flying Flapjack" picture. To be followed V.P.
-
F-35C Lightning II 1:48 Kitty Hawk We reviewed the F-35A (reviewed here, and F-35B (reviewed here) when they were released, and you can pick up some information on the real thing from there if you have a read. The F-35C is the traditional carrier-borne variant, which has a number of differences to make it resilient enough to work from a carrier at sea, including strengthened landing gear for those hard landings, larger folding wings and tail planes for greater control at landing speeds, and of course a big hook at the rear for trapping-on, which was subject to a little controversy when it had to be hastily re-designed. The Kit This is the third variant of the Lightning II from Kitty Hawk, and you can read our reviews of the previous two by following the links above. The C is likely to be the last for a short while until the various other operators settle on their configurations. In line with commonality of the real variants, the A and the C models share a great many parts on the sprues, with a subtly different fuselage that omits the refuelling port and adds a bulge under the tail for the arrestor hook. The guts of the beast are familiar, with new sprues containing the larger wings, a new cockpit tub and some weapons, plus the gear legs and wheels for this ruggedized variant. The box is standard Kitty Hawk fare, with a painting of an F-35C on the blocks ready to be catapulted into the air – a scene that lends itself to Kinetic's diorama base that I have half-completed behind me. Inside the box are eight sprues in light grey styrene, one of clear, a reduced Photo-Etch (PE) sheet, and two sheets of decals. A detail & Scale flyer hides the instruction booklet at the bottom of the box, which has a fold-out full colour painting and decaling guide that is much improved over their early efforts. Thanks for listening guys! The kit is typical Kitty Hawk, and if you have any of their kits, especially the other F-35s, you'll know exactly what to expect. The sprue ejector guy still has his machine turned up to eleven though, and there are some visible stress marks on the surfaces of the wings, and the instrument panel looks like it was almost punched in half by the severity of the ejection. The clear sprue is marked up differently than the A, but a brief visual inspection doesn't show any obvious differences, but it does show how lovely and clear the part is, although my canopy had broken off the sprue (cleanly) by the time I had opened the bag. The PE sheet is much smaller than the earlier A, eschewing the option of having the crisp metal exhaust petals that could easily drive the novice PE user to despair. Construction begins with the cockpit, and don't be tempted to choose the wrong tub as your basis for this. Appropriately it is number B13, and the instructions call for E25 instead, which has a sort-of missing edge to the tub to accommodate the refuelling probe bay on the starboard side. The pilot's seat is a little lacklustre, but does have a set of PE belts to hide the bland cushions, and of course a pilot figure that isn't mentioned in the instructions if you want to hide it properly. The instrument panel had received a punch in the back from the ejector pin, but remains intact on my review sample, so take care when you remove it from the sprue. The central portion is blank and has a decal to depict the large expanse of glass that is the modern instrument panel. It's like sitting in front of an ultra-wide LED screen, mainly because that's what it is. The rudder pedals are nicely moulded integrally to the tub, with a short control column and HOTAS stick on the port side console. A few black boxes affix behind the seat, and a large coaming shrouds the instrument panel, with the assembly to be added to the lower fuselage in due course. The nose gear bay is shallow and made up from separate sides with a separate angled forward section, so detail here is good. The chunky gear leg with a massive retraction strut can be placed in at this stage, or left 'til later, and the additional parts add extra life to it, with separate bracing struts, and of course the twin nose wheels, which are made up from halves, which suits the circumferential tread engraved into the contact surface. The big weapons bays in the belly are next, with a long snaking conduit running their full length, and a couple of equipment boxes added to busy the area up. You'll need to do a little more work with wiring (did I say a little?) to add extra visual interest and make the whole area as faithful as possible, or you can chicken out and close them up! The two weapons bays and nose gear bay are then installed in the lower fuselage, which should give it the structural rigidity that it lacks out of the box. A little tail-hook bay is placed in the rear, and then it is time to build up the engines, which comprise full-depth intake trunking, plus a basic representation of the engines themselves, which will ultimately disappear within the fuselage forever. The F135 engines that are currently too large to carry by the US Fleet replenishment systems have their rear face surprisingly close to the rear of the aircraft, so exhaust trunking isn't required, but you'll have enough sanding and filling already with the intake trunks, so breathe a sigh of relief here. These slot in on top and between the weapons bays, and are joined by the main gear bays, which will also need some additional wiring to super-detail them. The big gear legs have separate retraction jacks and oleo-scissors, with the wheels themselves made up from two halves and a separate inner brake calliper part, which look like they can also be installed later if you wish. Once in place outboard of the weapons bays, the cockpit is then attached to the roof of the nose gear bay, and attention turns to the upper fuselage. The gun blanking plate is attached above the starboard intake lip, and the refuelling probe is added, which doesn't seem to have a closed option, although the cover is added later in the build. Some test-fitting and fettling would be needed if you wanted to pose this closed. Ten PE shackles are added to around the cockpit lip, as well as a rear bulkhead behind the pilot's head, and the sharp tip is added to the nose, before the wings are started. The wing sprues of the C are totally different from the other variants, both in terms of sprue layout, configuration as well as size. The inner wing panels are built from a two-part core with separate leading edges and posable flaperons, both of which are also made up from top and bottom skins. The outer wing panels are similarly constructed, and can be posed down for flight, or by the use of a small hinge part, they can be posed up for storage below decks. A hinge strip is placed horizontally or vertically, respectively. The horizontal tails are two parts each and plug into the rear booms either side of the engine, so you won't be able to pose them without some adjustments. The enlarged vertical tails are also two parts, and these fit into some large sockets on the top of the fuselage. Again, they're fixed, so posing them offset to one side or other will involve work on your part. The exhaust petals are a single very finely moulded part, and quite nicely done. Mine had received a light blow during transit, so a couple of the petals were very slightly less sharp than the others, but this shouldn't notice under a few coats of paint. Once installed, a pair of serrated fairings are fitted to blend the exhaust in with the fuselage. A crew step is included in the kit, and that normally resides behind a fuselage panel á la the A-10. Another small door is present at the front of the tail-hook bay, and that opens up to permit the hook to deploy fully. If you are depicting your F-35C in flight, you'll need to address all these bays to fettle and fit them closed, and this will be best done before you close up the fuselage. The underside of the Lightning II is as forest of doors in order to maintain its low-observability as much and as long as possible. The weapons bays have two doors running their whole length, and the main gear bays have two that open toward the wing tips. The nose gear bay has a pair of clamshell doors at the front of the bay, and a single door captive to the retraction jack at the rear. All of these doors are well detailed inside, and have separate hinges that should result in a good strong joint with the fuselage. At the nose a clear part represents the faceted Electro-Optical Targeting System (EOTS) that is integrated with all of the F-35's systems. The real thing has an oily holographic sheen, but good luck with representing that one! Kitty hawk aren't usually stingy with their weapons, and with the C, we have a number that can be added to the pylons that are included with the kit, but none are able to be installed in the weapons bays out of the box, which seems a shame, and misses the whole point of providing the opening bays. There is however the new semi-stealthy pod that contains a GAU-22 25mm four barrelled gatling gun to give the new uber-aircraft old school dog-fighting capabilities at the expense of some of the stealth. This sits between the weapons bays on the belly, and is made up from three parts. The external pylons are fabricated from two halves plus an insert for the location points, with the slim outer pylon having faceted stabilising base attached to the upper edge of the pylon. To these you can add a combination of the following, but check your references if you want to make the load-out more accurate. 2 x AIM120 AMRAAMs 2 x AIM-9X Sidewinders 2 x GBU-38 Iron bombs 2 x GBU-31 Iron Bombs 2 x GUB-31B Iron Bombs 2 x GBU-12 Smart Bombs Markings We are treated to four markings options, which is good considering the short lifespan of the "final form" F-35C so far. From the box you can build one of the following: US Navy No.01 VFA-101 – all over RAM grey with hi-viz markings and Grim Reapers badge on the tails. US Navy CF-01 – all over RAM grey with lo-viz markings and blue/yellow lightning strikes on the tails with F-35 in yellow. US Navy CF-03 - all over RAM grey with lo-viz markings. US Navy CF-01 prototype – patchwork blue/grey primer, RAM grey and blue tail fins. Depicted before the final finish was applied. Colour call-outs are Gunze throughout, as you'd expect from a Far Eastern company, and the decals have been printed anonymously, as per their previous kits. The quality does seem to have improved somewhat, and registration is good on this issue, but there are still the occasional bleed of some of the more intense dark colours, especially on the stars and bars, although it's barely noticeable without magnification. One of the greys has been composited by mixing grey and black printing, so on close inspection some of the logos on nose appear a little grainy, but again, you really have to be paying close attention. The yellow flashes on the tail of option 2 are printed, and may not show up too well over a blue tail, so perhaps give some consideration to masking them, using the decals as a template. Conclusion The final part of the F-35 trilogy will fit nicely on the shelf with the A and B, and as usual with Kitty Hawk, should build up into an impressive looking replica with the application of some modelling skill. Test-fitting and care in preparing the parts will pay dividends, and that patchwork primer option is really rather tempting. Recommended. Review sample courtesy of and available soon from major hobby shops
-
With the future 1/32nd Bell P-39Q Airacobra(http://www.britmodeller.com/forums/index.php?/topic/234967987-132-bell-p-39q-airacobra-by-kittyhawk-cads-release-august-2015/), Kitty Hawk is to release in 2015 another 1/32nd WWII plane kit to celebrate Victory over Japan Day. Your guess? Source: https://www.facebook.com/736521713066784/photos/a.736556396396649.1073741827.736521713066784/800741429978145/?type=1&theater V.P.
-
Kitty Hawk is to release a 1/32nd Bell P-39Q/N Airacobra kit - ref. KH32013 Source: http://www.kittyhawkmodel.com/#!kh32013/c24dx V.P.
-
Source: http://www.themodellingnews.com/2014/09/the-griffon-with-two-heads-two-seater.html#more The Kitty Hawk's two seater 1/48th Saab JAS-39 B/D Gripen kit is expected before Christmas 2014- ref.KH80118. Single seat KittyHawk JAS-39A/C Gripen - ref.KH80117 - thread is here: http://www.britmodeller.com/forums/index.php?/topic/234930694-148th-saab-jas-39c-gripen-by-kittyhawk-released/?p=1182915 And Mike's JAS-39A/C review is here: http://www.britmodeller.com/forums/index.php?/topic/234941002-jas-39ac-gripen-148-kitty-hawk/ JAS-39 B/D box art, profiles, decals and more: htt V.P.
-
Announced at the US IPMS Nats 2014, the next Kitty Hawk 1/32nd kit (after the OV-10 Bronco http://www.britmodeller.com/forums/index.php?/topic/234952767-132-north-american-ov-10-bronco-family-by-kittyhawk-new-cads/) is a N.A. F-86D Sabre Dog - ref. KH32008 Source: https://www.facebook.com/pages/Kitty-hawk/736521713066784?sk=timeline&ref=page_internal V.P.
-
Kitty Hawk have announced at the US Nationals that a 1.32 scale F-86D Sabre Dog is on the way. FB link for those on there; https://www.facebook.com/736521713066784/photos/a.736556396396649.1073741827.736521713066784/776608805724741/?type=1&theater Julien
-
I need some help please. I have found very few references to what colours to use for the F-35 cockpit. Kitty Hawk are not at all helpful with no references in their instructions. Has anyone who has made either the F-35A or B got any colour reference please? Thanks Peter