Search the Community
Showing results for tags 'JASDF'.
-
 Kit used: Meng F-35A LS-008 + Zvezda 7235 Aircraft Stand.
 -
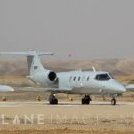
 This is the 1/72 Welsh Models Gulfstream G-IV built as a U-4 of the JASDF. The kit was built OOB with the addition of type-specific antennas and was started for the Turning Japanese GB last year. The decals are by Draw Decal A link to the GB thread is below. The U-4 Multi-Purpose Support Aircraft is a Gulfstream Aerospace Corporation business jet “GIV-SP” that has been refurbished to Japan Air Self-Defence Force (JASDF) specifications. The U-4 was introduced to JASDF in 1995 as a successor to the reciprocating twin-engine aircraft “B-65” which was mainly used for communication and personnel transport, and as a Multi-Purpose Support Aircraft. It is mainly used to transport personnel and small cargo and for training. In addition to the usual boarding door, there is a large cargo door for transporting emergency cases and goods on the right wing side. The GIV-SP utilizes its flight stability in high altitude and velocity of Mach 0.80 for liaisons in military operations, and to transport personnel and materials. Thanks to the quietness and comfort of the aircraft, it is also used to carry important personnel to remote areas in Japan in the event of disasters such as earthquakes, volcanic eruptions, and torrential rains.
 -
Hi, guys ‘n’ gals, I just read on the Warthunder Wiki that the F-104DJ didn’t have the radar fitted? Or it was removed later in it’s JASDF service? Can anyone confirm this? Cheers, Erik.
-
 Hello everyone … fresh off the Japanese group build is my 1/72 Hasegawa F-86D. It is in the markings of the 101st Squadron 3rd Air Wing early 1960’s. Try as I might I could not find a lot of photo’s of these Sabres in active duty ? Almost every photo I did find is either a Museum or gate guard subject ? Please feel free to ask questions, post comments or visit my build thread. https://www.britmodeller.com/forums/index.php?/topic/235110514-jasdf-f-86d-101st-squadron-3-aw/ Dennis
- 16 replies
-
- 32
-

-
- 1/72 Hasegawa F-86D
- JASDF
- (and 1 more)
-
 Konnichi wa shinai naru modeler! Here's my latest finish for the 'Turning Japanese' GB here on the forum. The build thread is here but to recap: Kit: Sword U-125A kit number 72127 Scale: 1/72 Build: OOB (5g weight in nose) Paints: Tamiya Acrylics, Klear, panel line wash, Satin varnish Decals: From the kit The lower fuselage paint should be more green/sky than sky and the decals (printed by Technod) had a terrible time accepting any kind of curves...,lots of shattering/splintering on the nacelles followed by touch-ups with blue paint. The u/c gear fit is also a bit iffy. But despite all that, really happy how it turned out and can't wait to build their Sabreliner kit! Thanks for looking, take care and happy modelling Dermot
- 10 replies
-
- 41
-
-
 Hasegawa 1/72 Mitsubishi F-2B DXM decal set "JASDF Matsushima A.B. Viper Zero Anniversay set. JASDF Mitsubishi F.2B 21.Sqn 30th Anniversary Matsushima A.B. 2006 Wolfpack update set - seamless intake wheel bays & exhaust. Pavla ACES2 seats. MrColor JASDF paint set. Half way through building this researching the airframe, I found that this aircraft crashed. No fatalities, but I think the first F-2 crash but the second model I've built this year which crashed. My other build earlier this year, the Czech MiG-21UM crashed as well.
- 28 replies
-
- 55
-
-
- Hasegawa
- Mitsubishi F2s
- (and 1 more)
-
 I think I need to get back to Straight from the box builds from time to time just to enjoy the building and finishing. Too many projects have been lost to waning enthusiasm of the extra detailing. This was a nice build of a very old kit but it still presents a nice representation of the Eagle. Some care is needed around the intakes and the point where the front and main fuselage join. The only aftermarket were Platz decals that were sourced online from a Japanese Hobby retailer. Comments always welcome, and thank you for having a look.
- 11 replies
-
- 49
-
-
a.thumb.jpg.58d92d116b0315dc55d352fd191d65e4.jpg) I would like to show you two F-4EJs that I have recently finished. The first one is a F-4EJ of the Air Developmant and Test Wing in Gifu. They painted it 2017 in a digital or pixel camouflage. When I first came across the photo of this aircraft, I immediately started looking for decals. At that time, there was only this Fujimi boxing available for a lot of money. But I bought it anyway and after a closer inspection decided just to use the decals and build the model using the Hasegawa kit. Here is now the finished model: It is an F-4EJ (without the "kai"), although it features the antenna on top of the spine. But the very small backward facing sensors on top of the rudder are missing. Applying the decals was fun. Fujimi provided large connected areas like one wing = one decal, but I decided to divide them into smaller areas for better handling. I strongly recommend this procedure. As a basic color I chose Revell Seegrün Aqua colours which fits perfectly. The Hasegawa kit is nice, but I added some details like instruments and wiring to the area between the two seats. Also the triangular shaped reinforcement plates on the stabilizers have to be removed from the top and added to the bottom. Check your references, when building a Phantom.... A lot of stencils are provided for the underside, too: The second model shows a F-4EJkai (improved) that can be recognized by the two small sensors and the big antenna on the spine. Also it features a slightly bigger radome, but Hasegawa ignored this difference. Fine molds however have reproduced it in their new range of F-4EJs. The JASDF 302 Sq have painted two of their F-4 in a special scheme for the retirement of the type, one white and the other one black. Hasegawa have released them both. The decals are nicely done but of course they need some touch up especially in the area around the intakes. I will build the black one using the Fine Molds kit. Here the reinforcement plates are correct as they are in the kit. Hope you like the models. greetings from Germany, Norbert
I would like to show you two F-4EJs that I have recently finished. The first one is a F-4EJ of the Air Developmant and Test Wing in Gifu. They painted it 2017 in a digital or pixel camouflage. When I first came across the photo of this aircraft, I immediately started looking for decals. At that time, there was only this Fujimi boxing available for a lot of money. But I bought it anyway and after a closer inspection decided just to use the decals and build the model using the Hasegawa kit. Here is now the finished model: It is an F-4EJ (without the "kai"), although it features the antenna on top of the spine. But the very small backward facing sensors on top of the rudder are missing. Applying the decals was fun. Fujimi provided large connected areas like one wing = one decal, but I decided to divide them into smaller areas for better handling. I strongly recommend this procedure. As a basic color I chose Revell Seegrün Aqua colours which fits perfectly. The Hasegawa kit is nice, but I added some details like instruments and wiring to the area between the two seats. Also the triangular shaped reinforcement plates on the stabilizers have to be removed from the top and added to the bottom. Check your references, when building a Phantom.... A lot of stencils are provided for the underside, too: The second model shows a F-4EJkai (improved) that can be recognized by the two small sensors and the big antenna on the spine. Also it features a slightly bigger radome, but Hasegawa ignored this difference. Fine molds however have reproduced it in their new range of F-4EJs. The JASDF 302 Sq have painted two of their F-4 in a special scheme for the retirement of the type, one white and the other one black. Hasegawa have released them both. The decals are nicely done but of course they need some touch up especially in the area around the intakes. I will build the black one using the Fine Molds kit. Here the reinforcement plates are correct as they are in the kit. Hope you like the models. greetings from Germany, Norbert -
Needing a kit to have fun with and hopefully minimum fuss. Trying to keep it in the spirit of building of just the kit supplied parts. Oh how easy it is to start browsing the web shops and fill your cart up with resin and etching. Most of my early modelling was a box build and even kit decals. A community friend gifted the kit to start and it was a boxing I did not recognize but the old reliable Hasegawa re-tooled F-15 was inside. No I couldn't hold back and found the Platz White Dragon release of 303 squadron's F-15J, a beautiful sheet printed by Cartograf. Does anyone think this looks like me!?!?! The Platz sheet, still available by searching on Japanese web-stores. The wing join seams were filled with stretched sprue but still required some Tamiya White Filling Putty. The vertical tail join line needed fill too. Actually a decent cockpit representation is provided but all references I could see showed the aft bay behind the seat was finished in white not the Metallic Blue-Green as instructed. The exhaust is 5 segments and maybe the biggest challenge is getting a proper looking circle of that opening as it is all glued. Patience and a cardboard circle template works using an Olfa circle cutter. Four external fuel tanks are included and I will be installing only the center tank. After a disappointing result with the first tank, I started a second tank, removed the locating pins and tried to be as careful as possible in alignment to prevent a large flat spot on the join line. Still a noticeable flat spot, I taped off the area and applied a liberal amount of the Tamiya White Putty, sanded and it seemed to look much better. Canopy was dipped in Pledge floor wax today so I will let it sit several days before masking and painting. Painting should only be a few days away and I have both the Light and Dark Ghost Gray in Mr Color and Tamiya Lacquer. Thank you for looking in, any comments welcome. Craig
-
Hi All, I just finished my build of the Fine Molds Phantom, in this case the JASDF Kai version. What a beautiful kit, well moulded, superb detail and fitted together wonderfully. My copy came from Frome Model Centre and arrived very quickly. One issue I had was that I took the instructions advice to not use “surfaces primer” too literally and my Tamiya paint was easily scratched during later assembly. I now think they meant avoid sprays like MrSurfacer as the detailing is very fine, but a light waft of Halfords might have been okay. That said, after the joy of building a few modern kits such as this, I’m wondering whether to flog off the stash of “classic” kits, or to pull on that hair shirt and build some! 🤣 Cheers Will
- 10 replies
-
- 34
-
-
Cleansing the palette so to speak. Almost an OOB with only adding the open gun purge door, seat harness and triangle patches on top of the Horizontal Stabs. Note the blue paint on the Stabs did not match each other per references. The kit goes together well but carefully watch the spine fuselage top panel and how the front fuselage attaches. I had a problem with a main landing gear "toe in" look to it. The scribing is very fine and a looks all the part to me. Thanks to @Gene K for help with this and as always comments are welcome. The Motive Thin solder flattened for the harnesses
- 21 replies
-
- 64
-
-
Hi all With the Pembroke end, it's time to start a new project. This time I go to the other side of the world and choose a more modern plane : the U-125A of the JASDF air force. The Sword artbox are always very attractive and I bought several kit for them 😀 The first test fit show a kit who should not be too difficult to build.
-
 Hello Friends, Just finished the F-15DJ of the JASDF in the Aggressor Color Scheme of Sand, Brown and Black. Academy F-15E Strike Eagle kit has been used as a donor kit and built into this F-15DJ. The model is built OOB and no mods have been used. The paints used are locally available acrylic paints. It has taken me around 20 days to build this model and I feel that it still is incomplete. Specially the decals and the stencils. Due to the pandemic I haven't been able to get my hands on the Relevant F-15DJ Decals and Stencils. Thus for the time being I just write the stencils and will paint the markings with grey paint and use the decals later on. The Work In Progress build is divided into a 3 part video series. Do have a look and do mention your valuable comments to improve upon in the future. Let me know what you think about the techniques and my ways. . . Do Enjoy the Pictures and the Build . . . . .Cheers Friends . . .
- 14 replies
-
- 36
-
-
G'day all, Been lurking for a few years but this is my first WIP. I have added an Aires Cockpit, though TBH it probably doesnt need one, Brassin Exhaust and Master pitot. I'm using a Two Bobs Aggressor sheet and will be doing the 203rd Hikotai (Red & White) markings. Just buttoned it up and layed down some primer- a few spots to tidy up and then on to the paint. thanks for looking.
- 17 replies
-
- 10
-
-
Hi there. Here is my latest model, a 1/72 Mitsubishi F-2A in a colourful 3SQ anniversay scheme. Built from the Hasegawa corresponding boxing. I had to order an aftermarket decal sheet as my kit decals had a green colour shift and Microsol destroyed my blue paint coat on application anyway. MrColor JASDF colour set, DXM decals, Eduard etch, Hasegawa 3D printed exhaust and minor cockpit scratch. Hope you enjoy the plane and stay safe!
- 22 replies
-
- 27
-
-
I will release 1/72 JASDF YS-11EB 3D fabricated kit soon. This kit is empty interior except for cockpit unfortunately because I have no data of inside. But landing gear is separable. This is a conversion kit of the YS-11A. Engine nacelle shape, props, fuselage windowm, antenna and mold arrangement is different. And there are radomes on top and under the fuselage.
-
Hi all. Our club theme this year for the annual QMHE show here in Queensland is two seaters and trainers. We're not limiting subjects to only aviation subjects but considering that we mostly build aircraft I've decided on a another jet subject for the display anyway! The more the merrier right??? This is the 1/48 Hasegawa Mitsubishi F-2B. I'm a big fan of the of the F-16 and seeing the F-2 is a close cousin, it was an easy decision to crack on with this build. Additional extras lined up for the build are Afterburner and DXM decals, Finemolds seat belts and pitot/static, Hasegawa weapons and Royale resin wheels. Montex masks will be used on the clear bits. And after seeing the U-125A recently built by @_alfisti_ I just couldn't go past the lovely two tone blue that the modern Japanese jets are famous for. The subject of interest. Some clean up and priming of parts. The full length intake and gear door interiors have some pin marks that I've filled with Vallejo plastic putty. It's good stuff and dries quickly in the stinking heat that we've had recently. The cockpit features nicely raised detail and the Afterburner interior decals registered well with the detail when applied. Below is the pit before any kind of wash or flatcoat. The seats are nicely done though if you don't like black then leave them alone. I tried to dress them up by using black and then varying shades of grey. The stencils near the headbox are from Afterburner and they'll eventually get some Finemolds belts. Again, this is before they've been hit with a flat coat. The intake is full length right back to the face of the engine. Not quite why Hasegawa didn't opt for this construction with their F-16 kits. Tamiya putty thinned with liquid glues has bene used on the interior seams followed by sanding with a long piece of rolled 400 grit sanding paper. Paint is Tamiya flat white acrylic applied with a larger than normal needle/nozzle (0.4mm) through a H&S airbrush. The paint goes a LOT better than with the 0.15mm smaller nozzle I normally use, perfect for applications in a confined space like this. There was a bit of faffing around with the next part to get the top and bottom fuselage halves to fit. I trimmed a variety of spots on the cockpit tub, instrument panel and cockpit interior and I still had to apply a bit more pressure to get the upper and lower fuselage halves to meet around the tub. Not a big issue but annoying nontheless. I left the parts clamped for most of the week to ensure the glue had gone off completely. You can see in this image where the problem was when gluing the upper and lower halves. Wings, fin and others to go on over the weekend. Apart from the above, it's been an easy build so far. Cheers, Mick
- 4 replies
-
- 4
-
-
- F-2B
- Samurai fighter
- (and 1 more)
-
 Hi all, Here are some (quite a few actually!) pictures of my latest build, it's Hasegawa's well know 1/48 F-104 Starfighter finished in the markings of 202 Hikotai when playing the role of an aggressor for one of their annual Air Combat Meets. These ACM's have produced some very nice and unusual colour schemes and it was difficult to decide which one to build, suffice to say that there will be a few more in the future. Anyway here are the pictures. Here is a link to the WIP and whilst you are there have a look at the other great builds going on in the GB. Thanks for looking in and all comments and criticisms are gratefully received. Craig.
- 12 replies
-
- 24
-
-

-
Time to narrow down my options for at least one build for this GB. The plan at the minute is to do one European and one Asian F-104 (although this may change!) and for the Asian one I have decided to go with an aircraft from the JASDF who were a major user of the type and had them on strength until 1986. The next problem is which JASDF one to do, a single seat J or a twin seat DJ. Both kits are unstarted as you can see below. And both come with very comprehensive and impressive decal sheets. Should be able to build every F-104 to serve with the JASDF from them! The only issue with the sheets is the usual Hasegawa inability to actually make the white on the decals white as it is a creamy colour, might try the "stick them to the window and hope that it lightens them" trick. but if they weren't enough options I have an aftermarket set from Two Bobs (who can make white white). Can't beat an aggressor scheme! Here's a closer look at the options. Very drawn to the one at the bottom, although I am also contemplating another one from the "Panda Bears" in grey and white which looks very smart and had rocket pods under the wings and it doesn't seem fair to only build F-104J's from the one squadron. And then there's the option of a DJ in the camo colours usually worn by Mitsubishi F-1's, oh dear decisions, decisions! At least I have until Saturday to make my mind up! Craig.
-
 Hello everyone, Here's a playlist link to youtube of some videos of planes and helis. Andy will provide much better photos in a separate post but I'm contributing with some videos. The Helicopter landing vid is particularly good. Enjoy! Part of a three week spotting tour in Japan. Totally worthwhile since they practice daily. Today was coincidentally graduation day at the Akeno training base.
 -
Second in my double build, this will be my entry using the older ghost gray scheme. I had already done a Gulf War F-15 about a year ago and did not feel like repeating. Instead, I had in my stash this wonderful and colorful F-15J from Tac Meet 2013. Lots of lightning bolts. Awesome cartoon bear in the fins. This is Japanese creativity at its best! The kit will be built entirely OOP. First steps were the cockpit. I read somewhere that some of the JASDF Eagles kept their avionics bay in the original metallic emerald color so I will keep them as such. There is sadly, no equivalent in acrylic so I used the instructions' recommended Gunze metallic blue-green which is a bit too blue compared to the real thing. Not a big issue frankly.
-
Hi, Want some wild colour schemes and bizarre partnerships? What about Bangladesh Let 410, Sri Lankan Kfir, Taiwanese B-24, Malaysian A-400, Myanmar MiG-29, South Korean Hawk, Communist Chinese La-11, Indian Navy Do.228, PLAAF Divine Eagle? And on, and on and on.....! Asian Air Arms SIG has been set up to enable modellers to access a huge resource of post-1945 military aircraft subjects from 26 Asian countries: Mongolia to the Maldives, and from Japan to Afghanistan. Huge website http://www.asianairarms.com offers thousands of photos, colour schemes, research, contemporary accounts, kit lists, decal info, photos of members' models and air arms' lists of serial numbers. We exhibit at many UK shows including North East, Midlands and South West. Members are encouraged to display under our banner. Next two shows: Boscombe Down 6th August, and IPMS Avon 13th August. We welcome all, particularly those with specialised knowledge to help add to, and improve the accuracy of, our resources. Costs nothing to join, just click "Join Here" on our website and you'll go straight on to our mailing list.
-
(Admin, please remove if posting videos isnt allowed) The Kit The aftermarket Legend Productions ACES II F-15 seats DXM decals Olfa circular cutter + lots of masking sheet /tape (the silly amount of masking required which will become apparent latter in the build) Hasegawa hologram (for the HUD) Hasegawa JASDF weapon set (for the AAM-3) Hasegawa weapon set B (for the ALQ-131) The Plane http://www.airplane-pictures.net/photo/493488/92-8068-japan-air-self-defence-force-mitsubishi-f-15dj/ WIP pics soon to follow. Cheers Shane
-
Afternoon folks - I have on its way an old Hasegawa 1:32 F104J and I am assuming the decals won't be of much use! I've had a quick look around and can't see who does aftermarket decals for Japanese Starfighters in 1:32 Can anyone point in the right direction? thanks Chris
-
Ok so I'm a big fan of the Phantom and decided a few months ago to do a joint build of Israeli and Japanese F4's. I used the Hasegawa kits for both builds with aftermarket decals from Isra Decal and DXM (stencils). I used the original decals for the JASDF Phantom in the main and considering they were printed in 1986 they came out well. Eduard cockpit aftermarket was also used and Ised Mr Color, Tamiya and Alclad paints for both. I got a lot of help form members on here during the build so thanks for that. The Israeli F4 has a temporary 'load out' as I am awaiting some of the Hasegawa sets. Overall I enjoyed the builds and even more so that the kits costs me £16 and £24 respectively which is great value considering I just paid £60 for the Hasegawa re-hash of the FGR1!!
- 17 replies
-
- 44
-