Search the Community
Showing results for tags 'Italeri'.
-
 After a bit of a break I've finally finished the Italeri Tornado! Some of the parts were a pig to fit but I'm fairly ok with the final result considering how the build went. I made it oob and only added the wing sweep covers cut from masking tape as otherwise you could see straight through. The markings were from the Airfix Tornado, though I cut the code letters up to make it into FL instead of FV. I used Flory dirt wash to dull it doen a bit and dirty the jetpipes and tail area. All criticism welcomed so I can improve! Comparison with the Airfix Tornado (ZA407, TWCU):
- 22 replies
-
- 44
-

-
Although I've got a few aircraft that would be suitable for this build, Martlet, Swordfish, Seafire, Sea Hurricane, Maryland, Albacore, Fulmar, I've already built a few of them in the past few months, apart from the Maryland and Albacore. The Maryland is a taxing build and my Albacore is a Magna Models resin kit that will need loads of work. So I've had a look at my AFV stash and found a fair few of different kits, especially some Italeri Italian armour. So here is a first one.
-
Just completed this 1/48 Italeri/Dragon Ta152H-1. I've been building up to this, so I hope I've done it some justice. Was expecting to have a nightmare with this 'old' kit, after my previous experience with the Italeri/Dragon Fw190A-8 (which I eventually abandoned), but to be fair it went together pretty well. Visibility/optical quality through the canopy is awful - I could have painted the cockpit bright pink and I doubt if it would be visible. Basically an OOB build, but with the addition of some PE harnesses, and using the Montex paint mask set, rather than the kit decals. Painted up to represent 'Yellow 1' of 7/JG301, before all remaining Ta152s got reassigned to JG301's Stab flight and received green numbers (or that's my understanding. anyway). There is photo evidence of Yellow 1 in any case, as well as numerous profiles. Painted using mainly Vallejo RLM76 and 83, and Mig RLM82, which I felt offered a better contrast with the Vallejo 83, rightly or wrongly. Followed by a bit of weathering with Mig panel line wash, some oils and Humbrol weathering powder - not sure how well that will show up in the pics. Whether the colours are accurate or not, I guess we'll never know. Apologies for the outdoor pics, taken under cover, in rain/overcast conditions - it always seems to be raining when I post an RFI..
-
I had built an Italeri RF-4 once before, so when one came up boxless & cheap on eBay I thought that I could either use it to convert the nose to a later batch rounded nose US RF-4C in Euro One camo, or keep the chisel nose and go Luftwaffe splinter camo. Then I built an Alpha Jet in splinter camo & the decision was made. So here she is. No aftermarket, but I did rescribe it to remove the raised panel lines, and scratch improved the cockpit area. The flaps were detached and lowered, making it look more in line with the pricier kits that usually come with separate flaps. Two RFs for the price of one! And without the dio. Thanks for looking
-
This is my Mirage 3E in 1/48 scale. This is a rebox of the quite old ESCI kit, but it captures the general shape of the Mirage 3 quite well I think. It has raised panel lines, which I accented by slightly polishing the paint off the panel lines with a very fine nailbuffer. I am not completely happy about the way the NMF turned out, but it was a good project to learn from. Most of the paints are Vallejo and Mig acrylics. Kind regards, Gerben
-
I wasn’t going to do a WIP for this one as the plan is for a fairly simple out of the box build of an elderly kit. But after another thread discussing US recce phantoms, I thought it might be an idea to share the way that the Italeri kit goes together. This is my second build of this kit - the first was an Alconbury RF-4C in wraparound SEA camo and a chisel nose. Anyway, this is the box, with my current fleet of spooks in attendance It isn’t as nice as the more modern a Phantom kits like the Revell / Hasegawa FGR2 - more in line with the old ESCI kits. Quite brittle silver plastic but the finished kit will fit in fine with the fleet. The cockpit is a little narrow compared to the others. You can’t swap the canopies between the kits. So there is a limit to what after market designed for other kits would even fit. First big job is to rescribe the panel lines. This is still underway. And the raised lines need to be taken off. Rescribing is down to everyone’s personal preference. I never used to do it but have started to recently. This kit will need some filler & sanding so much of the surface detail would be lost anyway. The cockpit detail is far from the worst I have seen. I usually like a resin seat, but I will stick with the kit here & just paint and add seat straps. The side panels are raised on the kit and come with decals so will look ok. The rear cockpit bulkhead needs some scratch bits adding though. This is the Aires set And this is what you get in the kit So finish the rescribe & work on that pit. The plan is for a splinter camo Luftwaffe jet, with the kit decals. So 35+43. I know that is 35+77 but you get the idea
- 58 replies
-
- 14
-
-
Hi there Just finished this today over on the He-111 GB. No resin was harmed during this build but sets of Eduard masks were used for the glazing. An ambitious project in real life but not very successful. When the V1 fired up at night it must have been seen for miles around. Regards Toby
-
Hello, Here's my just finished 1/72 Italeri Merlin HC.3 in 28 Sqn markings, using the kit decals and a few from the Revell reboxing. Bit of a mixed bag, this kit. It has nice surface detail, but it also has the typical Italeri issues like vague detail on parts, errors in the instructions etc. I used the colour call outs from the 1/48 Airfix kit, which seemed more accurate than the Italeri ones. Painted mostly with Humbrol paints. Sadly my usual light I use for model photography has died, so the pics are a bit meh. Time to invest in a photo booth, me thinks. Thanks for looking, Pete
-
Hi there I bought this a few years ago and I am hoping for some advice here on BM for alternative colour scheme for this build. A few years ago I built a Zwilling, the panel lines were scribed and very thin masking tape was put on the spinners to make the rough spirals. On with the pictures. Regards Toby
-
Good evening, This has to be my best completed kit to date. Italeri's 1/72 Short Stirling Mk.1, purchased for 30£ a few years back from a hardware store in Cornwall. A kit I've wanted to completed for some time but slightly deterred by it's complex appearance in the box. Finished out of the box, using Tamiya Acylic paints, I have tried to replicate the build as best as possible using the limited information available on this aircraft type and in an appearance that represents a well worn and used example. An extra few coats of Halfords Primer were applied in order to reduce the heavy panel line detailing, and aside from the obvious mistake of failing to paint the edge on either side of the canopy the corresponding color, the fit was generally good. I attempted to install the engines to the cowlings after paint, but ended up butchering the engines in order to fit, which has also resulted in some of the photo etch bending. The instructions on the kit is also missing placement locations for some photo etch and part numbers. Faults aside, this is a brilliant kit of an aircraft sadly no longer in existence, yet played an equally valuable role along side it's better known successors of the Halifax, Lancaster etc...
- 29 replies
-
- 83
-
-

-
 Well what else could a Minion do? I tried to resist for as long as possible but I am a truly weak willed Minion at the best of times, and as we all know this isn't the best of times! So in the ebst Minion style I reached into the stash and pulled out a BANANA!!! No not a large bendy yellow herb but a 1/72 Italeri Piasecki H-21 Shawnee or as it is usually referred the "flying banana". I really like the early helicopters and this has long been a favourite of mine, in fact this will not be the first time I have built one as I built a RCAF machine in a rather fetching red, white and blue rescue scheme. this time around I shall be building her as a USAF machine assigned to the flight test centre at Edwards AFB as my model clubs theme for this year is "testing times" and as it was my idea I thought I needed to build something else along the theme, I have built an AV-8B and am part way through a B-57E already ( really must finish that!) so this will join the line up. As usual lets start with box and contents shots; And the decals, some of which will come in handy; Now as I said I am still building for a model club theme so I intend her to end up like this; https://www.helis.com/database/cn/41702/ Now it might take me a week or so to get started as I have other projects to finish and two GB's to co-host with another on the way so don't go expecting rapid progress, or any at all to start with, but I am looking forward to this one. So until I get started, poopaye! Craig.
- 150 replies
-
- 16
-
-
Hello (Again) Everybody, this is my F35A, another gift ( I had a good birthday this year ) and this one was much closer to my normal taste. This was going to be a quick bash together and paint as a distraction from the intricacies of the Arado. I tried everywhere I knew to obtain paint masks for the RAM panels but to know avail. I decided that painting them without masks was beyond my patience and skill levels, so I have completed this one as 'representative' as an operational version. My apologies to the purists out there. Built straight out of the box and painted with Tamiya acrylics. As usual all comments and criticisms are welcome. Thanks for looking.
-
Probably mad given some of the brilliant Wessex builds here on Britmodeller, but my first entry into this GB will be Italeri’s 1/72 Wessex, built as a Royal Australian Navy HAS.31b. Here is a look at the box and contents: This will need some work, lots of ejector pins: The kit comes with a set of Aussie decals from Ronin, but I also have this set: haven’t decided yet which ones I will use. I also haven’t decided on how much, if any, interior detailing I will do, depends on whether I pose the side door open or closed, but I am going to have to add the window to the door and make the existing starboard window smaller. Wish me luck. AW
-
Here is my Wessex built for the Helicopter, Autogyro and STOVL group build. Italeri 1/72 kit representing RAN Fleet Air Arm 817 Squadron no. 813 operated from HMAS Melbourne. Decals from CtA set no 7 “Aussies over the Seas”. Scratch built cargo sling, Doppler radar and weapons carrier pylon, fuel tank modified from a suitable sized tank from the spares box. Tail rotor blades were cut off and reattached the right way around as Italeri have them back to front! Thanks for looking. AW
-
This is my carefully researched Sherman orphan this particular vehicle will be E3, of 2nd Company, 32nd Armoured Battalion, 3rd Armoured Division and will be painted as she appeared in Cologne 1945. One of the first production M4A1 76's to be built by Pressed steel car she was shipped to Britain for the start of D-Day but as the American tank crews had been training on the 75's and as the Company commanders had received feedback that the 75mm gun had a superior HE round the U.S. decided they wouldn't use them and so they were offered to the British forces unfortunately we didn't want them either as we by this time were using our own upgunned version called the Firefly. The upshot was come D-Day they were left in the UK and nobody wanted them hence the nickname Orphan. Just before operation Cobra though the U.S. had encountered it's first Panthers and realised that the 76mm gun actually might be of use and so 150 or so were shipped over for the start of operation Cobra. This lovely lady survived the war and was later remanufactured for the Mutual Defense Program and served with the French for a number of years, she is now a gate guard at Camp Patton, Nehou, France. Next job is undercoat then foundry marks and numbers and i'm just turning an antenna mast for the turret.....tracks and bogies are AFV Club and the kit is the old but still good Italeri as you can see most exterior detail is scratch (although i did order a PE kit but it took so long to arrive i pushed on anyway)tools are from the Tamiya Sherman and many other small details that were particular to the Orphans. Hope you like .....Steve
- 171 replies
-
- 20
-
-
This is my first go in the comprehensive italeri truck kits! Colour is tamiya TS58,pearl light blue. I like the scale,things aren't too small!,plus my hands aren't as steady as they once were! Good detail,some flash on some of the parts. Ive lost a few parts,by accident, 🤦♂️and my workstation isn't the tidyist!,so finding them,a bit tricky!. I used tamiya aerosols,and some airbrushing, mainly the cab interior. I used AK pigments and washes, i did like the engine,came up quite good. One thing,quite a few parts were a tight fit,especially if been painted, so i was doing a lot of scalpel work!,the cab roof especially...theres a gap on the passenger side where the roof meets the top of the door section. I didn't want too squeeze parts together too hard,....its plastic after all! Lol! Currently searching for the sun visor!,yet to fit small lights on the roof section, a square part on the bottom rear drivers side and some clear parts,painted clear orange,which im going to use for the indicator repeaters.(i lost one!) Bit of glue on the a pillar,and the air snorkel on the cab doesn't line up! ( the instructions didn't really give you a reference when you fitted the air filter assembly,where it sould be to line up with the snorkel assembly!)..maybe sort those later!
-
 My next project is complete, the unsung hero of Britain (and the answer to your initiation question), Italeri's 1/48 Hawker Hurricane Mk.I (Battle of Britain Edition). This kit was okay, the detail was adequate, a simpler build compared to what i've done lately but every now and then we need an easier kit.
- 9 replies
-
- 22
-
-
-
- Hawker Hurricane Mk1
- Italeri
- (and 1 more)
-
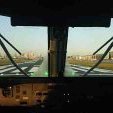
 Hi All, a Place Holder for Tomorrows Start I have a "In the Navy GB" F2A-2 Buffalo in finals, and a RNZAF P40M also on finals, so should be able to get into this fairly soonish The Kit box I want (given timing) to recreate this scene from an RNZAF Photo in the Book "New Zealand's Golden Age of Flying Boats" The Sunderland is being "Warped" into the Braby at Lauthala Bay, Fiji (Photo used for illustration only) I plan to keep the build fairly simple, but build a "Proper" Interior. For your viewing pleasure, a Film showing the arrival of the 4 Sunderland's into New Zealand. Yes, after thousands of Miles/Km's without major mishap, one of the escorting Hudson's collides wing tip to wing tip - Thankfully both aircraft and crews landed safely Arrival of the RNZAF Sunderland Mk III's See you all after the kick off Regards Alan
 -
HI all, not really a WIP, just some shots of a half built model. After a long break from modelling I fancied the newly released Alfa from Italeri. It's OK. Fit is very good, sink marks not so good. Detail is pretty good too overall. Anyway, here's where I'm up to:- So far I've:- Drilled out all of the kit 'bolts' indistinct plastic blobs, and replaced them with proper resin items Drilled out the core plugs, built up the outers and fitted brass core plugs turned 4 ali filler caps for the rocker covers and 2 for the engine block replaced the ignition leads with braided cord scratch built clips for the distributor cap scratch built air filter from PE mesh scratch build braided lines and banjo connector for the oil pump. added braided cable from the rocker covers to the bulkhead - rev counter I assume, although not sure why there would be two? Lots of alcad and hopefully subtle washes, I'm going for old but not dirty which is tricky to pull off. More to follow no doubt. Eventually I think I will turn some proper wire wheels, and replace the kit leaf springs and dampers with something better - but go with the kit items for now. Thanks for looking, Nick
- 22 replies
-
- 10
-
-
-
- Alfa Romeo
- Italeri
- (and 1 more)
-
 Good Morning All! I seem to be having a good output lately and this was one of my latest, built as part of the 'In the Navy' group build elsewhere in BM. As that GB is now well and truly over (thanks mods!) I thought I would share my efforts here as well for those that don't frequent the GB section so much. This is my Grumman Avenger MKII, JZ525 of 849 NAS onboard HMS Illustrious as part of the British Pacific Fleet. Kit is the 1:48 Italeri version, which is a repop of the Accurate Miniatures kit. I used an Eduard internal etch, mainly for the seat harnesses and instrument panel. I totally remodelled the centre cockpit based on all available information and a bit of good old imagination. The decals are from an old Aeromaster decal set, they weren't in a very good condition but I managed to adapt and overcome with a bit of imaginative repairing. The internal paints were from the Mig Ammo range and externals were from the ModelMaster Acryl range. Not sure about the weapon load or Yagi aerials being correct but hey ho I chucked them in any way. I deliberately left her unweathered as I didn't want to screw up the paint work 😁 I had been eyeing this up in my stash for what seemed like ages, must be over 15 years now. It felt good to finally get it done! Onto the phots! Internal detail is quite hard to see so here are a few in progress shots And if you want to follow the trials and tribulations here is the build thread. Cheers now Bob
- 21 replies
-
- 44
-
-
- 1:48
- Accurate Minatures
- (and 1 more)
-
Picked this kit up about three years ago in a New year sale at my local (only) toy & hobby shop. This is the Italeri 1:48 Arado 196 as re-boxed by Tamiya, it's not a bad kit - surprisingly big tho' - similar in size to a Stuka or a P-47. I built it with no extras, just straight from the box and really enjoyed it. Details in the (very visible) cockpit are a little light and some details are a little 'chunky' but IMHO that's a small price to pay for having something just that little bit different in your cabinet. Paints are all acrylic, I didn't have any RLM 72 & 73 for the camo, so went and looked at what others have done for the Fw200's etc and mixed-up a couple of tones that looked OK'ish. The purists out there (but probably not here on Britmodeller) may disapprove, but I can live with it . Please feel free to make any comment or criticism or suggestion. Next will be a return to a stalled (jet) project - have a great week all. Best from New Zealand. Ian.
- 10 replies
-
- 41
-
-
Well I've been racking my tiny little brain for quite some time as to which kit to build for this GB as there were quite a few that came to mind that I used to build a lot of such as the Airfix Dornier Do-217 or Heinkel He-111, or pretty much the entire Matchbox catalogue. But then I had a thought (yes I know that's a rare occurrence before any of you comment) the age limit on this goes up to 18 and the kit needs to be a memorable one, now like a lot of you I left school at 16 (I know it would have been earlier for some of you old buggers) and started work and with my first weeks wage packet I indulged my hobby. At the time I was fascinated by the Vietnam War and the aircraft that took part in it and had worked my way through the kits available from Airfix such as the Phantom, Skyhawk, AC-47 and E.E. Canberra and wanted some of the other types not covered by their range. It was at that point that the local CO-OP started to stock Italeri kits which had some of the aircraft in their range that I had been reading about. Now my Dad had decided that I was too old for models after the age of 13 so my kits had had to come as presents from relatives or bought with cash for birthdays or Christmas but when I got my first wages I could buy what I wanted, so I did! I came away from the CO-OP with three Italeri Vietnam era classics; the AC-119, B-66 and the B-57, and no my Dad was NOT happy, never mind eh! I have all of these in the stash today (not the same ones I bought in 1987) and have decided to build the B-57 as it was the first of the kits I built from my new stash. Obviously back then I built it in the Vietnam camouflaged markings that came with the kit but this time around I am going to do it as something different, as either a B-57B or B-57E used for testing at Edwards AFB, the decision is yet to be made. Here are the usual box top and contents shots and also a couple of additions that I might use during the build; The new boxings excellent decal sheet; And the extras that I might use; Thats the introduction over so as usual all comments and criticisms are gratefully received. Craig.
- 72 replies
-
- 15
-
-
This is where I'm up to with my current build, a Westland Wessex commando carrier. I've just been doing some faffy window masking. The instructions said to paint the passenger seats olive drab same as the pilot seas, but I've seen two photos of similar choppers of the same era where the seats are dark blue, and indeed this is how they are on the splendid Fly Models 1/32 kit, so I went with blue. This is my first helicopter, I'm enjoying it so far. I realise those circle things on the starboard fuselage should really come out, but they won't be seen once it's assembled. I've filled the three corresponding craters on the other side...
-
I was very impressed with the Italeri kit, nice detail and apart from the radome it fitted together really well. Colours all from Tamiya rattle cans; AS-7, AS-26 and AS-27. I made the Sidewinder training rounds simply by cutting off the fins and sanding the stumps down. It's definitely made me want to make more F-16s!
-
I only started taking the photos after making a start on this, but it's a familiar type and kit so nothing new really. No aftermarket parts needed, I'm actually really impressed with this old Italeri kit, it seems a good shape and it's a nice fit with minimum filler required. So here's where I'm at now, main airframe sprayed. Colours are Tamiya AS-7, AS-26 and AS-27. I'm really pleased how this demarcation turned out! Speaking of F-16s, does anyone know if the Italeri F-16C is good for a Bentwaters 527th AS Block 32 F-16? I got the decals but no kit for one yet!


Wedge-TailedEaglePortraitRaptorDomains.thumb.jpg.41a306d3445a68f0f2df773e01776ea6.jpg)