Search the Community
Showing results for tags 'Italeri'.
-
Not very colourful unlike some of the others in the group build but an advanced prototype that was sidelined through political and commercial underhanded dealing between the Texas Congressional delegation, the Air Force and Convair meant it was never had the chance to be developed into and effective aircraft. So with out a doubt the biggest 1/72 I bought to date (Airfix's Vulcan might be bigger overall but not for wings span) the Italeri YB49 (rebox of the AMT kit but with less floppy plastic). I've done a test fit and there are some joints that will need extra work as there are no alignment tabs on the wing mating surfaces. Its a pretty simple kit, no bomb bays just a cockpit and a big wing so should be fairly quick to build.
-
 #19/2022 So, here´s my dad´s fourth and last Texan for this year. Italeri Harvard boxing, the molding is worse than the previous Italeri T-6G boxing. Canopy parts had fit problems, cockpit sidewalls were molded in different thickness, landing light covers were too small and unusable. Took clear tape to simulate the covers. Sanded off the molded on seatbelts and used Eduard ones instead. EZ Line used for brake lines. Decals are from the kit, but the Swedish wing roundels were way too small, so my dad used all roundels from the Armycast sheet which he also used before for the Uruguay T-6. Painted with Gunze H418 RLM78 slightly oversprayed with a darker tone and Gunze H309 FS34079. Build thread here https://www.britmodeller.com/forums/index.php?/topic/235111019-nordic-cowboy148-noorduyn-sk16a-harvard-mkiib-svenska-flygvapnet/ The Swedes used a large number of different Texan types, Ts, SNJs and Harvards. This scheme shows an aircraft of Flygflottilj 10 "Angelhom" at Helsingborg Airbase around 1970. DSC_0001 by grimreaper110, auf Flickr DSC_0002 by grimreaper110, auf Flickr DSC_0002 by grimreaper110, auf Flickr DSC_0004 by grimreaper110, auf Flickr DSC_0005 by grimreaper110, auf Flickr DSC_0006 by grimreaper110, auf Flickr DSC_0007 by grimreaper110, auf Flickr DSC_0008 by grimreaper110, auf Flickr DSC_0009 by grimreaper110, auf Flickr DSC_0010 by grimreaper110, auf Flickr DSC_0011 by grimreaper110, auf Flickr DSC_0012 by grimreaper110, auf Flickr DSC_0013 by grimreaper110, auf Flickr DSC_0014 by grimreaper110, auf Flickr DSC_0004 by grimreaper110, auf Flickr DSC_0007 by grimreaper110, auf Flickr DSC_0017 by grimreaper110, auf Flickr DSC_0018 by grimreaper110, auf Flickr DSC_0019 by grimreaper110, auf Flickr DSC_0020 by grimreaper110, auf Flickr DSC_0021 by grimreaper110, auf Flickr DSC_0024 by grimreaper110, auf Flickr DSC_0026 by grimreaper110, auf Flickr DSC_0002 by grimreaper110, auf Flickr
 -
 The F-5 is such a tough looking little jet, made cooler by the huge variety of schemes and operators, as the many fantastic subjects in this GB attest. My little contribution will be another VFC-111 Sundowner bird, but, thanks to an Xtradecal set winging its way to me, rather than in a traditional aggressor scheme, I'll model it as F-5N 761547, which wore a retro USN WW2 VF-11 ‘Sundowners’ Hellcat scheme. Maybe it still wears this scheme - in the photo gallery of this neat 2020 profile on VFC-111, you can see 761547 in the maintenance hangar still in the WW2 colours. I can't find any open source images I can post here, but there are some great images on Flickr and elsewhere, such as this one and this one. I'll post pics of the decal sheet when it arrives. My kit is the humble little Italeri 1/72 F-5E, which I'll build out of the box, aftermarket decals aside. Appropriately it's a Swiss F-5E boxing, as all the F-5Ns are refurbished ex-Swiss AF jets. There's not a whole lot to this kit, especially as the upper fuselage and wings are a single piece. So there's the promise of a quick build. But the join between the fuselage top and bottom halves might prove tricky to clean up, especially with the prospect of collateral damage to the lovely raised panel line details, and the join does not represent panel lines on the aircraft itself. But still it promises to be a fun little subject and project - am looking forward to taking part. Fight's on! Gerard
 -
 Hello Everybody! Continuing my USAF jets saga, here is the little F-5B from Italeri. Not a new kit, but quite decent. Two big issues I tried to tackle: - The wings are very thin (like the real bird) so the wheel wells are not deep enough: What I did was totally removing the whole wheel wells from each wings, leaving a large hole, glued in the extrados a thin plate of evergreen and re-construct the WW with the correct depth; after this the landing gear were installed but needs dramatically to be detailed (both main and nose); -the cockpit, a known issue in all Italeri kits at that scale: I did a new one almost from scratch, the most challenging parts are the separation between pilots and the mechanism to raise the canopies which is very complex and obviously oversimplified by Italeri. As I like camouflage "off the beaten tracks". I decided to represent an F-5B from the 405th TTW sporting an unusual version of the SEA for the F-5, the FS 30219 Dark Tan been replaced by a light beige color, but not everywhere. Also, the yellow band on the top of the fin is not completely painted. Unfortunately I have only one photo of the aircraft, right side: The 405th TTW bagde is home made, names on the canopies are fake because too small to read. So here is my version: Hope you will enjoy it! Have Fun SAFELY!
 -
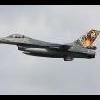
I'll be building 2 NF-5B's from 314 squadron Royal Netherlands Air Force. One will be the original ESCI kit and the other one the Italeri re-issue. Link to the Italeri F-5B: https://www.scalemates.com/nl/kits/italeri-1275-f-5b-freedom-fighter--105831 One NF-5B will be K-4021 in the grey/green scheme. Underside will be RAL 7001; top colors will be RAL 6014 and RAL 7012. The second one will be K-4018 in the F-16 scheme. Underside will be FS36375; top colors will be FS 36118 and FS 36270. Decals will be Dutch Decal and I'll be using the Wolfpack-D F-5A/B update set. Drop tanks for K-4021 will come from AK3D and paint masks from LF Models ( https://www.scalemates.com/nl/kits/lf-models-m72105-northrop-nf-5a-freedom-fighter-rnlaf--1408872 ) These paint masks are for an NF-5A and with some slight modifications on the nose can also be used for an NF-5B.
-
My entry is the Italeri 1/72 CF-116A I bought about 20 years ago with the intention of making a Canadian one with lau-5002 rockets as printed out image. Completely untouched for a long time, and I have done too many grey planes in the last couple of years so now's the chance. Apart from Master pitot it was going to be OOB, however looking at decals I have realised the slime lights are egg-yolk yellow, and there are a lot wrapping round the tip-tanks, so I need decals for a CF-116. Oddly a Canadian decal supplier has equally egg-yolk yellow slime light decals so I'll be ordering the Xtradecal set which is the only other option in print. And that will save me having to paint the blue fin stripes exactly correct for narrow red decal borders which is the kit option. Still two other GB entries in progress, but I am seeing this as a fairly quick build. The kit has white for u/c legs and bays, photos suggest aluminium; any thoughts? Chris
- 64 replies
-
- 12
-

-
 Hello guys, I'm planning on converting Italeri's Mirage IIIE into an EA. For that, I need to know the measurements of the empennage extension of the Mirage IIICJ. That part is needed to make (at least externally), an MIIIEA. This is the piece I need the measures of (highlighted in blue). I need its length, width, and height. Hopefully one of you will have the MIIIC with that extension and will be able to give me the measures. Preferently in centimeters. Thanks!
 -
Hello, Britmodellers! 👋 This kit was started some time ago as a quick background build alongside with Mi-24A, but some issues were revealed soon and all slowed down... I bought the box during sale and it’ll be a great addition to my Century Series kits. As always, I want to start from a little in-box «review». The box is a modern Italeri cardboard box with an excellent artwork: There are four painting schemes presented on the back of a box: Maybe I’ll choose this one: The box content: The decal sheet is large and beautifully printed, looks like there will be no issues on applying the transfers: Runner A with the port fuselage half: Two (early and late) types of afterburners here: The quality of these moulds is a spot on, even for this kit from 80s: I like these pipelines on the MLG struts: Runner B with another fuselage half, lower wing surface and other bits: Looks good: Runner C with the clear parts (one-piece canopy and gun sight): I started from filling an ejector pin marks with the Sprue Goo: Also I’ve done some subassemblies: That’s all for today, thanks for looking at and have a nice modelling week! 😉
-
This will be pretty much a straight OOB build of the Italeri kit in the SEA Camo scheme in the box. Hope to get on with it in a week or so. Steve.
-
As I said in the Group Build chat pages, this kit has been in and out of work since around 2007, but has been quickly pushed onto a back-burner in preference for other projects - this time around it will be finished. I haven't come across the decals for this kit but I may have popped them into my decals box, so I will have a check later. by John L, on Flickr by John L, on Flickr by John L, on Flickr
-
After my dad has built a French Texan this year and started a Brasilian and Uruquayan one, he´ll soon start the next T-6, gonna do a Swedish one with another Italeri reboxing of the Ocidental kit. DSC_0010 by grimreaper110, auf Flickr DSC_0011 by grimreaper110, auf Flickr
-
My second entry is Italeri’s F-104A. Currently toying with building this in flight, if I can find a suitable jet jockey. I will be using aftermarket decals from Wolfpack to represent an F-104A of the 319FIS. Why this aircraft, because the fuselage is ADC grey with white upper wings, this is important because I don’t enjoy painting NMF finishes.
-
Hello to all.Here is my latest finished model.The great italeri F-5A.I built it as a F-5C.I added a new pittotube and seatbelts.The rest was pretty much oob.Painted in gunze acrylics and sealed with the vallejo matt coat.The weathering is to a minimum on this one.
-
Reini's Century Series - F-100D Super Sabre Italeri's (ESCI) old and trusty F-100 is still a decent kit I think. Sure, it's lacking on some details (like the cockpit) and the wing slats are closed but despite being little dated, I like the kit. Box contents. I've built two of these before and for this build I'm going all in with the aftermarket items so I won't be using much of these parts 3D printed ladder, really fine looking thing. I just hope I won't break it... Some of the aftermarket parts. Upgrade for the cockpit as the kit one is quite spartan. Ejection seat is good upgrade but this is my fist try on the full Aires resin cockpit. Exhaust nozzle, another good upgrade, really adds details. Full napalm loadout, as I will be doing a vietnam era strike fighter. Tyres and a Master pitot tube, finding it really hard to do a build without Master pitot tube. Decals that I will be using. And then this beauty. The wing slats are closed in the Italeri kit and this will correct that. It also adds landing gear bay details. I've built couple Italeri Hun's before. This is my first kit since I re-started my hobby several years ago. This was my second attempt few years later with some experience and airbrush etc. For this build I modified the original wings to have open slats. But it's nice to have ready made part for that now. Let's see how this goes - welcome aboard
-
This (big) kit I've had in the stash for years. But the AM I bought for this GB. Danny Coreman's book I've used for some previous 1/48 builds. The dutch 'dusty' decal sheet i bought fairly recently, But I'm not sure if i'll go this way yet? I think the decals look hard edged compared to reference photos so if i do go this way I may create them manualy somehow. All the kit schemes are great too. I've always had a love of both the italian and Luftwaffe schemes.... hmmm. Here's the lovely extras: it's a big plane in 1/32... the reskit engine set is ace (and big) I'm looking forward to this!
- 43 replies
-
- 14
-
-
- 1/32
- Starfighter
- (and 1 more)
-
Joining with this Italeri F100F kit, depicting a two-seat F version. A donation at Jet Age, with damaged decals. Parts. Damage to the decals rules out some options - but not these two USAF. Undecided, which to use.
-
Hi Everyone, I was completing this model just as Russia was invading the Ukraine so I have been reticent about displaying it. Given the present situation I'll say nothing about the model other than it was built straight out of the box and painted entirely with Hataki acrylics. Apologies if the images cause offence. As usual all comments and criticisms (about the model) are welcome. Thanks for looking
-
I call this one done for now. The Italeri Semovente M42 "Beutepanzer" wich was deployed during the siege of monte Casino. The build was pretty straight forward with a simple interior. The tracks provided with this kit were horrible, however it was no option to order aftermarket tracks because of the cost. I struggled with the paintjob and altough i got it after the second time i still think i have much to learn and improve when it comes to airbrushing and weathering. I still have the feeling i don't master the techniques fully....so, much to learn. I tried to bring the vehicle to life with some stowage. I think it works nicely. Still a bit affraid to do figure painting so i saved the figures from a few kits so i can learn to paint them. Anyway, this is it. My take on the Semovente. Mistakes were made but i enjoyed the learning progress. I hope you guys like the build. I welcome any critisism, tips and tricks. Tnx for stopping by and taking the time to look at the build. Take care guys👍👍👍
-
 MB339 60th PAN Anniversary (1461) 1:72 Italeri via Wonderland Models The Italian Air Force Aerobatic team we know as Frecce Tricolori are the Pattuglia Acrobatica Nazionale (PAN) of the 313th Gruppo Addestramento Acrobatico of the Italian Air Force. They were founded in 1961 when it was decided to merge the teams already in existence. They have flown the F-86 Sabre and the Fiat G.91 before transitioning to the two-seat fighter-trainer Aermacchi MB 339. 2021 was the 60th Anniversary of the team with tails of the Aircraft being painted in schemes to represent aircraft of Past Teams, Cavallino Rampante, Getti Tonanti, Lanceri Neri, Tigre Bianche and Diavoli Rossi. The Kit This is a re-boxing of the original 1997 Supermodel MB339 kit. For this boxing you get 3 of the kits and a decal sheet with 60th Anniversary markings. Here the kit is moulded in bright blue plastic so sun glasses maybe needed. Each kit arrives on two main sprues with a canopy as well. Construction begins sorpresa with the cockpit. Both ejection seats are 3 parts which fit in along with the control columns and the instrument panels. All instruments on the main and side panels are provided as decals. The completed cockpit can be paced in the fuselage and it can be closed up. 30g of nose weight is suggested to be added. Both wings can now be constructed and added top the fuselage along with the tail planes. Additional side aerials are added to the tail along with a pitot tube. At the front the console separating the consoles is added along with the canopies. The main canopy has parts for it to be displayed open if wanted. Moving underneath all the landing gear can be added along with the gear bay doors. The forward ventral airbrake is added along with the rear ventral strakes. Pylons and tanks can be added under the wings as needed. The Team normally fly with tanks under the inboard pylons with the out board pylons empty. The long range ferry tanks are provided in the kit as well for the outer pylons. The last items to fit are the wing fences. Markings You can paint your kit in any scheme you want as long as its the Display scheme! Markings are included for all the team aircraft for the 60th Anv season, enough atripes etc are provided for three aircraft as its a triple boxing. the hard bit will be deciding which to use. Decals are by Cartograf, which is a guarantee of good registration, sharpness and colour density, with a thin gloss carrier film cut close to the printed areas. Conclusion Its good to see this kit re-issued with the latest team markings. Highly recommended. Review sample courtesy of
 -
#9/2022 My dad´s next addition to the French at war theme. Italeri reboxing of the Ocidental kit, Eduard PE detailing set, painted with AK Xtreme Metal Aluminium. All French combat Texans came with three rocket racks under each wing, the kit has none so my dad did some scratchbuilding. Turned out a bit more crude than the original but better than nothing. The aircraft had also a gunsight, none in the kit too. Found no suiting pieces in the sparesbox to replicate one. The kit gun pods have the gunthroughs at the bottom, looking at the originals they were in middle height. So filled the old holes, drilled some new ones and added plastic rods as gun barrels. Elastic thread was used for antenna wires and brake lines. Wings have no position lights, drilled holes and inserted plastic rods. Build thread here https://www.britmodeller.com/forums/index.php?/topic/235106944-guerre-dalgérie148-north-american-t-6g-texan-armée-de-l’air/ Model shows an aircraft of EALA 3/1 in 1961 during the Algerian War. DSC_0001 by grimreaper110, auf Flickr DSC_0001 by grimreaper110, auf Flickr DSC_0002 by grimreaper110, auf Flickr DSC_0003 by grimreaper110, auf Flickr DSC_0004 by grimreaper110, auf Flickr DSC_0005 by grimreaper110, auf Flickr DSC_0006 by grimreaper110, auf Flickr DSC_0007 by grimreaper110, auf Flickr DSC_0008 by grimreaper110, auf Flickr DSC_0009 by grimreaper110, auf Flickr DSC_0010 by grimreaper110, auf Flickr DSC_0011 by grimreaper110, auf Flickr DSC_0012 by grimreaper110, auf Flickr DSC_0013 by grimreaper110, auf Flickr DSC_0001 by grimreaper110, auf Flickr DSC_0015 by grimreaper110, auf Flickr DSC_0016 by grimreaper110, auf Flickr DSC_0017 by grimreaper110, auf Flickr DSC_0018 by grimreaper110, auf Flickr DSC_0019 by grimreaper110, auf Flickr DSC_0020 by grimreaper110, auf Flickr DSC_0021 by grimreaper110, auf Flickr DSC_0004 by grimreaper110, auf Flickr
-
Now that the French at war theme is coming to an end, it´s time for a new theme 😀 Gonna do a Skyraider from the Korean war, using the Italeri boxing of the old Esci kit with Cutting Edge decals. DSC_0001 by grimreaper110, auf Flickr DSC_0002 by grimreaper110, auf Flickr DSC_0003 by grimreaper110, auf Flickr DSC_0005 by grimreaper110, auf Flickr DSC_0004 by grimreaper110, auf Flickr DSC_0006 by grimreaper110, auf Flickr
-
Hello Everybody! I start a series of three blackbirds with the SR-71 Italeri kit. I always wanted to build this wonder but the choice was pretty poor on the market: Hasegawa, Academy and Revell made some but they are all wrong in shape and details so the less-worst is, my opinion the Italeri kit. However, if you want to have an "accurate" rendition of this iconic aircraft, a lot of work needs to be done. The Italeri kit comes with a D-21 drone, and I was surprised by the size of the bird! To simplify on the work to be done, I completely reshape the nose fuselage section which is too close to a A-12 "double seater" (!), way too thin and too flat. This is a big surgery and you need a good drawing to capture the right nose shape, add the navigation device "hump" in the rear of the navigator position etc... The other challenge is to add some "fat" to the fuselage section, not easy. For the rest, the kit needs to be engraved carefully, I used some PE for the auxiliary intakes doors etc.. The cockpit needs some extra work also but you will not see that much once finished... The landing gears required some detailing, I have separated the middle wheel from the main undercarriage (it is molded in a single piece) and detailed the three wheel wells which are pretty empty. Painting the kit is another challenge, as black is not necessarily black so I used various shades of blueish, brownish blacks sprayed randomly to some panels. For the marking, I selected a/c 1967 in the late 70 style based at Kadena in 1978. The decal sheet is from Rocketeer Decals "Ichi Ban". Highly recommended! Unfortunately I have only one photo of the aircraft. A slight weathering was also made. So the Photos: The real stuff: mine: ...and a little dio: the Ford tractor comes from the Hasegawa kit but needs to be enhanced. The SR-71 AG-330 starting group is from the British supplier 'AIM-ground equipment' but unfortunately the wheels are in white metal and are useless. Two groups were made, one type equipped with Chevy engines and the other one with Buick engines. The ladder is scratch built. As a conclusion, a disappointing kit and I am not satisfied with the result... When a definitive kit of this beauty at the 72eme scale will be on the market ???
- 10 replies
-
- 30
-
-
This is the Italeri kit from 2002 according to Scalemates. It’s OOB save for Print Scale smoke ring decals and Uschi aerial wire. Straightforward, simple. No filling needed. Seatbelts are moulded onto the seat (They’re inaccurate and not at all convincing). Some may want to rescribe the wings. I didn’t. Paint was Humbrol. Italian Sand, I4, equivalent to Hu.118 apparently. My tin is now 50 years old and still going strong. I’d mislaid my Italian grey so improvised. I saw recommended Hu.140 but it looked too dark to me after I’d put on the first coat so used Hu.127 instead. Decals, aside from the smoke rings, are from the kit and they went on fine save some silvering on the upper wing which I couldn’t get rid of. When touching up I found that the Green that was closest to the smoke ring green was Hu.91. Finally, I put on a Promodeller Wash of sand on the underneath only and tried to pencil the aileron, rudder and flap lines Problems. The spinner spiral. No decal provided. No generic decal sheet for spirals that I could find. Masking didn’t go well on such a small area (even with cutting the tape into small pieces) so went with pencil and Sharpie pen. An undercarriage strut pinged off and disappeared. A simple plastic rod was its replacement. The tail wheel snapped off. I inserted a pin beside it and glued accordingly. (I am in awe of those who can apparently insert a pin through an undercarriage leg lengthways in this scale. I certainly can’t and I’ve tried many, many times)
-
Looking back over what must be almost 65 years of building Airfix kits, I have to say that the pattern of their earlier aircraft releases seems a bit strange at times. Having started off with a supposedly Mk I Spitfire you might perhaps have expected a few more aircraft from the Battle of Britain period, but instead we got a Spitfire IX, a Hurricane "IV" and a Bf 109 "G" followed later by a Do 217E instead of a 17Z and a late war Heinkel He III H-26 I think. Whatever- I bought their Do 217E in the early 1960's not too long after it was released, and when I had probably not really heard of it and here it is, totally refurbished in Maritime colours RLM72/73 over 65, next to a Frog Do 17Z in normal 70/71. There is of course a strong family resemblance as it was initially intended to be an improved Do-17 but put on weight and was given a new number. Subsequently I bought a book which had details of the plane including the later versions with the new glasshouse nose and I rather fancied one, perhaps a K-2 with extended wings to carry Fritz X or Hs 293 missiles. However I ended up buying this. The kit was first released in 1977 though this is the 1983 boxing, and over the years they released it as the N1 night fighter in 1979, the K2 eventually in 1996, bnackdatyed it to an E in 2005, and then they released inline engined M1 in 2011. I think that at one point there was an aftermarket set of extended wings available but that seems to be long gone. The 217 is a curious plane in some respects. As a night fighter it was too slow and clumsy but had long range and made a good night intruder until Hitler stopped operations over Britain as he wanted the German population to see the fallen RAF planes over their own soil. As a bomber it was pretty good but mostly was used at night or on maritime duties and was not too well known in the UK. It had a max bombload of around 8000lb, was quite fast, perhaps 350mph at altitude, and depending on the fuel/bomb load it had a range of over 1000 miles. This will probably end up as a night bomber from KG2 Holzhammer as on the front of the box. Incidentally this is my second kit of this plane, the other was picked up cheap to provide an undercarriage for the Do-217 E refurbishment shown earlier. So if anybody needs any spares I should have everything except the wheels/legs/bay roof and maybe the cockpit floor and turret glazing. I may even have the decs too. Send me a PM if interested. So my contribution to this GB with any luck should be one of the first Do-17 and pretty much the last Do-217. Cheers Pete
-
 Here's my attempt at the 1/72 special livery Italeri "Big Cat" kit. Also used for some photographic practise, hence the variety of shot styles (sadly a memory card failed, so I've lost a chunk of the 'plain' model shots, and haven't the patience to go back and redo them all!). Mostly built OOB but an aftermarket seat, Eduard etch airbrakes/brake pipes/nose probes/nosegear door, and the ladder is from Flightpath. I scratchbuilt the removable intake FOD covers and the fuselage beacon, and also modified the main gear quite a bit to better represent the complicated cylinder arrangement. I also cut and re-set the flaps/ailerons/slats to try to better represent the usual 'droop' when the aircraft systems are shut down. Hataka acrylic grey paint, then those rather tricky decals over half the airframe. Loads of setting solution required! Italeri Jag kits don't have the best rep but I'm fairly pleased with this one. Thanks for looking! Here's a quick look at the evolution of the main undercarriage legs, in case anyone's interested: I've been frustrated that no kits (or 1/72 aftermarket parts) seem to have the correct look for the really complex multiple cylinders and rods on the real thing. The first view is the kit leg with the Eduard etch brake lines attached, at which point I decided to try improving a bit...the incorrect thin cylinder/pipe was removed, then various bits of plastic tube, filler and copper wire were added before painting and oil weathering (plus a couple of tiny bits of decal for the placards). Hard to make out much detail at that scale (each leg is only about 1" or less).
- 42 replies
-
- 74
-
-