Search the Community
Showing results for tags 'Eduard'.
-
 I have a nasty habit of doing WIPs and never showing off the end result, so for the first time, an RFI. the kit was the Eduard 1/48 dual combo P-39 Airacobra Bella. this has the privilege of being my first and second Eduard build. Paints used were mainly Mr Hobby for all major external surfaces, with details being either Vallejo or Tamiya. Apart from things like exhaust stacks, all applied with the airbrush. This was also my first attempt at weathering, though restricted to pre-shading and some exhaust and radiator staining. I found the kit to be challenging as some parts were not clearly defined on the instructions and the lack of locating lugs on the fuselage made alignment tricky whilst holding all the internals together. One improvement I would recommend would be to include an idea of nose weight. I added a 5g wheel trim weight plus six ball bearings to each airframe which just about was enough provided the wheels were glued in exactly the right position. Still, they didn't sit on their asses. On with the pictures. Thanks for looking.
 -
Time to stress myself out a little and go in a different direction, East. This is going to push me a bit further along the line of learning as there are going to be a number of firsts here. 1) Something in Russian service 2) Something that has a lot of etch 3) Two kits at the same time 4) A first attempt at weathering what is going to cause all this? Bella I made a start by opening the box, deciding it was too much and putting it back in the cupboard. I then made a second start by opening the box, unwrapping the sprues and washing everything. So, what is in the box? A glossy instruction sheet Some packets containing etch, A soddin' great decal sheet (the most hateful part for me) 2 sprues for the wings 2 for odds and sods 2 fuselages 2 clear sprues and some masks. quite a bit to get my hands on as they say. As I have not made anything other than factory fresh finishes I will have to decide how to approach a war weary look. A bit of time on you tube may be in order for this one. Hopefully a start will happen this week, mainly with pre painting the cockpit bits before sticking things together.
-
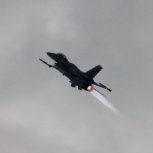
Hello all, Finished bits and pieces yesterday and had a good play with my camera. Comments and suggestions are very welcome: BANANA FOR SCALE: Many thanks!!!
- 24 replies
-
- 43
-

-
Looked at the GB calender today and remember I said I’d provide a Spitfire here. Hope it’s not too late to join. The raw material: Eduard’s Aussie Eight, probably the nicest kit I have laid my hands on. Here are some of the 32 options: Plenty of teeth on the decal sheet! With so many choices I might have to make the decision simple and use the one with the biggest mouth. Started with painting and the cockpit. More to come later - will have to post separetely, since three times the miserable Iphone has erased my attempts to add more pictures and text. Below the resin parts. The exhaust is from Quickboost - I figured the nice tyres and general level of detail warranted nicer exhaust pipes (drilling out non-circular pipes I am too lazy to do).
-
Well I made the decision to go for wheels only on the next build. I'm done with tracked AFV's for a bit. I liked this little number, so someone treated me to it for Christmas. Managed to pick up the Eduard PE for £4 on Ebay with free shipping; so why not........ I'm going to keep it simple.....although I'm trying to figure out how if possible to drop a single barrelled 20mm flak piece in the main seating compartment as I've seen done on some Horche 1A trucks on various fronts. But I don't think it's as long wheel based as the Horche....have to see once I get the main upper body together. So, while I'm been left alone this afternoon, I'll crack on with the chassis... Have a good rest of the day chaps. Simon.
-
let's see what we can do with this that I started years ago. a special edition kit from Eduard. I've lost most of the resin parts so it won't be from the box. Any ideas my accomplices
-
 I am surprised that no new tool Eduard Tempest has shown up in this GB yet, so I will have a go at Roland Beamont's mount as the CO of No.150 Wing, Newchurch, June 1944. I will use the plastic from the Series 2 kit I have in my stash and the decals from the Royal Class boxing when available as I don't want to buy the Series 1 boxing as three Tempest are enough for me and I really like to have the book that comes with the Royal Class boxing. I may use resin wheels and exhaust, but the rest will be OOB with maybe some extra detailing. Cheers, Peter
 -
Began this new project today, Eduard's new tool Hawker Tempest Mk.V Series 2 in 1:48. I will be using the plastic parts instead of the PE that comes with the kit. Box: Decals, PE and masks: The sprues: Instructions: Wings completed yesterday: So far, it's been an easy ride, though I did brake part of the tubing of the cockpit framing.
- 10 replies
-
- 5
-
-
- Pierre Clostermann Tempest
- Hawker Tempest
- (and 1 more)
-
 I have had in my stash, since it was first released, the Eduard Bf109G 1/48 Royal Boxing. I am aware of all its shortcomings, I in fact posted an article on Aeroscale ( https://aeroscale.kitmaker.net/modules.php?op=modload&name=features&file=view&artid=5612 ) correcting all the major problems of this kit. I eventually built the one kit in the boxing as a G-2 incorporating all the corrections. The remaining kit I decided to build as a G-14 version with all the Brassin sets that were available then, the engine set, the cockpit set, prop.& spinner and the radio set. After correcting the fuselage the kit was left in its box till now!! I purchased the new tool 109s which are excellent builds straight from the box but when I obtained the new tool G-2 version I had a spare set of wings which happily fitted the old tool 109. This negated having to alter the wings on the G-14 so eventually the build began!! I did run into some problems with this build i.e. for some reason the fuselage was too wide to take the front windscreen whether this was due to using the brassin cockpit I'm not sure. After some sanding down of bulkheads I manage to get a reasonable fit, although I'm not too pleased with the end result. I had some difficulty getting the engine to sit properly whether these problems were caused by me or the kit I'm not sure and the whole thing nearly ended up being scrapped. However I persisted and present the result for your perusal I'm not really happy with the end result ☹️. The machine depicted is a G-14 from 15./JG.5 Lister, Norway, May 1945 ( EagleCal Decal Sheet):- Cheers Andy
 -
This one was built from an initial Eduard boxing (2000) so I added their etch set to it and CMK exhausts, the heavy weathering was guided from reference of the same aircraft, these things got real dirty over in the Guadalcanal.
-
 Sometimes you have yourself a kit that is pretty much faultless, the build goes through without issues and it restores your faith in life. This for me is one of those - great package, great book that comes with it, huge colour profile book (32 to choose from!), perfect fit of parts. Probably only couple of things to say is maybe too many parts/bit over engineered for 1/72 (cockpit took me ages and now can barely see it!). Really wish Eduard would do more of these special boxings in 1/72 but they seem to focus on 1/48 recently. Vallejo model air paints, I chose the following markings: #1 S/L Tom Trimble No. 457 squadron, Sattler Airstrip late 1944 #2 F/O Norm Turnbull No 79 squadron, Morotai, April 1945
- 11 replies
-
- 36
-
-
Hi all, Returning to modeling with a Eduard Pacific P-38 kit I chanced upon on ebay, having just read "Forked-Tailed Devil" previously, I had to have it. Interesting project so far being the first time I've used either photo etched or resin parts. Safe to say I've lost/crushed a few PE bits & made a few errors along the way but still pleased with it so far. Not feeling ready to do a NMF I'm aiming to build it up to an olive green / grey version flown by Capt Jay T Robbins in 1943 I'm nearing the stage to start painting (1st attempt with an airbrush) but having built the canopy (pig of a job) & now applied the Eduard mask set supplied with the kit (another first) I'm really disappointed with the 2 side windows which have a X brace across them, the mask set is just not even and will look awful if I don't correct it. So can anyone point me in the direction of some tips on how to address this without losing too much hair. I would say my modeling abilities are rusty & limited by fat fingers & unsteady hand but I have high hopes & willing to learn. Thanks in advance, will post some pics when I remember to stop fiddling and take some. Lonners
-
LAU-10/A ZUNI (672211) 1:72 Eduard The Zuni 5-inch rocket as an unguided rocket used by the US Navy, US Air Force and US Marine Corps. It is usually carried in fours in the LAU-10 rocket pod. Designed by the Hunter-Douglas Division of the Bridgeport Brass Company, the Zuni is a modular system and was designed from the outset to deploy a number of different warheads, including a proximity fuse warhead. For this reason, the rocket was selected as the basis for the original AIM-9 Sidewinder. A laser guided version has been developed for deployment by the US Marine Corps. The set comprises two LAU-10 launchers, each of which can have up to four Zuni rockets added. The aft end cap is a separate part, and two version are provided so you can choose between an armed or unarmed pod. Tiny brass parts are provided for the armed version. Decals (not shown) are also provided. The casting is flawless and smooth, with minimal cleanup required thanks to the positioning of the pouring stubs at the tail-end of the rocket pod. Colours and stencil positions are marked in a colour diagram, with Gunze Mr Color paint references as usual. Review sample courtesy of
-
 Last of five Emils done. Eduard kit with Hasegawa decals, RLM71 from Gunze, RLM65 from AK Real Color, legs shortened about 2-3mm to make it look better and more realistic, plastic rods and lead wire for the brake lines, EZ Line and fishing line for the antenna. Build thread here https://www.britmodeller.com/forums/index.php?/topic/235055626-carpathian-eagle148-messerschmitt-bf109e-3-romanian-airforce/ Adjutant Tiberiu Vinca, Grupul 7 Vanatoare, Stalingrad in the end of ´42 DSC_0001 by grimreaper110, auf Flickr DSC_0001 by grimreaper110, auf Flickr DSC_0002 by grimreaper110, auf Flickr DSC_0003 by grimreaper110, auf Flickr DSC_0004 by grimreaper110, auf Flickr DSC_0005 by grimreaper110, auf Flickr DSC_0006 by grimreaper110, auf Flickr DSC_0007 by grimreaper110, auf Flickr DSC_0008 by grimreaper110, auf Flickr DSC_0009 by grimreaper110, auf Flickr DSC_0010 by grimreaper110, auf Flickr DSC_0011 by grimreaper110, auf Flickr DSC_0012 by grimreaper110, auf Flickr DSC_0013 by grimreaper110, auf Flickr DSC_0014 by grimreaper110, auf Flickr DSC_0015 by grimreaper110, auf Flickr DSC_0016 by grimreaper110, auf Flickr DSC_0017 by grimreaper110, auf Flickr DSC_0004 by grimreaper110, auf Flickr
 -
 Hello guys, Here's my latest finished model: an Eduard Bf-110 G-2 1/72. Excellent model. No problem at all. Easy assembly in a few weeks. I only used the Master PL 37 mm cannon. Out of box. I used Mr Hobby colors. Hope you like it. Send reviews! Cheers,
 -
 MiG-25 RBT Photo Etch and Masks for ICM Kit 1:72 Eduard Fans of Soviet military hardware appear to be living through a golden age at present. When I returned to the hobby almost 20 years ago, kits of Soviet subjects were far less common than they are now, and those that were available were almost all either old, inaccurate tools from the west, or limited runs kits of a 'challenging' nature from the east. These days we are far better served by a range of new, state-of-the-art tools from the likes of Eduard, ICM, Trumpeter and Zvezda to name but four. In most cases, Eduard have eagerly supported each new release with a set of photo etched details and masks. This month, ICM's new MiG-25RBT receives the Eduard treatment. MiG-25RBT In the usual Eduard style, this set comprises two frets of parts. The first fret contains pre-painted parts for detailing the cockpit and includes harnesses, cushions, pull handles and other details for the pilot's seat, as well as details for the instrument panels and side consoles. Also included are parts for the rudder pedals. Many of the parts require their plastic equivalent to be scraped away. The second fret is unpainted and contains parts for detailing the landing gear bays and landing gear itself, the canopy and various surface details, particularly relating to the reconnaissance equipment in the nose. Also included are details for the huge jet exhausts such as detailed afterburner flame holders. MiG-25RBT Zoom If you are more concerned about the cockpit than the rest of the airframe, then you can save some shekels by plumping for the Zoom set. If you do, the only other parts that you will be missing out on are some of the extra details for the canopy (although you still get the rear view mirrors, which in my view make a big difference. MiG-25RBT Masks This set provides pre-cut paint masks for the canopy and all of the wheels. If you've used Eduard's pre-cut masks before, you'll know that they are a real time saver. Conclusion These sets are a handy upgrade for the new ICM kit. Recommended. Review sample courtesy of
 -
Most likely now the last Emil by my dad for now 😄 Eduard kit with decals from the Hasegawa kit. DSC_0004 by grimreaper110, auf Flickr DSC_0005 by grimreaper110, auf Flickr
-
Started this last weekend, with a couple of extras Montex Masks Eduard Cockpit Etch Eduard Belts Assembled the cockpit, and weathered it down Peter
- 23 replies
-
- 11
-
-
Hi everyone, this is my first WIP on this site... I'm already some weeks into this build so no real 'in progress' pictures. I don't have too much time for modelling so my focus lies on building rather than taking pictures on the go. But now I found some time and thought I share some pictures. The kit should be well known, its the 1/350 Tamiya Tirpitz. I got it as a present from friends last year for my birthday and used the time to obtain some goodies for it: the eduard big ed set and a wooden deck from a chinese companie I do not know... So here we go: bridge assembly upper bridge full bridge assembly: and with radars all radars: funnel: scratchbuilt interior: ...aaaaand how little you see when the funnel cap is attached... I don't want to imagine how it looks after painting... At least I know its there! Now the hangars, first the only WIP I can show: side hangar before and after PE both done: big hangar: Now the big pieces: and everything together so far... looks like theres more brass than plastic and next the wooden decking... there are many issues with that... for example 1 easy to fix problems where eduard replaced the 'balconies'... 2 Big problem where eduard corrected wrong fittings on the deck... I still have no idea what to do with that... maybe fill in pieces out of sheet to simulate hatches...🤔 3 Huge problem where shields where moved to the correct positions... see also the first picture of the wooden decking aft of the 2nd tower in front of the bridge... I dont know what to do... as shown on previous pictures eduard provides etched decking but I know my painting skills will never be good enough to stand up to the real wooden decking on the main deck... Any input is highly appreciated. Thanks for looking Konrad
-
.thumb.jpg.0cb281983c298f55509ab7d9a06994bd.jpg) 318 (Gdanski) Squadron was one of the last Polish squadrons to be formed & was named after the city of Gdansk, after the custom of naming fighter squadrons after cities & bomber squadrons after regions. It performed the vital, dangerous but unglamorous work of army cooperation in support of the 2nd Polish Army Corps in the middle east & Italy. It saw intense action at Monte Cassino. Image from Polish Squadrons Remembered. This is my fourth Eduard Spit IX, detail is great but the engineering is over complicated in some ares. I can't understand why the exhaust comprises several parts & the cowling top is split in 2. I used Eduard's resin replacement on this which didn't fit as well as the Barracuda part I used on my other ones! Decals are from Topcolors Polish Spitfires booklet. It represents the aircraft flown by P/O Chudzinski from Tissano in Italy, July 1945. Any comments, criticisms & observations welcome. Pete Thanks for looking.
318 (Gdanski) Squadron was one of the last Polish squadrons to be formed & was named after the city of Gdansk, after the custom of naming fighter squadrons after cities & bomber squadrons after regions. It performed the vital, dangerous but unglamorous work of army cooperation in support of the 2nd Polish Army Corps in the middle east & Italy. It saw intense action at Monte Cassino. Image from Polish Squadrons Remembered. This is my fourth Eduard Spit IX, detail is great but the engineering is over complicated in some ares. I can't understand why the exhaust comprises several parts & the cowling top is split in 2. I used Eduard's resin replacement on this which didn't fit as well as the Barracuda part I used on my other ones! Decals are from Topcolors Polish Spitfires booklet. It represents the aircraft flown by P/O Chudzinski from Tissano in Italy, July 1945. Any comments, criticisms & observations welcome. Pete Thanks for looking.- 16 replies
-
- 40
-
-
Hi folks, This is a build that I finished some months ago and I forgot to post here. A tiny Hellcat Mk.I, 1/72. A Wonderfull model from Eduard. It haves a great fit, nice an very delicate details, is the Dual Combo edition. With PE and masks. I have to build yet the Mk.II. In this case I have added more rivets with a riveter wheel. I think It turns out quite good... Hope you like it 🍻 Greetings Ricardo
- 19 replies
-
- 33
-
-
- Hellcat Mk.1
- D day
- (and 1 more)
-
Hello my friends. This is my last built: an excellent Eduard Mig-21 MF. This mold is perfect. Easy fittings. I used Tamiya and Mr. Hobby mixes. Out of box. Cheers!
- 18 replies
-
- 31
-
-
Hi Guys Eduard weekend edition Mig-21MF quick build. That was very good set, no problems during build. Slovak Air Force "agressor" painting scheme. Model painted with Tamiya paints, details with brush Vellejo, Revell and Model Master paints. I use Eduard brassin wheels for main landing gear. Comparison with the Zvezda's Mig-21 1:72 scale model.
-
 Spitfire Mk.II Interior and Seatbelts (for Revell) 1:32 Eduard The new Revell Spitfire II was a welcome kit when it hit us in 2014, despite a few short comings it can still be built into a nice kit. These sets from Eduard will enhance the base kit. Interior (32936) Two frets are included, one nickel plated and pre-painted, the other in bare brass. A complete set of new layered instrument panels are provide. also for the cockpit a new pilots seat and the armour plate behind it. Rudder pedals, a new gunsight housing and control column parts. There are parts for the aircraft frames directly behind the cockpit. Inside the cockpit there are a myriad of parts for the sides, and cockpit controls. There are parts for the canopy frames and a new cockpit door complete with its framing and the canopy breaker bar (just don't paint it red!). Zoom! Set (33206) This set contains a reduced subset of the interior, namely the pre-painted parts that are used to improve on the main aspects of the cockpit, as seen above. Whatever your motivations for wanting this set, it provides a welcome boost to detail, without being concerned with the structural elements. Seatbelts STEEL (33207) These belts are Photo-Etch (PE) steel, and because of their strength they can be etched from thinner material, which improves realism and flexibility in one sitting. Coupled with the new painting method that adds perceived extra depth to the buckles and other furniture by shading, they are more realistic looking and will drape better than regular brass PE. Review samples courtesy of
 -
Eduard International Marine Signal Flags - Eduard 1:200 (53231)
Julien posted a topic in Aftermarket
International Marine Signal Flags Eduard 1:200 (53231) The international code of signals provides ways and means to communicate situations easily. Set up by the British Board of Trade in 1887 the system was reworked after WWI and the new code adopted in 1932. While the flags can be used to spell out a message, individual flags also have there own meaning when flown which are applicable to this day. For example the letter "A" means "I have a diver down, keep well clear at low speed". Quite a few kits provide a selection of flags and pennants that are printed on paper. These can look ok, but generally always have a tired well worn look. Eduard have now countered this look with the release of this pre-painted steel set. The 32 flags are beautifully painted and will look great either as a message from a halyard, or even on a ship dressed overall. Conclusion This is a very nice and easy to use set which would add a dash, or even a lot of colour depending on how many you use. Review sample courtesy of