Search the Community
Showing results for tags 'Brengun'.
-
 Dear fellow Britmodellers, I built Brengun's Yak-1 "Aces" boxing with markings for Mikhail Dmitrievich Baranov's "Red 1", flown in summer 1942 with 183.IAP. The kit is a multi-media affair, with plastic, etch and resin parts. Painted with Gunze/Mr.Hobby acrylics, weathered with artists oils from Winsor & Newton. Photographs by Wolfgang Rabel. # Thank yo for your interest in this topic. A detailled build review will appear in an upcoming edition of Scale Aviation Modeller International. Best greetings from Vienna, Roman
- 16 replies
-
- 44
-

-

-
Dear all, Please find below some images of my recently finished SAMI review kit of the Vought-Sikorsky VS-300. The VS-300 was the first practical US-designed helicopter and pioneered the now familiar lay-out of a main rotor and small tail rotor. The kit is a reissue by Brengun of the Extratech multi-media kit. The review article will appear in one of the upcoming issues of SAMI. Peter
- 11 replies
-
- 24
-
-
 Brengun has just re-released the Attack Squadron Northrop Grumman MQ-8C Fire Scout (Fire-X) resin kit - ref. BRS48015 Source: http://www.hauler.cz/e-shop/1-48-construction-kits-30/mq-8c-fire-x-1756 V.P.
- 2 replies
-
- 2
-
-
- MQ-8C
- Fire Scout
- (and 1 more)
-
Brengun has just re-released the Attack Squadron 1/72nd Kaman K-Max resin kit - ref. BRS72018 Source: http://www.hauler.cz/e-shop/1-72-construction-kits-20/kaman-k-max-1743 V.P.
-
- 2
-
-
- K-Max
- Attack Squadron
- (and 1 more)
-
I tripped across this kit looking for carrier deck parts and thought it would be a unique build. Did some reading up on the drone and found out an interest combat proven history in recent conflicts. https://en.m.wikipedia.org/wiki/Northrop_Grumman_MQ-8_Fire_Scout This Brengun kit in 1/48th on first look has nice surface detail it will take some careful cutting to get the parts off the carrier sprune. Plans are very straight forward should be a good build I havent done a kit like this in a non traditional format.
- 5 replies
-
- 4
-
-
- brengun
- Fire Scout
- (and 1 more)
-
Brengun is to release a 1/144th Douglas SBD Dauntless kit - ref. ? Sources: https://www.facebook.com/HaulerBrengun/photos/a.443370235821630/1540075489484427/ https://www.facebook.com/HaulerBrengun/posts/1579045355587440 Box art & schemes V.P.
-
Art Chesters JEEP brengun 1/48 resin kit the chester jeep was built for the 1932 national air races in the USA, it raced up until the 1948 cleveland air races and unlike alot of racing planes of that era it still survives. the brengun kit is lovely, goes together really well, the only problem i had was the vacform canopy, but that might have been me and my 'love' of vac form canopies. i have taken some photos next to a airfix spitfire PR19, just so you get an idea how small this plane really is. thank you for looking.
-
Brengun is to release a injected 1/48th DG Flugzeugbau DG-1000 (or TG-16A in USAF) glider kit - ref. BRP48006 Source: https://www.facebook.com/HaulerBrengun/posts/1530501893775120 3D renders And in USAF Academy colors ! TG-16A https://www.dg-flugzeugbau.de/en/wp-content/uploads/sites/2/2016/12/US-Air-Force-DG-1001-segelfliegen-INTERNATIONAL.pdf V.P.
-
Brengun has just re-released the former Extratech link 1/72nd Sud-Ouest S.O.1221 Djinn resin & PE kit - ref. BRS72017 Source: http://www.hauler.cz/e-shop/1-72-construction-kits-20/so-1221-djinn-1720 V.P.
-
 I bought this recently and thought that it would have made a nice subject for the Anything but Injection group build, but because that didn't make the cut for this years group builds I am going to build it here. The box and its contents are shown below, I have quite a busy schedule at the moment but I hope to start soon. by John L, on Flickr by John L, on Flickr
- 25 replies
-
- 10
-
-
- Anything but Injection
- 1/144
- (and 1 more)
-
Brengun has just released a 1/72nd Sikorsky VS-300 multimedia kit (ex-ExtraTECH) - ref. BRS72016 Source: http://www.hauler.cz/e-shop/1-72-construction-kits-20/vought-sikorsky-vs-300-1700 V.P.
-
After the 1/72nd kit (link) Brengun is to release a 1/48th Rutan Quickie resin kit - ref. BRS48012 Source: http://www.ipmsdeutschland.de/Ausstellungen/Nuernberg2020/Bilder_AT/index.html V.P.
-
 AV-8B Resin Accessories for Hasegawa Kit 1:72 Brengun Hasegawa's AV-8B Harrier has been around for a good while now. It represents classic Hasegawa in the sense that it provides everything you need to build a high quality Harrier while never going over the top in terms of engineering or detail. The kit has also been re-released by Revell on at least one occasion. Now Brengun have released a swathe of resin goodies to update and upgrade an already impressive kit. AV-8B Nozzles (BRL72183) This set provides nicely detailed hot and cold exhaust nozzles. Aside from the crisp detail, the parts are cast in one piece which will negate the need to spend ages tidying up the two-part kit items. I've used similar sets in the past and found them to be far superior to the kit items, as well as being much easier to use. AV-8B Cockpit (BRL72182) This set contains upgrade parts for the kit's cockpit. Unlike many upgrade sets, which contain a complete replacement cockpit tub, this set is designed to be used alongside the kit parts. Included in the set are sidewall details and consoles, a choice of instrument panels (for Night Attack and... um, Day Attack versions) and a fret of photo etched parts, most of which are upgrade parts for the kit's seat, as well as other bits and bobs. I personally would have preferred a resin seat, but that could still be an option as there are many of those available. AV-8B Night Attack Nose (BRL72184)] If you don't have the Night Attack version of the Hasegawa kit, with the FLIR bump built into the nose cone, then you can simply stick this bad boy on the front and hey presto. The resin is beautifully cast and nicely detailed and, thanks to the design of the Hase kit, you don't even need to saw off the old nose to use it. AV-8B Wheels (BRL72185) This set includes replacement wheels for the kit, including the outrigger wheels, as well as a replacement for the lower part of the nose gear leg. There is a tiny fret of photo etched parts that includes scissor links that can be added to the kit legs as well. The resin is nicely cast and includes fine detail on the tyres that is absent from the kit parts. Conclusion Hasegawa's AV-8B Harrier II is an excellent kit and I'm sure it will remain a popular choice with modellers for quite some time to come. While these sets join a somewhat crowded marketplace, the quality is sufficient for them to be able to hold their own and provide a useful option for modellers looking to upgrade their kit. Recommended. Review sample courtesy of
 -
This is my first armour build, let me know what you think.
-
Brengun has just released a 1/48th de Havilland DH.98 Mosquito two-stage merlin resin conversion set (ex -Attack Squadron ? ) - ref. BRL48124 - for the Tamiya keit. Source: http://www.hauler.cz/e-shop/1-48-accessories-22/dh98-mosquito-two-stage-merlin-(tamiya)-1672 V.P.
-
Ex Attack Squadron 1/48th Northrop Grumman MQ-8B Fire Scout resin kit is re-released by Brengun - ref. BRS48010 Source: http://www.hauler.cz/cs-cz/e-shop/1-48-stavebnice-30/mq-8b-fire-scout-1679 V.P.
-
- 3
-
-
-
- Brengun
- Fire Scout
- (and 1 more)
-
Yakovlev Yak-1b 1:72 Brengun Prior to the outbreak of WWII, the Yakovlev Design Bureau was best known for designing and building lightweight recreational and sporting aeroplanes. Starting with the Yak-2/Yak-4 light bomber, Yakovlev used this experience to create a sequence of successful, lightweight aircraft which used composite construction to reduce weight. The fighter aircraft produced during this period were largely compact and highly maneuverable. While the development of the new aircraft was not without difficulty, by the time Operation Barbarossa got underway over 400 Yak-1s had ben constructed, although not all were operational. In contrast to the MiG-3, the Yak-1 excelled at low altitude combat, with just 17 seconds required to perform a full circle. Although lightly armed by western standards, the Yak-1 was popular with Soviet pilots. It went on to be developed into the Yak-7, Yak-9 and Yak-3, with over 37,000 examples constructed in total. Brengun are a manufacturer of limited run kits from Brno, the Czech Republic's second city. They first came to my attention via their Hawker Typhoon kit back in 2013, but their catalogue is diverse, including kits and aftermarket parts in a range of scales. As befits a dimunitive aircraft, their Yak-1 arrives packed into a small, end-opening box, inside which are three frames of grey plastic, a small frame of clear parts, an even smaller fret of photo etched details and a sheet of decals. There are around sixty parts in total, excluding the photo etched details. The cockpit makes extensive use of photo etched material, with parts for the instrument panel, seat support arms and cockpit floor all rendered in metal. Plastic parts include the seat itself, the control column, oxygen bottles and medical kit. The sidewalls are nicely detailed and include the characteristic internal steel framwork. Once complete, the cockpit and the pin for the propellor can be fixed inside the fuselage halves. The upper deck and cowling is moulded separately to the fuselage, and includes nicely recess for the 20mm ShVAK cannon. Assembly then turns to the flying surfaces. The rudder is moulded separately to the fuselage and connects via to slots to the vertical tail. The lower surfaces of the wings are moulded as a single central span, while the upper surfaces are moulded as separate parts. The main gear bays are pretty nicely detailed and should be of sufficient depth. Each of the engine exhausts is moulded in four parts, all of which connect from the outside of the airframe. The undercarriage legs are accurately represented, with the same excellent level of detail as the rest of the kit. Each leg is made up from four parts excluding the wheels. The canopy is moulded in seperate stages to allow it to be finished in the open position. Decal options include: Yak-1b, 586 IAP (Women's Fighter Group), 1943; Yak-1b, 910 IAP, flown by Nikolai A Kozlov, February 1943; Yak-1b, 3 GIAP, flown by Lt. L.P. Savkin, Baltic Region, 1943; Yak-1b, 291 IAP, flown by A.F. Lavrenov, 1943 Each of the schemes is finished in the same green and black over pale blue camouflage. Despite the lack of variety, the decals look nicely printed. Conclusion There can be no doubt that Brengun's Yak-1b is a limited run kit but this doesn't mean it's any less appealing. It is nicely produced, has plenty of interior detail and captures the look of the real thing very nicely. The surface detail is delicate and the fabric over the rear fuselage is particularly convincing. Overall this looks like a really nice little kit that should be enjoyable to build. Recommended. Review sample courtesy of
-
Brengun is to release a 1/72nd, 1/48th & 1/32nd Schiebel Camcopter S-100 reconnaissance UAV resin kits Source: https://www.scalemates.com/kits/brengun-brs48011-s-100-camcopter--1250604 V.P.
-
 AN/ALE 47 Countermeasures Dispenser (BRL48122) 1:48 Brengun Modern aircraft that must face attacks from missiles similar to the ones they themselves carry need to defend themselves accordingly using chaff to confuse radar and flares to distract heat seekers. You often see the flares popping off at air shows, creating a point of immense heat that simulates the exhaust signature of a jet engine. The chaff doesn't show up so well, and cleaning-up the pieces off an active runway means they're seldom used other than in combat. The dispensers are usually found on the fuselage or wing roots of aircraft, and the AN/ALE 47 system is common on NATO aircraft, installed in recessed bays in boxes that can be triggered as needed by connected electronics. The dispensers fit flush with the skin of the fuselage to minimise drag, and once used the individual slots are clearly open to the elements – do they whistle at speed? The system is closely integrated with the aircraft's threat detection systems, and can either fire autonomously or at the request of the pilot, which is handy for airshows. Coming into service in the late 90s, they are seen on many of NATO's aircraft of that vintage. Other chaff and flare systems are available. The set arrives in a small flat(ish) package with three resin pouring plugs full of 30 different versions and complements of partly used, empty and full packs for you to use in your models. You can either cut the moulded-in kit depiction from the model and insert the boxes flush with the skin, box in the aperture and show them being installed or removed from the location by ground crew or, if you need to add the system where they don't already exist, fit them into your newly created dispenser. I'm sure there are other situations where they'll come in handy too, and they are easy to fit and use with a bit of minor surgery the only likely task to enable them to fit. They are much more crisp and detailed than any of the moulded-in systems I've seen on my travels, so it's a great way to add a little extra realism to your model. Highly recommended. Review sample courtesy of
 -
Brengun C-130J Engine Nacelles (BRL48123) 1:48
Mike posted a topic in Aftermarket (updates/conversions)
C-130J Engine Nacelles (BRL48123 for Italeri) 1:48 Brengun The large scale Hercules from Italeri has been around in many guises over the years, with the C-130J having popped up this side of the new millennium and most recently in 2014. It's a kit that is of a certain age now, but as there's fat chance of anyone issuing a new one in 1:48 scale, we have to take it as it comes with some elements that are less accurate than others. The J is the latest model of the Herc, and the only one still in production with upgraded Rolls-Royce turboprop engines and sabre-like Dowty props differentiating it from the previous marks externally. Those aren't the only upgrades, as the whole avionics package has been updated with new cockpit and countermeasures, plus improved range and performance. The J in kitform has a few challenges, one of which is the engine nacelles. This set is designed to address that, with resin parts that can far exceed the capabilities of plastic in terms of finesse and detail. The set arrives in a cardboard box that is sealed by its label and inside are found twelve large parts in grey resin, plus another twelve small parts in groups of three on the same pouring block. It's a Herk. In 1:48. So it's large. The parts are large too as you'd expect, and each nacelle comes in two parts with the front separate from the body so that a very crisp and thin leading edge lip can be achieved on the upper intake as well as the lower chin-scoop. The parts have a little engraved line where you should cut, and the front slides inside the lip of the nacelle, with the new prop boss slotting neatly into the front, allowing you to choose your preferred orientation. You'll notice that there are no blades included with the set, as Brengun consider the 6 blades on each engine to be up to the task – that's 32 - no 24 blades in total Chris (in-joke). The remaining parts are two antennae for under each nacelle, and a small cooling vent for the rear of the lower intake, which conveniently hides the blanked off exit. To install the engines on the wing, just remove 2.25mm from the inner nacelle roots and glue them in place with CA or epoxy glue as you see fit. Incidentally, you may notice the smaller parts have little extensions at the top of each high-point. These are bubble "traps" that should be cut off before you apply the parts, and are used to avoid inconvenient bubbles in delicate parts. Conclusion Well cast with only one or two bubbles in trailing edges, but these are easy to fix with some styrene rod or filler. The low part count is a boon, and everything fits together neatly, as you can see from the example above, which is only held together with a piece of Blutak behind the spinner. Very highly recommended. Review sample courtesy of -
RQ-7B Shadow UAV (BRS48009) 1:48 Brengun The RQ-7 Shadow is a tactical unmanned aerial vehicle (UAV) developed the AAI Corporation. The requirement for such a tactical UAV capable of battlefield reconnaissance, surveillance and target acquisition had been identified by the US Military and originally the RQ-6 Outrider was developed for this, however this programme was cancelled after 3 years of development. AAI looked at their existing RQ-2 Pioneer and developed this design into the Shadow. The small UAV with a length of 3.4m and a wingspan of 3.8m weighs in at 170kgs loaded. It has a 6 hour endurance, stretched to 9 with increased endurance wings. Take off is from a pneumatic assisted launcher, and landing are automatic with a ground mounted arrestor hook system. The improved RQ-7B arrived in 2004 with an increased payload capacity of 45 kgs and new "wet" more aerodynamic wings. Avionics have been improved and a new radio relay communications package installed to allow troops to communicate in locations in which radio would not normally work. Further developments of the system are to be introduced which may include IED jamming and ability for troops to see directly what the UAV is seeing. Arming the UAV was looked at however the USMC ran out of available development funds and the US Army had shown little interest in this. The shadow is currently in use by the US Army, US Marine Corps, and the US Navy. Overseas operators being Australia, Italy, Romania and Sweden, The Kit This is a re-boxing of the Attack Squadron kit by Brengun which first came out in 2017. The kit is all resin with a small PE fret and a small decal sheet. There is one block with the wings, one with the fuselage and tail booms, one with the inverted V tail, and two with all the other small resin parts. Construction is fairly simple. The wings attach to each side of the main body, underneath the sensor turret is added. The engine then fits onto the rear of the main body, you then have a choice of a resin, or PE propeller. At the rear the twin booms extend out to the inverted V tail. The basic sprung landing gear is then attached, as are some aerials and the control horns for the flying surfaces. As the kit is resin all the joints are butt type, so some care will be needed to get everything aligned correctly. The Decals There is no printers name on the decals, so could be in house? They appear to be glossy, and in register. The decals consist of serial numbers and warning tests only. The UVA is painted overall in Ghost Gull Grey (FS 36375) with patches of Dark Grey (FS 35270). Conclusion This is a great kit of this diminutive modern UAV. It is good to see more models of UAVs. Very highly recommended. Review sample courtesy of
-
Ju.290 Update Set (BRL72187 for Revell) 1:72 Brengun The Ju.290 Seeadler was a huge maritime reconnaissance aircraft that could also be pressed into service as a transport. It was chosen as a candidate for development into the proposed Amerika Bomber project that eventually fizzled out as the situation in Europe deteriorated. Less than 70 were built and none survived long after the war. Revell’s kit in 1:72 is as nice as it is large, and with its heritage beginning in 2003 it is a relatively modern tooling, but could do with some upgrading of the finer details to match modern standards and satisfy those interested in detail. This Photo-Etch (PE) set from Brengun is designed to improve on what Revell have given us by adding extra detail in all the right places. It arrives in a compact flat pack with a red Brengun themed header card and a sheet of black paper showing off the PE within. There are two frets of nickel-plated PE, plus a small slip of clear acetate with the instrument panel and gunsight on the mid-upper turret. The instructions are found behind the black paper, and construction begins with the rear turret, with interior detail in the canopy as well as within the opening into the fuselage, including a new set of ring sights at the tip of the barrel. Flipping to the front, the cockpit has a new set of instrument panels with the acetate rears depicting the dials, a new coaming, throttle quadrants, rudder pedals and other instruments on the sidewalls. The seats also get belts and a stowage pocket behind the right seat. The mid-upper is decked out with a brand new turret basket after removing the simplified tube that is provided in the kit, including instruments around the lip, ammo feed, and upgrades to the gun with the aforementioned gunsight. Externally, the main gear wells are adorned with a new bay skin, plus a new set of laminated bay doors and brake hose parts, while the airframe is given a make-over by replacing most of the antennae dotted around, including the whisker antennae on the nose, which will improve their look immensely. Lastly, the engines are fitted with a circular inner skin that gives the impression of depth and the cylinders behind the prop boss. As an aside, the picture of the PE wasn't taken in black and white, but came out looking that way for reasons best known to my scanner and how it reacts to the light reflecting off the metal. Highly recommended. Review sample courtesy of
-
Brengun is to release a 1/72nd Extra EA-300L/300LC kit - ref. BRP72040 Source: https://www.facebook.com/oxygino3dart/photos/a.205098073155516/1061164870882161/ Box art V.P.
-
Hauler Workbench with Table Grinder & Vice (HLU35116) 1:35
Mike posted a topic in Diorama & Accessory
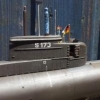
Workbench with Table Grinder & Vice (HLU35116) 1:35 Hauler Many workshops will have a workbench. I'm sitting at one writing this, and back in the 30s and 40s these looked a lot like office desks, and some still do. This set from Hauler gives us a workbench with a vice and bench grinder, all in resin. It arrives in a small cardboard box with a ziplok bag of resin parts and a small instruction sheet within. There are ten resin parts, the largest of which is the carcass of the bench, followed by the door, drawers and then the smaller parts of the grinder and vice, which are all attached to a single pouring block. Construction is fairly simple and begins with removing the thin pour blocks on the large parts, which have been placed on the back or bottom to minimise potential damage and as usual with resin, take the precaution of wearing a mask when cutting or sanding it, as the tiny particles are harmful to your health if breathed in. Washing the parts in warm water will also improve the adhesion of paint, as there may still be some mould-release agent on the parts when you receive them. The bottom drawer of the pedestal is moulded in place, but the two other drawers are separate parts and can be fitted open or closed at will. The right pedestal has a single door and an internal shelf, which can be left open and festooned with equipment if you wish. The vice is made up of two parts and is moulded open, but with a deft cut the jaws can be moved to meet your needs or just clamped shut by a tidy-minded operative. The bench grinder has a lozenge-shaped body with an abrasive wheel at either end, one of which has a guard while the other is open with all the health & safety issues that brings with it. Both devices can be placed anywhere on the desktop as needed, with a suggestion shown on the boxtop and at the bottom of the instructions. Highly recommended. Review sample courtesy of -
 Hawker Typhoon Car Door - Desert & Luftwaffe Trials (BRP72039) 1:72 Brengun In the design process even before the Hurricane reached squadron service, the Typhoon was initially intended to be a direct replacement, but with development scope to take advantage of the upcoming 2,000hp piston engines that would be near the pinnacle of propeller powered flight. Initial problems were overcome, and the early razorback design was amended to a bubble canopy that gave the pilot a vastly improved view of the sky around him. A larger, strengthened tail following a near disaster, and a change from 12 machine guns to four wing mounted 20mm cannon also improved the aircraft's offensive ability. The initial airframes had the car door canopy, which had a forward-opening door in the side of the canopy that was reminiscent of a car door – hence the nickname. It was never fully developed into a medium altitude fighter, but it did find a role nearer the ground, especially in countering the Fw.190 that was playing havoc with the Mk.V Spitfires at the time. It was a big stable aircraft with masses of power, which made it ideally suited to low level flight and naturally lent itself to ground attack. Fitted with unguided rockets or 1,000lb bombs under each wing, it became an efficient ground attack aircraft. Although the rockets were difficult to aim well, they had a massive effect on enemy morale, and played a large part in halting the advances made by German troops in the Battle of the Bulge, flying hundreds of ground attack sorties using rockets, bombs and cannon fire. Like any successful aircraft of WWII the list of improvements is long, and deletion of the car door canopy was one of the early casualties with the new canopy giving the pilot far greater situational awareness and reducing weight, although they took some time to filter through the production lines due to the complex nature of the changes needed. It was the Tempest that really made the most inroads into solving the Typhoon's shortcomings, and the original Typhoon was soon withdrawn after WWII came to a close, lasting only a few months of peacetime. Serious thought was given to the use of the Typhoon overseas once the problems with the engine, and rear fuselage structural problems were resolved. The proposals were first mooted in 1941 but not acted on until Winston Churchill raised the issue of them being used in the MTO. By mid November 1942 the aircraft was ready with a modified air filter being fitted. However due to engine failures and other accidents the programme was delayed. By 1943 three aircraft (R8891, DN323 & EJ908) were fitted with the new experimental filters and ferried out to the Middle East for trials. By the end of September 1943 the protracted trials were considered at an end and the three aircraft released to 451 Sqn for general flying. EJ906 was struck of charge in February 1944 due to a lack of spares, RR8891 was lost when it struck the ground in August 1994, and DN323 was stuck off charge shortly after the crash of R8891 as it was considered no longer worth the trouble of keeping it airworthy! All there aircraft features the scheme of Dark Earth & Light Stone over Azure blue. There seems to be evidence of EJ906 wearing the code letter Y, but none for the other two airframes. As with a lot of aircraft the Luftwaffe managed to capture and fix a few examples, with them being returned to flight status or evaluation. The first of these Typhoons to be flown by the Luftwaffe was EJ956 SA-I of 486 (NZ) Sqn. On 23 March 1943, the aircraft was llanded due to being hit by falk, before the pilot could destroy the aircraft it was captured. The Typhoon was repaired and test flown at Rechlin (the German equivalent to RAE Farnborough), and later served as T9+GK. At least two more aircraft where know to have been flown after forced landings. The Kit The new tool Typhoon has been with us now from Brengun since 2013 and this is the latest boxing released. The plastic is more of the short run type, but towards the higher end of. There is one sprue of parts, a fuselage sprue, and one for the wing. Additionally there is a clear sprue for the canopy, a small PE fret and a resin air filter housing; the later specifically for this boxing. There is some flash on some parts but nothing that will pose any problems. Construction starts with building up a few sub assemblies to incorporate in the kit. The seat is built up, complete with PE belts, followed by the instrument pane. The radiator assembly is built up, along with both sets of main gear legs and their door. The main gear wells are also made up at this point. The we move onto the cockpit. The side frames are added to the floor with the front and rear bulkheads being added. The rudder pedals, control column; and seat from earlier are then added. The cockpit is then added into the main fuselage along with the radiator assembly, tail wheel; and rudder. Moving onto the wings, there is a single part lower with left/right uppers. The wheel wells are added in then the wings can be closed up. If doing the desert version then the additional air filter needs adding at this point as well. The main gear legs can then be added to the wells. The fuselage can then be added to the wings. At the front the propeller is made up and added, engine exhausts are put in, and the tail planes added at the rear. The frame under the canopy can then be added, with the canopy following. The last steps are to add the landing lights into the wing, add the PE Pilots step, and lastly the aerial on top of the rear part of the canopy. The Decals There is no printers name on the decals, so could be in house? They appear to be glossy, in register and colour dense. They have an absolute minimum of carrier film. There are markings for all three desert trials aircraft and JP548 which was captured and trialed by the Luftwaffe. Conclusion This is a great kit of this important WWII aircraft. This boxing is something different from the norm which is to be welcomed. The quality is excellent and it will no doubt make up into an excellent looking aircraft. Very highly recommended. Review sample courtesy of