Search the Community
Showing results for tags 'Amodel'.
-
Welcome! I'm starting my workshop with another model KSR-5 "Raduga" (AS-6 "Kingfish") in 1:72 scale from AMODEL, it won't be crazy. Model started years ago, a little kicked, but it happens when you learn. But that was only thanks to my wife, who told me to get my models in order and tidy up the studio. Without any disguise I took the first model whose box was already a little bit shabby. After opening the box I found such a state.
-
 With the Supermarine 224 finished and the Dewotine D510 at the painting stage, I think I might have time for least another entry. So I have started an Amodel Hawker Fury that I have in the stash. This is a 'short run' kit that offers the wheel spats for the Mk II and nice surface detail, but is probably a harder build than the Matchbox kit I first built in the summer of 1973 after my First Year Uni exams. The Mark II Fury was an upgrade to the original Fury bought by the RAF. It had a more powerful Kestrel engine, wheel spats and increased fuel tankage which gave it a top speed of 223 mph compared to 205 mph of the original Fury. 100 were built and production started in late 1936 and the type entered service in early 1937. It was only ever seen as a stopgap and remained with a handful of squadrons for a short period until replaced something a bit more potent. Front line units equipped with the Fury II were 25, 41, 73 and 87 Squadrons, some as interim equipment for a few months with 41 having them longest from between October 1937 and January1939 when they were replaced by Spitfires. The Amodel kit is moulded in fairly hard pale grey plastic. Most parts display noticeable mould lines but no flash and some parts like the struts are quite delicate and will require care to remove them. Surface detail is restrained with the fabric areas being muted with none of the sagging associated with some kits of fabric covered aircraft, One small clear part is provided for the windscreen and the decal sheet provides markings for two Mk I's and a Mk II. The decals are matt and some colours look a bit dubious. The only areas of shrinkage on my sample was on the spatted wheels that I wanted to use and the prop, so out has come some filler. As always seems to be the case work started on the fuselage and cockpit. Some wall detail is provided on the fuselage halves and this was added to with a few scratch-built bits like a trim wheel and map case. There is a seat, rudder pedals and a control column that is added to a floor that never existed on real thing, but some effort has been made add details of the fuselage structure on it. The instrument panel is the correct shape and the bodies of the two Vickers machine guns are there as separate parts, but the location pins for them would leave them much too far forward. Paintwork was taken from the Mushroom Model Publication on the Fury and Nimrod and is largely aluminium with the tubular fuselage frames in black. The floor was finished to march doped fabric of the bottom of the fuselage. The lower wings area butt fit and so to make the join stronger and before too much work was done on the fuselage, I drilled a couple of holes and inserted some plastic rod that fit into holes drilled in the wings. Mrs T is out at the surgery until 8.00pm giving coronavirus jabs and so the fuselage will go together. No location pins, but everything lines up nicely by the look of it
 -
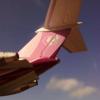
Yak-52 as used by ETPS built from the Amodel kit and home made decals. Steve
-
Soviet long range interceptor, from the mid-50's. Not really a well known type I suppose - but a cool looking plane nevertheless. There were also reconnaissance variants derived from this type. The kit is A Model Yak-25K/S: The box is quite full and doesn't look to be original. Plenty of stuff to work with. The plastic is soft, almost rubbery. Very dirty and has lot's of cleaning to do... Details are soft at best. Panel lines look like they have been rescribed by... me, really. And that's not a compliment The scheme I will be doing, same as in the box art. So this is not going to be easy kit, I can see that already. Kinda dreaded how this will work out but we will see Wish me luck!
- 17 replies
-
- 11
-

-
Amodel is to release a 1/72nd Eclipse 400 kit - ref 72369 Source: https://www.aviationmegastore.com/eclipse-400-72369-a-model-amdl72369-aircraft-scale-modelling/product/?action=prodinfo&art=173528 Box art V.P.
-
Hi all Here's my rendition of this charming aircraft using the A model kit. The plastic is quite hard and broke about six of my. 35 mm drills drilling the rigging holes. Goes together quite well and turned out an enjoyable build. I have added lap belts to the seats along with Milliput cushions. The front control stick has been placed in the Stowed position on the stb side of the forward cockpit. Fuel line from lead wire and photo Etch aileron, elevator and Rudder actuator points added. Also added exhaust straps from photo Etch fret. Rigged with invisible thread and brush painted with Humbrol enamels. Decals are from the kit and went on very well. Love the little AA badge on the Stb engine cowling panel I started this a few years ago and it stalled so wanted to build a few stalled builds like my last ones the Tiggie and Seahawk, the Sptfire Vb and Stearman I am currently doing, oh and a Camel is now involved. I have to say picking them up again work seems to progress quite quickly anyway, enough chatting some pics below. I am very pleased with this and may consider a Gypsy Moth in the future Thanks for looking Chris
- 21 replies
-
- 40
-
-
This was my long awaited Christmas present to myself, and I intended to start it straight away (as you do!), but circumstances meant it had to wait. However, the large awkward shaped box didn't fit into the stash very well, so the time has come to finally start. What's in the box then? A one piece main section of fuselage and two wings that are of a plastic coated fibreglass construction, 13 plastic sprues, a small set of photo etched parts and a decal sheet for an Orel Avia plane. Going by my normal build speed, this could be a long haul.... Dave
-
I just joined this community yesterday, after lurking about for many years. I thought I'd go ahead and try posting some photos of my latest completion. I like odd aircraft, and this one certainly qualifies. The kit had pleasantly good fit, and only a few issues to address. The clear parts were reasonable clear, and distortion-free, but I still did some polishing on them. I'm glad to finally complete a model, and have another unusual subject on the shelf.
- 11 replies
-
- 27
-
-

-
 Amodel is to release limited editions of 1/72nd Taylor JT-1 & JT-2 - ref. 72358 - Taylor JT-1 Monoplane & Taylor JT-2 Source: https://hobbyterra.com/product/plastic-model-1-72-taylor-jt-1-monoplane-taylor-jt-2-amodel-72358.html box art - ref. 72359 - Taylor JT-1 Monoplane & Taylor JT-2 Titch Source: https://hobbyterra.com/product/plastic-model-1-72-taylor-jt-1-monoplane-taylor-jt-2-titch-amodel-72359.html V.P.
 -
 After the 72nd scale, the model appeared on the 48th scale.
 -
Here is my recently completed Shavrov SH-2 Amphibian in 1/72 by Amodel. A limited run kit with the usual problems that had to be tamed. The subject was enhanced with the use of the PE set from NH Detail and a replacement engine from Pavla. The are of concern in this case was the central struts that had to be corrected and the manufacture of a small wind pump. Painted using Colourcoats enamel paints and a mixture of kit & DIY decals. Uschi line used for the control lines. As a new thing for me, I thought I'd make a small dio for the subject; a slipway with a bit of 'water', some scenic stuff and a figure/ fuel drum from Zvezda. WiP: Thanks for looking. Stuart
- 15 replies
-
- 34
-
-
-
My take on Amodel's Sud Aviation Caravelle III finished off in the markings of VIASA. I enjoyed the build although the undercarriage was an absolute nightmare to put together. Wings fences were made from thin plastic sheet as this boxing didn't come with photo-etched parts. (Luckily I had Amodel's 10-R version to hand, so their parts were used as templates). Classic Airlines decal sheet (CA144-419) was used and it will come as no surprise that they were beautifully printed and performed flawlessly. (It does give you the option to paint the tail and this is the route I took). Thanks for looking. mike (P.S. Looks like my entry for next year's Latin American competition has been completed 😋)
- 17 replies
-
- 32
-
-
-
Amodel 1/72 kit straight from the box Steve
-
The Yakovlev Yak-28 (Яковлев Як-28) was produced initially as a tactical bomber, it was also manufactured in reconnaissance, electronic warfare, interceptor and trainer versions, known by the NATO reporting names Brewer, Firebar, and Maestro respectively. Based on the Yak-129 prototype first flown on 5 March 1958, it began to enter service in 1960. Yak-28L (Izdeliye 28L; NATO reporting name: "Brewer-B") was a tactical bomber with ground-controlled targeting system using triangulation from ground-based transmitter sites. A total of 111 were built. The build was a trial all the way. By comparison, Airfix kits are shake'n'bake. A six-footer at best.
-
This kit somehow found its way into my car when I was at Modelkraft Model Show at the weekend. I had never heard of this type but looks rather interesting. First some 'fluff'. The Russian Shavrov SH-2 was an amphibian aircraft in a sesquiplane design that was developed in the 1930's for use as a trainer, fishery protection, patrol and an ambulance. The SH-2 was made primarily of wood and was powered by Shvetsov M-11L 5-cylinder air-cooled radial engine, driving a 2-bladed propeller that was capable of producing 100 hp. Being an amphibian, the SH-2 was fitted with wheels that could be lifted by a hand crank that was fitted on the cockpit dashboard. The cockpit had seats for the pilot plus one other and in the ambulance roll, had room for a stretcher patient behind the seats. Over 700 were built when production started in 1934 and proved very popular with pilots, staying in service until 1964. The kit. The boxart, looks rather cute. 1 plastic sprue. Second sprue. Third sprue. Clear bits. Decals. This will be the first time that I have encountered an Amodel kit and I have few illusions of the work that will be needed with a limited-run kit. A quick inspection of the main sprues show the usual flash and the detail is a little lacking. The glazing is a little thick with a number of options available. Decals look good but only time will tell how well they will go. If anybody knows anything about this puppy that could be useful, chip in. Stuart
- 173 replies
-
- 20
-
-
AviS is to release a 1/72nd Lee-Richards annular monoplane No.3 kit - ref. BX72036 3D renders V.P.
- 17 replies
-
- 4
-
-
- Amodel
- annular monoplane No.3
- (and 1 more)
-
Amodel is to release a 1/72nd Cobalt Co50 Valkyrie kit - ref. 72372 Source: https://hobbyterra.com/product/plastic-model-1-72-cobalt-co50-valkyrie-amodel-72372.html Box art V.P.
-
Considering SOVA-M is to release a UAV DA-42 kit (link) we can reasonably expect a 1/72nd Diamond DA-42 Twin Star kit by Amodel - ref. To be followed V.P.
-
1/144 - Grumman UF-1/HU-16B Albatros by Amodel - released
Homebee posted a topic in The Rumourmonger
Amodel is to release a 1/144th Grumman UF-1 Albatros kit - ref. 1424 Source: https://www.aviationmegastore.com/grumman-uf1-albatros-amdl14424-a-model-amdl1424-aircraft-scale-modelling/product/?action=prodinfo&art=79900 Box art V.P. -
My first build of an AModel kit. One of my favourite types of aircraft, and I was looking forwards to a nice quick build. I could not have been further from the truth! Started this in November, and only now at a point where I'm ready to put decals on her. Anyhow, I would like to share with you all how much trouble this lovable little aircraft has been! I don't know how many of you have had experience of AModel kits before, but I'll say this - don't bother unless you have a lot of patience, filler, sanding strips,films etc, and a desire to create something that no other manufacturers do. The main issue is the fit of quite a number of the major pieces. The tail was warped, and didn't sit flush with the fuselage, even with some careful sanding to re-profile, I was left with a considerable gap to be filled on either side of the vertical fin. The horizontal stabilizer needed quite a bit of reaming out on the inside to enable it to fit onto the top iof the vertical fin. Oh yes - before that though, I had to use that good old hot water method to bend out the offending warp in the fin. Wings: Well, the upper and lower surfaces did fit together quite nicely - just a little filler needed along the gap at rear edge where the flaps would be. It was far to big to be written off s the flap itself! Fitting the assembled wings to the fuselage was, going off a dry fit, need considerable work to be done to the area where they fit atop. Fuselage: There is an interior cargo section as well as the cockpit. both very lightly detailed, which came as no surprise for a kit this size - It's hardly going to be seen. The purpose of the main cargo bay then, seems to be to provide some rigidity and form to the fuselage. Well it would had the bulkheads not been way oversize. Cue lots of gentle sanding until they conformed to the inner diameters. Got that glued into place, then dry fitted the other half of the fuselage to check for fit. Not bad - a little gap, that would need filling, but it would also be hidden by the landing gear belly area which fits to the fuselage underside. The cockpit floor fitted perfectly, but I didn't bother adding the exceedingly basic seats and panel, as they won't be seen once the fuselage is together, and the windshield is in place. I did make sure they were painted in that nice Russian cockpit interior blue/green though!. Back to this landing gear/belly part. Oh Dear. huge gaps on the front and rear edges. Not only that, but it was about half a mm too wide on both sides, which doesn't sound much. but on 1/144 its like a cellar step! - This would need sanding flush, but wouldn't be too bad as not much in the way of panel detail here. The other gaps needed a hefty amount of filler, and some judicious but careful sanding to make them conform to the fuselage. Rear Ramp: Oh god no..... Well, I decided to do this as a nice clean version, with the ramp up as if it's ready to taxi out. The rear ramp and rear under tail area is in two pieces. the ramp itself, and the fuselage piece. Rear fuselage part was, like the belly, too wide, and would need sanding flush, as well as some filler being used. The ramp was a good 1mm too long at the front and back, and was also the completely wrong shape to fit to the fixing area of the fuselage, which necessitated a fair bit of shaving, filing, and sanding. Once in place, there were a coupe of very small but unavoidable gaps that would need a bit of filler. Wing attachment: The wings should sit into a recess on top of the completed fuselage, that is way too small for the chord of the wings. Once again I had to do some careful shaving and sanding at both front and rear edges to allow the wings to fit. This still left a gap, but was easily filled. To the wings then needed to go the engine nacelles. These looked to dry fit well together, but once the fan assemblies were made up and sat in place, it became clear that the fan diameter is way too big for the nacelle interior. Cue files and sanding stuff again! One part had to be removed altogether, as it seemed to serve no purpose other than to hinder the assembly. I ended up with as good a fit as I dared to sand down any further with, so once again out came the filler! No, its all together! She's been primed, and had her paint put on. Gloss coat is on too, and I'm leaving her overnight now and will deal with the decals over the weekend! Now, I do have a load of photos I have taken of this build - can anyone tell me how I can show these to y'all?!!
-
Hi All. Here is my freshly completed AModel Caravelle in SATA. Decals by 26Decals (of course) and all paints from rattle cans.
-
Here's my Amodel 1:144 Canberra T.17 which I built in 2010. It represents WF916/EL of 360 Squadron, RAF, based at RAF Cottesmore and RAF Wyton (from August 1975 onwards), UK, 1970s. Not an easy kit but the only one of this variant in this scale. I built it OOB adding several missing aerials. The kit was painted by brush with only the varnish being airbrushed. Thanks for looking Miguel
-
Amodel kit of the 2nd prototype CMC Leopard with homemade vacform canopy as the kit one had a flaw in it that I couldn't remove. Different engines and other minor details to the 1st prototype. Nice kit but very fiddly due to the small size. Together with the 1st prototype - more photos Thanks for looking. Steve
-
Amodel kit of the CMC Leopard with homemade vacform canopy as the kit one had a flaw in it that I couldn't remove and homemade decals as the kit ones are for a scheme the aircraft never flew in. Nice kit but very fiddly due to the small size. Thanks for looking. Steve
-

Comets - two of'em (Momentarily shelved)
HansReggelsen posted a topic in Work in Progress - Aircraft
So! Hot off the Bugle Buggy build, I sat down and pondered what to build next. Luckily sitting down is a skill I master quite well and t'was a clear evening and no clouds to obscure the stars. As I sat there, staring at the stars, and letting my mind wander, it suddenly hit me: How 'bout a Comet - no - not one, but two! I happen to have two AModel 1/144 DeHavilland Comets in the 'stash - a 4B and a 4C. They'll be built almost OOB and mostly for the fun of it. So - 'nuff said - let the building commence: Cheers Hans J