Search the Community
Showing results for tags 'Airfix'.
-
The kit comes with decals and different parts for four variants. I built this example as belonging to No. 15 Wing, Nato Flying Training Centre, RCAF Moose Jaw, Canada, in 2003. More on this page of my web site: Moose Jaw Hawk
-
 G’day all. I’ve just completed the Airfix Phantom FGR.2 this afternoon (Easter Monday). An annoying start followed by a pleasant build for the most part, I’m happy to say that this was an enjoyable project. The kit is built as XV466 ‘D’ Desperation while assigned to 1435 flight at RAF Mount Pleasant in 1991. The most annoying issues with the kit are the fit of the lower wing to the underside of the intake trunks and the fir of the forward canopy section to the nose fuselage. Some judicious plastic removal and fettling had the parts slip into place. Gaps were addressed with the tried and tested recipe of CA glue and talc. The Skyflash (Sparrows) and Sidewinders are courtesy of Eduard but the rest of it is what you get in the packet. The kit ordnance have fins that are a scale 6 inches wide so this was a must. The yellow seeker head covers on the Sidewinders add some colour to an otherwise muted colour scheme. I’m frustrated that Airfix still persist with panel lines that really are suited on a 32nd or 24th scale kit. Here in Australia you pay anywhere between $50 - $65 for this kit (25-33 pounds). Comparing kits of similar size and cost you get panel lines that are much more refined. Airfix, if you’re listening, please get your act together in this area. There has been much discussion about it. On the plus side, the kit decals were fantastic and reacted well to the Microset/sol combo. Painting is always the fun part for me. On the kit I used Mr Color lacquers for the camo greys and Alclad for the metal exhaust areas. Looking at photos of period jets and particularly XV466, the greys seemed to lighten over time, almost to the point of almost no contrast between the two topside greys. A variety of weathering products have been used for panel lines and such. You can make out the two tones of greys in the overhead shots. Anyway, on with the photos. Let me know what you think. Cheers, Mick.
- 26 replies
-
- 61
-

-

-
- Airfix
- FGR.2 Phantom
- (and 1 more)
-
AIRFIX Spitfire PR XIX Turkish airforce circa 1954. Airfix kit with eduard/scratch/kit cockpit, SBS models exhausts and xtradecal decals. Rob tarus canopy, don't like the airfix way of moulding open canopys, so a vac form replacement. Thanks for looking.
-
As a lot of you know, I wouldn't normally have time for modelling at this time of year due to my studies but we are living in interesting times and I'm finding I have some spare time and itchy fingers so I've decided to join this GB with the lovely little Airfix 1/72nd Spitfire F.22 released a few years ago. I don't normally like doing the scheme provided in the box because, well, anybody can do that, so I've been casting my gaze around for something different, I wanted to do something in the aluminium scheme. Poring over my references I'd found a couple of suitable candidates but then Michael @Ghostbase started a thread about aircraft his father had flown in whilst at 102 Flying Refresher School (FRS), at RAF North Luffenham and my interest was piqued. The Spitfires had been replaced in RAuxAF service by Vampires and Meteors by this time, service in units like the Flying Refresher Schools was the Spitfire's final swansong. The AIRFile book on RAF Trainers Vol:2 1945-2012 has a profile of F.22 PK399 coded M-50 which was in use with 102 FRS in 1951, a quick Google search turned up a small but nonetheless useful photo which showed errors with the profile (the profile shows no underwing roundels or serials, the photo definitely has roundels so I think it's also safe to assume serials would be present too). This build won't be quick, I shall be fitting things in around work, studies and gardening amongst other things.
-
Hello all, The contents of this tattered old box represent the oldest long term resident of my stash: I bought this many years ago and never found the right time to set about building it. over the years I have acquired a few extras such as the Moose republic decal set, a correct profile nose and pitot set by Maestro models, an Eduard wheel set and a Neomega cockpit set. I did think about an intake correction set but you have to draw the line somewhere. Anyway hopefully they will all help to turn the kit into a reasonable representation of a truly awesome piece of Scandinavian aviation history. I'll be doing a splinter camouflage aircraft not yet decided which one but the camo will be done with home masking and without the aid of a safety net..... ....as I said......hopefully. Cheers, Mark.
-
 This will be my first Work In Progress thread, and I thought I’d kick off with what I hope might turn into a good one. Be prepared, though, for some lengthy gaps in progress as I only let myself work on play stuff when I feel I’ve earned the time. I am self-employed, and I suppose I’m lucky enough to be a full-time professional model maker. I generally specialise in railway subjects, at O gauge (1/43rd scale), and so building model aeroplanes is very much a relaxation for me. Some background about me, for those who didn’t see my New Member thread. I am very focused in my collection. Well, I was focused. Working to 1/72nd scale, my aim was to make representations of at least one of each type of plane that flew in the Battle of Britain. Starting out with just RAF Fighter Command (Spitfire, Hurricane, Defiant, Blenheim, Gladiator) and the Luftwaffe and Italian forces ranged against them. The Battle has been an obsession for me since my school days, around the time of the 40th anniversary. I soon started to spread my wings, as it were, backwards in time to encompass Operation Dynamo, then the Battle of France, the Phoney War, and in the end, I’ve decided to include the Night Blitz and even extend to the Norway campaign. I now find I’m collecting aircraft that operated in the Northern and Western European theatres for the whole of 1940. So, that’s all the RAF commands and support squadrons, Fleet Air Arm, Dutch, Belgian, French, Norwegian air forces, Luftwaffe and the Italian contingent. At some point, perhaps I should start a gallery thread to show the aircraft I’ve built so far, and those that will be added in due course. That’ll be for another day. All that is a rather long-winded way to introduce the theme of this build, the Dornier Do17P. The Do17 development history is long and complex, and I can do no better than point you at the various online resources, including Wikipedia. Suffice to say, I already had the main Do17Z variant represented in my collection, in both the old Revell (ex-Monogram) boxing from some decades ago and the more recent Airfix one. I hadn’t originally intended on acquiring an earlier variant, though Airfix had produced the kit for the Do17E/F until relatively recently. However, a trip to a model show earlier this year saw a Do17E/F up for sale at a fair price on a stall - how could I resist? The 1986-style box was a little tired, but I was assured everything was in there. In fact, the stall holder insisted I should check all was in order. Sure enough, although some parts were rattling around loose, it all seemed complete. The moulding is in a hard light blue plastic. I was taken right back to my early days of sticky-fingered model building on the kitchen table! Surprisingly little flash was evident, though there were signs of age in the mould with mild sink marks and slight misregistration here and there. I was surprised to see quite a lot of detail available to fit out the cockpit. When was this kit first made? Crikey! 1971! Colour me even more surprised about the interior details, then! Outside, the Haldane Place Demon Riveter had been somewhat restrained, and there were even - gasp! - recessed panel lines. The instructions are old enough to still list the Airfix enamel colours. More memories came flooding back! The problem I had, though, was the Do17E was properly old hat by the start of 1940. I rummaged through my references to see if I could find any instances of an E or F in squadron service anywhere during 1940. All I could turn up was examples of the Do17M and P, meteorological and photo reconnaissance variants. As far as I could tell the biggest difference between the 17E and 17P was the engines. The E had BMW V1 inline units, the M and P had Bramo Fafnir radials, like the Z series. An idea began to form in my mind. A couple of decades ago, I built the Revell Do17Z to represent an aircraft that was brought down near Maidstone during the Battle of Britain. I threw everything at it, PE details, resin wheels and so on. I used the kit transparencies, as they were preferable to the vac-form alternatives I could find. Me being me, I wanted to open the pilot’s sliding window - and I cracked the transparency beyond repair! I went out and bought another kit, just for the cockpit greenhouse. Those were the days when I could afford to do such things. The remainder of the Revell kit remained untouched in the box ever since. I wondered, therefore, if I might be able to combine the Revell and Airfix kits and produce a Do17M or P. I had noted the Airfix kit used the same basic assembly arrangement for fitting the wings to the fuselage. If I was lucky, I might even be able to replace the whole wing assembly, rather than graft the engine pods onto the Airfix wings. Digging out the Revell box, I feverishly taped the wings together. I did the same with the Airfix fuselage halves. Now, that was encouraging. Some mild surgery, and no doubt a fair whack of filler, but this approach might well work. The Revell box might also yield various alternative parts, too. It looks like I can definitely create a Frankendornier to get a Do17P for my collection. Since my quick tests, I have decided to invest in aftermarket transparencies, PE details and resin wheels. If I’m going to do the work, I may as well do it properly! So far, no glue has been deployed, and it might be a while yet, but I wanted to start the thread to whet my appetite and see what you all think.
- 247 replies
-
- 30
-
-
Another ‘lockdown’ project completed. This time it’s Airfix’s 1/72 FW109A which is quite an easy kit to build even if some parts don’t fit properly, but then I suppose that’s modelling. It’s built straight out of the box apart from some PE seatbelts, a scratch built foot step and the two aerials under the rear fuselage. Topside aerial wires are Uschi Van Der Rosten thread with paint blobs for the insulators and I drilled out all six gun barrels and lower exhaust outlets for a better look. Paints are Tamiya acrylics and Winsor Newton oils all sealed with Humbrol clear lacquers. Any useful pointers or critique welcome. 🙃
-
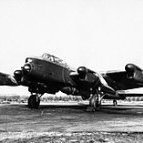
After much deliberation I went with the Airfix Biii special AJ/J piloted by David Maltby from 617 squadron. It was the 5th Lancaster to drop it's bomb and the one that caused the breach. Newer tool Airfix kit with Xtradecal X72093 617 (Dambusters) Squadron 1943-2008 History decals, the rest OOB So I guess I'll put my marker down for when we eventually start Ian
-
Hi Chaps, I am entering an old BBMF boxing of an Airfix Mk1 Lanc, has been partially started but below the 25% rule. Looking at finishing this one wheels up on a stand, potentially might order some prop blur propellors as well. Here's the boxing below; Will be ordering new decals for this build and thinking of potentially finishing her as "Uncle Joe Again" from 463 Sqn, RAAF. Also have a revell Dambuster to build but I won't overcommit just yet!
-
Hi All, Happy Easter to one and all! Here is my 1:48 Airfix Supermarine Walrus, built as KF*A of No. 5 Communications Flight RAAF, based in New Guinea, 1943. Finished mostly OOB with the addition of Eduard cockpit set and harnesses, and Montex mask set. This build was notable for me for a number of reasons: 1. First Seaplane 2. First Biplane and therefore rigging attempt 3. First use of masks for insignia and national markings What could possibly go wrong?! 😬 There are not too many photos of RAAF Walrus' from this period, but here's a few (copyright Australian War Memorial): I've elected that these aircraft would have taken a hammering from the tropical sun, so have tried to simulate a faded finish. Finished in a mix of Humbrol and Mig acrylics. Despite the multitude of errors and minor niggles I'm pretty pleased with the outcome, and she has an impressive shelf presence. I enjoyed the challenge of the build, and would highly recommend the kit. Hope you enjoy it - comments and critique gratefully received as ever. Thanks for looking, Roger
-
I'm going to build L.E. Curdes' Bad Angel. Let's start with a contemporaneous photo. Notice the kill markings? German, Italian, Japanese, and, um, American! Wikipedia has this to say: And here's a photo of Curdes and his bride, Svetlana Valeria Shostakovich Brownell. How many husbands can claim they shot their future bride out of the sky? I'll be using the Airfix A05106 North American F-51D Mustang boxing and CAM 48-115 Mustang Thoroughbreds
- 50 replies
-
- 17
-
-

-
Hi all, hope you all are ok and safe... This is my first completed model during my quarantine here in Spain (started several months ago). I bought this one because of the color scheme, without knowing anything about the sprues or reviews, etc. so it was a surprise when I opened the box. Airfix did a strange thing with this product, I don't mean it's a bad thing, but at least strange. Half of the sprues are from the '70s and half are modern ones, designed for this D-Day edition... I think it had been better to design completely a new one model, if you plan to design the half of the sprues (the fuselage, and the top part of the wings, mainly). I must say that the old moulds almost haves a more crisp and fin details, except for the outside panel lines. The new parts haves modern negative panel lines, but a bit oversized. There had been some serious fitting problems, specially with the wings, and a lot of putty and sanding, and again sanding. But I think at the end it turn out nice. I must say that it had been in some points a bit painful, but in the other hand is a nice project to test my skills... I completed the model with a set of PE from Eduard designed for a Tamiya kit, and a bit of scratch, specially in the cockpit. The bad part is that behind the glass and the fuselage it will be all this work hidden. May be the thing I like more of my build is the cockpit, with all that wiring and scratch added to de PE, it had been very pleasant to do. I had follow some points on the page Scalespot.com and his beautiful Mossie in 1/32 from HKM for the references specially in the cockpit parts. Also added some scratch to the wheel bay and landing hear, because out of the box is very simple. Also rivet works by me, and I split the back control surfaces to have a more dynamic form. The decals are very hard to work with Mr Mark Setter/Softer and they are very thick... Well, I hope you like it. Thanks for take a look... Ricardo.
- 11 replies
-
- 19
-
-
-
 As a big fan of Spitfires powered by Griffon engines and fitted with bubble canopies, I've decided to enter this Group Build with an Airfix Mark 22 in 1/72. It will be finished as PK605 wearing codes RAC-D of 502 Squadron, circa 1948, thanks to Xtradecal's sheet X72-178. I have some aftermarket to embellish it, such as new 3-spoke wheels, a seat and instrument panel (and possibly more!), but there are no photos of them at this stage - stay tuned to the build. Anyway, just in case you haven't seen this kit before, here are the sprues: Airfix 22 sprues by Andrew, on Flickr Airfix 22 sprue wing by Andrew, on Flickr There's not a whole lot to this kit but I like (for the most part) what Airfix have provided. I'm looking forward to getting on with the build. Andrew.
 -
Hi folk's built for the In the Navy GB is an original boxing(possibly 1st) using the original decal's a big thanks to @GREG DESTEC for the kit and a trip down memory lane,last shot is the four completed Airfix oldies,three more to go.
- 16 replies
-
- 40
-
-
Hi all, Given the strange times we all live in, I thought I'd go for an unusual build, and push myself a little again. Who can ignore an aircraft nicknamed 'Steam Pigeon', or even better 'Shagbat' 🤣 Here's the beautiful box art: And the obligatory sprue shots: I could only lay my hands on the 'Silver Wings' boxing, whereas I had a hankering to build an RAAF type. I therefore laid my hands on a few extras, as shown below. This will lead me to a couple of major firsts in my modelling journey: Sprayed markings, and rigging a biplane. The plan is to build an aircraft of No. 5 Communication Flight RAAF, based in New Guinea in 1943. Photos of aircraft are relatively sparse, but this is the scheme as presented by Auntie: What could possibly go wrong?! With a degree of trepidation, I bravely started on the easy stuff, removing the multiple ejector pin marks from the fuselage interiors. This is mid way through the process - it did look better in the end I then used multiple drill bits opening up the rigging holes Today I then cracked on with the interior. I also learned a valuable lesson along the way that water-based paints actually thin very well with.... water! I've persisted with using Tamiya thinners for airbrushing, but delayed deliveries due to COVID have forced me to consider alternatives, and the interior green with which I've always struggled settled down beautifully when thinned with good ol' H2O. Here's where I ended up after a good day's self-isolation: Thanks for looking, Roger
- 27 replies
-
- 23
-
-
P9495 took it's first flight on 15th April 1940, issued to 610 (County of Chester) Suadron RAF and was struck off charge on 24th August 1940 after being damaged by Bf-109s near Dover on 12th August 1940. I've made dozens of the most recent boxing of the Airfix Spitfire I but never using the decals in the box. Here's my attempt, out-of-the-box, apart from the rudder actuator and aerial (both made from stretched sprue), cockpit armour from plastic card and, a piece of clear plastic for the gunsight glass (which you can't see anyway), brush-painted with Colourcoats and Humbrol enamels, weathered with gouache and, a Windsor & Newton matt coat. Should you care to look, WiP is here: The photographs were taken with my phone so aren't the greatest. Thanks for looking.
- 24 replies
-
- 29
-
-
This my latest model, being a home during lockdown helped to get this finished as the new wing leading edges are a pain to get anything like correct I tried to fit the new leading edges as a single assembly as suggest by the instructions but they were an awful fit. So I added the tops and bottoms to the appropriate wing halves then brought them together. This seemed to work but a bit of filling was still needed. Not perfect but not bad under a very bright light. X I used a set of Freightdog markings for the COs machine of 118 Squadron and they were excellent thought they need to be floated onto the model with lots of water as they stick like limpets. The nose door letter provided is yellow and it ought to be Black according to Cold War Shield by Roger Lindsay. I used a spare decal. Thanks for looking.
-
Began another Airfix kit last week. This one has really thick spruegates, so some parts ended up with some damage. Box: Sprues (the clear one is not pictured): Decals (I'll paint the Argentinian flag instead of using the decals): First assemblies. In order to reduce weight, I cut off the exhause of the exhaust pipe and glued them to the aircraft (not pictured). More photos soon.
-
 Airfix Supermarine Spitfire Mk.I - ref.A05126 Sources: http://www.airfix.com/catalog/product/view/id/8404/category/1213/ http://www.primeportal.net/models/thomas_voigt9/airfix/index.php?Page=3 V.P.
- 24 replies
-
- 4
-
-
- Supermarine
- Airfix
- (and 1 more)
-
My next build is Airfix's 1:72 Bristol Beaufighter TF. 10. I have had it in my stash a while, and have always loved the look of this aircraft, and can't wait to start building her. So lets have a look at the box. The artwork as usual is ace, and depicts the aircraft in the colour scheme i plan to build her in. The box contains a detailed instruction booklet, small decal sheet and clear sprue. There are 5 grey sprues, all with little to no flash and lots of detailing. Looks like it will be a nice clean kit to build. I am planning on building it straight from the box, using Vallejo model air acrylics in place of the suggested Humbrol. I also intene to use some resin wheels i picked up at a model show a while back. I am building her in the colours of No. 45 Squadron, "Operation Firedog", RAF Kuala Lumpur 1949. Here's hoping I can do the aircraft the Japanese called 'Whispering Death' justice. So far I have cleaned off the sprues in soapy water, and given the cockpit parts a blast of Vallejo primer. Here we go.....
-
 Good afternoon all! It's taken me since Christmas and has been a bit of a cursed build (see below) but here is my first ever He 111: This an aircraft of Kampfgeschwader 55 'Greif' and fought in the Battle of Britain and is actually part of the Airfix BoB 75th Anniversary pack. Built out of the box but with the eduard interior pack and masks for the canopy. I refrained from adding rivets on this one but tried out some new techniques which some I'll use again, some I won't. Pastel weathering for exhaust fumes was a new one for me as I usually airbrush these on. This worked well on the top of the wings, particularly where I laid down white, then grey then finally black pastels to create a heat damaged paint surface and then the usual soot from the engine. This didn't work so well underneath as the lichtblau showed every mistake and worse still, the matt coat started coming away where I tried repeatedly to get the effect I wanted. I ended up correcting with oils as the pastels simply wouldn't stick and I wasn't going to matt coat it again but this now looks overdone for me. Another new technique was stretched sprue for the antenna wire which i'm not completely sold on as it's a little thick for 1/72 and saggy; I may replace at some point but that's it for now. So why has this been a cursed build? The canopy out of the box was warped but good 'ol Airfix sent me a replacement very quickly. The eagle eyed of you will notice I've sprayed more of the canopy on the top two panels than I should have... this is to cover up fogging caused by Tamiya green top. Not that I'm blaming this but lesson learned, PVA glue from now on. Throughout building I had multiple incidents from needing milliput to fill gaps, a split fuselage which needed re-gluing and refilling, poor fitting fuselage windows which aren't the clearest meaning a lot of the interior extras can't be seen very well. I've also lost part of the rudder mechanism and the rudder itself is sitting a little low which I only noticed once I'd started painting. I didn't follow the instructions properly on the tail flaps which meant I had to perform quite a bit of surgery on them to get them looking ok. Here's some of the WIP and more pictures. Hope you enjoy! JB Finally, here she is with the rest of the BoB set:
- 42 replies
-
- 55
-
-
Evening all, It's been a very long time since I posted a WIP on here, and even longer since I joined a Group Build, but given my passion for naval types in particular it seemed rude not to join in this one. I've plenty of options in the stash, and I may end up entering more than one build, but looking through the build threads I didn't see a Buccaneer, so I thought I'd put that right for starters. I'll be building the new Airfix 1/72 kit OOB, although I may choose to finish her as a 736 NAS option on an old Model Alliance Sheet I have knocking around. On with the now very familiar box and sprue shot... I have a Stuka on the bench that is nearing completion, so hopefully I'll be able to get cracking with this one sooner rather than later. Cheers, Shaun
- 36 replies
-
- 10
-
-
Hi, Here is my Airfix Bf 109 in Romainian markings. Totally brush painted using Revell & Humbrol acrylics. Markings are OOTB as is the build. I think it makes a nice change from the Luftwaffe options, and looks good beside my other "regular" 109's. I had to scratch build the Armour windscreen as the front canopy in the kit didn't have it for this version. Thanks for looking, Cheers, Greg
- 14 replies
-
- 26
-
-
-
 Here's one of my entries for the 'In the Navy' GB still ongoing just now. The conversion from the new tool Airfix kit was a breeze, the Alleycat parts fitting superbly, even for a hamfisted numpty like myself! I've ordered another to do a MkII NF which I have markings for. The Airfix kit even has the early teardrop canopy to use for this build, signs of a MkI or MkVI on the way maybe? The decals were from High Planes and worked smoothly using the 'wetting on with the Johnsons Klear' technique described variously on this forum. I do very little weathering to my models, to worried to overdo it! Questions and comments welcome. Davey.
- 14 replies
-
- 43
-
-
This is the second build I fancy doing for this GB, a Merlin engine Beaufighter Mk II, 789 Sqn, based in South Africa around.1945. I can't seem to find any photo's of Beaufighter's in this squadron on the 'net so will have to trust HPM's research. I'm using Airfix's TF.X boxing, the first I will have built, along with the AlleyCat conversion. Straight tailplanes are courtesy of a few MPM boxings of the Hasegawa kit I bought cheaply on E-Bay a year or two ago, hopefully they will match up well enough with the Airfix Fuselage, nowt a bit of modelling won't fettle!🙄 The leftover wings and engines will be used on a High Planes Mk Ic I have in the stash, of which I have built one which went OK, just the cowlings weren't the greatest to get right! I am waiting for the decals to arrive from Singapore, there's plenty of time yet an can get the thing built and ready for paint in the meantime. Will post pictures of the decals when they arrive, only been a week now although it didn't take that long for the last ones I ordered to arrive. Davey.
- 35 replies
-
- 6
-
-
- Airfix
- AlleyCat models
- (and 1 more)