
Search the Community
Showing results for tags 'Airfix'.
-
Hi All. This is my first post after years of just reading and picking up info from the site. This is my Airfix Scammell Tank Transporter and IBG Models Crusader Mk3. Supposed to represent circa 1943 scene. Crusader painted to represent a Polish Army example with SCC2 and SCC1A in an MTP 20 pattern. Reference mainly Mike Starmers guides. Ultimate aim is to include in a diorama. All finished with Humbrol enamels. A few little additions here and there - glazing to the tractor cab, a few tools etc. Weathered with a combination of acrylic paints and pastels. Hope you like.https://photos.app.goo.gl/vjqATNmFNs1tD1SUA
-
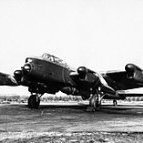
Mosquito Mk.XVIII NT225 'O' 248 Sqn flown by Flying Officer William Cosman, DFC, (RCAF) and Flying Officer L. M. Freedman, navigator. Kit - Airfix 1/72 'new tool' 399 released in 1972 Flying Officer Cosman and Flying Officer Freedman flew this plane in Ops during 1944 and were sadly lost in an engagement with Fw 190s near Gossen on 7 December 1944. A fuller account of their Ops in NT225, and details of the Mk.XVIII, is included in an article published in 2016 in THE OBSERVAIR (newsletter of the Ottawa Chapter, Canadian Aviation Historical Society). Above is the finished article. This is how it looked last October when retrieved from the 'box of doom' in the loft; The kit I made in 1972, The WIP of the rebuild is here; Thanks for looking, Charlie
- 22 replies
-
- 60
-

-

-
Blackburn Buccaneer S.2B in RAF Service (A12014) 1:48 Airfix The Buccaneer needs little introduction to most British aviation enthusiasts, as it was in service for a long time, first in the Royal Navy's Fleet Air Arm, and latterly with the RAF after remaining airframes were handed-over, performing a similar strike role in both branches of the British armed forces. The Buccaneer was originally designed by Blackburn for the Royal Navy, which is why even the RAF aircraft retained their folding wings and arrestor hooks. Blackburn was later rolled into Hawker Siddeley, hiding away its lengthy heritage. It was designed to be a rugged low-level attacker that was to approach below the enemy’s radar horizon, and had a reputation as a highly-stable weapons platform that although it was just subsonic could leave other more modern aircraft in its wake in the turbulent air close to the ground. After the last British aircraft carriers were retired at the end of the 70s, the hand-over to the RAF was completed, and older airframes were scrapped due to safety concerns after an accident, leaving them with a fleet of around 60 aircraft that served until 1994 when the Tornado took over the tasks it had been carrying out. The type progressed from initial S.1 variant to S.2, replacing the underpowered De Havilland engines with the powerful Spey engines that were also used in the Nimrod and British Phantoms amongst others. This required a larger intake to ingest sufficient air to feed the engines’ voracious appetite, and later the S.2B was further upgraded to carry Martel missiles. The S.2A moniker was reserved for former FAA airframes after they had been converted for use by the RAF, while the C was the Navy’s name for the S.2A, and the D were former Naval airframes upgraded to S.2B standards. The last hurrah of the Buccaneer was during the first Gulf War that the British called Operation Granby, laser designating targets for the Tornados that it accompanied in the event they encountered problems with their own pods. They were instrumental in the destruction of many bridges in Iraq, and they were also sent to dive-bomb airfields and bunkers either solo, or with lasing provided by other aircraft. On its return from the Gulf, it was decided that they were no-longer needed, and were retired early, despite having been substantially upgraded at great cost just a few years earlier, which is typical of British Defence decisions. Their role was taken over by the Tornados after they had been upgraded to operate the Sea Eagle anti-shipping missiles that the Buccaneers had been carrying before they were retired. The Kit This is a fresh reboxing of the still brand-new tooling of the venerable Buccaneer from Airfix, adding RAF decals and a new sprue of parts that contains many parts common to the previous version, reorganised to accommodate the new missiles etc. The kit arrives in a large top-opening box, and if you consider part count to be a value indicator, you’re getting almost 300 of them on the seven sprues that are in a darker grey styrene than usual, reminiscent of the Extra Dark Sea Grey scheme that it often wore in service. There is a single sprue of clear parts, a large decal sheet and a thick instruction booklet that has three glossy colour and markings profiles inside. First impressions are excellent, with lots of delightfully fine detail that includes panel lines and rivets, as well as raised details where appropriate, at odds with the jest that the Bucc was hewn from one huge billet of airframe aluminium. Amongst the parts you get a very detailed cockpit, gear bays, engines, boarding ladders, an open port engine bay that even includes a handy styrene mask for painting, a contoured box inside the nose for the nose-weight, detailed bomb bay, air-brake in the tail and a broad weapons load, plus a set of FOD guards for the intakes and exhausts. That’s an impressive list of features that even includes two pilot figures, although they are sadly still suffering from the hands-on-laps pose that dates back to the 80s and beyond. Such a minor gripe that it’s hardly worth mentioning, especially as many folks don’t use pilot figures anyway. Now that my two old Airfix Buccs have been firmly pushed right to the back of the stash, let’s move on. It’s of no concern to this modeller though, because this kit and its siblings are already doing roaring trade at model shops, and is firmly in the realms of the de facto standard for 1:48 scale. Having since watched the Hornby TV show where Paramjit worked upon this project, it’s clear that he and the team have put in a lot of effort to create a model kit that trumps their old tooling by a substantial margin, which is honestly a huge understatement. The decal sheet is similarly well-detailed with lots of stencils, seat belt decals, and dials for the instrument panels that should add to the realism of the cockpit without stressing your bank account further. Before you break out the tools, you need to decide which of four weapons loud-outs you are planning to deploy on the wings and in the belly of your Bucc. Decal Option A 4 x Sea Eagle Anti-Shipping Missile Decal Option B 4 x Empty Underwing Pylons 4 x 1,000lb Bombs in Bay Decal Option C 2 x Slipper Tanks on Inner Pylons 2 x Empty Outer Pylons Decal Option D 1 x AIM-9 Sidewinder Missile or 1 x 1,000lb Paveway II Laser Guided bombs 1 x AN/ALQ-101 ECM Pod 1 x AN/AVQ-23 Pave Spike laser designator pod 1 x Empty Inner Pylon Construction begins with drilling the necessary holes for your chosen weapons scheme, which takes up four pages with various diagrams used to assist you with the decision. A further page shows the location of the various internal decals that are used throughout the build, although they aren’t mentioned on the actual instruction steps, so a bit of cross-referencing and pencil markings might be wise to prevent missing some out. They are all within the cockpit however, so that shouldn’t take long. We finally get to cut some parts off the sprues to make up the two Mk.6 Martin Baker ejection seats, which consist of six parts each, with large multi-part cushions and the overhead pull-handles that initiates the ejection process in the event of an emergency. The seat building process is carried out twice, then the rear-seater’s instrument panel is made up with a recess on the front mating with a block on the back of the pilot’s launch rail, adding decals to the panel and the headbox of both the seats. The cockpit tub has the nose gear bay glued under it, needing just the aft end cap adding to box it in, then the side consoles are detailed with top surfaces that lock in place on shaped depressions, and accepting decals later to improve the detail. The pilot’s instrument panel is started by adding rudder pedals behind the centre, and adding the short L-shaped control column into the slot in the front of the panel, before it and the rear bulkhead are joined to the rest of the cockpit, followed by the two seats, the forward one also holding the rear instrument panel. In preparation for the closing up of the separate nose portion of the fuselage, a container is made up from two halves, which has large I-shaped bars running down the sides, and inside you are told to put 15 grammes of nose weight before closing the lid on it. It’s a fancy feature that should make the sometimes fraught task of avoiding a tail-sitter model a thing of the past, cramming lead shot into available spaces to your best guess and hoping it won’t cause problems when you close the fuselage halves. The nose sides have cockpit sidewall detail moulded-in, which is improved further by adding seven extra parts, and if you are planning on using the included boarding ladders, you should drill some holes where indicated, ensuring they are horizontal to the finish aircraft’s line of flight. The nose weight fits into the port half of the nose on its I-tab, taking care to glue it home fully. The cockpit slides into the port nose half, and should click into position thanks to a tab on each side of the rear bulkhead that clips in place on a shape secreted in the rear of the nose halves. Gone are the days of inexact cockpit positioning, which is another welcome improvement. The nose is glued together and allowed to set up, then the pilot’s coaming and clear HUD are popped on top, finishing off the work in that area for now. As mentioned, there are detailed engine fronts included, plus their trunking that penetrates deep into the fuselage and out the other end, with an almost full engine in the port side nacelle that can be displayed. The first parts are the exhaust trunking halves that are paired on a cross-brace and the halves fit together using four circular depressions, and includes some framework for the main gear bays, which is painted a different colour. A bulkhead straddles the two tubes and incorporates the rear walls of the main bays, with another at the forward side that clips onto a large tab. Another bulkhead slides into the rear of the exhaust trunking tubes, and two perpendicular panels slide in between the two aft-most bulkheads to strengthen the assembly, and provide surface detail for the inner walls of the main gear bays. This part of the assembly can then be inserted into the lower fuselage half, which has the rotating bomb-bay roof moulded into it. Before proceeding, two raised panels and square blocks should be removed by sanding back to the correct profile of the engine nacelles. The intake trunking is mounted on a similar cross-brace with two circular alignment pins, then is butted up against another bulkhead that has engine front-faces moulded into them. You are incited to build the next few steps whether you intend to display the engine or not, as it will make aligning the parts much easier down the line, and I’m not going to argue. The shell of the port engine is made up from two halves, and attaches to the rear of the forward bulkhead behind the intake trunks, with some detail painting necessary before you insert them into the fuselage in front of the aft assembly. Some additional tubing is laid over the top of the engine as it will appear through the hatch if you are leaving it off, but omit these parts if you are modelling it closed. A curved plastic part is included with the word ‘MASK’ etched on it is surfaces that can be used to protect your hard work on the engine during the painting of the exterior of the model. Paramjit is clearly demonstrating his devotion to modelling and modellers there, as masking a recessed area can be tricky. If you are displaying the engine, the upper fuselage needs a little work, removing the access panel that has been helpfully part chain-drilled for you from the inside, making the task simply a case of attacking it (carefully) with a scalpel, and a scrap diagram shows the correct angles to cut through the thickness of the fuselage. A side wall is glued in place in preparation, then the fuselage is left to one side for a moment, before it is shown again over the page, where you are incited to paint the main gear bay rooves and drill out some holes in the spine if you are folding the wings. The fuselage halves are then joined only if you are folding the wings, where you are advised not to glue the aft bulkhead as it will help ease the alignment of the two halves. The decision of whether to fold the wings or not is down to you, but bear in mind that RAF aircraft retained their wing-fold mechanisms, and there are photos of them with wings folded on airfields, despite their original reason being to save space below deck on a carrier. The folded option involves inserting ribs into the wing roots that have spikes projecting from the top to receive the outer wing panels, which are next to be put together. Two decal options involve making up fairings that project from under the leading edge of the wing outer panel, then the ailerons, all of which are made from two parts each, then adding a choice of different shaped clear wingtips, depending on the decal option you have chosen, stopping the inner ends with a rib that accepts the fold mechanism later. You are told to remove the fifth vortex generator from the inside edge, and the port wing also has a long pitot probe mounted on a fairing below. For unfolded wings, a spur on the outer panel is removed, and so is the fifth vortex generator as for the folded option, then an A-frame with insert is placed in the recesses inside the wings before they are joined. The wings are glued into the lower wing roots within the raised guides, then the upper fuselage skin can be glued down, again without gluing the aft bulkhead. The same painting and drilling is done before the two halves are glued, as per the repeated scrap diagram. If you have elected to expose the engine, a brace is glued across the bay, then the bay door and a small part are fixed in place on four hinges that slip under the edge of the bay. Again, the mask part is included for your convenience during exterior painting. The Bucc has an area-rule era coke-bottle shaped fuselage, so has a bit of a wide rear, which is made from a separate section to the main fuselage and incorporates the tail fin. The tail is split vertically into two parts, and has an aft bulkhead inserted during closure, after which the tail-hook insert is glued into the gap in the underside of the assembly, followed by gluing of the tail and the nose assemblies to the fuselage, taking care to align everything neatly to remove or reduce any remedial work. The larger S.2 intake trunks are slotted over the interior trunk surface, and are topped off by a handed lip, but as usual, it’s best to ensure a good fit here before applying glue. The exhausts have inner and outer skins too, and these slide on inside the other before being attached to the rear of the fuselage either side of the tail, with the short flap-sections made up from top and bottom halves and fixed next to the exhausts either flush, or dropped to 40°, next to the ailerons that can be offset to 30° by swapping the actuator part out. The final flying surface is the prominent T-tail, which starts with the main surface that’s made from top and bottom halves, mated with the now usual circular locating tabs, then it’s glued onto the moulded-in tail fin. The fairing on top is two more parts, with a choice of forward and rear bullet fairings, separate elevators (one of which is arrowed to the rudder position incorrectly) and rudder panel, all of which are single parts each and can be deflected as you wish. The Buccaneer has a long tail cone fairing that splits vertically and hinges out into the airflow to act as the air-brake, which was a definite weak-point of the old kit in terms of detail and fit, but doesn’t seem like that’s going to be the case with the new tool. To display it open, you begin by assembling two outer skins on a W-shaped support, then inserting the three peaks into the rear of the brake surfaces, which are moulded as one, and have some nice rivet detail moulded into them. The surfaces are boxed in at the rear by the fairings that give it the tapering profile it achieves when stashed away, adding a short bulkhead and a triple-linked tube before sliding the air-brake assembly into position, with a scrap diagram showing the correct orientation of the tubes diagonally within the assembly. The closed air-brakes are simple by comparison, comprising two halves and a central bulkhead that creates the vanes at the top and bottom of the fairing. It slots straight into the rear of the fuselage, so is quite the appealing option if you’re intrinsically lazy, in a hurry, or just don’t like masking. The arrestor hook is added later by choosing a deployed or stowed Y-shaped base, actuator to get the correct angle, and the hook itself with a small blade aerial next to it. A pair of blade antennae and two probes are also fixed under the nose while the airframe is inverted, with a tubular aux-intake further back on the fuselage. Under the belly of the Bucc is an innovative rotating bomb bay that you can either pop the lid onto and carry on with the rest of the build, or put the effort in and detail it further. The process begins by adding an insert forward of the bay, with another insert with clear light at the rear, and a detail insert in the front of the bay that is used for both options. The closed bomb bay can then be covered up and you can move on, but if you plan on showing off that nice detail within, there are five lengths of hose/cable bundles fitted within, plus two thick pipes added into the main gear bays nearby. The bombs are fitted later if you plan on using them. The gear of the Bucc was sturdy to cope with constant hard landings and catapult launches from the deck of a carrier, so all the struts are moulded in halves with some of the wider sections hollow inside to reduce the likelihood of sink-marks. Some bright spark will probably make metal inserts to toughen those up further. The three wheels are each moulded in halves, with a flat-spot on the bottom to simulate weighting, although all the wheels are shown as not glued in place yet, presumably so you get the flat spot on the bottom consistently. There is also a scrap diagram showing the diameter of the hub, which should allow the deft modeller to create their own punch-out masks to ease painting of the wheels, choosing a diameter of 7.6mm. Once the gear is done, flooding the wheel centres with glue should prevent them moving again if you don’t want to faff about every time you move it in the future. The nose gear leg slots into the bay with a retraction jack behind it, and a single bay door running down the side of it. The main gear legs fit into a hole in a rib and on top of another rib, making for a strong bond, then they have their curved doors fixed to the edge of the bay with three hinges that slot under the side. A decal of a data-plate is applied to both the main gear legs at front and rear, which is good to see, as stencils make models look much more detailed IMHO. Before applying the glazing to the cockpit, you should choose whether to install the pilots, which have a detailed painting guide next to them, then a blast-shield is placed between the two pilots, and a choice of two windscreens, only one of which has a wiper, so you can use aftermarket Photo-Etch (PE) wipers if you’re an inveterate detail upgrader. This is certainly a model designed by modellers with modellers in mind, and watching the episode where Paramjit is working on the design is well-recommended. The main canopy also has two parts, one with the det-cord breaker moulded-in and the other without it, so you can use alternative methods such as PE or decals to replicate the det-cord that shatters the canopy in advance of the pilots punching out. Yet another helpful addition. You can close the canopy or depict it pushed back to just over the rear pilot’s seat using either of the two parts, either option showing off the detailed cockpit within. The Bucc’s prominent L-shaped refuelling probe is inserted into a recess on the nose in front of the canopy, and the spine is decorated with blade antennae and lights depending on which decal option you have chosen. The weapons included in the box are well-detailed, and have inserts for the Sea Eagle missiles to give them more realistic thickness fins. The weapons set includes the following: 2 x TV Martel Anti-Shipping Missile 4 x Sea Eagle Anti-Shipping Missile 1 x Martel TV Guidance Data Link Pod (left over from the C/D boxing) 2 x handed slipper tanks 1 x 1,000lb Paveway II Laser Guided bombs (the instructions mark this as a 10,000lb bomb due to a typo) 8 x 1,000lb Iron Bombs 2 x AIM-9 Sidewinder Missiles 1 x AN/ALQ-101 ECM Pod 1 x AN/AVQ-23 Pave Spike laser designator pod All the weapons have handed pylons that are suitable to their station, some of which have additional parts to thicken their mounting-points, and the bombs have either pylons for wing-mounting, or cleats for mounting inside the bomb bay. All the weapons and fuel tanks have stencils and a painting guide included on the main sheets. The model is complete now, but Airfix have helpfully included several extras that will give your model some additional visual interest. There are two crew ladders with separate stand-off brackets, one for each pilot that are fixed side-by-side to the nose using the holes drilled initially before the model was completed or even begun if you’re prepared. There are also Foreign Object Debris (FOD) guards for the intakes and exhausts, which have nice engraved detail, and the exhaust blanks have a T-shaped handle that is fitted to the centre of the part. Markings The Bucc didn’t wear too many schemes during its long and illustrious career, but Airfix have managed to include four different options on the sheet, each of which has a side of glossy A3 in full colour devoted to it to assist you with painting and decaling. An additional four pages in the instruction booklet shows where all the many stencil decals are placed for each decal option, avoiding duplication and over-complication of the other sheets of diagrams. From the box you can build one of the following: XW527/527, No.12 Sqn., RAF Lossiemouth, Scotland, 1993 XW544, No.15 Sqn., RAF Laarbruch, Germany, 1971 XV352, No.208 Sqn., Operation Red Flag, 1977 XW547/R, Guinness Girl/Pauline, Operation Granby/Desert Storm, Muharraq Airport, Bahrain, 1991 Decals are by Cartograf, which is a guarantee of good registration, sharpness and colour density, with a thin gloss carrier film cut close to the printed areas. Conclusion I’m still excited of course, but I’ve calmed down a little bit since the initial release. It’s an exceptionally well-detailed replacement for the old tooling, and the engineering that has gone into the making of the kit is first-rate. Add to this the useful extras such as the ladder and FOD guards, and we’re onto a winner. It’s a Buccaneer too, and we’ve waited SO long for a new one. Extremely highly recommended. Kit Only Kit & Coin Review sample courtesy of
-
 Greetings all - and all the best for coming year. Airfix 1/24th Hellcat II NF (F6F-5N), KD127, 892 NAS, Drem, Scotland, mid-1945. Here's my first completion of 2024 which nearly made 2023 but the cold, wet weather was against me for the final varnish coat! The Airfix 1/24th Hellcat is well known and documented so I'll save the background information but suffice to say it's one of the most enjoyable builds I've ever done - it's an absolute beauty of a kit and I loved building it. Whist there are some nice marking options in the box, I decided to go off-piste a little and do something different, hence buying the excellent Aerocraft set to make this into a Royal Navy night-fighter variant: The level of detail is sublime out of the box, and it went together beautifully with virtually no fit issues whatsoever. What I will say though, is tolerances are very tight indeed and the parts benefit from having their mating surfaces sanded slightly to cater for the thickness of the paint. The gun bays, for example, have a lot of the wing structure to add and thus very careful test-fitting was required to get that satisfying 'click' as it all goes together. The engine is a small model in itself - it took a total of three weeks to get it together and painted. Airfix give you a very detailed construction guide and this enables the builder to add the mass of wiring associated with the ignition harness - I used some aftermarket braided wiring and the effort was well worth it. The surface detailing is some of the best I've ever seen and gives a wonderful 3D effect - when you catch the right light it looks so realistic: Considering this was built OOB with the only additions being the seatbelts (I felt the kit examples were a little over-scaled), the ignition wiring and conversion set, it's exceptional value and quite a presence on the modelling desk. Paints were all Xtracolor enamels and I kept weathering effects to virtually none - these were, in reality, high gloss Dark Sea Blue and pretty clean. The stressed skin effect does most of the work for you to be fair, and other than some light exhaust staining I kept this in line with period photos of late-war Royal Navy Hellcats. To anyone considering building this, a few observations of the build process which may come in useful: As mentioned above, tolerances are very tight - gentle sanding of gluing surfaces and test-fits are a must and it will be very easy for things to become misaligned, especially in the gun bays; If you can, build the engine and main airframe as separate parts and bring them together after painting. I installed the engine as a completed unit prior to the main airframe being painted and this resulted in some very complex masking around the exhausts! The main canopy was quite a bit wider/flared at the base than the runners it is supposed to sit on. I had to coat the inside of the canopy with some Future (to avoid 'fogging') and then attach it with CA glue; The wing tip light lenses are slightly too large for the apertures they sit in - in hindsight I should have test-fitted these earlier in the build and not after painting! Be really careful when following the instructions as to whether you are doing wings folded or extended - the build sequence is very different between the two! Anyway, that's enough waffle from me! All the best, Tom
- 19 replies
-
- 67
-
-
-
Hello everyone and Happy New Year (if I'm not too late to say that). I could hardly wait to get started on this GB because I haven't had a modelling table since just before Telford and the withdrawal symptoms were setting in! I had to wait a day or 2 extra until I could establish my new place to mangle plastic. It's not the kitchen table anymore but still not actually permanent (it'll have to be tidied a bit if Daughter no. 3 suddenly decides to visit) but better than before. So I'm excited ...... So to begin. I aim to contribute 2 builds for this GB, both of which are older Airfix I have chosen to do the Hs 129 first as i think it will be quicker because I don't intend to get bogged down in internal details (I'll believe that when I see it ) as little is likely to be seen through the limited cockpit glazing. AND I'm awaiting some AM for the Mosquito that I'll be doing as the MkXVIII. Doing both with big guns sort of balances out I think. Should be fun anyway as I don't really know too much about the subjects and will hopefully learn new things. For this build I'll be taking a lot of direction from this build https://www.britmodeller.com/forums/index.php?/topic/235041344-172-henschel-hs-129-done/ that I found when digging around for info. Thanks @Dermo245 hope it's ok. The box I have for this kit appears to be the first issue (according to Scalemates) from when the kit came out in 1968. I actually bought it about 10 years after that from a place near Halifax or Keighley (can't quite remember) called MHW Models. I haven't been over that way for many years but I don't think they are trading any more. It has been kept dry in the loft and seems to be in reasonable nick, although there's a worrying bend on the "Big Gun" which I'll have to look at (maybe it was for shooting around corners ? ). The decals must be a bit of a worry but they could potentially be ok. I used some last year of a similar vintage without too much trouble. I have some spares somewhere if not. The painting bit refers to Airfix enamel colours. I actually still have some tins from my former modelling life but not opened them yet. Maybe I'll have a look, but I thought them more appropriate for the Classic Aifix GB later in the year. Anyway, thanks for looking. Just off to give the sprues a bath. More later hopefully. cheers Rob
- 77 replies
-
- 29
-
-
A happy new year to you all! It’s been a while since my last build, with theatre commitments, holidays then Christmas, but I’m back with a bang, or should that be Bucc with a bang! Despite waiting ages for the RAF version for which I’m awaiting delivery, I felt compelled to buy and build the previous FAA version as a companion to the Sea Vixen. Seeing this kit reduced to £50 it seemed a good time to get one, I doubt it’ll ever be less than that. So without further ado, my first build of the year. The now very familiar box, freshly delivered this morning… And a LOT of plastic inside! I’m tempted to make it with wings folded, but reserve the right to change my mind. Lovely decal sheet! And this is the scheme that most caught my eye. The real thing, images below are all courtesy of the FAA Buccaneer website: I’ve already got a spray can of EDSG so should be ready to get going. All comments and advice and general Bucc banter more than welcome …
- 47 replies
-
- 12
-
-
Hi folks, Please can you count me in for this GB as it will be the perfect excuse to build this: Cheers Kris
- 27 replies
-
- 26
-
-
Hello everyone! Here is one of the three kits I finished in the very last days of last year! It's a Focke-Wulf Fw 190F-16/R16. The F-16 was a planned but unbuilt final variant of the F family. Over a year ago, when I decided to start a run of Fw 190s which has been going on and off since then, I spotted this variant in the Valiant Wings Airframe & Miniature No.7 book on the radial engine versions of the Fw 190 and what sparked this project was having a four-bladed propeller on an F-model. Seeing this project was feasible for me, taking into account the other modifications to make, I bought what I needed and only in October did I finally get on with it. I decided to use an Airfix Fw 190A-8 kit as the base since it was considered decent (despite some negative aspects) and, above all, cheap. I almost regretted it when I struggled with the poor fit around the nose area! Anyhow, I managed to pull through and had fun making the modifications and some improvements. This build dragged on for over two months because I kept taking on completely different builds simultaneously, something I will not do again... The Fw 190F-16 variant has three major differences to the A-8/F-8: 1 - The four-bladed propeller. This I made using spare wider blades from Eduard kits. The remaining parts were from the Airfix kit. I modified the spinner to have four perpendicular openings for the blades. 2 - A Ta 152 tail. I used an AML resin tail set for the Fw 190D. The forward section of this part had to be cut off as it was the fuselage extension for the D. I had to open up a bay for the tailwheel. 3 - Extensions in the wing root. I used scrap plastic and CA glue sanded to shape to make these. This version had the late-type blown canopy which was in the Airfix kit but the related headrest wasn't so I used a spare one from an Eduard kit. The blister for the underside loop antenna was removed and an aerial further back was made from stretched sprue as was the radio wire above. The outer panels of the wing undersides were sanded smooth and the outer guns cropped as they were not used by the F family. The book depicted an R14 subvariant with a standard torpedo. I decided to use a pair of Airwaves white-metal BT400s which I have long had in my stash, thus making this an R16 subvariant. I made the underwing FuG 101 radio altimeter antennae from sprue. One of the Airfix kit's negative points is the main undercarriage. I shortened the legs in the oleos 1.5mm and did the same to the doors. The main wheels were replaced with spare ones from an Eduard Fw 190A-5 kit I built earlier this year. The scheme, completely fictitious of course, was an attempt to make one for low-level attacks over water. I have made some other "what-if" naval attack aircraft kits but using greys so this time I went for a late-war green. I felt a wavy pattern would be better than squiggles and had the insignia in minimal (outlined) versions to aid in the camouflage. The kit was fully painted and varnished with brush. Some of the decals were from the kit, the rest being from spares or generic sheets. Despite some troubles, this was a fun project and I'm very pleased with the result and really glad I made it. For some reason, it looks mean and heavy with the four-bladed propeller. Thanks for looking and all comments are welcome Miguel
- 10 replies
-
- 29
-
-
Good morning everyone For this beautiful first GB 2024, I chose an English plane that I love very much: an Airfix Bristol Beaufighter Mk.I. At the moment, my only aftermarket set to use is a CMK cockpit... later we'll see what I can add........Happy GB everyone Ettore 🍡
-
 I'm not the first to offer up a Blenheim for this GB and I think this particular Airfix 1/72 boxing has already had an airing as well! But I fancy doing a Fighter variant of the Blenheim, this one was sitting near the top of the stash and so out it has come. I plan on building this one pretty much out of the box. This boxing has decals for BQ-O (L8679), a 600 Squadron aircraft based at RAF Manston in August 1940, but I'm planning on doing this one as a different aircraft on the squadron during that month so I'll be digging out some extra decals. Haven't worked out which exact aircraft I want to do yet; some reading through the Squadron ORBs (AIR-27-2059) and my two main reference works (Gentlemen in Blue by Hans Onderwater and The Bristol Blenheim: A complete history by Graham Warner) is ongoing. I think (hope?) I've got a masking set somewhere...
- 18 replies
-
- 21
-
-
- 1/72
- Blenheim Mk.IF
- (and 1 more)
-
This one is the Airfix Starter Set, the kit itself needs no introduction. I started the model while I was on an Airfix Vampire kick in my Shackleton WIP, but was discouraged by some Humbrol Clear mistakes I made with the other two. I’m not really in a position to airbrush for a few days, and have the Twins GB yet to start. I’m also holding off a bigger project until the Shackleton is complete. I was going to turn this into a 14 Sqn. build alongside the Sword Strikemaster, but decided it was time to wrap up the Vampire quickly instead. Here’s the progress so far. I was raised with a bit of a Protestant work ethic, so my six-months-ago self did all the boring parts first. Great! I learnt a few little idiosyncrasies in the last few which are still fresh (make sure the fuselage doesn’t set twisted, listen to Airfix and install the main gear legs early), so this should theoretically be a nice simple build. I’ve had a good experience with the Stynylrez black primer recently, so I’ll try that again along with their metal primer as it looks like a good approximation of the high speed silver dope.
-
 Well I think I'm probably being over ambitious with thinking I may get these two builds done but I will try my hardest that's for sure. Will start with the Blenheim, I have the mask set and paints already and if I get time I will get Whitley done as well. Both will most likely be finished as the aircraft from the box art, I will definitely do the coastal command Whitley, perhaps a different scheme for the Blenheim. Looking forward to getting started!
- 7 replies
-
- 19
-
-
- Blenheim Mk.IF
- Whitley
- (and 1 more)
-
Last one for the year, a quick build of the Airfix Ferret. Brush painted with Tamiya Acrylics, somewhat over-weathered with Vallejo Model Washes. No additions other than a couple of aerials from copper wire. Completed as vehicle in UN colours in Cyprus, 1974. The instructions say 5th Parachute Brigade, but a search online actually indicates it’s a vehicle belonging to 5 Troop, Parachute Squadron RAC. Thanks for looking and a Happy New Year to all.
- 16 replies
-
- 34
-
-
 Hi All, My last completion for 2023 (I can say this definitively on New Year's Eve 🤣) is Airfix' lovely Beau TF.X, completed as LZ407 of 455 Sqn RAAF, based at RAF Dallachy, Moray, Scotland in 1945. 455 Sqn was part of the Dallachy Strike wing, and the squadrons carried out strikes on German shipping using both rocket projectiles and torpedos (LZ407 was an RP-armed aircraft). I do not have a photograph of LZ407, but here is a photo of other Dallachy Beaus (copyright IWM - images for discussion only and will be removed on request): Now this was part of an informal GB with @bigbadbadge, and both he and @AliGauld were most generous in sharing their information on Dallachy Beaufighters. Anyone else considering the build should consider getting hold of the superb Aviaeology pack, which although OOP provides a wealth of detail on the Dallachy wing aircraft. Here is the WIP if anyone is interested: The build was OOB, the only 'improvement' was reshaping the elevator actuators with brass rod. I've attempted to replicate the heavy weathering which these airframes displayed. And so to the photos: Now as this is the last build of 2023 a couple of indulgences. First a shot with another RAAF Beau, 'Slippery Ship II', from the 1:48 Tamiya kit: Finally a family shot with a couple of other 2023 Bristol builds, Airfix' excellent Blenheim Mk.IVf, and Beaufort Mk.I (completed as a Mk.Ia): So that rounds out 2023 with a total of 14 builds for me, which is not a bad total! Thanks very much to everybody who has been part of the journey, and for all your kind words, advice and encouragement. Happy New Year to one and all, and let's look forward to plenty more plastic-mangling in 2024! Thanks for looking, Roger
 -
 After reviewing the newly re-released Bristol Bloodhound kit the other day, which you can see here, I thought to myself "I talk a good fight about adding a cab interior to the Land Rover, but could I do it?". I started mucking about cleaning up the parts last night while I was watching The World at War, and things initially started with the dashboard, as that's probably going to be seen from outdoors, at least from above. I found some pics of a restored exRAF Landy, and aware that you should always be a bit wary of restored vehicles, but what the hell? Something in there is better than nowt! I put a couple of strips across the bottom of the windscreen, then added an instrument binnacle from a piece of strip that I rounded the ends of. A couple of punched discs were used to depict the instrument, and I bent up another piece of strip to support the steering wheel. Now, about that steering wheel... It's a bit small, but I'm not changing it now! I made the rim from lead wire, then made the three spokes from flattened wire, bending them to shape into a 3-pointed star. I glued that to a column made from rod, and then somehow managed to glue the rim to the spokes without too much swearing, or destruction of property. I touched in the joints with extra CA, and left it overnight. A coat of grey primer showed it was "OK", so I shortened the column by trial and error, and installed it in a shallow depression in the dash and its support. You can also see I added a few supports to the allegedly canvas roof, just in case anyone looks The seats were figured out as I went along, putting in a base made from strip and rod, over which I put a piece of styrene that I'd scribed into three cushions and rounded off to look a bit cushion-y. The back cushions were a bit more tricksy, as they had curved backs. I started with scribed grooves, then used my curved sander to put a dish in the individual sections, accentuating it near the top. I also put some thinned areas and curves in the top of the back of the cushions to give the impression of them being curved, and it seems to have worked. The short bulkhead behind it was trimmed to accommodate a mistake I'd made earlier, and glued in place behind the seat backs, both strengthening each other. The pic doesn't really show the curve to the seats very well, but I'm happy with 'em. Shame they'll never be seen I replaced one of the location tabs for the dash with a shaped piece of rod, as there's a bit of transmission tunnel there, although it's in a recessed part of the bulkhead, and I'm not that crazy. The other bit of tunnel was made from a larger piece of strip that was trimmed to something like the right shape. The next job was the vehicle sides, taking care not to baulk the final assembly in the process. I started off with a couple of strips representing the basics of the door cards, such as they were on early Landies. Then I realised that the bulkhead behind the seats wasn't full height, and there were a pair of windows in the back of the vehicle. I put in some benches from 0.25mm by 4mm strip to cover the top of the wheel arches, and then boxed them off with more of the same, then added some base and back cushions to each one, being careful of the short bulkhead behind the seats. I've been test-fitting everything as I go along, so hopefully it'll all fit together in the end. As a happy coincidence, I have had a bunch of cabochon self-adhesive rhinestones in my drawers (not the ones I wear, that's just silly) for years. I dug them out and noticed that I'd got quite a few larger 3mm and 4mm ones, some 2mm ones that were just a wee bit large for the lights, but LO! at the back of the 2mm packet, I found a small strip of 1,5mm rhinestones, and peeled one off to quickly test it. It could have been made for it, which makes me a happy fellow. As a quick afterthought, you might notice that I've hidden quite a few ejector-pin marks on the interior, including the roof. If you're wondering how I did it and why I was so fastidious about doing them all, I've discovered a fantastic new tool that makes it a piece of cake I have a Galaxy Model engraver/motor tool that's more like a pen than a Dremel, and is rechargeable. I usually use it to trim, sand and cut small tasks, but on a recent trip to AliExpress, I found some DSPIAE bits that fit this and any other 3mm chucked tool, with a bit of a warning not to use them at too fast a speed for fear of melting the plastic. The bits have a flat circular top, and you can either glue/tape bits of sandpaper to it, or buy the sponge-backed paper that they sell, and at AliExpress prices, they're pretty darned cheap, so I stocked up on different sizes and grades. This is the first time I've used them in action, and I'm very impressed. It will sand away putty-filled pin marks, it can reduce the height of pins that stand proud, but it's best to trim them back so you're not sitting there sanding all day. The best and most effective method I've found for handling recessed marks is to fill them with CA applied by cocktail stick, squirt a bit of accelerator over it, and then sand with a larger tip until it's flat. Sometimes you have to re-do it if the glue was a bit low, but it takes all the tedium out of it, and you should all get one immediately! I'm fiddling about with this kit over Christmas for a bit of fun, and may or may not finish it (what's new, I hear you cry!), but at least I've put my money where my fingertips were, and proved you can lash-up a quick interior to give the viewer something else to look at if they get close enough Last bit for now. Apologies for the dust, but you can't make an omelette without breaking legs
 -
Hi All, My latest completion is Airfix' lovely little Tiffie, completed as MP126 of 247 Sqn, which was part of 2 TAF based at Eindhoven in December 1944. The aircraft, piloted by P/O F. Wiersum was lost to flak on 5th December 1944. Here's a photo of the aircraft, along with the scheme (image for discussion only and will be removed on request): This build occurred in tandem with a Hurricane Mk.IIc build - here's the WIP if anyone is interested: And here's the photos: Here's a final shot with the build-mate: I have thoroughly enjoyed this kit, and would highly recommend it. I shall add both the Typhoon and Hurricane as late additions to my 2023 yearbook. Thanks to all who have offered kind words and encouragement along the way - it has been much appreciated! Thanks for looking, Roger
- 18 replies
-
- 48
-
-
-
This will be my third build for the GB - I have another two possibles but that depends on how things go as I will probably be involved in one or more GB at the same time. Ok, I know this has a lot more parts but the box is enormous - at least 3 times the volume of the boxes for the original Airfix B-25 and the Frog one, though in fairness it is quite full. As I mentioned elsewhere I pre-ordered it when first Airfix announced the release so it is the first boxing and I am not altogether happy with the two colour schemes offered. As I will be doing the old Frog one in RAF markings this will almost certainly be a US one, and as it seems they preferred the B-26 for Western Europe then I suppose it will have to be something appropriate to the Western Desert or Italy unless I go for the Far East., so I will have to have a think about that. Airfix have subsequently reboxed it as an RAF Mitchell II, a B-25B, and another desert version, and looking at the parts breakdown I suspect one of the later versions may be on the cards. Pete
- 34 replies
-
- 12
-
-
iBristol Bloodhound (A02309V) 1:76 Airfix Vintage Classics Following the cancellation of an earlier Ramjet-powered Surface-to-Air missile project by the name of Blue Envoy, due it seems to the 1957 Defence White Paper by the now-infamous Duncan Sandys, a shorter-range project was considered to pick-off the remaining enemy bombers that made it past the English Electric Lightnings that were responsible for point-defence of the Great British airspace. The fact that the Blue Envoy project had been progressing well, with successful trials of a scale-version of the missile, caused some scratching of heads, but the new Bloodhound missile benefitted from its technology, giving it a head start on its development path. Much of those technology benefits were incorporated into the Mark.II Bloodhound, extending its range to almost double that of the Mk.I. When launched, the missile accelerated incredibly quickly thanks to the four booster rockets that were ejected after only three seconds, by which time it would be travelling at an ear-popping 1,800mph, with attendant sonic boom in addition to the roar of the rockets and ramjets, making hearing defence an absolute necessity. It homed in on its target using a combination of semi-active radar and powerful computing capability (for the day) that gave it a high level of resistance to electronic countermeasures, and allowed it to accurately track low altitude targets, making it a lethal opponent for the expected waves of lumbering Soviet bombers and their escorts in the days before ICBMs took over the role of delivering nuclear weapons. It remained in service with the British and Swedes until the 90s due to its abilities, and Britain took their Bloodhounds out of service when the Berlin wall came down, while the Swedes kept theirs until just before the new millennium. The Bloodhounds first paired with the Thunderbird shorter range missile and then the Rapier that covered the required defensive envelope between them. The smaller missiles could also be transported comparatively easily, while the Bloodhound was of a size that lent itself to fixed installation, often around strategic areas such as airfields. The Swedish Bloodhounds were converted to be vehicle transportable, and a possible future development of the missile was to introduce this facility wholesale to the Mk.IV, while the Mk.III was to be nuclear tipped with a longer range that would presumably be used to thin the bomber stream over the sea, hopefully keeping any fall-out away from the land. Both those variants weren’t completed however. The Kit This kit was first released in 1960 when the missile itself was still new. It has been reboxed several times since then, and up until the announcement of its long-overdue re-release, it was achieving eye-watering prices on a certain auction site. It’s amazing how some people are prepared to throw money at something if they want it badly enough. Now that it is back in Airfix’s catalogue under the Vintage Classics line, there will be a few people feeling a little silly, but the rest of us will just be glad to see it again, and pleased that the moulds are still in good condition. I built one myself as a nipper, and remember it fondly. Where my kit went though, I have no idea. The kit arrives in a diminutive red-themed top-opening box, and inside are six sprues of various sizes in the new darker grey styrene that Airfix have been using, which has been well-received. There are no decals, but there is a Land Rover with missile trailer, and a set of figures to guard the emplacement, including a dog that one of the chaps has on an invisible lead. Detail on the missile is good, and once the seams are dealt with, it should look suitably sleek. The trailer is a nice inclusion, as is the Landy, but if you want to give it an improved look, you might consider adding some clear acetate windscreens, a bulkhead and a couple of seats for the crew, or at least the impression of those things. There are of course some ejector-pin marks here and there, most annoyingly on the canvas roof of the Land Rover, which will make careful removal and making good very important. There is surprisingly little flash too, most of it around the sprue runners and the figures, which should be quick enough to remove with the edge of a sharp blade and some fine sanding. Construction begins with the missile, joining the main halves that includes the two Bristol Thor ramjet engines, then adding delta-shaped steering fins forward and square fins to the rear, plus the support structure for the temporary boosters in the form of a cruciform part at the rear of the missile. Each Gosling booster rocket is made from two halves, one of which has the fin moulded-in, and once complete the quartet are joined to the main body on lugs near the front fins, and at the rear on the four points of the cross. In action, the rockets were hooked to a ring fore and aft, and once their thrust became less than the ramjets, they would slide backwards, opening like a set of petals before falling away. That’s the missile finished. The Land Rover is next, building the canvas-topped bodywork onto a flat-bottomed floor, adding the windscreen, bonnet and radiator assembly to the front, plus two axles that thread through holes in the arches, to be finished by adding wheels to each end of the axles. A scrap diagram shows that if you leave the glue off, the wheels should rotate. At the back of the vehicle a bulkhead with a notch for the towing hitch closes the rear. The launch platform has several parts left unglued to allow it to be moved, based upon a flat turntable, which is joined to the floor by a styrene pin that joins them together and allows them to rotate. The side walls trap the launch rails and their supports into position, adding extra supports as the parts are joined together, and finally a stopper pin that plugs into the back of the missile so it stays in position. The last main assembly is the trailer, the chassis made from two halves that trap the tread-plated floor in position, adding twin wheels into the rear arches on both sides, another frame is glued to the trailer’s gooseneck, and twin supports are added fore and aft. The front wheels are based on a pivoting platform secured in position by another styrene pin, adding two stub axles beneath that have more pins to hold the wheels in place, and an A-frame with towing eye on the front. There are five human figures and a dog on the sprues, although you only use three of them according to the instructions. One is an officer waving while a ‘Snowdrop’ RAF MP stands to attention, and a dog-handler should be linked to the dog via a fine wire so it doesn’t bite anyone. The other two dog-handlers don’t have a dog to handle, but you could adapt them to other poses if you feel the urge. Markings As already mentioned, there is only one colour scheme depicted, which consists of a white missile with yellow boosters, green launch platform and trailer, and an RAF blue Land Rover. Other schemes were used, so check your reference if you feel like a change. Conclusion A great many modellers have been waiting for this kit to come back in stock, and unlike those with bottomless pockets, we appreciate the reasonable price that it is now being offered at. Most of us won’t notice the slight difference in scale from the usual 1:72, and if you give it some care and attention, you should end up with a creditable replica of this Cold War Warrior. Highly recommended. Review sample courtesy of
-
Another new work in progress despite numerous build. I have decided that I will start the new year 2024 with something different from what I have been building; a ship…..a tiny one……make difficult with tiny PE parts. Wanted to build a Falklands ship but the conversion will only increase the difficulty level. So, I shall stay with the original version. This is my first serious ship building. The last few times were built during school days, built out of the box. I bought the Atlantic Models PE set and there are some new structures added on some levels. Will probably need to dig further for some pictures.
- 34 replies
-
- 12
-
-
- Airfix
- HMS Fearless
- (and 1 more)
-
Sounds like there might be quite a few B-25s in this Group Build, so I'll be adding another. Using the recent new tooling from Airfix, I'll be building the B-25D "Grumpy", an airworthy B-25 that has a history of flying both in Europe and the US. It was just sold in September and will be returning to Europe next year. A bit of its history can be found here https://b-25history.org/aircraft/433318.htm Box pictures, still getting the correct decals. Looking forward to this, as I've yet to build the Airfix version, which im hoping is a better build than the Hasegawa offering.
- 15 replies
-
- 15
-
-
This is the superb Airfix kit of the Austin K2/Y Ambulance. An incredibly impressive kit! A fantastic level of detail that comes together to produce a lovely looking model. The model was built out of the box, apart from the various items of stowage & kit. The decals are very nicely done. They are thin, opaque and settle down with little effort. Painted with Tamiya acrylics and weathered with filters, washes and chipping. Thanks for looking Angelo.
- 13 replies
-
- 40
-
-
-
 Managed to get my hands the Airfix Ferret very soon after it arrived at my local hobby shop. While I finish off my Whippet and Sherman I thought this might be a nice quick build. First the sprues, which are nice and clearly marked: Neatly printed decal sheet: Im going to finish mine as a UN painted vehicle in Cyprus. My mother was a QA nurse there in the mid-60s while Dad was serving in Aden. Started with the interior and main hull. Went together very quickly. Just a little bit of dirty wash before sealing up - not going to be able to see much inside. Everything slots together really easily. Just a bit of blu-tak with some fishing weights to add a bit of “heft”, before I sealed the engine compartment up as well. Made a start on painting the wheels using Tamiya XF61 Dark Green and Vallejo Dark Rubber. That’s it for the next few days - festivities await! Merry Christmas.
 -
Fairey Gannet AS.4, 815 Naval Air Squadron, HMS Ark Royal, 1958. The new Airfix kit, OOB painted with Humbrol, Vallejo, and Revell acrylics.
- 23 replies
-
- 64
-
-
-
This is going to be my entry, picked up from either Lidl or Aldi earlier on this month (I can't actually remeber which of my excessively large haul of bargin kits came from which): The box contains two very nicely moulded sprues of parts (plus the clear sprue): I'll be building the boxart airframe, complete with the black tail. I've only got Xmas eve and Xmas day to complete it, but I'm reasonably confident I can manage it James
- 21 replies
-
- 12
-
-
As I’ve been getting bored waiting for filler to dry on the Wellington, I’ve started another build. This time it’s Airfix’s Spitfire Vc, which I got for £9 thanks to a 25% voucher from Hobbycraft: I think most of us have seen the sprues before, but have a photo anyway: I thought I’d open up the slot in the headrest armour for the harness, along with deepening the lightening hole indents (I didn’t see the point in going all the way through in this scale): A bit of detail painting and dry brushing later, and the tub was assembled: That’s all OOB, including the kit IP decal. I did use a set of Eduard generic RAF seatbelts, which annoyingly wouldn’t go through the slot I opened up! So I’ve tucked them down the back of the seat, which I know is inaccurate: I’ve not decided which aircraft to build just yet, but I’ve narrowed it down to two USAAF aircraft (but not the kit one as I’m not a fan of the style of the sharkmouth). I’ve got the decals on the way from Hannants and I’ll make my mind up when they arrive, but both machines have sky blue undersides. James
- 75 replies
-
- 12
-


