Search the Community
Showing results for tags 'AFV Club'.
-
Hi all, After far to long sitting on the shelf of "I'll finish it one day", that day has finally arrived. I did start a WIP, but that never went anywhere. Ho hum. This is the AFV Club centurion kit modified with the Accurate Armour conversion to make it into a Centurion MKI used as part of the Operation Sentry. More I could do, but its better than leaving it on that shelf (box in the corner actually) for another day (or three). I think there should be a repeat of the serial number on the turret, but there you go. I like the look of the tank without the side panels, so went with "Sheila", as there is at least one photo of the tank in this state. Comment welcome. Tim
-
Hello everyone Another Tiger from AFV Club , this time the F version. Colors are Gunze and decals are Print Scale 48-113 (IRIAF F-5) The model actually is still incompleted because the seats should be changed with the MB ones. Hope you enjoy. Barzin. The completed family🙂 The real thing:
- 22 replies
-
- 46
-

-
- AFV Club
- Northrop F-5F Tiger II
- (and 1 more)
-
Hi dear friends, this is my second experience with AFV CLUB Northrop family,actually this time with a copy of Northrop’s tiger! ”SAEGHEH” (in persian it means lightning)the Iranian version of F-5E Tiger II with some differences and upgrades.The most visible change is twin vertical fins!! The kit is the old F-5E kit with an extra sprue including saegheh parts and very nice decals. Colors are mixture of MR.HOBBY and AKAN paints. Sorry for non professional pictures,I took them in different lighting. Hope you enjoy Regards Barzin with his IIAF mate: Real Aircraft:
-
Hello everyone! With my second little one now semi-settled in to a sleeping routine, I may get the chance to do a bit of modelling again and who can ignore the chance to build a Tiger in a GB?! I'm hoping to finish this little beauty, AFV Club's 1/48th Tiger I Ausf E "Final Version". It will be a slow build as I steal the odd hour here and there. Looking forward to getting started 😀
-
Here's the second of my first two kits completed this year. It's AFV Club's 1:144 Curtiss P-40M Warhawk 185, of the 47th Fighter Squadron, 15th Fighter Group, USAAF, at Noumea, New Caledonia, in December 1943. Apart from the comments I made on the P-40N I posted earlier today, I had to correct the cockpit as, despite including an insert for the rear section of the cockpit, the head armour part was incorrect for the M variant being slanted forward (for the P-40N) instead of rearwards. I added the missing radio mast. I had intended to make an RNZAF machine using the decals from the Printscale sheet but these were both incomplete and inaccurate so I went for the kit's only option. The kit was fully painted and varnished by brush. Thank you for looking and all comments are welcome as always Miguel
-
Hello! Here's one of my first two kits completed this year. It's AFV Club's 1:144 Curtiss P-40N-5 Warhawk 663, flown by Wang Kuang Fu (6.5 kills), of the CACW's 7th FS/3rd FG, at Laohokow, China, January 1945. I scratchbuilt the missing intake detail, the CBI radio blister and loop and the outer struts for the drop tank. I added a headrest, belts and stick in the cockpit. I only realised the inaccurate setting of the tail wheel doors when it was too late. These come moulded with the fuselage halves and should be wide open, almost perpendicular to the fuselage. Since the tail wheel comes moulded next to one door, it was risky to fix it at that point. The kit was fully painted and varnished by brush. Thanks for looking and all comments welcome Miguel
-
I’m going to start the first GB of the year off with something different for me an AFV!! After having so much fun building the ZSU-57 of the 60‘s GB I thought I better build something similar for this one. Enter the M42A1 Duster, I’ve always like this beast so here is the perfect opportunity to build one. I’ll be building AFV Club’s lovely model of this beast with a few extras thrown in. Of course I could go past Friulmodel tracks, though these ones are a wee bit more complicated to build than the usual one. You have to attached tiny white metal nuts to cover where the metal pins go for each link! There’s two days work and lots of swearing covered! That in a moment of complete insanity I bought the Voyager Model PE Upgrade set for her……little knowing just who intricate this set is! Something like 4 or 5 hundred bit of PE to use, and most are the perfect size, as in microscopic for the carpet monster to eat! Dear God what have I gotten myself into!!! Oh well where’s the fun of a build without cursing and muttering……..so lets start the year at 11!!!!
-
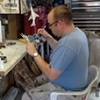
Hi, My first thread here in Britmodeller will be a model I've been building for a while now. It's AFV Club's LVT-4 Early version with few extras such as Voyager basic set, Eduard interior set, Aber metal barrels for machine guns and AFV Club aftermarket tracks. It's one of these vehicles that need the interior to be painted even before the basic assembly. So I was eager to complete the interior that much that it can be painted and the hull could be assembled. At first after following needed steps of the instruction it even seemed that way. But before I reached for the airbrush, I took some time to pay attention to some reference material in hand and it appeared that many of the interior elements are still to be added. So here we go: Gear selector had to be scratched as well because original broke in two and half of it went missing. That's all for now. The engine of my airbrush has finally started and next update will be of the painted interior. Kristjan
-
 AFV Club is working on a 1/48th Curtiss BF2C-1 Hawk III kit - ref. ? Source: https://www.facebook.com/AFVCLUB.TW/photos/a.237327066312820.56570.236926266352900/1776152392430272/?type=3&theater Box art Remember Freedom Model Kits is also preparing a similar model: link V.P.
 -
Vought F4U Corsair (AR14406) 1:144 AFV Club via Pocketbond The Corsair is an iconic fighter aircraft that had speed agility and an unusual look to recommend it to pilots, but its gestation was far from easy due to the highly demanding specification that required not only high speed, but great load carrying capability, combined with a low stall speed to make it suitable for carrier operations. It was given the largest engine then available in the shape of the Pratt & Whitney Double Wasp radial engine, which could drive a huge three bladed prop that was almost 14 feet across. The aircraft had an inverted gull shaped wing so that the prop didn't strike the ground on take-off or landing. It had already proved itself capable before the United States entered WWII, being the first US single-engined aircraft to exceed 400mph. Concerns about armament led to the cowling guns being deleted and three .50cal machines guns being installed in each wing, which displaced the fuel tanks into the fuselage ahead of the cockpit, giving the aircraft its distinctive set-back appearance. By 1941 it was in production and had been allocated the name Corsair; initial trials revealed an unpleasant stall characteristic that would lead to one wing dropping suddenly, which was fixed with a small root mounted stall strip. The set-back cockpit also gave poor forward visibility on landing and take-off, with oil from the engine further obscuring the view. The top cowling flaps were replaced with a fixed panel, and the landing gear struts re-tuned, but this delayed its use as a carrier borne fighter until 1944. Despite these set-backs it was used successfully as a land-based fighter, and was used in large numbers by the US Marines to good effect. A number of aces got their kills in the Corsair, which was superior to the Zero, which coupled with the pilots' experience over the poorly trained Japanese pilots made them easy targets. Because the Corsair was fast at low level it was also used for ground attack, using unguided rockets, and bombs. The Royal Navy used the Corsair from 1943, putting it into use immediately, as it was far superior to their existing options, and despite its unforgiving deck handling characteristics it found favour with pilots. After WWII it went on to serve in many conflicts, with the production line finally closing in 1953, more than 10 years after it opened. As a testament to its longevity and usefulness, some foreign operators still had Corsairs in service in the 1970s! The Kit In what seems to be an extension of their Mini aircraft series is seems AFV club are expanding their 1/144 scale kits (They previously only did P-40 kits in this scale). Inside the box there is enough plastic and decals to build two aircraft. The plastic is a dark blue colour presumably aimed for those who don't want to paint the kit. There are a selection of canopies for the different variants in the kit. All parts are well moulded, there is no visible flash, and there are fine engraved panel lines. The ribbing on the wings is not overdone for the scale. The one part cockpit and seat is put into the main fuselage and this is then closed up, the headrest part is then put on behind the cockpit. For the wings care must be taken to open up the right holes depending on the variant being modelled and the underwing armament to be used. The wings can then be glued together. The intakes and gun parts are then attached, again with care needed to select the right parts. For the front of the aircraft the modeller has the options of open, or closed cowl flaps to fit over the engine. Two different propellers are provided depending on the variant chosen. The landing gear can then be added with a choice of ground or flying position available for the tail wheel part. For under the wings a choice of rocket, bombs and fuel tanks are provided. Lastly the correct canopy for the variant being modelled is added. Markings There is a fairly comprehensive decal sheet which looks to be printed in house. The colours appear good, and everything seems to be in register. From the box you can build two of eight markings; F4U-1 VF-17, USS Bunker Hill, July 1943 F4U-1 No. 1834 Sqn, Royal Navy Fleet Air Arm, Quonset Point, July 1943 F4U-1A VMF-214, Solomon Islands, Dec 1943 F4U-1A No. 18 Sqn Royal New Zealand Air Force, Guadalcanal 1945 F4U-1C VF-85, USS Shangri-La, March 1945 F4U-1C VBF-99, USS Shangri-La, March 1945 F4U-1D VF-84, USS Bunker Hill, Feb 1945 F4U-1D VBF-88, USS Yorktown, Aug 1945 Conclusion It is good to see more kits for those modelling in the smaller scale, these are quality kits and come highly recommended. Review sample courtesy of UK Distributors for
-
Sikorsky SH-3A/D Seaking (AR14405) 1:144 AFV Club via Pocketbond The Sea King is one of the most enduring aircraft of the post-war period, the Sikorsky SH-3 Sea King flew for the first time in 1959. Although no longer in production, the Sea King continues to serve with air arms around the world, including those of Canada, Germany India, Ireland, Italy, Spain and the United Kingdom. The SH-3H was a US variant developed specifically for anti-submarine warfare. Originally conceived of as a development of the SH-3D, the SH-3H morphed into a sophisticated ASW platform and was fitted with anti-ship missile detection equipment. It was capable of carrying a pair of torpedoes as well as a range of depth charge weapons. Just as they had done with earlier Sikorsky designs such as the S-55/H-19 Chickasaw (produced in the UK as the Whirlwind) and S-58 Choctaw (Wessex), Britain's Westland Helicopters secure a licence to produce the Sea King not long after the aircraft made its first flight. The Kit In what seems to be an extension of their Mini aircraft series is seems AFV club are expanding their 1/144 scale kits (They previously only did P-40 kits in this scale). Inside the box there is enough plastic and decals to build two Sea Kings. All parts are well moulded, there is no visible flash, and there are fine engraved panel lines. In the cockpit two rudimentary seats and an instrument panel are added, the centre console being moulded in. The front and aft bulkheads are then attached to the main cabin floor. Windows are added into the main cabin along with the pilot entry door, and then the two fuselage sides are brought together around the cabin floor. The lower boat shaped hull part is then added, along with the cockpit glazing. On top the engine inlets are added along with a part on the rotor head box. The main side door and its running strip are then added. The two sponsons are then built up and added, with the main gear wheels being built and added into them. The tail wheel is also added. The winch over the mail door is added. The tail boom is assembled and added at this point. It can either be out, or in the folded position. Once added the tail rotor is fixed on. Next up the min rotor is added. Again like the tail boom the rotors can be in the extended position or folded. Markings There is a fairly comprehensive decal sheet which looks to be printed in house. The colours appear good, and everything seems to be in register. Whats good is that AFV Club have not skimped on such things as the US Navy titles, so from the box you can build any two of the four markings; HS-4, USS Iwo Jima, April 1970 HC-1, USS Coral Sea, 1972 INS Shikra, Mubai, 1980 HS 50, Royal Canadian Navy, HMCS Bonaventture 1965. Conclusion It is good to see more kits for those modelling in this smaller scale, these are quality kits and come highly recommended. Review sample courtesy of UK Distributors for
-
 Afternoon all Sitting here looking at the rain. My set of projects all on hold due to many supply and painting issue's (also l can't face the Sturer Emil at the moment....., it's gonna be a long one) So, I decided to have a time filler in between while waiting. Picked this up when I lived in the States in 2003. Never got round to moving further than a few parts on the chassis. I bought it to see what AFV Club was like. It's not Tamiya, but nice so far. Not a crisp detail on the small parts, and a little error ridden in the instruction sheet. But nothing that can't be over come. Doing research on the web, and not too many images for reference. I'll keep looking, as it's nice to have something to work towards. I have the AFV Club PE set for it, and at the time the Friulmodel tracks for a Hanomag 250 which this one is based on. A cheap version at wars end. Not sure if I will use these Friuls. I might make use of the tracks that came with it and see if I can get track sag without. Have to see. Anyway, have a good afternoon all. Regards Simon.
 -
For the aircraft part, nothing more than what was previously announced: two-seats F-CK-1D Ching Kuo (link) & Hesa Saeqeh-80 (link). Source: https://www.facebook.com/AFVCLUB.TW/photos/a.237327066312820.56570.236926266352900/1628070587238454/?type=3&theater V.P.
-
My entry for this GB will be AFV Club's M10 Tank destroyer. Unlikely to start for a couple of weeks, need to finish my entry in the F-104 STGB first.
-
Churchill 3" Gun Tank with Snake Launcher (DH96006) 1:35 Ding-Hao Hobby The Churchill tank was named after Winnie, who once he realised it wasn't a particularly good tank, wasn’t very pleased with his namesake. It was a cruiser class tank intended to replace the Matilda, and was designed with the last war in mind, as were many of the British early war designs, so was under-armed and under-armoured. Many changes and variants later it was still having problems, and its terrible performance during the ill-fated and poorly prepared Dieppe landings sealed its reputation as a poor design. The post D-Day variants were at least capable of penetrating enemy armour, but as with the Sherman, it struggled with the more heavily armoured Tiger and Panther tanks unless it was at close range. A variant of the chassis was used to create a gun carriage, with a 3" howitzer ball-mounted horizontally in a casemate and protected by thicker armour. Because of the Sherman Fireflies with their superior gun however, they didn't see action, and some were converted to carry the experimental Snake mine-clearing system, which was a development of the Bangalore Torpedo, and fired a line of rockets across the battlefield, detonating the charges within to clear a path for tanks and troops to advance. Sixteen Snake tubes were carried on each sponson over the tracks and extending their full length. The 3" gun was removed and replaced with a blanking plate to reduce the all-up weight and prevent draughts. It wasn't deployed on the battlefield, although its successor Conger did see some deployment, encountering problems with premature detonation, possibly due to the vulnerability of the explosives in such an exposed position. The Kit Ding-Hao are the specialist arm of well-known model company AFV Club, and this is a retooling of their Churchill kit that was released early this decade, with additional sprues added to create the casemate and rocket tubes. It arrives in a brown cardboard box with black overprinting that gives a little background to the company name, and what its aims are, describing the kit as "Collector Grade". The kit specific details are found on a wrap-around cover that shows printed pictures of a complete model, plus the bonus resin figure that is in the box. The box has a captive lid that hinges back, revealing quite a lot of plastic in the box. The Churchill base kit parts are all double-bagged along with the resin figure, and the variant specific parts are separate in their own bags, so there's going to be a lot of crinkly bags to dispose of once you unwrap the kit. There are seventeen sprues in olive green styrene, a clear sprue, two rubbery tracks, four small frets of Photo-Etch (PE) brass, a length of cord, twenty two short springs used in the suspension, a small decal sheet and of course the instruction booklet. The bonus figure is made from cream resin and is supplied in four parts, which fit together very snugly. Construction begins predictably with the suspension and road wheels, utilising all those real springs to give the suspension functionality. It is a little complicated, so take care and follow the instructions, testing the fit as you go. There are a lot of parts, and the working suspension adds another layer of complexity, as well as increasing the part count. The drive sprockets and idler wheels are added at the ends of the sponsons along with access doors and additional parts, after which the two assemblies are joined by attaching the hull floor and lower section of the rear bulkhead. The bulkhead is then decked out with towing hitches, light clusters and radiator parts, with the aft section of the engine deck added on top in two parts after they are detailed with hatches and grab rails. The glacis consists of a thick front plate, and a sloped plate onto which the headlamps are glued, then fire extinguishers, exhausts and their armoured shrouds are attached, then the fenders are installed on the tops of the sponsons after adding the flexible plastic/rubbery tracks, which show a surprisingly good level of detail for their type and moulding era. You can of course replace them with the usual white-metal tracks to get the correct faceted look and weathering opportunities, but that's your choice! Engine intake boxes are fabricated from styrene and PE, then applied to the slots on the sponson sides, with styrene mudguards front and rear that have PE accessories added for scale fidelity. It seems a little out-of-sequence at this stage, but the rear panel that forms the back of the Snake boxes as attached by two faux-bolts to the towing eyes, gluing only the bolts at this stage. Tiny PE firing harnesses are added to the rear of each of the firing pins, with a photo showing how they should be arranged once complete. A quartet of British style jerry cans are attached to the rear fenders, and attention then turns to the casemate. The crew compartment is made up from flat armour just like the real thing, and has a PE blanking plate for the gun mount on the thick mantlet, which glues in from behind. Hatches, commander's cupola and vents are also added before it is dropped into the long hole in the hull, and this is where you find out whether you've managed to build the assembly square or not. It might be best to test this before the glue is dry however, when it will be a lot easier to check. Large F-shaped brackets are fitted to the sponsons, which support the snake tubes, each of which is built from four sides and a separate front, which has the hollow muzzle and a representation of the rockets moulded-in. They slide in through the brackets and butt up against the rear plate attached earlier, with a number of locating pegs ensuring a good fit. Towing cables are made up from some of the supplied cord glued onto the plastic eyes, and an aerial is stretched out from sprue, and that's the kit done. The figure that is supplied is in cream resin as mentioned earlier, and has separate arms and head, with a single part providing the torso and legs. The detail is excellent and the casting is crisp with sensibly placed pouring blocks, which shows up the detail of the tanker's winter coveralls with integrated hood to great effect. The chap is relaxing with a hot cuppa while leaning against his tank, with a very natural pose, which is accentuated by the incredible fit of the parts. When you offer the arms up to the torso, there is along pin that fits into a corresponding hole, and once you have the correct position, the join between the two parts almost disappears. The head is similarly well done, although to me his neck could do with extending by a fraction, as when it is hard down into the socket he looks a bit lacking in the neck department. A small blob of Milliput in the socket would make that an easy correction, and any excess can be smoothed off with a damp blade before it cures. Markings There is only one option in the box, and for some reason you are incited to paint it Dark Earth, when almost every Churchill I've seen, including the box top photo is an olive drab(ish) colour. It's probably best to go with what you know for the main colour, but the instructions for the figure seem to be more appropriate. The decals on my review sample had merged with the protective paper, but most of it peeled away with a little effort. The rest was removed with a moist cotton bud, by rubbing gently side-to-side over the paper adhering to the decals. A few scraps remain, but these should float away when the decal is dumped in water. Conclusion An unusual variant of a fairly unsuccessful line of tanks that on initial release commanded quite a premium price that possibly scared away many potential purchaser. There should by now however be some more attractive offers available, so if you're a fan of the "funnies" or weird dead-end developments, maybe now is the time to pick one up. Recommended. Review sample courtesy of UK Distributors for
-
AFV Club is to release a 1/144th Sikorky SH-3A Sea King kit - ref. AR14405 Source: https://www.facebook.com/AFVCLUB.TW/photos/a.1512888545423326.1073741955.236926266352900/1512888992089948/?type=3&theater V.P.
-
As follow up to its Northrop (R)F-5E/F Tiger family, AFV Club is to release a Iranian 1/48th HESA F-5E Saeqeh-80 kit - ref. AR48111 Source: https://www.facebook.com/media/set/?set=a.1512888545423326.1073741955.236926266352900&type=3 V.P.
-
A new 1/144th Chance Vought F4U Corsair kit is announced by AFV Club - ref AR14406 Source: https://www.facebook.com/media/set/?set=a.1512888545423326.1073741955.236926266352900&type=3 Source: https://www.youtube.com/watch?time_continue=233&v=8BQ8UD2e5qA V.P.
-
Evening all, was back at work today but did finally manage to get this beauty finished over my days off this week. AFV Club F-5N straight out of the box. I do have a PJ Productions pilot to drop into the pit shortly and I did have to replace the AFV Club decals with a set of Two Bobs decals, fortunately for an aircraft in the same colour scheme! A bit disappointing the the kit decals didn't play ball but the quality of the Two Bobs sheet kinda made up for it. Main finish done with Tamiya acrylics airbrushed, details done in Vallejo acrylics. Klear used before and after decalling and weathering done using with Promodeller Dark dirt wash, Tamiya smoke, pastels and silver pencil. Photo's taken outside with my trusty phone so hope the pics are up to scratch, nose pitot probe lasted less than 30 secs!! Will replace it with a section of needle I think. Hope you like! I'm in love with her 😉 Eng
- 13 replies
-
- 29
-
-
Good evening, Had the opportunity to flash up the airbrush today now that the kids are back to school and this weeks shifts are done! I've had this AFV Club F-5N pretty much since the kit was released but it stalled after I put the first of the colours on it. Today I've managed 2 rounds of fiddly masking and painting, oh how did I ever put up with Xtracrylix in my airbrush, Tamiya forever now! I have just managed a first coat of Klear as well before retiring for the evening. After another coat of Klear I'll be looking to decals this bad boy aggressor, but wondered if there's any issues or things to watch with AFV Club decals as I haven't used them before. I'd normally use Microset/sol or Klear, how do AFV decals react to Microset/sol? Quick pic for those interested (I have progressed the KH Su-17 as well but that's for later!) Eng
-
1/35 AFV Club M35a1 Vietnam Gun Truck with Bravo 6 and Verlinden figures along with an awful lot of paint brush bristles. Thanks for looking Si
- 11 replies
-
- 13
-
-
After what seems like an age of no plastic modelling , I decided to go for something I wouldn't normally choose just by way of a change . I settled on something Modern-ish and something U.S. Finally after reading a lot of great things about AFV Club's M60 Patton series I couldn't wait to try one for myself . Opting for the M60A2 because I really like the look of this vehicle , even though by U.S. Military standards they were relatively short lived and a little unpopular ,they were for a short time at least ,a part of the vanguard that would help protect Europe from the "Red Tide" who would invade and overwhelm western forces should WW3 erupt . The kit itself is a really nice kit with some really neat things going on inside the box like textures a nice drivers station interior and a rear section that's all ready to accept an aftermarket engine . This will be a relatively slow build as I plan to adapt a voyager etch set made fro the M60A1 for parts of this build and also some of the textures area little over the top in places and in others either too dissimilar or non existent . I will also be doing some additional detailing along the way and finally converting the crew figures ...eventually . So here's the kit box and overflowing contents ...this is a very full box ! The Lower hull is a very nice slide moulded item , the Cast texture though is a little overboard and looks akin to pebble dashing , There's also a few large mould seam lines to deal with . My copy seems to be suffering in a little mould misalignment though , this impacts on some key areas such as the large flat areas where the plates mount to build the suspension arms onto . Lots of nice features though such as the casting/foundry marks including the "G shield" of manufacturers General Steel . To my eye these also look a little bit too sharp but they'll doubtless be fine for most . These interesting Circular marks are to be removed , they're what I hope are marks to mount Blazer armour to in a future release ? A M60 RISE and an IDF Magach 6 would be nice eh ? So I began this project by trying to calm down the heavy pebble texture with 800 grade Wet or dry paper , This actually gave a much more convincing "Cast" look and I'm quite pleased with the result . Maybe I wont need to Mr surfacer it after all ? , Next I began work on the Turret mouldings . I didn't take a photo of their "Before" state but they are almost devoid of texture completely . I think AFV Club listened to critique regarding the texture and dialled it back .. almost completely . Anyhow I started to add cast texture using a 1mm round dental burr and a very fine 0.5mm round diamond burr in my motor tool , the speed setting was slow at first and then turned up for subsequent passes . This will give me the multi layered effect of a cast surface . Finally I brushed out some solvent cement over the entire turret to help soften things out a little . Incidentally upon test fitting the turret halves I found a strange anomaly , it appears it may be mould misalignment ? but I will have to do some blending in . Need to find out the shape of the real turret . The opposite side seems to mate a lot cleaner . Lastly It was time to add some smooth marks and some linear marks to the upper turret edges to simulate areas where the raw casting was ground and finished at the foundry and also to simulate more of the layering effect of laminations to the steel . These were made with the tip of my scalpel blade and point respectively . this was then partially softened and melted with solvent cement . Throughout I have been using photos of Jacques Littlefield's M60A2 for surface effects . More soon , thanks for looking ! Jim .
- 28 replies
-
- 11
-
-
- M60 Patton
- M60A2
- (and 1 more)
-
Dear Colleagues Wanting a break from 1/72 scale aircraft for a while I fetched my 1/35 AFV club Valentine out of the attic. I added Bronco early tracks. I was inspired by a picture of troops clambering over Valentines probably in 1941. Believed to be the new establishment of Guards Armoured being shown the tanks of 17th/21st Lancers. The figure was from Passion models I think Hope you like it? Andrew
-
After more than 10 years of entering AFV's in the competition at Telford, I finally picked up a trophy. This one got the best model of an Allied AFV of WWll from IPMS Czech Republic. It's the Academy Honey M3 with AFV Club's suspension and tracks and MB Modellbau's horseshoe turret. There are also a lot of scratch built items such as the sand shields and the large stowage box over the engine deck. AFV Club's suspension and tracks are superior to Academy's items and fitted to the Academy hull with no problems. I changed the turret for the MB Modellbau one as Academy's hexagonal version is incorrect for this tank. The figures came from various sources and have had their arms and legs repositioned and the heads placed with Hornet items. The stowage is a mixture of Resicast, Value Gear and Accurate Armour. The .303 mg is from RB Models and the decals are curtesy of Bison Decals. A very enjoyable build. Regards, John.
-
#25/2016 After the Humber IV, my dad has finished the next in-between armour model, this time the Baby Tiger from AFV Club. The kit is as good as a Tamiya one, the vinyl tracks went on trouble-free. The only, typical for AFV Club, problem were the crappy decals but my dad managed to get them onto the model. Painted with Gunze and Tamiya acrylics. The model shows a tank of the "schwere SS Panzerabteilung 102", still in pristine condition before rolling into Normandy action.