Search the Community
Showing results for tags '1:48'.
-
Hi guys planning on evicting some shelf of doom residences, first starting with this p38. I'll probably move some more models into the shelf later, due to doing this one and not the ones I'm meant to be doing! Anyway I got it to the decal stage but looking at it I've done an awful job on the building of the model as none of the joins line up. So first to fill them and then paint job, which has more patches than a pirate. For some reason I started weathering before all the decals went on... what on earth was I do?!! Stripping of the decals sanding back any blobs in the paint work. Then a quick rivet job finished by an OD and NG paint job. Sounds simple enough doesn't it Here's what I've got to work with and who knows what's under that canopy Anyway wish me luck and let's see what we can do! Regards Joss
-
Well here she is. A labour of love, only additions are an Eduard cockpit, Yahu Instrument panel and HGW fabric seatbelt.
- 54 replies
-
- 67
-

-
- Hawker Typhoon
- Airfix
- (and 1 more)
-
I build models for the exciting project : Hawker Typhoon Preservation Group who are restoring a genuine and what will be the world's only flying Typhoon MKIB. There's been a bit of a rush on lately with customers wanting a quarter scale model of the Typhoon! So I have ended up building four at once! Three marked as the actual airframe 'RB396 although they wanted invasion stripes on her which she never had: therefore there is some artistic licence going on!; and the fourth one is the aircraft that first trialed the use of Napalm bombs in the UK which was flown by David Ince who sadly passed away this year. However the timing is perfect for these four as I have organised in partnership with Romsey Modellers a special Typhoon display at SMW 2017 next week, which is aiming to spread the word about the project, so if your off to SMW please come and see us either at the Typhoon display or at Tangmere Sector Modellers display in the same hall. The kit I used is the Italeri which is quite basic but goes together well and is enhanced by eduard cockpit set. Iv used Mission Models paints for the first time which worked beautifully: Decals are from xtradecal and their RAF number and letter set.
-
 A quick build of the Tamiya 1:48 British 7 ton Armoured Car Mk IV (which I gather is actually a Humber). Brush painted with home brewed Tamiya Acrylic mix for SCC15. Finished with the markings out of the box for a vehicle from the Polish 1st Armoured Division in NW Europe, 1944-45. My first attempt to weather with oils. Very enjoyable, stress free build (except for the wing mirror I kept knocking off). Build thread here. Thanks for looking. Some photos out in the sunshine.
 -
IAI Kfir C2/C7 Kinetic Models 1:48 History The Israel Aircraft Industries Kfir ("Lion Cub") is an Israeli-built all-weather, multirole combat aircraft based on a modified French Dassault Mirage 5 airframe, with Israeli avionics and an Israeli-made version of the General Electric J79 turbojet engine. Two powerplants were initially selected for trials, the General Electric J79 turbojet and the Rolls-Royce Spey turbofan. In the end, the J79 was selected, not least because it was the same engine used on the McDonnell Douglas F-4 Phantom II, which the Israelis began to acquire from the United States in 1969, along with a license to produce the J79 themselves. The J79 was clearly superior to the original French Atar 09, providing a dry thrust of 49 kN (11,000 lb) and an afterburning thrust of 83.4 kN (18,750 lb). In order to accommodate the new powerplant on the Mirage III's airframe, and to deliver the added cooling required by the J79, the aircraft's rear fuselage was slightly shortened and widened, its air intakes were enlarged, and a large air inlet was installed at the base of the vertical stabilizer, so as to supply the extra cooling needed for the afterburner. The engine itself was encased in a titanium heat shield. A two-seat Mirage IIIBJ fitted with the GE J79 made its first flight in September 1970, and was soon followed by a re-engined Nesher, which flew in September 1971. The Kfir entered service with the IAF in 1975, the first units being assigned to the 101st "First Fighter" Squadron. Over the following years, several other squadrons were also equipped with the new aircraft. The role of the Kfir as the IAF's primary air superiority asset was short-lived, as the first F-15 Eagle fighters from the United States were delivered to Israel in 1976. The Kfirs first recorded combat action took place on November 9, 1977, during an Israeli air strike on a training camp at Tel Azia, in Lebanon. The only air victory claimed by a Kfir during its service with the IAF occurred on June 27, 1979 when a Kfir C.2 shot down a Syrian MiG-21. By the time of the Israeli invasion of southern Lebanon in 1982 (Operation Peace for Galilee) the IAF was able to use both its F-15s and F-16s for air superiority roles, leaving the Kfirs to carry out unescorted strike missions. Shortly afterwards, all IAF C.2s began to be upgraded to the C.7 version, with enhanced weight performance, making the Kfir more suitable to its new fighter-bomber role. During the second half of the 1990s, the Kfirs were withdrawn from active duty in the IAF, after almost twenty years of continuous service. The Model The kit, contained in the usual attractive box with an artists representation of the aircraft in dramatic pose of dropping a LGB and dispensing flares. Inside the kit is on seven sprues of light grey styrene, one sprue of clear styrene and two small sprues of a greeny-blue styrene. There is a nice double sided A4 colour chart and painting guide as well as a medium sized decal sheet. The parts are all very well moulded with fine recessed panel lines, fasteners, and raised areas, such as strengthening plates, where required. There is no sign of flash on any of the parts and only a very few moulding pips. The styrene appears to be on the soft side and any ejection pin marks aren’t on the visible sides of parts. The clear parts are very clear, although there does seem to be some distortion on the curving top surface of the main canopy. Initial impression is that this a nice looking kit and from completed examples on Britmodeller does in fact build into an excellent model. Construction starts with the ejection seat. Now there are two in the kit, one for the C2 and one for the C7. Each seat is made of five parts, the seat squab and backrest, two sides, head box top and ejection handle. Unfortunately there are no straps or belts provided so the modeller will have to either scratch build or buy an aftermarket set. There are also a number of sub-assemblies shown to be built on the first page of the instructions; these include the HUD, which is made up of three clear parts, an auxiliary air duct, and cockpit rear bulkhead, on which two electronics boxes are fitted. The cockpit is made up of the cockpit tub, moulded as a single part, the ejection seat, optional instrument panels, depending on which mark is being modelled, two rudder pedals and the joystick. The detail on the cockpit tub is a little soft and really could do with extra detailing, as do the instrument panels, although some very careful painting may bring out the moulded detail on these. The next stage is to make some more sub-assemblies, which include the undercarriage, nosewheel bay, intake ducts, tail flare dispenser, exhaust nozzle, the alternative noses and the LGB illuminator pod. The nose wheel is built up with the oleo, scissor link, landing lights, wheel hub and two tyre parts, whilst the main undercarriage components are made up of the oleo and similar three piece wheel arrangement as the nose wheel. The nosewheel bay is a three piece affair with the roof, moulded with front and rear bulkheads and the two side pieces. The detail moulded on these parts look pretty good and will be enhanced with some careful painting and weathering. The alternative noses, whilst having different parts look very similar and the completed assemblies only differ by what looks like an auxiliary intake/outlet duct. The engine exhaust is built with just two parts with the exhaust fan moulded complete with the exhaust duct, which looks like it will quite awkward to paint effectively, onto which the exhaust nozzle is attached. The sub-assemblies for the intake ducts, cockpit, nosewheel bay, and cockpit rear bulkhead are then fitted to one of the fuselage halves, and then the fuselage can be closed up. The nose and external parts of the intakes can then be attached. Two holes need to be opened up on either side of the spine for additional parts fitted later in the build. Moving onto the wings, these are made up of a single piece lower wing and two upper wing sections. Onto the completed wing the flaps, (flaperons?), can be constructed either up or down using different parts for the actuator fairings. The four airbrakes are then attached, two above and two below in either retracted or deployed positions. The wing is then attached to the fuselage along with the two cannon troughs, canards, engine nozzle, the engine fan disk, fitted the now joined intake ducts, the windscreen and canopy, although this should really be left off until the end of the build if being posed open as it will surely be knocked off. To the underside of the aircraft several sensors, probes, outlets and aerials are fitted, as are the optional panels aft of the nosecone, one with a laser guidance pod and one without. The undercarriage is then completed. Each main leg has an actuator and the two outer doors attached, whilst the nose leg has its actuator and the front bay door fitted. The main bays also have the large inner doors glued into place, through research there doesn’t seem to be a definitive position for these when the aircraft is shutdown. Some pictures show them open whilst on some aircraft they’re closed, so it’s really up to the modeller how they should position them. What Kinetic do well is provide the modeller with plenty of weapons to hang off their completed aircraft, and this kit is no different. Apart from three different types of drop tanks the kit provides the following:- • Two Griffin LGBs • Seven Mk82 bombs with retard tails. • Seven CBU-20 cluster bombs • Two Python AAM There are of course the requisite pylons for these weapons to be hung off, in addition to a Multiple Ejection Rack, (MER) for the centre line station on the C2 version. Not all weapons can be used for both versions. Decals There are in fact two decal sheets, the main, large one, and a small additional one. This small sheet is for one aircrafts numbers, the Hebrew equivalent and a decal for the flare dispenser. The decals, by Cartograph are up to their usual high standard, being very thin, glossy with a fine carrier film. The register appears to be very good as is the opacity. They should settle down with the modellers’ solutions of choice. There are national markings and stencils for one aircraft and insignia and identification numbers for the following:- • Kfir C2 number 805, The Valley squadron, Ramat-David AF Base 1983 • Kfir C2 number 861, The Valley squadron, Ramat-David AF Base 1985 • Kfir C7 number 553, Venus, The Arava Guardians, Hatzor AF Base 1988 • Kfir C7 number 539, Venus, The Arava Guardians, Hatzor AF Base 1992 • Kfir C7 number 521, Pluto, The Arava Guardians, Hatzor AF Base 1994 Conclusion This is another great looking kit of a really good looking aircraft from Kinetic. Yes the detail could be improved in the cockpit and the main undercarriage bays, but it will build into a good looking model straight from the box. Highly recommended In association with
-
Hi all,This is brought about by a SU-27 airport scene, showing the ice and snow began to melt under SU-27, and it’s also the first Russianaircraft to try.Because the hatch connection of HobbyBoss is so terrible ,I consider my canvas cover up, canvas using the recommended method to a friendZhong, who interested can find his tutorials. The scene platform also get lots of proposal of many friends, thanks a lot!
- 19 replies
-
- 16
-
-
For this build I'm going for the 1:48 Tamiya kit for the Corsair I'm going to go with the American Navy build. The juries out on whether I'll do it with the wings deployed, or stowed away. I've purchased the Eduard decal kit to go to the kit as I've never used them before so wanted to give them a try. This will be my first Tamiya kit, having always been and Airfix man...the parts on the sprues seem quite large and bold compared to the kit I'm used too...or maybe it's just the Corsair I'll post pics of the sprues and pictures I took of any actual corsair at the Fleet Air Arm museum in a separate post.
-
 I built these two a while ago. I have always been fascinated with the captured aircraft markings from WWII. The Messershpit is the Tamiya MkVb with fusion resin conversion set which I have to say is superb and caused me very few issues. I also added a Yahu instrument panel and Eduard harness. Painted using Vallejo in the 'alternstive' scheme to the main stream thinking, but has a strong possibility of being correct in terms of the blue underside. The BF 109 is an OOB from Airfix club edition. Again lovley set!
- 11 replies
-
- 29
-
-
- 1:48
- Tamiya Spitfire
- (and 1 more)
-
My current Bronco Staghound build has been off the boil to say the least the last month, so I turned to one of the excellent Tamiya 1:48 military vehicles as a quick build to get my hand back in. It's a public holiday here in Perth, and the weather hasn't been great, so a good excuse to get some glueing and painting done. My choice this time is the Humber Armoured Car. Sprueshots. As always, progress was very quick in terms of construction. And here was where I was at on Sunday evening. Just a little filler needed Monday was spent brush painting. Some home mixed Tamiya Acrylic SCC115 from a previous project. Tyres done in Tamiya NATO black. I managed to knock one wing mirror off. That's it now until next weekend.
-
German Type VIIc U-Boat Etch sets 1:48 Eduard Having updated the Revell 1:72 Type VIIc U-Boats, Eduard have now turned their sights onto the huge Trumpeter 1:48 kit, releasing three sets of etched brass, to update the conning tower, upper and lower hull. The hull sets in particular will require quite a bit of surgery to be carried out on the kit to allow the etched parts to fit, but with plenty of care and patience they will make quite a difference to the finished model. 53191 – Part 1, Upper Hull: This large single sheet set contains parts of the main deck, namely the quarterdeck and extreme foredeck. Each deck is fitted out with numerous hatches with separate hinge plates, bollard covers, rear wire spreaders have new support feet, hawse pipes front and rear, new gun mount foot plates, bow mounted wire cutter and support feet, although the rear support arm needs to be made of 56mm x 1.5mm rod. The handrails have new clamps and the guard rails new cable eyes. The main 88mm gun is fitted with a whole load of new fittings. There are a lot more fittings on the sheet, but there doesn’t appear to be any mention of them on the instructions, which is rather bizarre. 53192 Part 2, Conning Tower: Although the easiest to use, this single sheet set definitely has the most parts, contained in the smaller, glued sleeve, the set is used to add detail, not only to the tower, but also the AA weapons. The single 20mm Flak 38 gun receives new fittings for the mount as well as the guns itself, with new sights, supports, traversing wheels, brackets and spent casing bags. The decks of the tower are provided with new opening panels. The shelving/seating around the inside of the tower are replaced, as is the housing containing the DF array, whilst the lifering has a new holder. The set also includes the footrests that are fitted to the lower parts of the guardrails. There are numerous hatches for both the inside and outside of the tower, plus the access hatch is fitted with a new locking wheel and latch handle. All the hand rails are provided with new attachment points 53195 – Part 3 Lower Hull: Comes in a zip lock bag with one sheet of etched brass. This set contains two replacement free flooding and venting areas for the aft lower hull between the propeller shafts. Rather than just scabbing the panels onto the kit, it’ll be better to remove the areas, using the etched panels as a guide, thinning down the edges then fitting the panels from the outside. The set also includes quite a selection of hull vents and intakes, which once again will need the areas of the kit to be removed, plus access hatches on the ballast tanks. There are also additional plates to be fitted on the dive planes, rudder and proper A frames. Conclusion Whilst the huge Type VIIc is an amazing kit there are some things that really can’t be moulded using standard techniques, even in this scale, and it this is where the etched brass comes in. The finesse it provides to a finished model can really make it shine. These sets can, when used correctly do just that for this stunning model, just be careful with the cutting out of the kit parts. Review sample courtesy of
-
To start I need to use either grey or black UMP (Badger Stynylrez) primer depending on the finish required, wood effect will have grey primer, red and metal finishes will be black UMP grey primer UMP black primer next I’ll be painting the wood effect in the cockpit and propellor until next time as always, any suggestions or comments will be gratefully received. rgds John(shortCummins)
-
Hi guys, as said in the chat thread picked this up at tank fest for a pretty penny. Not sure which one I'm going to make so many choices!! Only planning on making the one but time will tell... While my other build, Zulu, is in dry dock at the moment and the 109 nearly done I'm going to turn my hand to this and see how well I can butcher it Joss
-
The quality of the Airfix 48 scale Lightnings is well known. I have a dream to build one of each Lightning mark in 1/48 - I have all the base kits, we'll see whether it happens. Anyway, made a start by obtaining a resin cockpit set to give the office a little more oomph. I'll model the canopy open on this one. Quite a nice bang seat: Cockpit fit seems OK at the dry fit stage: In the meantime I have been working on other sub assemblies. The wing tips need a little attention for sink marks: But that shouldn't be too hard to deal with.
-
Hey again... Yep two finishes in as many days - definitely NOT the way I usually roll, but no matter. Kinetic 1:48 Alpha Jet with (outstanding) Wingman decals and no other extras whatsoever. Kit does have some 'build issues' most notably in the wing/fuselage join - so-much-so that in order to build it with the flaps dropped, you need to cut away a couple of milimeters from the inside edge of the flaps and re-profile them with a sanding stick to get them wing in to position. Also the engraved details appear to have been applied by an entrenching tool... all that said, it's still light-years ahead of the old Heller & Esci kits from back in the day. Paints are all Xtracolour enamels except the yellow on the fin which is Tamiya acrylic straight from the jar. Please feel free to make any criticism, comments or ask any questions. Ian.
-
This thread will document my attempt at the Academy F-15I. I'm not an eagle expert, so I can't speak to the kit's accuracy, but it looks nice and fun. Its been sitting in my stash for a few years, and this seems like a great opportunity to get it built.
-
The Tamiya 1:48 Tilly finished in representation of a Caunter scheme with brush painted Tamiya Acrylics. Build thread can be found here. Really pleased how this one came out. Thanks for looking.
-
My next project. It's so little! My plan is to finish it in a Caunter scheme (to use up the paints I mixed for my recent Matilda). Thanks to @Bullbasket I have some idea where I am going with the exterior, not so certain on the interior. I am assuming that (and the underneath), would be left as there were "off the boat". The question is, what colour would that be? Is it too early for SCC2?
-
The 1980's produced some fine aircraft designs and this is one of those that went by the wayside. In an effort to improve the F-5 family and also generate a lightweight, agile and most importantly, cheap fighter aircraft, Northrop designed the F-20. The West required something akin to the Soviet MiG-21 i.e. mass-produced at low cost and could be thrown at an aggressor in sufficient numbers so as to not need to be "bleeding-edge high technology" but also "budget-blowing". However the F-20 WAS a high tech aircraft introducing computer technology, HOTAS, electro wizardry, etc, etc. Subsequently its real competition was the F-16, from where its engine originated. The initial production order was from Bahrain. In this “whiff”, additional orders were placed by Singapore, Brasil, Taiwan, Australia, USN and the RNZAF, enabling it to actually go into production and enter service. This being an operational example based out of Ohakea in the attack/fighter role in a similar manner to the A-4K Skyhawk filled. The Euro 1 scheme is a homage to that worn by Scooters of that era. Introducing the FA-20K Tigershark. 20170119_164840-1 by Arthur Dent, on Flickr 20170119_164644-1 by Arthur Dent, on Flickr 20170119_164547-1 by Arthur Dent, on Flickr 20170119_164602-1 by Arthur Dent, on Flickr 20170119_165159-1 by Arthur Dent, on Flickr 20170119_164712-1 by Arthur Dent, on Flickr 20170119_164804-1 by Arthur Dent, on Flickr Underway... 20170116_133902-1 by Arthur Dent, on Flickr 20170116_133812-1 by Arthur Dent, on Flickr It is nice to see thought put into those who want to open up panels (gunbay here) and find the inside of the mouldings already done on the inside of the access doors. Really intelligent design! 20170102_121509 by Arthur Dent, on Flickr I'm really quite surprised with my first experience with a new model company. Freedom Models have done themselves proud with this kit. The fit has been exceptional and I have used a pin-head amount of filler on the entire build! It is that good! Two small issues that I would have to note. First, the lack of seatbelts on the ejection seat. These could be moulded in (like an Aries unit, which I prefer) or with photo etch. Second is the fins on the smaller droptanks. These are simple rectangular "blocks" which have not been shaped into aerofoils. Perhaps the designer went off for lunch and forgot when returning? These are the only points I would raise. Everything else has been a complete joy to encounter and has kept me interested from the start (1 January) until now. Hopefully you enjoy. Right. That's probably going to make the rest of my year very quiet, with attempting to get the P-61 completed, then on to the Airfix Buccaneer. Images copyright of the owner.
-
This is a kit I have always wanted to build. I am the lucky owner of the Airfix twin kit so I wanted to be able to show this amazing airtcraft as best I could. I have decided to depict an aircraft from 208Sqn whilst it was on the Red Flag exercises in the 1970's The Buccaneers had never been seen by the Americans and during the exercise the RAF re-defined to the hosts what low level flying was. Ity was a superlative display of low level fast flying. Not one Buccaneer was intercepted! The kit has its issues, but forms a superb basis for super detailing, so here it goes! I wanted to show an Engine and the bomb bay, all my efforts are from refrence photos and are built by the eye, not plans, so it wont be 100% accurate. The photo etch is from Flightpath.
- 122 replies
-
- 35
-
-
- Buccaneer
- flightpath
- (and 3 more)
-
An impulse purchase a few weeks ago, inspired by, amoungst others, a build by @BIG X. Finished in brushpainted Tamiya acrylics. Lots of fun to build. Build thread can be found here. Thanks for looking
- 8 replies
-
- 19
-
-
- 1:48
- Bedford MWD
- (and 1 more)
-
As promised @PlaStix, but no - this is not a single night's work. I started at the beginning of the week, and haven't had a chance to post anything. On a bit of a roll here with 1:48 scale military vehicles. This one was an impulse buy a week or so ago, inspired by some of the terrific builds I've seen on this forum. Box top: Sprue shots: The mouldings are not as crisp as the 1:48 Tamiya vehicles I have been building, see for example the front wheels: This is going to be another out of the box build, I am going to do the later model RAF marked vehicle. First, I drilled out the ends of the "bumper" (almost going cross eyed in the process) Chassis went together very quickly There are a few mould lines in awkward places, but they won't be visible so I am not too fussed - but still not quite as much finesse as the Tamiya kits. Wheels look nice and rugged, and the flat bits all touch the ground! Now on to some painting. I brewed up some SCC 2 with Tamiya acrylics according to the recipe I found in this conversation thread: http://www.britmodeller.com/forums/index.php?/topic/234913729-british-ww2-tank-colors/ For the canvas tilt I mixed up roughly a 1:1 mix of XF 78 wooden deck tan and XF 49 khaki. Looks ok to my eye. First brushed on coat of SCC2
-
I am really getting addicted to these 1:48 military vehicles. This was just a weekend build. Finished in brush painted Tamiya acrylics. I was going to wait to take some photos outside, but winter weather has really set in. Build thread here. Thanks for looking.
-
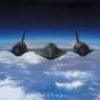
Gun Barrels & Pitot Probes 1:48 Master This month’s releases from Master Models include these three sets for 1:48 scale aircraft. Two of the sets are the more usual replacement barrels for the Hawker Tempest series, and one set for the SR-71 Blackbird that contains the pitot probe. [AM-48-132] – This set for the SR-71 Blackbird contains a three piece pitot probe, with the two brass parts joined by a resin element. Whether it’s normal to have a spare element is normal in the sets or not, but this set does. Just glue the brass and resin parts together and, having drilled a 0.6mm hole in the nose of the model, glue into position. [AM-48-133] – Designed to be used with the any early 1:48 Tempest Mk.V they are a simple replacement for the kits barrels, these being with a full jacket. Just drill out a 2.2mm hole where each barrel is to be fitted, then glue into place, ensuring the inner barrel is inserted 1.3mm further into the wing. [AM-48-134] – This set is designed for any Tempest Mk.II/Mk.V late, Fury or Sea Fury and contains four barrels and a pitot probe. Once the holes have been drilled out to 1.8mm the barrels are inserted so that the outer muzzle is visible just ahead of the leading edge of the wing, while the inner barrel should be 1.3mm further in so that you can just see the muzzle in the hole. The pitot probe requires a 0.8mm hole drilled out before the probe can be glued into position. Conclusion Master Models just can’t stop bringing new sets out for the benefit of those who like to have the highest level of detail in their models. It’s great to see older kits still being catered for too. Review sample courtesy of Piotr at
-
Boulton Paul Defiant Trumpeter 1:48 History The Boulton Paul Defiant was designed in response to Air Ministry Specification F9/35 of 26 June 1935 calling for a two-seat fighter with all its armament concentrated in a turret. It was believed at the time that, in avoiding an enemy aircraft’s slipstream, fire from a powered turret would be more accurate than that provided by fixed forward firing guns. Five companies responded to the specification but, for various reasons, four withdrew leaving Boulton Paul the sole contender. Designed by John Dudley North, the P82 prototype (minus turret) first flew on 11 Dec 1937 at which point it was named the Defiant. A second prototype was fitted with a Type A four-gun turret based on a French design already licensed for use on Boulton Paul’s Overstrand bomber, and this version with but minor changes became the production Defiant Mk1. The turret was electro-hydraulically operated with a mechanical backup and carried 4 x .303 Browning machine guns, electrically fired with cut-off points in the turret ring preventing activation when pointing at the propeller disc or tailplane. Whilst the gunner could lock the turret forward and transfer firing control to the pilot, this was rarely practised given forward elevation restrictions and the lack of pilot gunsight. The Defiant entered RAF service with No 264 Squadron in December 1939 and saw combat for the first time in May 1940 during the evacuation of Dunkirk. It was initially successful with Luftwaffe fighters sustaining losses, but a change of enemy tactics with attacks from below or head on soon saw Defiants forfeit the initiative. Following the loss by 264 Squadron of 7 aircraft with 9 crewmen dead over the three days 26th to 28th August 1940, the Defiant was withdrawn from the day fighter role. Four squadrons were equipped with the aircraft for night fighter duties, however, and it is apposite that during the “Blitz” of 1940-41 the Defiant destroyed more enemy bombers than any other type. It was finally retired from the front line in 1942 and thereafter used for training, target-towing, ECM and air sea rescue – many aircraft having had their turrets removed. The “Daffy”, as the Defiant was affectionately known, also saw service with the Royal Navy and the air forces of Australia, Canada and Poland. The Model We hadn’t had a Defiant in 1:48 at all, then within a year we have two. Unfortunately Trumpeter seem to have snatched defeat from the jaws of victory again with some sloppy research. This is particularly noticeable on the fuselage. The nose appears to be the wrong shape, being too deep and not long enough. The shape of the rear fuselage is no better, being too deep and also missing the kink on the lower fuselage between just aft of the turret and the tail. I'm not really sure of the right nomenclature, should it be F1, or Mk.1. The detail is nicely restrained, but many of the panel lines are spurious at best, many being moulded complete with two lines of rivets where the real aircraft only has a single line of rivets and no panel line. Having said all that, the moulding is very nice and, apparently, according to some build reviews it is easy to build and look nice, if wrong, on the shelf. Not having the Airfix kit, means I cannot do a direct comparison, but I get the feeling that the Airfix one is more accurate, if a little lacking in surface detail. So, on with the build, beginning with the cockpit, naturally; this is built up from the floor, seat, rudder bar, joystick, the two sidewalls and instrument panel with decal instruments. The cockpit assembly is then glued into one half of the fuselage while a small switchbox is fitted to the starboard side. The fuselage is then closed up, with the two piece tailwheel sandwiched between. The clear parts of the section between the cockpit and turret and then added from the outside. The wing is comprised of a single piece lower section complete with wheel wells and two upper sections, once assembled this is glued to the fuselage. Each main undercarriage assembly is made up from the single piece wheel, undercarriage leg and outer bay door. Once glued in place the retraction actuator is then attached along with the inner bay door. The individual exhaust stubs are then attached; three per side, as well as the landing light covers, navigation light covers and separate ailerons. The propeller is a single piece item, with separate spinner and backplate whilst the radiator bath is a two piece affair whilst the oil cooler is a single piece item. The lower outer bay doors are then glued into position along with the optionally posed flaps, as is the separate rudder, main and rear mounted aerial masts. The turret is very well detailed, made up of seventeen plastic and two brass parts. The four gun barrels are hollowed out at the muzzle, giving them a nice appearance. With the turret assembled it can be inserted into its aperture. Unfortunately, the turtle deck, aft of the turret is fixed, and there si no option to have it retracted, without further surgery. The build is finished off with the fitting of the windscreen and canopy, which cannot be posed open without some surgery, the two horizontal tailplanes and finally the pitot probe. Decals The decal sheet provided markings for two aircraft and are designed and printed by Trumpeter themselves. The decals are sharp, in good register, nicely opaque and with minimal carrier film, except around the letters of the main identification letters. The aircraft markings are for the following:- Defiant F1 L7009 TW-H in a day fighter scheme of dark green, dark brown over light aircraft grey. Defiant F1 N3328 DZ-Z in a night fighter scheme of overall black. Conclusion This looks to be quite a nice to build and will no doubt look stunning in an experts hands if they can get over the kits inaccuracies. It would certainly be a good kit for a novice modeller too as it’s not too taxing, although they may need a little help with the turret. Just a shame that Trumpeter failed to get the shape right as it could have been a great kit. Review sample courtesy of UK Distributors for
-
My latest build, the 1:48 Tamiya Matilda finished out of the box as the well known "Phantom", which according to the instruction sheet is from 42 RTR, 1st Army Tank Brigade, North Africa 1941. The Caunter scheme was painted in Tamiya acrylics using the mixes available here: http://www.network54.com/Forum/47208/thread/1252022924/The+complete+Mike+Starmer+Acrylic+Paint+Mix+Database Build thread can be found here. These Tamiya 1:48 armoured vehicles are addictive! My next one - the little Dingo Mk II. I may have a go at painting the crew for this one. Thanks for looking!
- 10 replies
-
- 20
-