Search the Community
Showing results for tags '1:24'.
-
All done: Couple of photos of the completed chassis before I popped the wheels on - first time using a model-specific 'detail-up' set and it makes a H*LL of a difference. Very, very impressed. * * * Completed build as it was about an hour ago but forgot to touch-up the black trim around the windows before I got the camera out !! - all done now Already started the next build, you can find it in the WiP section a little later this evening, my time. AFN Ian.
-
Tamiya kit, built straight from the box - enjoyed every moment of it, fantastic kit. Please feel free to make any comment, criticism or ask any questions. Ian.
- 10 replies
-
- 13
-

-
Bought this on impulse from Malcolm Rawlings (Kitfinger) a couple of weeks ago - started it as soon as it was delivered !! So with two sessions I'm well in to the (fantastic) engine & transmission sub assembly, lots of pre-painting needed but this is a wonderful kit and not too far away from my usual NASCAR comfort zone. Feel free to make any comments, criticism or ask any questions. Thanks for taking the time to look, more soon. Ian.
-
Another NASCAR build finished today. So why the title ? - couple of years back I posted three NASCAR builds in quick succession - Keefr22 was very complimentary and we chatted about NASCAR modelling (as you do). Next thing is, Keith has bagged-up and sent a whole slue of unused and very rare AM decal sheets all the way down here to New Zealand without asking for any payment but asking that I promise to 'put them to good use'. Just now I'm really in to race-car modelling in general and NASCAR building in particular so it was easy to keep my promise and here's the first of 'Keith's builds'. Dale Earnhardt Jnr. raced a couple of times in the Winston Cup '99 season but his first full rookie year was 2000. This is his 2000 car from the Revell kit, painted as usual with Tamiya acrylic straight from the rattle-can (the interior is Xtracolour enamels). After two brushed, yes brushed coats of Johnsons Klear, I applied the excellent JWTBM decals and sealed them with another two coats of Johnsons. I'll wax polish the model in a few days once it is fully dried/cured. Finished just in-time for a competition here on Armistice weekend (same as the Telford Nationals). Thanks for taking the time to look and/or comment, please feel free to ask any questions or make any criticism. My sincere thanks to Keith for the decals and I will be doing another 'Keith Car' very soon. AFN Ian.
-
Tamiya 1/24 Peugeot 307 WRC With Tobacco decals and crazy modeller photo etch. Used Gravity colours Ferrari red as I had enough left over from a F1 car and it was a nice bright red. White stripes were painted rather than using the decals that come with the kit. This kit has the die cast metal base, that adds nice weight to the model. Overall quite happy with how it came out. With one of the first kits I made a few years ago: upload foto share link
-
1992 vintage Airfix kerb-side/motorised kit, apparently quite rare nowadays. Tamiya paint from the rattle-can, followed by three coats of X22 clear, Studio 27 decals and more X22, finishing with Turtle Wax again. The decals were outstanding but measured for an entirely different kit !! :bangs head . The kit may have been from Japan originally either Doyusha or Nichimo or someone like that. It fits where it touches and sits way too high, but as you don't see too many (any) around, then why not, eh ? Thanks for taking the time to look and/or comment. AFN Ian.
-

MASTER Gun Barrels For Hawker Typhoons. 1:24
Shar2 posted a topic in Aftermarket (updates/conversions)
Gun Barrels For Hawker Typhoons 1:24 Master This month’s releases from Master Models include these two sets for the Airfix 1:24 Hawker Typhoons. [AM-24-014] – This set is designed for early aircraft with flat recoil springs. Each barrel comes in three parts and the only preparation you have to do to the kit is to cut off 4mm from the tip of each kit fairing and open the hole out to 3mm. The aluminium fairing tip is the glued into place, followed by the spring section and finally the muzzle section. [AM-24-015] – This set is designed for later aircraft with the round recoil springs. These barrels come in four parts and require the same preparation to the kit fairing tips before the aluminium replacement tip is attached, followed by the rear barrel section, separate spring and finally the muzzle section. Conclusion The outstanding Airfix kits are a work of art and require much patience and skill to make them look amazing. These simple sets will be the cream that tops it all off. Review sample courtesy of Piotr at -
 I've had a dig around the stash and pulled out the Airfix 1:24 scale kit of the James Bond Autogyro but I don't want to build it as the James Bond version. I'd like to know how many other Autogyro's of this type were built and who used them. I'm looking for something different than the film version. cheers Mike
 -
Took a l-o-n-g time to get finished, but finally completed the Esci Ferrari 'Berlinetta' last week. Definitely not my best work and half of the reason for that is my own lack of skills, but the other 50% is down to the quality (or lack of) in the kit. That said, if you really want a 1:24 SWB in your cabinet, and I did, then other than finding a rare Italeri or Ultra-rare Gunze kit, then this is pretty much your only choice. OK enough talking here's some photos: Please feel free to make any criticism, comment or ask any questions. Thanks for taking the time to look. AFN Ian.
-
Here's the Revell Ferrari F310B 1:24 which M Schumacher drove. The first model that i've sprayed with an air brush using the Revell Aqua paints and to be fair, not done a bad job. The gloss humbrol gloss mixed with white spirit on a 1:1 ratio. I didn't leave enough room for the car's number on the nose, again the instructions mislead me to putting the white stripe in the wrong place. The photos do the more justice as the paint work is a little bit dark. It told me to mix Revell Luminous Red 332 and Fiery Red 31. I should've just bought Ferrari red. Maybe the instructions were printed before Revell brought out Ferrari red. The rims were hand painted with Tamiyas X-12 gold leaf. Ive found a cheap way to thin the tamiya paint down. Use Boots' own acetone free nail varnish remover (the green one) as it contains isopropyl alcohol which is whats in tamiya mini paint pots, its a 1:4 ratio (nail varnish remover : Tamia paint)
- 5 replies
-
- 3
-
-
- F1
- Ferrari F310B
- (and 1 more)
-
 Well I'm starting my build this week. I'm not sure which car to do, chassic 19R or 27R. These are my choices. What do you think? EDIT: I think the Papaya Orange is a cracker colour EDIT: I think the Papaya Orange is nice but I'm now thinking of building the Gloss black in the Pre Season livery that comes with the kit How about a nice hill climb at Goodwood festival of speed to get in the mood
 -
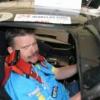
 Hi. Having not started anything for (ahem) quite a while, I was persuaded by my daughter to help her build a 1:24 Spitfire that I'd given her some time ago. We all know that this kit shows its age but we're not entirely put off just yet. The plan is to stick to OOB as far as possible in the interests of making it to the finish line. The monster's tasks are to cut things off the sprue (she's getting good), delegate fitting to me mostly (can't be doing with all that filing stuff), do sticking, do painting (except when she should be doing homework etc in which case she sometimes delegates) and doing the obligatory swooping the taped together assemblies around the room making machine gun noises. However, her retentive father is getting a little bit frustrated by the general vagueness of the kit but I know precious little about Spitfires so I reckon it is time to ask for help. So: 1) What is part 158 (in step 2) supposed to be? It sticks out from what seems like an additional gearbox cover that sprouts from what I'm guessing is the prop reduction gearbox. Few of the Merlins I've found have this extra gearbox and none of them have a shaft coming out of it. 2) What's the story with the coolant header tank (part 9)? All pics seem to be natural aluminium (not matt black as called out) and none are just hoop shaped. Every Merlin seems plumbed differently. 3) Are we right in going for semi gloss black for the engine rather than matt black? Some pics are natural alloy, some gloss black, some semi, but not matt. 4) Humbrol 78 seems much darker than the very pale green found on all the restorations. Just add white to a second coat or go with it? 5) Firewall: Green or silver? 6) We added the electric motor (thanks Jadlam/Amazon) and I spent a long time getting it to sit square within the engine block. However, the practice prop still seems to bind a bit, despite part 5A being smooth as silk. Any top tips? 7) Why are the cannon ammo boxes (? - step 15) optional? Were there 2 different types of fairing? What's right for this kit? 8) Any other suggestions for a "let's build it competently OOB" build? Thanks in advance, Kirk (& daughter)
 -
W3768 Vb was built at Supermarine, Southampton. Named as a presentation Spitfire, Higham Ferrers And Irthlingborough and assigned to No 501 Squadron (SD) in August/September 1941. A major inspection on 14-05-42 revealed the need for repair work. No 93 Squadron (HN) took possession on 20-06-42. In September it moved to King’s Cliffe, before being sent into storage and conversion to LF.Vb on 03-12-42. It was issued to No 504 Squadron on 27-08-43. After a brief stay it was re-assigned to No 313 (Czech) Squadron (RY), then on 27-02-44 to No 441 (Canadian) Squadron (9G). On 20-03-44 she went for overhaul and then to No 350 (Belgian) Squadron (MN) for Normandy patrols on 26-06-44. On 23-07-44 she was re-assigned to No 57 OTU (XO) and was involved in an accident on 12-12-44. She was struck off charge on 18-12-44 and subsequently scrapped. Airfix 1:24 Supermarine Spitfire Vb 12005
- 13 replies
-
- 16
-
-
Hi everyone Well, for a change I am posting pictures as I actually build a kit and, for once, I have NOT added any lights (like most of the kits I post). I just hope it turns out ok and worthy to be shown on the 'Ready for Inspection' section. I'm still getting used to going fully airbrushing using Acrylics. The results are far superior to hand painting (in my opinion) and cleaning everything is so much easier. I look forward as always to anyone's opinion and hope to keep you interested in following my build. Thanks for viewing. First, the Powerhouse
-
Hi Has just picked up the latest Revell 2016 catalogue. Noteworthy by its absence is the complete lack af ANY F1 models. Meaning that the entire backlog of older F1's will disappear in thin air. Needless to say there was no mention of any new ones... Also worryingly the only DTM car was the white BMW - all other were gone - Mercs and Audis... :-( The two new models were the ones already made by Tamiya: The Vaillant and Jægermeister Porsche 934. Hmmm... :shock: Flemming
-
Republic P-47D Thunderbolt Kinetic 1:24 The Republic P-47 Thunderbolt is one of the largest and heaviest fighter aircraft in history to be powered by a single piston engine. It was built from 1941–1945, and was heavily armed with eight .50-caliber machine guns, four per wing. When fully loaded, the P-47 weighed up to eight tons, and in the fighter-bomber ground-attack roles could carry five-inch rockets or a significant bomb load of 2,500 pounds; it could carry more than half the payload of the B-17 bomber on long-range missions (although the B-17 had a far greater range). The P-47 was designed around the powerful Pratt & Whitney R-2800 Double Wasp engine—the same engine used by two very successful U.S. Navy fighters, the Grumman F6F Hellcat and Vought F4U Corsair, the latter of which was the first to fly with Double Wasp power in late May 1940—and was to be very effective as a short-to-medium range escort fighter in high-altitude air-to-air combat. When deployed as a fighter-bomber with its usual "double quartet" of heavy-calibre M2 Browning machine guns, it proved especially adept at ground attack in both the World War II European and Pacific Theatres. The P-47 was one of the main United States Army Air Forces (USAAF) fighters of World War II, and served with other Allied air forces, notably those of France, Britain, and Russia. Mexican and Brazilian squadrons fighting alongside the U.S. were equipped with the P-47. The armoured cockpit was roomy inside, comfortable for the pilot, and offered good visibility. A modern-day U.S. ground-attack aircraft, the Fairchild Republic A-10 Thunderbolt II, takes its name from the P-47. Throughout its career the Thunderbolt was almost continually updated and refined, leading to the P-47D, (the subject of this review), which was the most produced version with 12,602 built. The "D" model actually consisted of a series of evolving production blocks, the last of which were visibly different from the first. The first P-47Ds were actually the same as P-47Cs. Republic could not produce Thunderbolts fast enough at its Farmingdale plant on Long Island, so a new plant was built at Evansville, Indiana. The Evansville plant built a total of 110 P-47Ds, which were completely identical to P-47C-2s. Farmingdale aircraft were identified by the "-RE" suffix after the block number, while Evansville aircraft were given the "-RA" suffix. The P-47D-1 through P-47D-6, the P-47D-10, and the P-47D-11 successively incorporated changes such as the addition of more engine cooling flaps around the back of the cowl to reduce the engine overheating problems that had been seen in the field. Engines and engine subsystems saw refinement, as did the fuel, oil and hydraulic systems. Additional armour protection was also added for the pilot. The P-47D-15 was produced in response to requests by combat units for increased range. Underwing "wet" (equipped with fuel plumbing) bomb racks were introduced to allow a jettisonable drop tank pressurized by vented exhaust air to be carried under each wing, in addition to the belly tank. Seven different auxiliary tanks were fitted to the Thunderbolt during its career. The tanks made of plastic-impregnated (laminated) paper could not store fuel for an extended period of time, but they worked quite well for the time it took to fly a single mission. These tanks were cheaper, lighter, and were useless to the enemy if recovered after being dropped—not only did they break apart, but they did not provide the enemy with any reusable materials that could be scavenged for their own war effort. With the increased fuel capacity, the P-47 was now able to perform escort missions deep into enemy territory. A drawback to their use was that fighters could not land with the tanks in place because of the hazard of rupture and explosion. Fighters recalled from a mission or that did not jettison their paper tanks for some reason were required to drop them into a designated "dump" area at their respective fields, resulting in substantial losses of aviation fuel. The P-47D-16, D-20, D-22 and D-23 were similar to the P-47D-15 with minor improvements in the fuel system, engine subsystems, a jettisonable canopy, and a bulletproof windshield. Beginning with the block 22 aircraft, the original narrow-chorded Curtiss propeller was replaced by propellers with larger blades, the Evansville plant switching to a new Curtiss propeller with a diameter of 13 ft. (3.96 m) and the Long Island plant using a Hamilton Standard propeller with a diameter of 13 ft. 2 in (4.01 m). With the bigger propellers having barely 6 in (152 mm) of ground clearance, Thunderbolt pilots had to learn to be careful on take-offs to keep the tail down until they obtained adequate ground clearance, and on landings to flare the aircraft properly. Failure to do so damaged both the propeller and the runway. A modification to the main gear legs was installed to extend the legs via an electric motor (un-extending before retraction) to accommodate the larger propeller diameter. The Model Kinetics new kit of the P-47D is an update of their 2014 release, with the razorback fuselage replacing the cut down, bubble canopied example, which in turn was originally released by Vintage Fighter Series. The kit comes in a pretty standard sized box, only, very, very deep. The boxart shows a P-47 just leaving the runway on a mission, inside the box is pretty much packed full to the gunwhales with styrene. In total there are twenty four sprues of mid grey styrene, with the wings and fuselage halves separate, there are two sprues of clear styrene, two rubber tyres and a large decal sheet. The parts are beautifully moulded, with no sign of flash or other major imperfections, although there are some flow marks on the wings, which will easily be covered by primer and paint. Whilst the main parts are large, the detail is well reproduced with recessed and raised detail where appropriate. The kit doesn’t look particularly complicated, although the instructions parts placement indications could be better, and whilst it is well detailed it does appear to have some scope for the modeller to add even more, particularly on the engine and in the cockpit. Talking of the cockpit, that’s exactly where the build begins, nothing out of the ordinary there I here you say. The cockpit consists of the floor, front bulkhead, rear bulkhead, three piece seat, joystick, beautifully detailed sidewalls, with separate throttle quadrant, and instrument panel, which is fitted with separate rudder pedals and gunsight. The engine is built up form two banks of cylinders, each moulded as one piece. Each bank is fitted with their respective push rods, whilst the front bank is fitted with the cowl mounting ring. The exhaust manifold is assembled, with each of the exhaust pipes being separate parts and fitted to the engine bulkhead. The gearbox cover comes in three parts and is detailed with separate magnetos before being fitted to the front cylinder bank. The firewall is then detailed with the five piece oil cooler section to the front and the two piece channel to the rear. The engine is then fitted to the bulkhead along with the two oil cooler ducts. The area between the engine bulkhead and the firewall is filled with pipework, oil tanks the turbo-supercharger, and engine mounting stays to which the engine assembly is attached. The cockpit assembly, wing spars and turbo-supercharger outlet are glued to one half of the fuselage before it can be closed up. The engine assembly, with cowling front now attached is then fitted to the front of the fuselage. The rest of the cowling can then be attached, of left off as per the modellers wishes. If attached, the clear cowling sides can be left unpainted if desired. The horizontal tailplanes are now glued into place, followed by the two gills on the mid fuselage sides, either in the open or closed positions. The tail wheel is made up from eight parts and fitted to the rear fuselage, along with the tail wheel bay doors. The fuselage mounted, five piece flattened drop tank is fitted into position, as are the inner main wheel bay doors and supercharger outlet duct. Each wing consist of upper and lower halves, with separate ailerons, flaps and navigation lights. Before gluing the wing halves together, the quad 50 cal gun bays are assembled from seventeen and fitted to the lower wing and any holes required, to be opened up. Each gun bay comes with a separate cover which can be left off if required. Only the port side gun bays is further enhanced with the ammunition belt bay, also with separate, poseable covers. Each of the completed wings are then glued to the fuselage. The underwing stores options include:- • 108 U.S. gallon (409 l) drop tank • 110 U.S. gallon drop tank • 500lb GP Bomb • Triple Bazooka tube launchers Each with their respective pylons and fittings. Each of the main undercarriage assemblies are built up from seven parts, with separate scissor link, inner hub, and outer bay doors. The relevant stores and undercarriage are glued to their respective positions. The flaps can be posed retracted or extended, with the relevant parts required to show off the fully extended flaps. The kit is finished off with the fitting of the two leading edge gun panels, pitot probe and a choice of four different propellers depending on the type you are building. Decals The decal sheet is suitably large, as it should be given the scale, yet there are only two schemes provided, both in olive drab over neutral grey, although one has an off white tailplane. The decals are well printed and really quite vibrant, given the subjects provided. The carrier fill is quite thin, so care should be taken when manoeuvring the decals into position. Conclusion Another one of my favourite aircraft, mainly as it’s one heck of a brute and goes against grain of the dainty fighters of the period. This kit will build into one large model, yet, whilst the size will be quite impressive the parts count isn’t that great. This means that even a fairly novice modeller could have a huge P-47 in their collection. That said, it is quite expensive for what you get, (yes, I know the moulds will be large and the company will need to get their money back on the investment), but it just seems to lack that je ne sais quoi detail one would expect. It’s still a great looking kit and I can quite happily recommend it, as it will give hours of fun, especially with the detail painting, although, if you don’t own an airbrush, you may need a large brush for the exterior paint job. Review sample courtesy of
- 7 replies
-
- 4
-
-
- Lucky Model
- P-47D
- (and 2 more)
-
RAF S.E.5.a 1:24 Merit International One of the most famous of all British fighters of the Great War, the S.E.5a entered service in 1917, and stayed on the front line until the end of the war in November 1918. It was a much easier aircraft to fly than the tricky Sopwith Camel, and given that many pilots were arriving with as little as 20 hours flying training, a much more suitable mount for the inexperienced. Designed by H P Folland, it's characteristics can be readily seen in the post war Gloster Grebe and Gamecock which Folland also designed. Other of his notable works were the Gloster Gauntlet and Gladiator, and he went on to found the Folland aircraft company. The earlier aircraft were powered by the 200 hp Hispano-Suiza 8b geared engine, and later on the 200 hp Wolsely Viper direct drive engine was introduced. In simple terms, the drive shaft of the Hispano Suiza drove a gear wheel, which then drove another gearwheel above, attached to the back of the prop, which rotated clockwise when viewed from the font. Visually this raised the prop higher in the nose, and often these machines had 4 bladed propellers. The Wolsely Viper was a licence built version of the Hispano-Suiza, and dispensed with the gear mechanism. The prop was bolted directly to the drive shaft, so that visually it sat in the mid position of the nose, and rotated anti-clockwise. This is a quick way to spot the difference between a geared Hispano Suiza, and a direct drive engine, probably a Wolsely Viper, although to complicate things, Hispano Suiza started to produce direct drive engines as well. The kit. Merit international have now released a 1:24 scale S.E.5a to accompany their recent Fokker DR.1. Packed in a sturdy cardboard box with a lovely painting of a lone S.E.5a on top, the kit consists of 5 large sprue frames, a small clear one, a nickel plated sheet of etched brass, and an A5 sized decal sheet, every one of which is sealed in its own plastic bag. The instructions are in the form of a 16 page A5 booklet with line drawings showing construction over 24 stages. Assembly starts with the interior, and like the DR.1 kit has full length fuselage frames. Cockpit floor, rudder pedals, control column, seat, and instrument panel (with decals) are all provided. It would have been nice to have a pair of pilots lap belts on the etched sheet, as these are prominent items in this scale, but there are none. The modeller will have to fabricate their own or look to the aftermarket for a set. Sprue A holds most of the interior items, plus that big clockwise rotating 4 bladed prop. All is sharply moulded with nicely defined detail, no flash or sink marks being apparent. Sprue B has the fuselage halves, forward coaming, wheels, fin and rudder. Again the moulding is neatly done. The coaming unit has fairly prominent rivet detail that will benefit from a little rubbing down. Also there is a small window just in front of the cockpit opening that has been moulded solid. Some may wish to drill & open it out, and glaze with clear plasticard or similar. The cowling panels are all moulded shut, as no engine is included. Sprues C and D have the wings, which are in upper and lower halves. Rib detail is prominent, and depending upon personal preference, some may prefer to reduce it with a little sanding. Also present are the triangular inspection panels on the top of the lower wing and underside of the upper. In reality these were clear celluloid triangles that gave a view of an aileron control cable as it made a 90 degree turn around a guide pulley. On my 1/48 Roden S.E.5's I represented these by painting them on, and laying a few coats of Tamiya X19 'Smoke' over the triangular panel. The effect was quite good and should work well here. Sprue E supplies tailplanes, elevators, struts, exhaust pipes, and undercarriage. The undercarriage legs are the early steel tube type, which were replaced on later machines by an altogether more substantial pair of made of wood. Etch. The rigging is all provided as individual etched brass wires, of which the cross brace 'X' s between the struts are fitted before the top wing goes on. Once the wing is on the rest of the rigging can be popped into its little locating slots. It should make this task a lot easier for those who don't like using fishing line or elastic line for this task. Even the control wires for the rudder, elevators, and ailerons are supplied as etched items. The final elements to go on are the propeller and the overwing Lewis gun on its Foster mount. Curiously the Lewis is provided with a twin side by side ammo drum fitting, which I have not seen or heard of before, and am wary of it's accuracy. A typical fitment would have been a single 47 round drum. Double versions containing 94 rounds were available but were made as 'stacked' units rather than side by side. Decals. These are on a single A5 sized sheet, with good sharp edged printing and colours and minimal carrier film. The national markings are all provided, with alternate rudder stripes and individual markings for your chosen option. The instrument decals are very fine, and can be read with a magnifying glass. Options. Two options are provided, but no information is given about what they are. A quick bit of googling reveals that we have ; A. F-943 92 Squadron, probably post war. B. A2-13 (Formerly D8476 in RAF). One of 35 supplied post war to the Royal Australian Air Force. Conclusion. This is a nice sized model that should be fairly simple to build, and may well make a good first biplane project, especially with the pre-made etched brass rigging. Much of the detail is basic but adequate. The novice should not have too much trouble building it, while the purist will want to add to, and enhance the detail provided. Whichever, it will make an excellent partner to Merit's recent Fokker DR.1 to the same scale. The model best represents an early war S.E.5a, with a geared Hispano-Suiza driving a four bladed propeller, and steel tube undercarriage. Photos of the original A2-13 and F-934 can be found on the internet, and both certainly appear to have a 2 bladed propeller in the lower position, with the heavier wooden undercarriage appropriate for a later S.E.5a. This will not be a problem for the previously mentioned novice, but again others may want to seek out alternative unit markings Review sample courtesy of UK distributors for
-
Hi all, Apologies if this is photo heavy... I finished this earlier this summer. Pretty straight forward OOB build. Literally glued the whole thing together, sprayed it silver, then hand painted the suspension arms and any other small details. The decals were nice and thick and went on a treat. Not 100% happy with the colour as the real thing looks more like a mirror finish than silver but short of MF'ing it I'm not sure how i'd be able to recreate that finish. Not much else to say about it, any questions just ask! (I know I messed up on the tyre logo's...) Here's some shots of it with the Merc from the same year:
-
Hi All, Just a quick one. I recently purchased the Revell 1:24 Huey, and it's a MONSTER of a kit. Unfortunately the kit decals are so painfully dull! I've had a hunt around and come up dry for aftermarket options, do any of you know if there are any out there and if so - Where? Really want to make this look a little better than the stock stuff, so anything you can point out would be great. Cheers, James
-
Kit - Monogram 1:24 Paint - Bodyshell: Tamiya acrylic aerosol. Internals & Chassis: Tamiya acrylic, Tamiya & Humbrol enamels. Decals - Kit Extras - None Of course, straight after taking the photos, I realised that I'd forgotten to fix the exhaust pipes, but they're attached now. Another great NASCAR kit from Monogram back-in-the-day, thouroughly enjoyed every minute of this project and already got the next one on the bench... BIG demands on my time just now (I'm working at the FIFA U20 World Cup for the next couple of weeks), plus the day job, plus the whole 'house husband' thing... Who knows when the next model will arrive here at Britmodeller. In the meantime, thanks for taking the time to look and/or comment. AFN Ian.
-
Kit - Monogram 1:24 Paint - Body: Tamiya aerosol acrylic. Chassis & internals: Tamiya acrylics, Humbrol & Tamiya enamels. Decals - Slixx Extras - A couple of litres of Micro-Sol and lots of foul language . The decals over the nose fractured and tore even as I was taking them out of the water, so there's a LOT of effort gone in to making it to the checkered flag with this project. It will pass inspection at more than 1m (US = 1 yard), but less than that and it will scream 'decal fail' very loudly. As ever all comments, criticism and questions welcome. Thanks for taking the time to look. Ian.
-
Hi Everyone, Here is another 2015 build : Revell 1:24 Enzo Ferrari which is part of the Revell Ferrari Set II. This kit has some mesh pieces in the kit, which have to be cut to the correct shape to get them in the kit. Anyway here are the photos of the kit. Updates will follow. Thanks for looking. Rick
-
Afternoon folks. I decided just after Christmas to start both the Airfix 1:24 Harrier GR3 and the Trumpy 1:32 Lightning - why I have no idea and I won't be doing anything that daft again! I am really pleased with the Harrier despite the amount of filler needed (a whole tube)! I decided early on to do both kits 'in flight' which actually makes the build more difficult as 'closed gear doors' are a nightmare to fit and get to 'look right'. Anyway its been an enjoyable build overall and it is OOB. I used Mr Color for the camo and did this freehand with the airbrush and I think it looks quite effective. Hope you like it Chris
- 26 replies
-
- 37
-
-
ok so I am most of the way done with the GR3 but the canopy is not good and resisting my attempts to improve it! Same with the engine nozzles. Looking around I can't see much aftermarket for the 1:24 Harriers and I wonder if anyone knew where or who I might get some from? Thanks Chris
-
 Good morning, as my Kawasaki ZX-14 build is nearing completion, I am planning to start on this one next. I haven't made up my mind which colour to go with yet, but i think I might have a go with some Zero paints, especially as they do colour-matched paints for this car. I know a couple of companies make PE sets for this kit, so I may have a look at those too. Any advice you may have on using Zero paints, and building car kits in general, gratefully received! Stayed tuned, I'll put some pictures up later. Cheers, Andrew