Search the Community
Showing results for tags '1/72'.
-
 Hi, I was quite happy when I heard Airfix was bringing out a new 1/72 Defiant as the MPM kit while better than the old Airfix kit never looked quite right to me. Airfix appears to have done a nice job with the new tool Defiant, the only real boo boo being the wheels which I heard were lidar'd correctly from the museum but at a time when the correct wheels had been replaced by those from a Morris Minor. When I received Alec Brew's latest book on the Defiant, it gave the impetus to build this kit as there is an image of a RAAF Defiant from 456 Squadron (the only previous photo was from Alec's earlier book "Turret Fighters which I used as reference for my earlier MPM model which is on this forum as well). As well as replacing the wheels with a set from Barracuda, I also ordered the replacement guns and aerial/pitot from Hannants. The latter aren't really necessary however in this case I needed a few extra items to reach Hannants minimum order limit. The aircraft has been finished in Gunze "cowl colour", an IJN colour which is a dark ultramarine much as RAF Night is. This is also the first time I've used Gunze's GX Flat as a dull coat. It was suggested by one of our club members. I'm always a bit wary of any of the really flat coats as they tend to give a chalky finish however in this case this was precisely the type of tatty finish I wanted for a night fighter finished in "Night". I still had to buff out the finish a bit and if I used it on another type of colour scheme I think I'll thin it out with some Mr Colour Levelling thinner. Other than the Barracuda parts mentioned, the only changes to the kit was the replacement of the wing tip lights with clear sprue, a Yahu instrument panel and some round disks to represent the landing lights. One item to note is that I only realised that the rear retracting antenna under the fuselage is actually offset to port when I was looking at some plans when working out undercarriage rake. This required some last minute updates as Airfix have put the location hole dead centre. Cheers Michael
 -
Hi, This is a model I built a few years back but was never completely happy with. The main reason was the Humbrol colours of mid stone and dark earth were so similar in tonal value they blended together as a muddy overall brown coverage. After one of the members of another forum I'm a member of drastically redid a Martlet he'd mis interpreted the instructions for, I was encouraged to do the same to this 109. I'd picked up a set of Sovereign Colourcoats for RAF Desert Scheme at Model Expo a year or so back and decided to try them out on the 109. I was very pleased with the results, matching the colour chips in the RAF museum book and the contrast seen in photos. This 109 is less famous than "Black 6" which was restored to flying a while back however it was another airframe captured by 3 Squadron RAAF and brought back to operational condition. There is a photo over at ADF serials showing Bobby Gibbes seated in this aircraft. The kit is the Fine Molds kit and I made a few fixes during the refurbishment. I replaced the pitot with a Fine Molds metal one, added an armoured windscreen from the Tamiya 109E kit and had to replace the antenna which broke during refurbishment. A group photo with "Black 6". 3 Squadron operated both together for a while until "Black 6" was confiscated by the RAF. Cheers Michael
-
Hi, Following a successful refurbishment of a RAAF Me 109F in Desert Scheme (I'll post this later), I decided to continue using the Sovereign Colourcoats paints I had out to finish a RAAF Spitfire VIII. The mid stone from Sovereign is the best match I've found for the colour chip in the RAF museum book. Previously I've used Humbrol, Gunze and Testors and none were fully satisfactory though I found the Testors one the previous best. Most (if not all) the original Mk VIII's delivered to the RAAF were originally finished in Desert Scheme but most were repainted to replace the mid stone with Foliage Green prior to operations with the allocated unit. The few aircraft I've seen which retained Desert Scheme were used by non operational units, mainly OTU's. The only identified aircraft which operated in a front line unit is covered in the Aussie 8 decal sheet however this is from 54 Sqdn RAF which I'll likely do later (A58-466 ZP H, Dick Due's aircraft has been documented a number of times as being in Desert Scheme, but this is most unlikely based on the dark colour band going through the cockpit). Most of the aircraft in the back room units were in generic schemes except for A58-464 from 8OTU based at Parkes NSW. This aircraft had the white tail and leading edges specified by RAAF marking instructions at the time for IFF though it wasn't really necessary for this airframe. There is a top view photo of this aircraft in the Eduard book which shows extensive overpaints to cover the RAF roundels and serial. I've been kindly sent a couple of additional photos of this aircraft by @Magpie22. Peter Malone theorizes the overpaints were Light Earth replacing the mid stone and RAAF Dark Earth (which is a very similar colour to RAF Dark Earth). Member @Ed Russell thought the mid stone overpaint would have been a Mid Stone paint match using available paints. I've decided to go down the Light Earth path - You pays your money and you take your chances. The model is pretty much out of box from the Aussie 8 boxing which contains resin block pattern wheels and an extensive etch set. The only addition is the Falcon vac canopy to allow the canopy to be slid back. The decals are a mixture of DK, Red Roo and Eduard stencils. Cheers Michael
-
 AZ Model is to release 1/72nd Supermarine Spitfire Tr.8/.9. - Ref. AZ7478 - Supermarine Spitfire Tr.8 Source: http://www.azmodel.cz/product_info.php?products_id=741 - Ref. AZ7479 - Supermarine Spitfire Tr.9 In Dutch service Source: http://www.azmodel.cz/product_info.php?products_id=742 - Ref. AZ7480 - Supermarine Spitfire Tr.9 IAC & RIAF Source: http://www.azmodel.cz/product_info.php?products_id=743 V.P.
 -
This is where I'm up to with my current build, a Westland Wessex commando carrier. I've just been doing some faffy window masking. The instructions said to paint the passenger seats olive drab same as the pilot seas, but I've seen two photos of similar choppers of the same era where the seats are dark blue, and indeed this is how they are on the splendid Fly Models 1/32 kit, so I went with blue. This is my first helicopter, I'm enjoying it so far. I realise those circle things on the starboard fuselage should really come out, but they won't be seen once it's assembled. I've filled the three corresponding craters on the other side...
-
 HIC SUNT DRACONES (Parchment II) (Here be Dragons) (The WiP is here: (The companion Dragon is here: This second conversion of a Dragon Rapide to seaplane configuration in Canadian registrations sprouted from the first one, which used (refurbished) EDO floats for an Uruguayan conversion. In this case, Fairchild Canada floats were needed, and those were procured from an Execufom Fairchild Super 71 vac kit I build long ago on skis. The floats needed detailing, but the general shape was there. As with the other seaplane mentioned above, these are the needed mods: 1) Getting or fabricating the floats 2) Modification of the bottom of the engine nacelles, removing landing gear and it's fairing, then fairing again the bottom according to photos. Beware that these modifications differed from one plane to the next, depending on the float used and particular machine. 3) Reshaping the fin extending it as per photos of the original plane. 4) Researching and fabricating all the associated float struts. 5) Adding a mirroring door on the other side. 6) Deleting/painting over back windows, depending on model. 7) Reducing the number of seats. 😎 Modifying exhausts to match photos (they vary) 9) Modifying props as needed (some were metallic Fairey-Reed, others seem to be wooden ones. The kit's prop spinners are the wrong shape for any version and need correcting. The decals were commissioned from Arctic Decals, and I used also their "metal" window frames set (self-adhesive pre-cut chromed vinyl) and their painting masks. I have built a few Dragons before from the venerable Heller kit, but was taken by the photos showing them on floats, where it looked so smart. I had to build them! Now, being these floats also used by other planes (and kits), would we at some point be graced by some cottage industry-fabricated EDO Yd-6470 / Ya-6235, and Fairchild 5500 floats? Some (nice, please, not ridges-ridden trash) 3D printed ones? Or resin?
- 32 replies
-
- 29
-

-
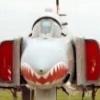
Hello all, Yet another 1/72 bipe - the venerable Airfix ‘Vintage Classic’ Hawker Demon. Don’t be fooled by the new shiny box, it’s the same kit from 1965 but with more flash! 😆 Nice decals though, although very thin so care required in handling required. Quite a few alterations to the base kit, but basically, there is a nice model hiding in there somewhere. A brief build thread here: I’ve got the ‘Vintage Classic’ Bulldog on pre order so hopefully I can improve my efforts on that when she comes. Anyway, macro photography a bit harsh in 1/72, but here she is finished: Thanks for looking, Guy
- 28 replies
-
- 82
-
-

-
- Vintage Classic
- Airfix
- (and 1 more)
-
Hi everybody, the Stuka GB has just finished, and as usual I haven't manage to finish my build. But this time I am only about a week short, so things are improving!!! Here is a link to my thread in the Stuka GB, for the ones interested. For @Ray_W I have not been successful in my quest for ammonia at our neighbors. The blasted thing was so flat that it could have been water. BUT... there was a glass bottle marked Windolene, and upon opening it out of sheer curiosity, my olfactory system was put out of commission by the sheer power of ammonia coming out of the bottle!!! The poison must have been manufactured during Rhodesian days looking at the label, but it has not lost any power! So the cockpit clear parts are already soaking in it, and we shall see tomorrow! I really do pray it will deal with the Klir disaster. Cheers. JR
-
 Before some years this kit was in the Special Hobby catalogue as future release under number SH72137. New mould photo: http://www.modelforum.cz/viewtopic.php?f=97&t=77712&p=1600814#p1600814
 -
Dear comrades... This is one of my favourites aircrafts and making this is a very special for me. I made this model during the lockdown here in Spain. I used to build 1/48 models, and this is my first 1/72 since my childhood The kit doesn't have the best quality... but is acceptable. I've added several Eduard photo etched parts (flaps, interior, exteriors, bomb bay, etc...), Quickboost gun barrels, CMK engine set, etc... Here yoy can see the entire album: https://flic.kr/s/aHsmPLMNYf
- 17 replies
-
- 50
-
-
-
Last November, during the BTE (Best Trip EverTM), along with @CedB, @Terry1954, @Navy Bird, and the Mighty @Procopius, I got to visit the FAA Museum at Yeovilton, and found this prize in the gift shop: While paying for my new treasure, the kind women behind the counter asked if I'd like to have the author, David Morris, sign it for me, he was standing right there! BTE. Here's a pic I snapped of KD431 in the exhibit hall: Hopefully, this one helps me rebound from multiple recent modelling setbacks, we'll see. I was originally going to attempt this in the upcoming STGB, but I'm afraid that it's too big a project to do under a time pressure, please pardon this sinner Dennis @Corsairfoxfouruncle - I'll attempt a RNZAF Corsair in that one. Well, I want to build it as close as possible to how it's displayed at Yeovilton, so that means opening up the panel between the engine and fuel tank, and scratch building a bunch of stuff to put in there. Panel removed with scribing tool, then razor saw. The wide portion of an eye dropper will be the fuel tank. By a stroke of luck, the plasticard I have lying around is exactly half the thickness of Tamiya sprue, so if I glue two pieces together it is the right size to represent the ducting header for the tubes going from the wing root air intakes. I'm not looking for 100% (or even 78%) accuracy, I just want it to look busy in there.
- 78 replies
-
- 24
-
-
Hello, I'd like to share this model recently re-released by Airfix in new striking colors. It was built OOB for my 8 years old nephew in 4 full days. He has patiently followed the whole process taking active part in it. The only addictions were the little antennae above each tail boom. I'm a fan of Airfix whose new kits are nice and sweet and really cheap! A joy to build! Hope You enjoy it! Giovanni (uncle) and Francesco (nephew)
- 21 replies
-
- 56
-
-
-
- vampire t11
- airfix
- (and 1 more)
-
Stash Clearance #3. Kawanishi N1K1 Rex
Properjob56 posted a topic in Ready for Inspection - Aircraft
It seems appropriate for this to be the third in a series as my first 'Stash Clearance' was the Kawanishi N1K1,‘George’, the landbased fighter developed from this aircraft and the second 'Stash Clearance' the Nakajima A6M2-N, 'Rufe’, a float plane. From Scalemates, this is the original boxing from 1996. There were 3 boxings of the type. The 'Early' and 'Late' models distinguished by their engines and the prototype with 2, 2-blade contra rotating propellers. This is the 'Late' version. Typical Hasegawa fare of the time, accurate, easy to build, good fit and not many parts. Interior detail is basic as are the decals. The model is OOB with only the addition of Tamiya tape harness and Uschi thread for aerial wire. Colours are from the White Ensign range (now Colourcoats, by Jamie@Sovereign Hobbies, although having checked yesterday some of these colours don’t appear in the current range) Those used were ACJ-10 Kawanishi Green, ACJ-04 Nakajima Interior Grey-Green and ACJ-12 Undersurface Grey Green. The carriage was gunmetal Hu27004+drybrushed Hu.11. I would have tried clear wood grain decal if I had had any but I remembered that I had a tin of Hu.110 'Wood' so used that. Wheels had Revell 83 Rust drybrushed and Revell Anthracite for tyres. Finally, Tamiya Weathering Powders were rubbed on and Matt Aluminium drybrushed with a cut down brush to show wear on the paintwork. Hu.33/21/60/27002 were used for details as well as Humbrol Clear Red and Tamiya Clear Blue Decals are from the kit, which has just one option, for an aircraft from the ‘Sasebo Naval Flying Group’. I did the canopy frames by hand as my attempts at using decal strip before had not been v successful. I figured the inevitable shakiness was worth putting up with to save the time and hassle for a not very much better result. (Note to self: next time ordering from the Lowestoft emporium get clear decal sheet as well as the wood grain decal referred to earlier.) Like the ‘George’ and ‘Rufe’ its USP was badly done. In this case, the float assembly did not fit at all well and because of its position it was not easy to fill or sand the join. Further, its pegs into the underside were barbed so once pushed home it couldn't be withdrawn. Other observations: 1. I solved the ill fitting canopy problems I’d had in other builds by cementing with ultra thin polystyrene cement using capillary action early in the process rather than adding it at the end with Kristal Kleer when it would be fragile and prone to popping off. In that way I could sand and file it like the rest of the plastic. 2. Ladder colours are too garish and I should have used v dark grey and v light grey. The ladder itself is crude and overscale as it is in plastic, etch would have been better. 3. Prop blades had only 1 coat of aluminium when they should have had two. Also, I’m not convinced they’re at 120 degrees to each other despite Hasegawa’s efforts to make fixing them at the right angle foolproof. 4. Had to use pencil lines for underside panels as sanding had made a lot too shallow for washes. 5. Float has a weight of solid plastic included in the kit. It works surprisingly well. 6. Tailplanes are handed. 7. I didn’t work out what the float stripes were for until the very end so, eg, didn’t line them up with the trolley posts. They’re not too bad as is but even so.... 8. Navigation lights are not delineated on the wings and so were positioned on a ‘best guess’ basis as I couldn’t work it out from period reference photos either. Furthermore, fuselage lights other than the tail light were not mentioned in the Instructions nor shown on the box picture nor could I see them on photos so they were left out. 9. Cockpit is poorly detailed to such a degree that what there is, is entirely fictional save for the instrument panel. 10. The weathering isn't great. The maxim 'less is more' should read in this case 'less is less'. To my eye the exhaust staining is barely noticeable and the stippled matt aluminium on the fuselage sides and wing tops looks very artificial. It would have looked much better if I had put more on. Still, delicate balance and all that... Anyhoo, enough of my ramblings I’ll now attempt to post some pictures. This is the Wikipedia photo of the type and it's the aircraft the decals represent. It's for you to decide how close I got. The box and instructions are shown below. 1/4- 6 replies
-
- 3
-
-
- White Ensign
- Hasegawa
- (and 1 more)
-
I've wanted to build a model of this eccentric little aircraft for years. Maybe I should have waited to see what the planned release from Avis looks like, but in the meantime here's the basic resin and vacuform kit from Sharkit. Very basic, as you see. The kit also includes decals for G-BGMW, shown on the box art above, but at present I'm toying with other plans. The moulding is pretty clean, but undetailed. A couple of minor holes to fill, and those five pour stubs in the fan duct to remove. I'll add some detail to the cockpit, which at present consists of three seats and a blank instrument panel. The main challenge is going to be the vacuform cockpit canopy, which is intended to wrap around the outside of the assembled cockpit. Two parts are provided for this, but one of them has a nasty crease in my kit, so that ups the ante a little more. The instructions suggest painting only the resin parts, and not the overlying vacuform, but that's going to be an ugly effect. So I'd like to paint the vacuform itself, but that means making myself some interestingly curved paint masks. I also suspect that this one will want to sit on its tail, and there's really nowhere to conceal lead in the nose. Maybe a flight stand, maybe glue it to a solid display base? I'm not sure yet.
-
Hello Mates... I'm looking for photos or draw for the flight deck of HMS Endurance ... I'm finishing this Lynx Has3 ICE and I'd like to make a portion of the flight deck grazie Silvano
- 22 replies
-
- 5
-
-
- HMS Endurance
- Lynx Has3 ICE
- (and 1 more)
-
Thought I’d tap the brains trust - which is the ‘best’ F-35A kit in 1/72 & 1/48 scale? Possible candidates listed below. 1/72: Hasegawa Academy Italeri 1/48: Meng Kittyhawk Ideally, I’d like to avoid boilerplate-scale external “detail”. Cheers!
-

Tim's Fiat G-91R - COMPLETED
theplasticsurgeon posted a topic in 50s NATO v Warsaw Pact in Europe GB
Joining you with this kit, Airfix Fiat G91 light-fighter. This option 103 Gruppo, Treviso San Angelo, 1959. Parts. I think this is the correct sequence - speak up if it's wrong. This kit and an Airfix Avenger joined my stash in 2011, swapped for an Italeri B-25 Mitchell with Dermo245. Transaction was a result of a BM wanted posting, and the swap took place at Telford. RoyM brought the kit over, as Dermot wasn't attending that year. Outside - and shortly after this GB, this model will be converted to a US Army trials aircraft. -
This is the Hasegawa P-3C Orion converted to a P-3B of the Argentinian Navy. I modified it to a B model by removing the sonbuoy tubes and updating the antenna config consistent with the prototype. The HF wire antenna lines are EziLIne. I also rescribed the model. It is painted mainly in Gunze acrylics and SMS metallics and decalled with the DekLs sheet (the reverse type).
- 20 replies
-
- 46
-
-
(510x640)-Copy(95x120).thumb.jpg.33073138e01aa81779639a845926753e.jpg) Stage 3. Resuming the story after the events in December 1944, MJ271 underwent repairs and on June 21st 1945 was delivered to 29 Maintenance Unit at High Ercall. By that time, negotiations were already underway with the Air Ministry to buy surplus aircraft in accordance with 'Plan Target One' - the reconstruction of the Dutch Air Force, or LSK (LuchtStrijdKrachten). Starting mid 1946, twentyone low-hour Mk.IXc Spitfires were tested from RAF airfields by Dutch pilots, and when accepted, transfered to the Netherlands for use with the Fighter Training School (JachtVliegerSchool) at Twente AB. Amongst which, in November 1946, MJ271. Initially the new arrivals were kept in the familiar RAF scheme, although with (mostly) Dutch markings and a plethora of spare parts exchanged between airframes: In August 1947 she would receive the registration code H-8, but major overhauls at Fokker (Schiphol) would see her wings clipped, redone in all-aluminium and with the code 3W-8. By the early 1950s however it was clear that the Mk.IX was no longer suitable for first line use and was succeeded by the Gloster Meteor Mk.4. MJ271 did not get sold to Belgium, pushed on the scrapheap, or as target on the shooting range (as was the fate of many former Dutch Spits) - rather she was used for a time as a decoy on Volkel AB, then ended up on a playground and a rooftop, looking worse for wear. tattered and forlorn, dressed up as TA-26 'Opa'. Images courtesy of Collection Netherlands Institute of Military History.
Stage 3. Resuming the story after the events in December 1944, MJ271 underwent repairs and on June 21st 1945 was delivered to 29 Maintenance Unit at High Ercall. By that time, negotiations were already underway with the Air Ministry to buy surplus aircraft in accordance with 'Plan Target One' - the reconstruction of the Dutch Air Force, or LSK (LuchtStrijdKrachten). Starting mid 1946, twentyone low-hour Mk.IXc Spitfires were tested from RAF airfields by Dutch pilots, and when accepted, transfered to the Netherlands for use with the Fighter Training School (JachtVliegerSchool) at Twente AB. Amongst which, in November 1946, MJ271. Initially the new arrivals were kept in the familiar RAF scheme, although with (mostly) Dutch markings and a plethora of spare parts exchanged between airframes: In August 1947 she would receive the registration code H-8, but major overhauls at Fokker (Schiphol) would see her wings clipped, redone in all-aluminium and with the code 3W-8. By the early 1950s however it was clear that the Mk.IX was no longer suitable for first line use and was succeeded by the Gloster Meteor Mk.4. MJ271 did not get sold to Belgium, pushed on the scrapheap, or as target on the shooting range (as was the fate of many former Dutch Spits) - rather she was used for a time as a decoy on Volkel AB, then ended up on a playground and a rooftop, looking worse for wear. tattered and forlorn, dressed up as TA-26 'Opa'. Images courtesy of Collection Netherlands Institute of Military History. -
Evening Ladies and Gents, I have a story to share. Behold this marvel of Soviet engineering, the MiG-15. I’ve been told that a couple of them have been built over the years. This one is mine, and, well, the build was... an experience (i.e. horribly cursed). So it all started when I tried to assemble the fuselage. The halves wouldn’t fit and I had to do много sanding. Then when cementing the wings, I realized that I had done the wrong variant. The seat kept falling out of the cockpit, and I forgot to glue the ballast, resulting in it all leaking out. I planned to use maskol to mask the blue camo lines, but when I opened the jar, it had hardened into a solid mass. When painting, the white didn’t come on right and I had to sand it and redo it. The bombs wouldn’t fit on the pylons, the right wing broke for no reason, and when I was finally putting the decals on, they inverted on themselves. Finally, the wash I used leaked out of its bottle. Nonetheless, I soldiered on through and eventually triumphed. Please pardon his appearance, the rear canopy is still drying. This came as part of the Royal Class Quattro pack, so there’ll be more to come (I’ve heard nothing but praise for these kits, so hopefully the next are not nearly as painful as this one). Cheers, Olivér
-
My 1/72 Phantom lockdown phasination is phinally over with the completion of my naval pair: Last to complete are my two RN Phantoms, one from 892 Sqn (ARK ROYAL) and one from 767 Sqn (RNAS Yeovilton). Both of these are Fujimi kits, pretty much "out the box" (except for the aircrew). The 767 one was a rebuild and tidy of a kit built just over 30 years ago, the 892 one is new: I have two of the new Airfix kits in the stash, but whilst I love the build options, I'm really less than convinced about the deep toy-like panel lines and prefer this set of kits by a very long way; if and when I build the Airfix ones, the panel lines will have to go. These are my usual finishing technique - hairy brush applied thinned Humbrol enamels, a Klear coat to help decalling, a light oily wash in the seams/engravings, then Windsor & Newton acrylic matt varnish to complete. The Fujimi kit is generally an easy build. As with all Phantom kits, you need to take care with the intakes and the wing to fuselage joints. Some preparation and care will avoid most problems. the newer kit was the upgraded mould with additional parts - e.g. air brakes and re-positioned auxiliary intakes - its wing halves didn't fit together quite as snugly as the RAF FGR.2 that I did last month, but they do fit with a little force. Please excuse the missing pitots on this one - they were there right up until I added the nav -lights! aaaargh.... Not quite worked out how to remedy this yet. The 767 yellow bird decal is somewhat smaller than the Airfix kit; I think Airfix have got it right here. The Royal Navy titles are also suspect - they are much larger than Airfix (& Italeri), but seem to match relative positions on the fuselage - perhaps the badly positioned auxiliary intake is confusing here, or perhaps letter size changed during service? and finally, a group shot of the whole "haunting" set together (numbers count etc....) ! Enough phantoms for now - a Buccaneer (HERMES - 801 Sqn) is nearly ready for decalling! FredT
-
Hi all. Another finished build. This time a 1/72 Eduard MIG-21PF. Really nice kit in every aspect. Nice fit in general, but some parts needs putty on the bottom side. Decal are great and nice PE parts also. I choose to use the RS-2US as ordinance since i don't got any other aircraft with it. I always find DDR markings a good option, going along with the MIG-17PF from AZ Models and the MIG_21 F-13 from Revell. Thank you all again. Luciano.
- 1 reply
-
- 7
-
-
- MiG-21PF
- eduard kit
- (and 1 more)
-
 Well time to let the glue follow the posts and start with my entry for this GB. I will be building the AH-1 Cobra Kisarazu Special 2012/2013 double kit with a flamboyant livery depicting two of the four Kisarazu sisters (anime girl mascots of the 4th ATHS). So without further ado: the obligatory box shot: Here are some more shots of the sprues (of course there are two sets of those in the kit): A close-up of the decals - the highlight of the kit: While the artwork was originally placed only on one side of the choppers, I intend to decal the right hand side of the cobras as well - because I can And now for the extras: Cockpit masks and the cannon which I may or may not replace: I also got the right colors! This is my first brush (excuse the pun) with Tamyia colors, so I hope all goes well with the thinning (I probably will airbrush the models, but then again looking at the camouflage pattern I am not sure the hairy sit wouldn't be faster & easier. The kit itself seems to be fairly straight-forward (famous last words!). At least there won't be many issues with the landing gear Wish me luck and watch this space.
 -
We've discussed the story of the Scottish retailing legend John Menzies elsewhere in this GB. As mentioned, they got into kits in a big way in the 1970s and '80s with most of their shops having at least a modest stock. The shop in my home town wasn't enormous but it was very busy, being located next to the bus station. Downstairs was the newsagent section, stationery, sweets and books, upstairs was toys, kits and records. I would pass the shop on my way to or from the town and more often than not would wander in for a look. I was a big fan of Action Transfers, and bought quite a few from the shop: http://www.action-transfers.com/html/a_ranges/at_linking.shtml I particularly liked the Action Profile series, and can clearly remember having the Bf109 book: http://www.action-transfers.com/html/ActionProfiles/actionprofiles2.shtml There was a reusable range as well, printed on vinyl. I had the el Alamein edition: http://www.action-transfers.com/html/a_articles/what11.shtml One of the shell bursts from that stayed on my bedroom window until I moved out of my parent's house 🙄 The kit section stocked Revell, Airfix, Hasegawa and Scalecraft - remember them? Anyway, late 1974, the 12-year-old me was heading up the stairs to see what was new. As I emerged onto the sales floor my eye was immediately caught by an unfamiliar piece of box art and the kit-seeking alarm in my head went off: WANT, WANT, WANT! The cause of this was a dark blue box with - how cool was this - a Ju-88 night fighter on it. I must have been on my way into the town as I still had pocket money on me and that seldom happened on the way home. In any event I was able to scrape together enough to lift the box off the shelf and take it to the till. More shortly. John
-
Spitfire Mk. VIII | 1/72 | Hasegawa No. 155 Squadron, Royal Air Force, Burma, 1945 I finished this on 7/18/2020. A straightforward build, however I used some spare parts from my Eduard Mk.IX builds to improve the cockpit (which may have been a waste of time with a closed canopy), and provide better looking landing gears and gear doors. In general the Hasegawa kit has nice external detail and went together fairly easily (although I had to put a little more work than usual into getting the nose seams to look good). My only gripe with the kit is this: I was warned by someone that the Hasagawa Mk. VIII, was "too small" in the back, which I mis-interpreted as "too short". Matching it to an un-built Eduard Mk. IX, I found that, if the fuselages are lined up at the back of the canopy, then both the tail and nose are about 1 mm too short. Not very noticeable. However, I think "too small" meant that the area just forward of the empennage is too thin (from bottom to top). It looks more spindly just forward of the tail than the Eduard kits on my shelf. I tried to mimic the dusty conditions I saw in some photos of 155 sqn. aircraft by using white oil paint rubbed into the gloss coat (post decals). My experience is that this oil paint will become very light when dry, but will darken again with the application of dull coat. Unfortunately, it darkened too much so it was not very noticeable, so I misted the surface in spots with a Mr. Color tan. It actually looks better in the pictures than in real life! This kit is actually a replacement for the terrible Starfix Mk. XIV I made a few years ago. I really like the SEAC scheme, so I chose this kit, to replace the Starfix one. I will be re-doing Ginger Lacey's Mk. XIV mount (Correctly) using the Sword 1/72 kit. Paint: Mr. Surfacer 1500 black decanted into airbrush > Hataka RAF Dark Earth / Ocean Gray / medium Sea Gray > Testor's "Deep Yellow" > Mr. Color 311 (FS36622) for spinner and theater stripes > Alclad Aqua Gloss (pre-decal) > Mr. Color GX113 dullcoat (post-decal) Decals: Kit decals plus leftover Eduard stencils Aftermarket: Eduard steel seatbelts No WIP for this one. Here's a comparison of the instrument panels: Hasagawa in the center, un-altered Eduard on the right, and the Eduard one I modified to use on the left: Eduard's part behind seat looked better than Hasegawa's so I modified it and used it (Hasegawa on the right): Here's the cockpit all finished: And I scratch built the rod that extends from the back of the seat: Thanks for looking! Questions, comments and constructive criticism always welcomed.