Search the Community
Showing results for tags '1/48'.
-
 With the situation in Lebanon worsening, the British Govt decided to send an air support presence to the region in September 1983. Having considered the RAF’s other attack types, the Buccaneer was deemed most suitable because of its laser targeting capability. Six aircraft were dispatched to Akrotiri; three each from numbers 12 and 208 squadrons. Here is the full story for anyone interested in further reading. http://www.naval8-208-association.com/NewsArticlesOpPULSATOR01.html This is the new tool Airfix S.2B and it’s a superbly engineered kit and great fun to build. All of the parts fit together well and only minimal filler was required. The cockpit is already good so I didn’t use any aftermarket apart from the decals. There’s also a decent array of underwing stores included, all I needed to do was alter the Paveway so the main body was the same size as a standard 1,000 lb bomb. Thanks particularly to @Phone Phixer and @Selwyn during the WIP, especially regarding stores and flare dispensers, etc. WIP here: https://www.britmodeller.com/forums/index.php?/topic/235135865-from-one-bucc-to-the-next-…-‘pulsator’-pirate-148/ The real XX901 at Akrotiri during Operation Pulsator … Anyone have any yellow ‘901’ numbers they’d be willing to sell!?
 -
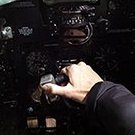
 Hello to all, After the amazing saga my last build has been (a vintage race car, the Fiat 806 Corsa at 1/12 Italeri, see if interested the summarize here: Of course, many builds have ever been dedicated to the Tamiya P 51D Mustang, especially on Britmodeller... I saw particularly the Squibby one, begun very recently and very nice, that will be definitely a source of inspiration. But as every build is different and personal, I decided to dive again in the Brit bath! I must precise too that I will take a good part of my inspiration in the great Juan Manuel Villalba DVD, for which I made the translation in french for the subtitles. Juan is a very famous modeler and a real gentleman, who learnt me a lot in model making and photography, he is a master and a friend, even if we couldn't meet up to now (we live far away one to the other one, pity...). Before beginning the build, a word of history: John Brooke England was born in 1923 at Caruthersville, Missouri. His service number was O-739263 and he joined the 362nd FS of the 357th FG in April 1943 as a 1/Lt meaning that he was part of the original cadre that left the ZI in November 1943 for the UK. He was promoted to Captain and then to Major. He took command of the 362nd FS on 25 August 1944, while he was only 21. He served two tours with the 357th FG for a total of 108 operational missions giving a total of 460 hours combat flying time. He was the second highest scorer in the 357th with a total of 17.5 victories. England finished his second tour and rotated home on 26 January 1945. He remained in the service after the war and was killed in an F-86 crash in November 1954 in France. I began my build logically by preparing the parts of the section 1 and some other ones, placing them in a box with compartments, that I got in the Italeri's kit (one of the best part of this kit, definitely 😞 N.B: I just made the photo, so the radio compartment is ever begun... After the parts preparation, I began the cockpit by removing some details to replace them by new ones (arrow 1, and the radio). I didn't use the Eduard P.E part 47, too thin, and replaced it by 0,3 mm thick tin wire (arrow 3) I must precise now that, differently with Juan, who made the radio by total scratch (amazing), I used the very recent Eduard photoetched set for Airfix kit (ref. 49853), that I had to adapt to the Tamiya kit: N.B: here too, I just made the photo, some parts have been removed and ever used. The screws on the side were made from very small portions cut in 0,2 mm thick tin wire (Juan cuts in stretched plastic). The tabs come from another Eduard PE set. N.B: I had to adapt the A 17 Tamiya part to the Eduard 42 one, smaller (for Airfix) and accidently, I cut a portion of the floor and radio support. Of course, I will do the necessary correction... IMPORTANT: I have decided (lately, I had to edit my posts) to number the pics: - the assembly pics will be numbered in yellow - the docs will be numbered in black (white if the background is black). The different versions (enlargements, fe) of a same doc will have a letter a, b, c... after the number. So, it will be easier to mention a pic in the debates we should have. GLOSSARY: this glossary will refer to the numbered docs. Of course, it will be actualized along the way... - 108 gallon paper tanks: 20a, 23, 23a, 94, 94a, 95, 96, 107, 108, 109, 110, 111, 112, 113, 114, 115, 116, 119, 128, 129, 131, 132, 133, 134a, 137d - radio compartment and fuselage tank: 1, 1a, 1b, 1c, 1d, 2, 3, 4, 4a, 4b, 6, 7, 8, 9, 9a, 10, 11, 12, 15, 26, 30, 65, 66 - outside, rivets: 90, 97, 97a, 97b, 98, 98a, 98b, 99, 101, 102, 103, 103a, 104, 104a, 117, 118, 137b c d, 138a b c, 139 - gear strut and wheels: 23a, 23b, 106, 106a, 120, 134a, 137b - tail wheel: 121, 122, 123, 124, 125, 130, 138b - John England: 24, 24a, 24b, 24c, 25, 106 - joystick: 46, 49b, 62, 70, 71, 72, 73, 75, 76 - Missouri Armada: 20, 20a, 21, 22, 23, 23a, 100, 106, 118 - left panel: 41, 42, 43, 44, 45, 57, 58, 58a, 59, 60, 60a, 74, 84, 85, 88 - right panel: 50, 51, 52, 53, 54, 55, 56, 88 - pedals: 52, 79, 80 - cockpit floor and details: 46, 46a, 47, 48, 48b, 49, 49a, 49b, 61, 62, 62a, 64, 67, 68, 69, 70, 80, 81, 82, 83 - seat, seat support, cushion and seat belts: 5, 5a, 14, 15, 16, 17, 18, 18a, 30, 31, 32, 33, 33a, 34, 35, 36, 37, 37a, 38, 39, 40, 137c - instrument panel: 87, 88 - canopy and rail: 18a, 18b, 19, 27, 28, 29, 89, 90, 91, 91a, 92, 92a, 93, 101, 118, 137a - radiator area: 77, 78, 86, 137d, 138a - helix and nose: 104, 106, 118, 134b - landing gear wells: 138a N.B: Lately, I have abandoned the idea of numbering the docs, for several reasons, among others : - some docs that I first considered as very important had finally to be not good. It is the case for example of the ones showing the rivets lines 97 and 98. - it is difficult (and sometimes unfair) to decide that such a doc is more important than another one. - numbering the docs is time consuming and we can refer easily to a doc by mentioning the post#. - small and small, a lot of docs and infos have been brought in the thread, which has turned in a real reference one, thanks to the contribution of experts on the matter. Thank you for your comprehension, I hope you will enjoy the thread...
 -
My first finish of the year. Just a quick simple OOB build to get my mojo back. I decided to do a wheels up model from the start, problem was I could not get a propellor effect I was happy with. Late in the day I retrospectively decided the best way to represent a spinning propellor is with a spinning propellor and motorised the model using a couple of old quadcopter drone motors powered by a 1,5v battery. Unfortunately because the wiring was not planned in from the start, it is a little untidy but I hope this does not detract too much. The aircraft represents Beaufighter MkVI V8881 FK*L of 219 Sqn RAF. On the night of 6th Sept '43 the aircraft was flown by Wing Commander Archie Boyd with Fl Alex Glegg as Navigator intercepted and shot down a He111. Model is the Tamiya 1/48 Bristol Beaufighter MkVI. The aircraft is painted using Colourcoats enamels. Markings are a mixture of box, generic and hand cut masks and painted Thanks for stopping by..
-
I built this massive Trumpeter U-boat (1/48) and although I’d always planned putting it on a nice wooden plynth, I had this mad idea about putting it “in the sea”. I’ve never worked with any kind of diorama before, and especially resin, but I was wondering what your thoughts were. As the boat is clear and lit one side below the waterline I thought it’d be cool to “float” the whole ship in tinted resin, with sea texture on top, so top-down looks like she’s a normal solid ship, but a side view from starboard would show the illuminated interior. Anyone ever seen anything like this before? I think I can make her watertight to keep the resin out, but fag packet calculation suggests I’d need about 40L of resin which might kill the project as I’d be looking at £00’s at hobby shop prices, but whether it’d be possible to texture the sea on top once she’s set in the resin without damaging the boat. I’d also have to find a way of minimising the appearance of the wires protruding from the keel as well, but that’s minor compared to the above. Any thoughts appreciated.
-
Having just finished Airfix’s superb Royal Navy Buccaneer, I couldn’t wait to start an even newer kit, of the 1/48 RAF’s S.2B version. The sprues are pretty much the same but with a bulged bomb bay (that I won’t use as this one will be open too) and handily an ECM pod, AIM-9 and Paveway LGB as used in Operation Pulsator, the deployment of six RAF Buccaneers to Akrotiri in 1983 to support the British Army peacekeeping force based in Beirut. These jets flew at ultra low level through (rather than ‘over’!) the streets of Beirut to deter terrorist attacks on the UK contingent. There’s a fascinating account of this deployment here: http://www.naval8-208-association.com/NewsArticlesOpPULSATOR01.html This will be my chosen aircraft; XX901 of 208 Sqn: I’ll need some aftermarket decals for this one, plus an extra Paveway LGB from somewhere (only seems to be one in the kit that I can see). I’m also going to stick four 1,000lb bombs in the open bomb bay. I bought an Xtradecal sheet for the underwing serial. I need two yellow ‘0’s for the tail fin but I’ll worry about that later! This will come in handy, particularly for the Pulsator weapons loadout. Tally ho! …
- 50 replies
-
- 11
-

-
Fairey Gannet AS.4, 815 Naval Air Squadron, HMS Ark Royal, 1958. The new Airfix kit, OOB painted with Humbrol, Vallejo, and Revell acrylics.
- 23 replies
-
- 64
-
-

-
Hi folks, another Tamiya Me 262 for the WW2 Twins GB- this one being Galland's 262 with JV 44. Kit is Tamiya with KitsWorld decals and sprayed with Vallejo acrylics as usual. Thanks for looking in!
-
Hi all, recently finished this Tamiya Bf109E-4- the second build from the Aims JG 54 decal sheet I have. By far the most challenging scheme I've attempted with the sawtooth mottle and Balkan campaign RLM04 markings- I'm glad I gave it a go though as I think this is the best finished product I've done! Painted with Vallejo acrylics, with the yellow being Ammo RLM04. JG 54 Fw190 in the works now, thanks for looking in!
-
Hi all, another Tamiya 262 from me here for my 2nd build of the GB. Using Kitsworld decals again to build Adolf Galland's Me 262 from JV 44. I also have Montex masks for the canopy which will make life easier. Standard 76/81/82 scheme here with some mottling, should be a nice challenge. Made a start last night assembling the interior components, once they're sprayed and fitted the kit really does just fall together in no time. Thanks for looking in!
- 24 replies
-
- 10
-
-
 It seems like I've hit a bad patch recently, with a work/life balance that was not really balanced. It seems that too much stress at work really isn't good for you...who would've thought? The trip to the doctors office actually showed a low steady heart rhythm, good exercise regime but high blood pressure. It's probably not related at all to the Valom Bristol Firebrand that I'm wrestling with over at the Salty Sea dogs GB While the doctor is requesting more data and me collecting said stuff for a few weeks, I decided to go clean up my workbench. It was stacked about 5 projects deep (2 P38, a Firebrand, a P-47, and a F-16 was found, together with some pieces of Lansen, Viggen and a few other bits). I'm sure that this has never happened to anyone else, and I'm completely unique in this aspect. Anyway, the cleanup was fairly quick, nothing was binned and all of a sudden I found myself with a nice and tidy bench. What now? Puttying the Firebrand? Decaling a swing-wing? Masking a P-47? No! Don't ever finish stuff, that could only lead to ruin, so instead I brought forth this. Much better! Well molded, oodles of detail, a few extra bits and bobs as well, and apparently a mostly stellar fit. So, caution thrown overboard, and the snipper started to work on the wheel bays. That's quite a few bits to build up the bays!! This was also a shot of primer, and a base coat of interior green, like so. A dark wash in the will do nicely I think! Main fuselage also got a lick of paint while the airbrush was loaded with the correct colors. Looking at the rear of the fuselage, I've only seen this amount of raised and lowered rivets on one other kit. That would be the 1/24 Tiffy that I built (more than) a few years back No oil canning on the Eduard Tempest though! But for 1/48, this is awesome.
- 32 replies
-
- 17
-
-
While waiting for a replacement windscreen from Zvezda for my 1/72nd C-130, I built the Tamiya 1/48th P-47D Razorback. I've had this kit in the stash for many years but something else always pulled me away from building it. Since I am not sure how long it will take for Zvezda to get the part to me to continue the C-130 build, I wanted something that would be "quick". This one was fairly quick, for me, but painting took quite a while, even with the relatively simple color scheme. I painted on the stripes and tried a new metal finish (for me). I also had an Eduard color PE set for this one. Overall, I am happy with the result. Of course there are some things I think I could do better with. I used an aftermarket seat with molded on belts, Quickboost I think. Paint is the Vallejo Metal Color Aluminum with a few panels in a mix of Aluminum and "Silver". The paint set had 4 colors included, but the other 3 were quite a bit darker than the aluminum. The darker panels are a 60/40 mix of aluminum and silver. The white stripes are the undercoat of Tamiya spray can Fine White Primer. The black stripes are Testors flat back, and the forward antiglare panel is Model Master Olive Drab. Decals are a mix of kit stencils, Eagle Strike, and Superscale. I painted the cockpit in my version of Dull Dark Green, an ancient tin of Humbrol 88 (pushing 25+ years old and still working well.) However last week, on Hyperscale, a discussion erupted concerning P-47 cockpit colors. I don't think there was any confirmation on colors for various P-47 models (C, D, G, M, N). Interesting food for thought... Background on this one: While researching the 23rd Fighter Squadron, 36th Fighter Group, in WW2, I always thought that they started D-Day carrying bombs for close air support or battlefield interdiction. Most, if not all, USAAF fighter wings were tasked with air superiority for the first missions of the day. The 36th was no exception. In reading pilot accounts, most flew 3 or even 4 sorties on June 6, 1944. The first 2 sorties were air superiority, and following tasking was for air to ground. I wanted to show this aircraft ready for it's first mission that morning. I choose tail number 42-26043, a P-47D-22-RE. This ship was lost to flak near Mortain, France on 7 Aug 44. Pilot James "Mose" Cole was KIA. I wasn't sure of the in-squadron letter so I chose "J" because I had a J on the decal sheets and my wife's name starts with "J". It wasn't until after the 36th moved to the continent that colorful engine cowling and tailplanes appeared. Even though it's just silver, black, and white, mostly, it still has some color pops here and there. I kept weathering to a minimum since the aircraft were fairly new, having only been in operation for a few weeks before the invasion, and the stripes had been painted only hours before the first sorties on D-Day.
-
 Hi All, This is my second post on Britmodeller, it is a Me262 A-1a from Tamiya upgraded with Aires aftermarket for cockpit, wheel bays and engines. Hope you like it! Happy modelling, Alex
- 16 replies
-
- 60
-
-
-
This is my version of the great Revell Lockheed PV-1 Ventura, the plane that replaced the Hudson. Apparently much reviled by the RAF (unmaneuverable and under-armed) , it was put to wide use by the USAAF (amongst others). This is BuNo 48891, flown by Lt. ‘Butch’ Mason, based in Attu, Alaska, 1944; part of numerous bombing sorties in the Pacific, the plane was finally lost at sea in 1945. Revell’s kit is a fantastic build - large parts that fit together cleanly, unfussy engineering and a decent degree of detail. It was nearly all OOB, with just the addition of an Airfix pilot and a Tamiya navigator as no figures were included. Even though it was not designed for an in-flight option, the gear bay doors fit perfectly anyway - although the tail wheel doors needed a little surgery. Once built, it’s a large canvas. With broad, nearly monochrome areas, it invites some invention in the paint work to provide some variety. These planes were flown to the point of exhaustion, and that was my aim - to convey a well-worn machine near the end of it’s functional life. I used a lot of Mission Model paints, which build in transparent layers pretty well. Masking in different ways (liquid masks, salt, tape, etc.) broke up the surfaces and the weathering across them - a really addictive process. Thanks for looking!
- 32 replies
-
- 85
-
-
-
- Lockheed Ventura
- 1/48
- (and 1 more)
-
My first attempt at one of the new-tool Airfix 1/48 Buccaneers, and I thought I’d start with the Royal Navy version. I have to say it’s an absolutely superb kit, Airfix’s engineering is brilliant and required only a few areas of filler. The fit is excellent with many parts just dropping into place. I didn’t need to use any aftermarket as the cockpit, decals, undercarriage, etc are all great out of the box. XV340 was delivered to the Fleet Air Arm in April 1967, and served on board HMS Eagle and Ark Royal as well as at Lossiemouth. It was transferred to the RAF in May 1973 but was grounded following the Buccaneer fleet inspection in 1980 and allocated the maintenance serial 8659M, seeing out its days on Pendine Ranges. The model shows XV340 in its heyday as a front line Royal Navy strike jet based at Lossiemouth in 1970. All comments, constructive or otherwise very welcome!
- 11 replies
-
- 61
-
-
-
This build is going to be quite elaborate and involve 12 kits in total. In addition to the kits, I will be utilizing a plethora of diorama medium / accessories. The Fw 190 A-7 will be opened up and in disrepair. It will be nested under a makeshift Luftwaffe canopy with a group of mechanics, tools, and parts including a new engine in a wooden crate. Makeshift Luftwaffe canopy: I plan on going with the scheme flown by Rolf Hermichen. Rotenburg, Germany. March 1944 for the A-7. I love how light in color it is. Should hopefully show tons of details with the right weathering techniques. As you can see, I have opted for a plethora of after market parts for the A-7: The Fw 190 D-9 will be in complete functioning order. It will be situated in front of the repair area on a dirt airstrip. Luftwaffe dirt/grass airstrip: I plan on going with the D-9 flown by Gunter Syed. Uetersen, Germany. May 1945 The schemes I chose are primarily on uniqueness. Majority of Fw190 that I see are pretty dark in color, and I thought it would be fun to do a few lighter ones. All kits pictured are 1/48 and listed below: •Eduard Fw 190 A-7 Kit •Eduard Brassin Fw 190A-7 Engine and Guns •Eduard Brassin Fw 190A landing flaps •Eduard Brassin Fw 190A Wingroot Gun Bays •Eduard Look Fw 190 A-7 •Eduard Fw 190 D-9 Kit •Eduard Brassin Fw 190 A-4 engine •Tamiya Kubelwagen Type 82 •Tamiya German aircraft power supply unit & Kettenkraftrad •Tamiya German tank crew & field maintenance set •Tamiya brick wall, sandbag, & barricade set •ICM Luftwaffe ground personnel •ICM Luftwaffe pilots & ground personnel •MiniArt German fuel drums •MiniArt German Jerry cans •MiniArt Field workshop •MiniArt Wooden barrels This build will likely take me 2 months or so from start to finish. I plan on doing two 12”x12” diorama squares that will come together seamlessly for photos, but still function fine on their own. My display shelf restricts me to the size I have decided to go with.
-
 Hello folks here is my completed Spitfire from the last year's local exhibition dedicated to our former airman W/Cdr Jaroslav Hlaďo. My local modellers club took part in the exhibition with model kits of the aircraft on which gen. Hlaďo flew during his long career in the RAF and Czechoslovak Air Force. I contributed with this Supermarine Spitfire Mk.IXe, TE 524, JT-5, Planá u Českých Budějovic aerodrome (former DU-F, No.312 (Czechoslovak) Squadron RAF). It was a fast and easy build without any modifications and improvements of the kit, built only for the exhibition purposes. I quite enjoyed it because it brought old friends together after a long time... So here she is:
 -
 Nice sunny day for some photos... Airfix's 1/48 scale Hurricane Mk I Tropical... done as a machine from 73 Squadron, North Africa in 1942. Pretty much from the box, except resin wheels and exhausts, and PE seat belts. Markings are Montex masks and masking tape. Cheers, Paul.
- 37 replies
-
- 90
-
-

-
-
Hi, With this thread, I want to share my project to build (at least) one fighter of each Fighter Group of the Mighty Eight. I say "at least one" because there a couple of Groups that I want to build several aircraft of (the 4th, the 56th, the 78th, the 357th...). I see that most threads here on "Work in Progress" are marvelous guides to building the subject with great photography. My builds are pretty average and I'm not that good at macro-photography. Still, I believe that some of you might enjoy seeing this collection being built. It may take a while, of course. I do not expect to complete this before the end of 2025...at the earliest. But this is a good time to start the project. I have completed one build in the P-47 STGB, I have done some work on other P-47's during that time, I have a P-38J in progress in the "WW 2 twins" GB, I will participate in the Mustang STGB, Eduard will release a P-51B this year, 1944 is 80 years ago... This project will be about the following 15 Fighter Groups: The 4th FG: planning a P-51B. The 20th FG: planning a P-38J. The 55th FG: planning a P-38H. The 56th FG: one Tamiya P-47M completed. The 78th FG: a Mini Art P-47D in progress. The 339th FG: planning an Eduard P-51D for the Mustang STGB. The 352nd FG: planning an Eduard P-51D for the Mustang STGB. The 353rd FG: a Tamiya P-47D Razorback in progress. The 355th FG: a Tamiya P-47D Razorback in progress. The 356th FG: planning a P-51D. The 357th FG: an Eduard P-51D in progress. The 359th FG: planning a P-51D. The 361st FG: planning a P-51D. The 364th FG: planning a P-38J. The 479th FG: a Tamiya P-38J in progress. I'm leaving out the 1st, 14th, 31st and 52nd FG. These were briefly in the 8th AF Fighter Command, but were transferred to the 12th AF on the 14th of September 1942. Cheers, Stefan.
-
A happy new year to you all! It’s been a while since my last build, with theatre commitments, holidays then Christmas, but I’m back with a bang, or should that be Bucc with a bang! Despite waiting ages for the RAF version for which I’m awaiting delivery, I felt compelled to buy and build the previous FAA version as a companion to the Sea Vixen. Seeing this kit reduced to £50 it seemed a good time to get one, I doubt it’ll ever be less than that. So without further ado, my first build of the year. The now very familiar box, freshly delivered this morning… And a LOT of plastic inside! I’m tempted to make it with wings folded, but reserve the right to change my mind. Lovely decal sheet! And this is the scheme that most caught my eye. The real thing, images below are all courtesy of the FAA Buccaneer website: I’ve already got a spray can of EDSG so should be ready to get going. All comments and advice and general Bucc banter more than welcome …
- 47 replies
-
- 12
-
-
Greetings to all, as this is actually my first build in a long long time ( started at 6 y.o. stopped at 12 due to school ), I'd like to thank you for accepting me in the group and I'm happy to share with you my efforts in building an iconic spitfire , its nothing compared to what I see here but, it's a start! By now I'm 24 and finally have the time to enjoy perhaps one of the best hobbies in the world as I have already managed to create a respectable stash. I tried to improve the frames by drilling the holes , I avoided any kind of wires running through , although I do regret it now.. All comments / criticism / tips are more than welcome!
- 15 replies
-
- 10
-
-
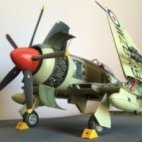
Bf109F-4 of 8./JG 54 - Flown by Max-Hellmuth Ostermann. Kit is a Hobbyboss easy-assembly kit in 1/48, decals by Aims. Thanks for looking in!
-
This build took roughly a year to complete and features 3 Imperial Japanese Navy aircraft involved in the assault on Pearl Harbor. I discovered this kit from Hasegawa around the fall of 2022 and had a pretty rough time tracking it down. It is a limited kit and had a very small run. Fortunately though, my wife was able to score one off Ebay and surprised me with it. I was initially drawn to the kit having all three planes in one. Especially the B5N2 Kate with the torpedo. At the time of discovering this kit, I had also been wanting to build an A6M2. The D3A1 was icing on the cake as I have a bit of nostalgia from using that plane in the video game Battlefield 1942 as a teenager. Additionally, I purchased Eduard detail sets and mask for all three planes. Since I just finished the A6M2 Zero this post will also feature glamour shots of it alone. The A6M2 was the final plane I needed to complete to call this build done. A6M2 Zero: Interior: Engine: Carrier deck photos - These forced perspective photographs were taken on a 1:48 replica of the IJN carrier Hiryu (24”x36”) that I made. Background images were photoshopped in. Completed build for D3A1: https://www.britmodeller.com/forums/index.php?/topic/235134064-d3a1-val-pearl-harbor-attack/#comment-4849239 Completed build for B5N2: https://www.britmodeller.com/forums/index.php?/topic/235132510-148-hasegawa-b5n2-kate/#comment-4816388 WIP build thread for A6M2: https://www.britmodeller.com/forums/index.php?/topic/235134216-a6m2-zero-attack-on-pearl-harbor/#comment-4869009 WIP build threads for the D3A1 and B5N2 are on another modeling forum. I can provide link if requested. Additionally, I have a build thread for the carrier flight deck. Overall, I am satisfied with this offering from Hasegawa and am happy to have it on my display shelf. My one major gripe would be the decals provided. Majority of them are rather thick and brittle. I used all the decals for the B5N2 Kate, but decided to move away from them on the D3A1 and A6M2 when possible. Specifically I painted on the Hinomarus, and any type of stripe.
- 22 replies
-
- 64
-
-
-
Hi everyone I just wanted to share my thoughts and progress using the Cricut Explorer Air 2. I received my Cricut last Wednesday, my wife brought it for me for my 50th birthday (thank you Leanne). Now I'm a bit of a luddite when it comes to technology and I'm incredibly lazy I just want things to work with out any messing around but to my surprise the Cricut is very easy to use and I think the masks that you can make are as good as any commercially produced items. I started by looking for any additional software that you might need to use for designing and producing masks, the Cricut software is ok but almost every user I could find recommended using Adobe illustrator so I duly subscribed to Adobe (£19 pcm) down loaded the software and had a play. I started by producing a series of RAF roundels circa 1939 - 45, I found several references online that gave the size of each roundel type in inches so I found an online conversion tool and converted these measurement's to cm and drew them in illustrator to 1/48 scale. I then sent the image to the Cricut software and cut my first mask a Type A.1 roundel in 1/48 scale. I used some white vinyl which has proved to be very hard to remove because its too tacky and it lifted the paint. I had another go, this time creating a mask for a 56 in, 28 in, 21 in upper wing roundel again in 1/48 and sprayed that (see both roundels below) Not too bad I think I could be onto something here? I then decided to create some templates for RAF fonts circa 1939 - 45 again a search of the internet threw up some examples so using these a place to start I produced my own set of fonts again in illustrator.. ..for my next test I scaled my drawings to 1/32 and created some more masks this time using Frisk film as the masking medium and this time sprayed my 1/32 Fly Hurricane paint mule again applying a Type A.1 fuselage roundel and code letters.. I think with a little more practice the Cricut will prove its worth enabling me to produce any set of codes, markings, camouflage, wheel and canopy masks. I think the Cricut is a great bit of kit, not cheap (my wife paid £260 for mine) but I'm the kind of person that will spend a small fortune on after market masks so I think that for my it will cost effective in the long run plus its quite enjoyable researching and making the masking templates. Cheers all Iain
-
 Just a place holder for the next couple of weeks. Jane and I are on our honeymoon, currently bobbing across the North Sea on a cruise to the Norwegian fjords. It's a bit lumpy out there at the moment Inspired by @danbuoy's Formation Monitor build, I thought I would do something similar. I'll be using Tamiya's 1/48 P-47D Razorback, which I have never before built but which is well-known and well-regarded. My subject will be 42-8567 "The Snoop" - NMF which will also be a first for me. Many thanks for looking in! Cheers, Mark EDIT The build starts here.
 -
 Hi all- I was looking for a quick build and this kit took about 5 weeks after spending about 7 months on my Dynavector Gannet. I dragged the old Classic Airframes Sea Venom out of the stash plus a resin wing fold set by Wolfpack. Fortunately, I had saved several posts with photos by Navy870 on his Sea Venom collection. Other references included the CMR build by Navy Bird and the WIP has some good photos too. An old soft cover book "Sea Fury, Firefly and Sea Venom in Australian service" by Stewart Wilson has information on these RAN aircraft and their history. ADF Serials website for photos, periods of service and fate of each machine. Finally, a search on Britmodeller found some nice builds of this kit including a nice RAN target tug version of the Sea Venom by PWJ. Decals - I used a couple of the kit stencils, tail boom roundels, upper wing roundels & NAVY lettering on the nose and then printed the rest of codes, serials & underwing NAVY lettering on to Expert's Choice clear decal sheet using a Cannon 5100 series basic dot matrix printer - I thought the kit underwing roundels & NAVY lettering were too large, so I used some kangaroo roundels from Xtradecal sheet X72260 - the 36inch ones were pretty close to what I wanted in 1/48 scale - printed the NAVY underwing letters 10mm high which looked about right when comparing to photos. The model is of WZ935 878/NW and there is a nice colour photo in Stewart Wilson's book - the serial in the photo is N4 935 but I decided to stick with the original WZ prefix. Jury struts are made from Albion Alloys brass tubing and wire. The rear stub in the rocket rails had enough meat on it to attack it with a file & give it a rearward slant as in my reference photos. I made some basic alterations in the cockpit to make the observers side look a bit more like a FAW53 plus Airscale instrument decals & some internal canopy structure from strip. Finally a line up of my RAN 724 Squadron models from early 1960,s era. cheers CJP