Search the Community
Showing results for tags '1/35'.
-
Well it's finished. I've kept it new and shiny looking, well because they are mostly I think? I'd almost forgotten all this was in here - seems a long time ago! Thanks for looking! Nick
- 17 replies
-
- 40
-

-

-
I'm a huge fan of excessive, never-to-be-seen-detail so these RFM kits are right up my street. There's no real way of ever displaying all the work inside these things as transparent stuff always look a bit naff to me, exploded stuff can be made to work, but I'll settle for some photos along the way. so having said that, here's some of the really nice detail the chaps at RFM provide that will never see the light of day. I like it anyway. The 'Powerpack' I know little of tanks, but as far as I can see, the transmission has a pair of friction plates that engage with a similar set in the hull, so the whole shooting match looks like it lifts out pretty easily without messing about disconnecting any driveshafts etc. You can see them in this shot, very clever if that is indeed how it works? 'So we want you to drive this big tin box full of very large explody bullets, right next to your left ear while people shoot at you' That big old motor/transmission does fit in the hole it turns out You can still see some stuff with the lid on Lots still to do, but really enjoying this I must admit. Thanks for looking Nick
- 27 replies
-
- 20
-
-
-
All hello! I will build the British heavy tank.
-
 Hello everyone, onto a new project, I had a look at what I have left to build and I still have four Miniart M3's to build. I did one a while back in the M3 group build which I enjoyed making, so I thought now's a good time to do another. Three of them are just normal builds but one is an interior build which I fancy doing now whilst I'm still able to do so. So the one that I have picked is the M3 Lee Early Production, here is the box art... There are eight versions to choose from, three Red Army, two German, a Canadian version and two US Army. The only versions that interest me here are the US ones, one is the 1st Armoured Division and the other is the 2nd Armoured Division US Army. Fort Benning (Georgia) early 1942. This is the version that I will be making. Here is the colour and marking scheme... To start things off I started to work on the baseplate, the parts have nice crisp detail and look fabulous, really looking forward to doing this... I really like doing their interior builds, looking at the instructions there should be plenty of opportunity for panels to be removed later on to show off all the interior details, so that's the plan... That's it for now I have quite a few parts to clean up next for the next stage so will be back soon. all the best Ed
- 243 replies
-
- 26
-
-
This one has been sitting in its box in storage for over a year and a half, forgotten. I stumbled on a bunch of kits in various stages of completion that I put away to clear off my workspace for some projects that I needed to complete. This was a kit that I'd been hoping for for many years and bought it when it came out in 2021 or so, but lost interest before I got too far. Don't know why I stopped-it's pretty fun. I finished the engine and engine bay this afternoon. Hopefully I'll finish this one and some of the other shelf queens I found in there!
-
Hello everyone, I'm venturing into uncharted waters here, normally being a landlubber over in the AFV section where I'm half through a Mercedes-Benz L 4500 truck build. While mulling over cargo options, I briefly considered a S.L.C. "Maiale" as 'somethings a bit different' but thought it would be too long and too, well, 'torpedoey', to be feasible. But then I stumbled across the following which got the old cogs turning... Early in the video we see a 'truncated' "Maiale" separated from it's warheads... The warheads subsequently being bolted onto the 'nose'... Hmmm, interesting. The "Maiale" sans warhead would probably fit onto the truck bed quite nicely, and the detached warhead(s) could then sit alongside, something like this with some rearrangement... It's a total flight of fancy with no evidence that they ever put one of these things on a truck, but why not? The decision was made, let's have a "Maiale" cargo! I knew that Italeri did a nice 1/35 Siluro a Lenta Corsa (S.L.C - Italian, Low Speed Torpedo) also known as "Maiale" (Italian for pig, hence the topic name). I didn't know, however, that the kit is discontinued and so a bit tricky to get hold of. I did eventually managed to acquire one... I won't go into too much detail on the kit contents as there are several reviews available elsewhere. Suffice it to say that the kit is quite simple, being contained on a single sprue, with the warhead(s) already separated from the main body of the Pig (which needless to say is very useful for what I plan to do - result!)... The kit also contains a small etch fret, some diver figures (probably won't be used), and a booklet giving additional information and a pretty comprehensive set of photos (which is a very nice touch)... I've made a cursory start on the build by starting a tidy of the welders mask front shield. Holes were drilled in the shield roof as indicated in the instructions, using small moulded depressions as a guide. The shield walls are far too thick, looking like they are fashioned from substantial armour plate. Some thinning will be needed here, which will unfortunately result in the shield interior detail being lost (not a bad thing given the ejector mark and general untidiness of the interior)... The shield should be thin plate similar to this photo grabbed from the kit booklet... After some scraping, sanding, sanding and scraping things start to look a bit better. I'll leave it to you to work out which side has been worked on in this before/after comparison shot... I need to be a bit wary though as the plastic is starting to get a tad thin... A quick word of warning before I sign off - there may be the odd truck picture appearing in this thread! I'll try to keep these to the minimum, but if you want to venture over to the 'dark side' and see more, the parallel truck build can be found here.,.. Cheers, and thanks for looking, Paul.
- 57 replies
-
- 12
-
-
- S.L.C. Maiale
- Italeri
- (and 1 more)
-
 Hello everyone.👋 Trumpeter's late version Tiger I in 1/35 scale is ready to be primed. I can only recommend this kit. For reasonable money it offers a lot of details including zimmerit which is easy to work with because it is made of thin plastic sheets. Its perfect regularity and thickness are targets of criticism, but I chose the kit precisely because of it (really easy to work with). Figures are from HobbyBoss. The loader and commander have aftermarket heads from Alpine Miniatures (faithful copies from AliExpress 💶). : Some inspiration:
- 3 replies
-
- 4
-
-
- Tiger I late version
- Trumpeter
- (and 1 more)
-
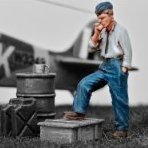
Hello modeller friends, As I’m currently building a B5N2 Kate model, I wonder about the use of the 3 oxygen bottles located on the port side of the observer’s station. Are they related to the torpedo operation or something else? Were they present in which ever mission, torpedoeing or bombing? Which colour were the bottles? I searched the internet with no result and hope that you can help me in that matter. Thank you, Cheers, Quang
-
Well first build of the year completed granted not many parts but a bit of fun building it after real life issues getting in the way. Time to get back to some of my stalled stuff and clear that shelf will need my dust mask some have been lying around that long. So anyway this is the 1/35 scale Secondary Bismarck Turret painted using Colour Coates enamels and various oils for weathering and a Italeri figure from the Pibber sub kit for scale and lots of coffee stirrers for the decking from various outlets. WIP https://www.britmodeller.com/forums/index.php?/topic/235134645-bismarck-turret-15cm/ Stay Safe beefy
- 17 replies
-
- 29
-
-
-
 Build this severals years back, the only aftermarket parts used in the build are 3 PE clamps. Canvas tarp made from tissue paper. [/url]
- 39 replies
-
- 56
-
-
Hi, guys! Finally, I managed to finish this project started a few years ago. The build was straightforward, only change was a resin turret, because one that came in the kit was not that good and didn't offer an option to open the turret hatches and rear storage box. But there was a solution that came form the SBS Model: a beautifully casted resin turret with detailed metal barrel and PE parts that improved the overall look of the model and gave me the option to put some crew figures eventually. Painted with acrylics and weathered with oils, enamels and pigments. Cheers☕
- 13 replies
-
- 26
-
-
Or maybe the new title should be ' Don't just bloody sit there, get out and walk!!) The basic vehicle and base was 'finished' months ago and sat on the shelf. I posted it here and decided not to add any more figures or detail but just couldn't get over how plain it looked, was not happy with the finished result and just wouldn't let it lie. Hence......eventually I decided to add some more, in the form of the Miniart tank riders with some Hornet heads, along with a few background bits and bobs from the spares box, kebab stick posts and fuse wire barbed wire. I am much happier with the result now, although am still tempted to add a couple more figures.....Watch this space
-
Hello everyone, this is a trumpeter model, I got it for $23, I think it's a treasure for the money! The model is well detailed, the assembly process is also not difficult, so I can recommend this model to you. Stash on the back from the Stryker set from Trumpeter. I made a camouflage net for the first time, and I think it turned out pretty well.
-
Good day to everyone here, I do hope you have all had a wonderful Christmas. Before the New Year starts off, I would like to show off Border's new B5N2 in the 1/35 scale, seeing as I believe I am one of the first to get my hands on it. (As for why it is in this section, I cannot make a post in the 'Reviews' area - and I will be building this beauty anyway). Starting off with the cardboard package... ..out comes the box top which itself is magnificent, displaying some of the best artwork of any new kit I have seen this year, with B5N2s going for torpedo runs at Pearl Harbour. The sides of the box... And the first look inside - quite jam packed! All of the sprues laid out... And now each of them close-up - in alphabetical order: A, wing top sections and the lower fuselage: B, fuselage sides and elevators: C, lower wing parts and propeller: D, cockpit pieces and upper fuselage: E, engine and cowling: F, undercarriage and assorted details: G, Type 91 modification 2 (special Pearl Harbor version) aerial torpedo: H, Type 91 aerial torpedo: I, canopy and other clear parts: J, the Type 99 No.80 Mk 5 AP bomb used to destroy the Arizona: And K, cockpit details: The decals: The P.E, which amounts to seatbelts and fine details: And finally, the Instructions, with some nice history and part diagrams. As a whole, the kit is very, very comprehensive. The level of detailing on the individual parts is fantastic, the raised riveting is all uniform and the clear parts are perfectly clear and blemish-free. Interestingly, the fuselage is constructed by mating the sides and the the top and bottom, perhaps to mask any gaps that might arise from a traditional joint. The fabric detail on the control surfaces is relatively deep, but looks good. Noteworthy is the lack of an option for the 6 x 60kg bombs or the 1 800kg bomb, but I suspect we might see those in future releases, maybe a B5N1? The detail is especially good on the Type 92 machine gun used by the gunner: And the Sidewall detail for the Cockpit: One of the more notable bits about this kit is the 'stressed skin' effect on the wings and lower fuselage, as shown: It will be interesting to see how this comes out under a coat of paint. The final part are the schemes, which follow: If I am not mistaken, I believe that both of these aircraft are from Akagi, but the decals provided should allow for a 'DIY' approach to the schemes, with enough coding to build a variety of aircraft. Note that the scheme for AI-311 is different on the Box, perhaps a late change. All in all, I would say this kit has definitely been worth the wait. Even though it is slightly odd in scale compared to the rest of the 1/32 riffraff, it still looks like it will build up magnificently out of the box. I understand that my camera and photography skills are lackluster, so if any of you would like some better images of certain bits and bobs than I will be happy to oblige. Sincerely, Hurricaneflyer
-
 Hey all, Benefitting from my first Christmas off in six years, I managed to sneak one last build past the goal post before the new year. This is Trumpeter's BTR-50PK from 2011, which followed on from their release of the PT-76 amphibious light tank, of which both vehicles share a common hull. This kit comes with decal options for either Russian or East German vehicles. The decals contain set numbers for vehicles depicted on the colour schemes as well as a set of numbers 0-9 to make up your own vehicles. I painted the vehicle using the suggested body colour as per the instructions, which was Mr. Hobby's 303 Light Green. I feel it might be a little too light, and for future builds I might shop around for a darker shade prior to painting. Departing from the colour scheme, I recently purchased Tankograd Publishing's book on NVA T-34s, and one image of interest I found was that of a T-34 ARV towing a disabled BTR whilst on winter exercises. The image shows both vehicles in a field applied winter scheme with daubs of white paint applied hap-hazardly over the vehicle. I was inspired by the look to replicate this on my vehicle. Ultimately I used a somewhat frayed old, square brush I had and with Humbrol 34, I took the excess off the brush and applied the rest in a random pattern over the vehicle. The weathering was achieved with oil paints, thinned down Tamiya Acrylics to make filters as well as AK Interactive's Acrylic Mud. I also used Tamiya snow effect. In a departure from recent builds, I decided to have a go at a vignette, which is a first for me. Using a cheaply sourced canvas, I glued down polystyrene sheet and shaped it to create a sunken road. I then applied the same acrylic mud that I had used on the vehicle. I blended some Tamiya snow into the mud to create a slushy, snowy, muddy look. The rest of the snow was applied to make it look like recent snowfall. I added grass tufts that I bought off of a wargaming vendor at a recent Tankfest, and then I drybrushed the tufts white to make them look suitably wintery. My final addition to the vehicle was a commander figure, which was spare from a recent Tamiya T-55 Enigma that I had built. Thanks for looking! Sam
 -
Here is the Tamiya Pz II Ausf. C (Polish Campaign) kit backdated to an Ausf. A. The kit actually has most of the parts necessary to build any version from an Ausf. c to an Ausf. C, even though Tamiya never mentions the Ausf.c parts in either version of this kit. I added the Dragon/Cyberhobby interior to the hull and used Dragon Magic Tracks in place of the kit tracks. I am currently working on the French Campaign version of this kit-they are fun little builds.
- 32 replies
-
- 58
-
-
-
I wanted to do a relatively quick build, so of course I chose something from Miniart. This is a non-interior kit and is pretty straightforward while still maintaining the stunning detail that Miniart brings to its kits. I've never built any postwar armour in my fifty years of modeling, so this is rather interesting for me. I'm a few weeks into this build, but now have the hull pretty much complete assembly-wise. The wheels are just pressed into place until I weather the hull and install the tracks. This is an excellent kit and has been very enjoyable so far. I'm working on several projects right now and likely to start another next week for a build review because of course I have Modeler's ADHD.
-
Hey all, This is Tamiya's Bradley. The kit was originally released in 1985, but this updated version was first released in 2003. I initially got hold of this kit to build it as an example used in Operation Iraqi Freedom, but seeing some of the other schemes, I had a change of heart to do it in European markings for a unit based in Germany at the time. The kit was built out of the box, but this time I took the oppurtunity to drill out the muzzle of the vehicle. I painted the vehicle using Tamiya Acrylics, and Humbrol Enamels. I weathered the vehicle with oil paints, and Acrylic mud effects by Mig. I also used all of the stowage handily included in the kit, which was painted with acrylics and oils. As a finishing touch I added Mantis Miniatures branches. They look fantastic, and are easy to use. However, they are quite expensive, and looking at them, you could probably achieve the same with a large tub of mixed herbs and some roots pillaged from the garden. I have seen techniques where you use PVA to dab the areas where you want the 'leaves' to stick and then sprinkle mixed herbs or similar over them to create some convincing albeit fragrant tree branches. Many thanks for looking! Sam
-
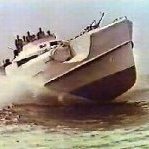
My first build in 30 years is going to be a Sturmboot, 14th May 1940 at Sedan. I have found one photo of the 1 Pz Div. crossing showing a Sturmboot in the background. Do anyone have more photos? The Dragon kit from 1999 has one big problem. It doesn't look like a Sturmboot (more like a bath tub!). The aim with this build is to try to get it to look a bit more like the original. I have only manged to find a drawing of a Sturmboot with decking. The obvius problem is the width of the boat (the length is ok). I have tryed to correct it with a wooden insert and boiling water.
-
Hello everyone, this is my new BTR-80 model from Trumpeter. The model has a very good fit of details, I was even a little impressed, the detailing is also very good. To paint the Ukrainian pixel, I cut out masks from masking tape myself, for painting I used the following colors from Tamiya xf-67 nato green, xf-68 nato brown, xf-69 nato black, xf-88 dark yellow 2, I also added a few drops xf-60 in each color to simulate burnt paint.
- 11 replies
-
- 30
-
-
 Folks, I've done yet another Warrior. This one as a leaving present for Tim. He's been trying to get my Warrior off me since I did it, and since he used to command one, I thought I'd do one as a gift. I finished it a while ago but I didn't want to spoil his surprise when he got it. The kit is Academy with Eduard etch (if ever there was a kit that needed etch it was this one). I love the kit (this is my 4th iteration!) but it is showing it's age and somethings, like the telescopes, are out of scale. The Meng version is a great kit but you cannot do a bog standard 510 from it. The cam net and covers are scratch built. Paints are Mig, Tamiya and Humbrol, gloss coat was Quick Shine and Vallejo for the matt. The IRR green was Mig NATO Green with a few drops of yellow. Pin wash was oil paint and terps. Weathering is Mig dark earth and dust, mixed with plaster for the thick mud. I used resin for the lights. Bill
- 13 replies
-
- 26
-
-
I found this in the internet and just loved the scene. As you can see two fairly bored looking Germans guarding the wreckage of a MK V ( no it is a Mk Ia and thankfully my plans are too ) Spitfire. I’ve chosen 1/35 because I have quite a few Tamiya figures in the spares box in that scale, and it rather scratches the spitfire than attempt to scratch figures. First off some plans, scaled to 1/35 and printed. Next up some woodwork. After some time with my detail sander a coat of polyurethane ain’t to see where we’re going. I’ve cut out the engine bay and cockpit area and skinned the whole thing in 20 thou plastic sheet. Next some more spitfire work and a bit more carpentry
- 38 replies
-
- 16
-
-
 This was my project for the Vietnam II GB over in the Group Build section. Kit: 1/35 AFV Club Extras: AFV Club track links - kindly supplied by snapper_city Pegasus Camouflage netting Academy Allied and German Tank Supplies Set II AFV Club 20Pdr. Gun Ammo Paints: Humbrol and Revell Acrylics - Humbrol Spray can for the base colour - all other paints applied by hairy sticks. This was my first proper 1/35 AFV build - I practiced first on the old Tamiya Panzer Kampfwagen II Ausf.F/G kit in the Achtung Panzer GB earlier in the year.The WIP for this build can be found here. There are quite a few photos. In Country; Some close-ups: So thats my last completion for 2015. Roll on 2016s builds! I'd like to thank everyone who contributed to this and all my other builds during the year - as Ive said before; none of them would be what they are without the advice, suggestions and support of fellow Britmodellers. Thank you. Happy New Year! Kind regards, Stix
- 39 replies
-
- 38
-
-
Hey All, This is Tamiya's T-55 Engima. Somewhat iconic in its day during desert storm, you can still see at least five preserved examples worldwide, including one that I've been luckily enough to get up close and personal with at the Bovington Tank Museum. The outlandish look of the vehicle and the lack of definitive details surrounding it certainly means this T-55 variant lives up to its name, and inspired me to build one for myself. The kit was built out of the box. I painted the vehicle in Tamiya Deck Tan and then chipped it back with Humbrol 155, before using oils, pigments and thinned down acrylic filters to weather and dust the vehicle. Additionally, I used quite a bit of raw umber and burnt sienna oils to create the streaking effects. Thanks for looking! Sam
-
Been a while since I posted, hah. Also been a little while since I finished this, but finally got around to taking and posting images. I was asked by a family friend if it was possibly for me to replicate this vehicle for their dad as a Christmas present, as its his dad in the picture. Took a bit of searching to uncover the type of truck, and while I'm not explicitly clear that it was necessarily the one they drove (rather they may have posed with it) and only one angle, I set about doing my best to do a model version. Luckily found that IBG models did one in 1/35, and while I'd never used IBG before, I was pleasantly surprised with the detail. Went together without much issue, painted it up, and then had to steadily hand paint some of the markings on the front (the rest were kit decals). Bought a little case for it and had to modify the bottom so it could fit inside. Oddly, after about a week in the case, the entire truck went glossy and slightly tacky. I had to pull it out and respray with matt from VMS again to tone it down, and sadly ended up affecting some of the windows. Not sure what caused that, but a MiG-29 model I also did and put in a case has subsequently gone super shiny as well. Wondering if its something going wrong with VMS varnishes. Anyway, put a small hole in the top of the case as a precaution and it doesn't seem to have turned shiny again, so that's a plus. Sadly, leaving it out to thoroughly dry for a few weeks resulted in that super clingy dust in places. Not ideal, but the friend is happy with it. Thanks for looking ^-^ Gaz


.jpg.62476ce06a197f21aa77dc5bc2880d48.thumb.jpg.ccc9f5d9677f9de613991cc33bfbd809.jpg)