Search the Community
Showing results for tags '1/24'.
-
 I have now completed my entry into the Orange Countach club. I started this quite a while ago, but having a bit more time on my hands at the moment, I've been able to finish what was quite a challenging kit Build post here, if your interested: Painted in Lamborghini original Arancio California from Zero paints, with Zero pre-thinned clear. Only extra, besides a bit of sratch build extra detail was after-market ignition leads I took a picture of the interior before putting it all together. Details I know will never been seen by anyone, but I know there there Thanks for looking. Comments & criticisms greatly appreciated Cheers, Paul
- 13 replies
-
- 17
-

-
- 1/24
- Lamborghini
- (and 1 more)
-
Giddey to all! Here is my first build of the Lancia 037 Rally - my favorite rally car! This is the first version, the other is the evoluzione type (the later version) All comments welcome as usual, especially if you can suggest something I can do better! Hope you like it! Chhers Andreas
-
Hello All, I have had this one on the back-burner for years. I have finally decided, what with the FIAT 500 nearly done and another couple of cars nearing completion as well, to resurrect this one. It's the Fujimi 1/24 246 Dino. It's one of their 'enthusiast' kits, meaning loads of fiddly tiny parts. I have already done a couple of the Porsche enthusiast kits and apart from a few niggles, they went together well. I just wish I knew where I had put them in the loft for safe keeping. I started it a while ago and then put into storage, where it got forgotten for a long while. I have painted all the major body parts in Halfords' 'Broome Yellow'. It has come out quite well, even gloss cover and no serious imperfections. This is the dinky little engine: I have put a few more parts together since these photos were taken. I am planning to add ignition leads as it looks a little bare without. Thanks for looking, Alan.
-
Giddey to all! Here is my first build of the Lancia 037 Rally - my favorite rally car! This is the first version, the other is the evoluzione type (the later version) All comments welcome as usual, especially if you can suggest something I can do better! Hope you like it! Cheers Andreas
-
Well now! I had this: ..and this...: and - with a little imagination - ended up with this: I present to you - Feline Female! I hope you like it (couldn't call her - you know what - but Feline Female - or FF for short - should be OK?) Cheers Hans J
-
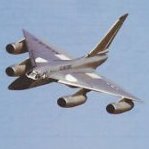
 Well hello there and welcome to my latest endevour. "The Airfix Messerschmitt 109-e 1/24" This will be my biggest and first build at 1/24 Scale, I plan to scratch some stuff together as I want to be able to take The cowl off and expose the engine. It's a lovely looking kit to go with a lovely looking subject. I bought this while having a few swift halves on a caravaning trip to the new forest, Ebay special £19 I had planned to build it OOB only using scratch additions but that has gone out of the window already. I hope you will follow me on a bit of a bumpy ride through a wonderfully large model that I have wanted to build since I was about four years old. Oh by the way the Title "yellow nosed b*stards six o'clock high" Is a movie quote from "The battle of Britain" 1969 shared to me by the wonderful TonyTiger. It referes to the yellow paintwork on the planes nose. There is a definate custard theme running through a lot of my builds of late. If you're all sitting comfortably then I shall begin. The obligatory box. And the sprews these are really quite crisp for an old kit. aaaaand a big pile of stuff that fell off in the bag I think this must happen a lot with these large kits? the cartograph decals look smashing although I'm missing a Swastika from the tail and an IP ? what? why ? I'll be going for this scheme I think but who knows what might happen? the clear parts are divine. well the canopies are, although looking at the pic the gates look rather large. any way on with the build. The engine is first up........ oh befor I do start I bought a ref book, my first ever ref book, rather nerdy of me, here it is. Can anyone see what might be wrong with it? any way back to that Engine..... a few bits of flash and a bit of sanding. but as dry fits go its pretty good. ( sorry Tony no electronic spinning I'm afraid ) the top got some sanding as it had some weird crease lines. then glued. The details aren't bad. I'll add more but I'm impressed. The pipe on the join in the top left of the pic will ge fettled to just work rather than sanding the whole thing off. more parts dry fitted. and some rather iffy looking sink holes. where's my Mr Surfacer gone? aaah good old filling I've missed you. And that as they say is where we are. Hopefully I'll get some more time in the morning but I do have an Ivy to fight back. Take it easy and happy Telford to one and all. Happy modelling. Johnny BIG nose.
- 675 replies
-
- 10
-
-
- Airfix
- Messerschmitt bf109-e
- (and 1 more)
-
This model ticked off a number of firsts for me in model building....first 'civilian' vehicle, first 1/24 scale, first salt and hairspray weathering, so was really an ongoing experiment all the way through. The bus is the excellent Revell 1/24 Samba bus. The side doors, load bay and engine cover all open but the front door hinges were so fragile that I glued them shut. The figures are Masterbox and the wall is made from an old piece of laminate flooring painted to look like a concrete wall, with AK graffiti transfers. Paint was Vallejo, Tamiya and some oils for weathering. All comments and constructive criticism welcome
-
Hi All, Another one that I have had for many, many years. I was a Christmas present from my ever-suffering wife and, after several years I decided I needed to get a move on with this one. So here we go: A handsome vehicle to my eyes. I have assembled the engine: I primed the body with Tamiya XF-4 before spraying a colour code that consisted of the following: Tamiya XF-16, Tamiya Clear blue and something else (I can't remember the proportions:. I'll look it up later) That's where I have got with this. Thanks for looking. Cheers, Alan.
-
 Hey everyone Well you might think that I'm jumping on the 1/24 Airfix Hurricane band wagon what with @The Spadgent making a rather good start on his (you'd be right by the way 😊) but in my defence I do have some time to kill whilst I'm waiting for some bits to dry on my Hawker Typhoon and I think a large scale Hurricane will complement it nicely. So without further a do rather lovely box art.. The proposed scheme, Hurricane P3675 UF*S, 601 Sqn RAF Tangmere September 1940 (I built the 1/48 Scale version recently).. ..using the Montex masking set.. ..and here is where I'm at at the moment. My fuselage halves are both quite warped so for the worst offender I am going to straighten it out by gluing on the side panels... ..I drilled out the panel location tabs ...and cut the starboard panel in two.. ...it still fits ok.. Cheers all Iain.
- 83 replies
-
- 10
-
-

-
Well here she is my version of the Airfix Hellcat. It had to be in the Fleet Air Arm scheme as my house is a solid RN only household. I used the Airscale cockpit set, Master gun barrels, Montex Mask set, HGW seatbelts, Anyz engine dress up set and a brass and resin undercarriage. Happy with all of that except for the cockpit set as it just isn’t that visible on the finished kit. I have a spare set of the undercarriage as I ordered 2 by mistake if anyone wants them. Thanks for looking.
- 17 replies
-
- 45
-
-
This is my first work in progress post so please be gentle on me. This was going to be my winter project, then when I had to go into lockdown for 12 weeks it became my virus project. Unfortunately I have to go into hospital on Tuesday so this may be as far as I get. The kit is great so far, I am not sure if the kit is a lot better than the Typhoon or if I have got better, but so far there are no issues putting it together. I went for a cockpit upgrade kit and I don’t think it was worth it. The seat belts from HGW are excellent and well worth the investment. I have freestyled the inside of the back of the aircraft as I want to leave the bottom hatch showing. I have taken some inspiration from Nigels Modeling Bench but not followed him exactly. I have the Anyz engine upgrade set and brass undercarriage which I have to make a start on but I am leaving that until after my hospital visit. Eventually it will be finished in the FAA scheme as I am ex RN myself so it seemed the obvious choice. These close up photos show up errors and such that I just cant seen with the naked eye 😢
-
Thank you all for being so welcoming on here. Time to add my current Work in Progress. This is almost complete, but here's where I am so far. Sorry for a lot of images, but I have been building this for quite a while now After starting this, I've discovered that the kit is no where near as good as the Aoshima one, but that didn't stop me from giving it my all I've had the Tamiya Lamborghini Countach and "Orancio California" paint sitting in my cupboard for way too long, so this is my next kit: I bought some yellow wire for the HT leads & sticky back suede effect cloth for the dashboard, but not sure if it will work, or be too thick to give the look of the real Countach dashboard: Unboxed: Not impressed with the decals, the's no decals for the badges on the back or the Bertone badge on the side Starting off I thought I'd test fit the bottom & interior. Hopefully, any issues should show up here, but everything slotted in quite nicely: Then although there are probably more important things to start with, I wanted to address my favourite little quirk on the LP400. Which is the "Periscope" Window in the roof. Apparently, the original concept was to use a periscope mirror instead of a conventional rear view mirror, but they found it too distracting when used on the concept car & went with a regular mirror instead. But the designers liked the detail on the roof so much, they left it in anyway! On the kit, this was just a moulded shape: So with a bit of cutting, cutting again, filing & sanding, I managed to open it up: UP PERISCOPIO! Then on to de-chroming the engine & wheels, using my favourite cleaning liquid which hasn't failed yet in removing the chrome without damaging the plastic in any way (what ever you do, don't use this on chrome taps! :shock: 😞 As always, worked a trick: Next up, I'll start on the body to get rid of mould lines & imperfections I sprayed some of the parts before moving on the body: Then, as the Zero paints had been sitting for about a year, I spent a good half hour shaking & stirring. Then set up ready for paint: 2 coats fully covered, but it still didn't have the depth I wanted: Needed to keep stirring the paint as the gold flake kept settling at the bottom. Not sure if you see in this picture: Then, I kept going with another 3 heavy coats. Now it looks really orange: But it did use alot of the paint: Now I'm happy with the body, I was going to move on the decals, but when I soaked the Lambo badge, instead of lifting off the backing, it started to disintergrate! I can only assume this kit has been sitting on a shelf for alot of years before I bought it. Lambo badge decals orderd from Ebay I shook all my paint tins vigorously, added thinners & then added more detail to the dash. Including the different colour buttons under the binnacle. The dash board itself is painted with Tamiya tyre paint, but it gives a good replication of the suede in the real car: Then I had to address the ignition wires. I had cut the wires a little too short to play with & connect the other end. So easiest solution was to cut the distributor caps off, glue in the wires, then add some styrene rod get them re-attached. It's still alot of wires into a very small space!: Then I painted the centre console with some Vallejo black metal & silver and used black flocking for the carpet. Even though I wanted a black interior, I wanted as many different textures & shades as I could get away with: Then in went the seats, seat belts & seat belt sockets on the sides of the seats. Gear stick & door handles finish it off: Engine now dried & all back in. It's not quite as neat as I would like, but I'm happy with how it's come together: The interior is now done. (That's stage 3 in the instruction book!) All seems to fit together still: I'm really happy with the Tamiya Tyre Grey colour on the dash. It looks more like suede than if I'd used the suede fabric I bought at the start. The top of the seatbelts are a bit of a glue bomb, but you won't see that when it's all together: Firstly, I cleared the body with Zero pre-thinned clear coat: Painted the black bits with Tamiya semi-gloss black & window trims with Vallejo black for a more matt finish: Quite happy with the results: Then, with a very small brush, tooth picks and cotton buds soaked in thinners, I carefully painted the badges on the back: Gave up on using the decal for the tint, all the decals in this kits have disintegrated upon hitting water. This one had a coat of liquid decal film, but still failed!: Decided not to use the decals for the rear lights either & thought I would get a better result by hand painting: Thanks for looking. Comments & tips greatly appreciated Cheers, Paul
- 21 replies
-
- 12
-
-
Finished this kit a couple of weeks ago, but only just got round to photos due to the weather. As I've just finished the Stratos as well and it's sunny I ventured outside with a bottle of cider to keep me cool in the hot sun 😉 The things we have to do for our hobby It's a great kit made even better with the detail kit, I'd highly recommend it, but if you do take it on, really study the instructions and do a lot of dry fitting Not brilliant photos, but it's not my forte. Any feedback or tips to improve welcomed Ian
-
 I made three vintage 1970s hang gliders to go with my Revell 1/24th scale Volkswagen Samba bus. I used paper (mainly), aluminium tubes, and thread. More detail on my web site: https://everardcunion.com/plastic-models-2/24thbrock82/#top
 -
As I've nearly finished the S4 barring a couple of detail bits I'm waiting on, I thought I'd choose my next victim. As I'm running low on white paint and awaiting supplies, I thought I'd do the Stratos as I seem to have plenty of red to hand After all the detail of the S4 I thought this as a curbside kit would be easy and quick as there aren't too many parts, but looking at it I think I'm going to have to do a lot of de-seaming, flash removal and loads of filling sink marks, but that's all part of the hobby I suppose
-
After the Peugeot 206 WRC I looked through the stash and decided it was about time I started the Group B monster the Delta S4 that I've been putting off I've never built a Beemax kit before, but I'm impressed with the fit of the parts up to yet. The engine is together and ready for a weathering wash and some of the pipework painted and ready for assembly, just need to do the banding Ian
- 49 replies
-
- 10
-
-
Evening all, My build of the London Black Cab has finished and the images submitted for judging. Here it is for the viewing pleasure of my fellow Britmodellers. Feel free to comment as you see fit. Trying to improve my photographs so fingers crossed they're better than previous ones. It was a fast build and learned a lot of good lessons along the way. It was built using only the kit and sprues in the box + a set of VIP Rims. Its the first time i have done a roof chop and certainly something i would like to do again given the right subject. All the photos are available in the Google photos album here: https://photos.app.goo.gl/bLSeaCMKymmCvPMZ9 The WIP is here: Photos are below: I hope you like it, cheers for looking. Coops Coops
-
 It's done boys, the beast is finally slain!!! This kit....where do I begin? A subject I wanted to build a kit of the moment I saw (and heard) it for the first time. An incredible car, that looks amazing and sounds amazing. I did the kit in the markings of the #67 car, driven by Brits Andy Priaulx, Harry Tinknell and Brazilian Pipo Deraini. On it's debut at the 2017 24 Hours of Le Mans the car finished 2nd in the GT Pro class and won the 6 Hours of Silverstone that season (see below). The Revell kit.......is a mixed bag. It's not a bad kit, but for a modern kit that was only released 18 months ago, it's disappointing. It has good cockpit detail, and good engine detail....but you can't see any of it. The kit decals are excellent with great colour density and printing, but then the fit of many of the parts is somewhere between vague and poor. The rear end doesn't want to go together. I had to cut the windscreen wiper off to fit the windscreen.... As for my build of it, it was a battle. I made many mistakes, and my car building skills weren't up to the job in places especially masking and painting a complex scheme on a complex model. But having said that, this is one of the best 4 foot models I have ever made. I turn around and look at it in the cabinet and it looks amazing. When I handle it up close I see a dozen or more little mistakes that can't be covered up with weathering! 🙈 I had my sons help with this, he did some of the interior painting and construction and a lot of the decalling. Here we are together at the 2017 Six Hours of Silverstone. And here he is now. How did he get so big in under 3 years???? Glad to have finished it, now 5 finished kits this year! I would also like to try the Tamiya Ford GT to see how they have gone about the kit (ie, how to do it better/properly) and paint it in a much simpler "civvie" scheme.
- 13 replies
-
- 16
-
-
 So here we go, this is my interpretation of Aoshima's excellent Lamborghini Countach LP400. I've always preferred the original Countach before it sprouted wings, wheel arches, massive tyres etc., so this one appealed straight away. It was a bit daunting when I opened the box, but in truth this is a very well engineered kit with very few issues. It's probably the best kit I've built so far, and I have to admit that the end result, being completely out of the box, is 90% down to Aoshima with only a small input from me. I'll start by apologising in advance if you feel there are too many photos (and I will admit that this post is very photo heavy), but the Countach is a very striking and photogenic car. The build thread is here if anyone wants to see how it came together. First up, the engine bay, which to my eyes looks very good even though it's one of those where you only really build the bits you can see, Still pretty effective though: Then it's onto the interior. the doors can be placed in the closed or open positions by means of removing them and positioning the hinge arm into one of two positions in the A-pillar - simple but effective. This also has the advantage that for photography you can remove the door completely giving an unusually clear view of the interior of the car: It's never the easiest thing to show the underside, particularly of a low slung sports car, but hopefully the mirror shots will give an rough idea. The parts underneath are all separate, with the coil springs (all six of them), being particularly effective at sucking time. And you can't even see them in these shots... And now it's time for the walkaround the car which I usually put in these RFIs. The trouble is that as opening the doors makes such a difference to the look of the car, I'm afraid there are in effect two walkarounds, hence lots of photos. First up, with everything closed. I mention at the end of the build thread about the doors not quite fitting perfectly. the truth is that they sit quite loosely and adding the door cards and chassis seems to have ever so slightly flattened the shape - they still fit in the door gap but now sit a little proud at the top. After that little lot, here's some (not as many) of it with the doors open. Those metal pins look good, but the boot one is a bit of a pain as it has a penchant for diving into the engine bay when you're trying to prop up the engine cover. Even so, it's still a good idea and looks much better than my usual method of supporting a bonnet (i.e. putting a cocktail stick in there). If you made it this far, thanks for looking in. All comments and constructive criticism welcome, I'm improving but still a fair way from getting a 10/10 model.
 -
Here's my attempt at the 1/24 Hellcat by Airfix. Apologies for the photos but as you'd expect this is a big beast so it's very difficult to get the whole thing in shot. It's built out of the box except for a set of HGW seatbelts and some in-wing resin fuel tanks (to avoid seeing empty space inside the wings when looking up through the undercarriage) and a resin engine core, both from Nigel's Modelling Bench. I've built it so that the upper and bottom engine panels are removable so as to see all that lovely detail that Airfix have included. If you're wondering how the unattached panels in front of the cockpit are able to stay in place you can see the complex technical solution I devised in the last photo. I really enjoyed building this kit and the detail that airfix have incorporated is amazing. I didn't use any filler other than to fix a few sink marks in a small number of parts and to smooth the joints on the propeller blades. I did a brief work-in-progress report of the latter stages of the build here: Thanks for looking....stay safe, keep calm....and build models! Next on the bench for me is Trumpeter's 1/32 A-7E Corsair
-
Finally got around to finishing this off from before Christmas, it's a great little kit that goes together really well, as do most Tamiya kits. The decals were challenging to say the least, I found that along with micro sol/set that you needed a bottle of red wine as well They all seemed to fit fairly well apart from the RH rear quarter which wrinkled a bit due to all the compound curves and edges, but it's not the end of the world My camera skills aren't up to much, but here you go. Any comments, tips welcomed Thanks Ian
- 10 replies
-
- 11
-
-
I'm now quite well into my build of the 1/24 Hellcat by Airfix, but I thought I'd share some pictures of where I've got to plus some brief thoughts on the build to date. The only after market additions I've used are (1) a pair of resin wing tanks produced by Nigel's Modelling Bench (in order to avoid seeing an empty space inside the wings) and (2) a set of fabric seat belts by HGW. I'll also be using the Eduard canopy mask set (I'm useless at masking canopies!) I've used Mr Color number 365 gloss sea blue for the outside and as you can see I've also started weathering by very gentle use of some ultra fine Flory polishing sanders. In summary, I highly recommend this kit. The fit of the parts so far has been excellent - I've only used tiny amounts of filler in a few small places along the top and bottom seams. There are a few areas of burring here and there (unlike the 1/24 Typhoon, which requires a serious amount of clean-up) but so far this has been very easily sorted with a sanding stick or blade. Two areas that could be improved - the kit seat belts are too thick for the scale - they can be used but the HGW belts are sublime. Secondly the machine gun barrels have very soft detail. I see that Master have subsequently released a set of brass barrels and I would certainly have purchased a set had I not sealed up the wings by now. Otherwise I can't really fault the kit. The engine and cockpit are mini-kits in themselves and the detail is superb. I added ignition leads by using copper wire to my engine. This was extremely fiddly and time consuming but definitely worth it in my opinion. The kit instructions are a great help in showing where the wires should go. On the subject of the instructions, they are generally excellent but I have noticed just a couple of incorrect part number call-outs and some missing colour instructions on a handful of parts. So far I haven't used many decals other than those supplied for the instruments and placards, but they have been fine so far. I'll post up a few more photos as the kit nears completion. If you've been wondering whether to buy this kit then I would say definitely don't hesitate - its too good to miss!
-
Having completed the Stratos is pretty quick time (for me at least), it's time to move on to the next project. This time, it's the turn of the Lamborghini Countach, which I picked up a couple of years ago. I had a read around before buying this kit, and Aoshima's Countaches generally seemed to get the best reviews. Having bought the kit, I can see why - even sitting loose in the box it looks great. First reaction on opening the box though was that not only did it look good, but also a little bit daunting as there are a lot of sprues which suggests lots of parts. I think it's only a similar quantity to the Trabant, so maybe not that scary. Work on this actually started way back in June with spraying all the chassis and bits which need to have the same finish as it, alongside the body and all the body coloured items. No pics of the chassis work in progress (just Halfords grey primer then satin black), so I'll go straight onto the body. Not only is the body crisply moulded, but there are also minimal mould lines and I only found a couple of sink marks on the rear deck above and to the side of the tail lights. Needless to say, they have been filled prior to priming. And with the filler sanded down. Aoshima do seem to have been very conscious of those thin A- and B-pillars, so plenty of bracing to be cut out prior to construction, but much better that than snapped or bent pillars. Even better, a solid part is provided for where the windscreen belongs to help protect that delicate A-pillar prior to the glass going in. You remove the windscreen brace first, fit the solid windscreen to provide strength, then remove the rest of the bracing. This is where it ended up after the primer had gone on. After that, it was a case of adding the colour coat. The Countach isn't a car which needs a bright colour to stand out, but I remember a bright orange Matchbox Countach I had when I was about four, so that was the obvious colour. I fully appreciate that in that photo it looks like I've peeled an orange and glued it to the body, but after it got a clear coat it does look much better. Currently it's part polished, so is a bit of a work in progress. I taped the sills on from behind for spraying, they're sitting in a box now and will get properly fitted in due course. This weekend is really where I'm starting the build proper. Tomorrow I should be able to provide a small update
-
Since coming back to modelling, I've only built aircraft (and some buildings for my modelrailroad). Back in the day I really enjoyed building cars as well, including some of the old MPC and more left field Japanese kits that were around then - well anything was better than Airfix whose only interesting "modern" car kits were the Mini and Lotus Cortina, their vintage ones were surpassed by Matchbox too. This is the Aoshima Mazdaspeed Roadster, which I received as a Christmas present. It's the NB Mk.2 Mazda Roadster / MX-5 / Miata (depending on market) fitted with Mazdaspeed bodykit, buckets and roll bar. I'm not entirely convinced about the headlight finishers or these wheels. It is not a model of the full-size Mazdaspeed limited edition, which was blue with gold wheels and the only factory turbo to date. The standard Mk.2 kit seems to be available from UK importers again as Aoshima have repopped it. The kit was very easy to build. The kit fits together easily having been well-designed and moulded, almost if not quite Tamiya quality. As always with cars itself about the paint job. This one has grey primer, 2x white primer, 2x matt red and 4-5x gloss red. Primers were Halfords cans and airbrushed reds by Tamiya. I rubbed down between each coat. For some reason I can't get on with airbrushing gloss varnish so the shine is 4-5 coats of brushed Klear. I enjoyed building the kit, and I'll be doing some more cars as there are a few in the stash. Cheers Will
-
So alongside the predictable Draken build I'm doing, I'm also going to be building this in the GB... The 1991 Rally Sweden winner, as well as being the winning car, it had a Swedish crew - Kenneth Eriksson and Staffan Parmander. It's a fairly simple kit, with a limited part count, no engine, etc. It does come with some material to make seatbelts from, some rubbery plastic sheet to make the mudflaps, a metal rod for the antenna and a small PE fret. I've also bought some aftermarket PE set that also comes with some seat belt material too. The decals look pretty good, though that's to be hoped for as other than the decals the exterior of the car is mostly white, other than the blue rear corners/boot which has to be painted onto the body - hopefully the line of the decal covers it, I hope the blue/white crossover doesn't show through the decals! The instructions look clear (well there aren't many parts), the English information panel is full of translation mistakes and misprints (though I kind of enjoy that). The only niggles are the clear parts aren't great, the tyres have a seam and the bonnet has a 2 nasty imprints that will need sanding out - I imagine that's because they based the shell on the road car version/other versions which have 2 large air-intakes louvers there - hopefully that'll sand out nicely.
- 7 replies
-
- 12
-
-
- Galant
- Mitsubishi
- (and 1 more)