Search the Community
Showing results for tags '1/144'.
-
 One of two builds that I completed over the weekend. This one had been sitting on the shelf of shame for a little while and was one of my entries for the KUTA GB in November. It has been brush painted with both enamels and acrylic paints and I used the Xtradecal RAF Update 2013 - 2015 set for the scheme. Eurofighter Typhoon FGR.4 ZK353/BQ, RAF 29(F) Squadron, RAF Coningsby flown by Flight Lieutenant Jonny Dowen by John L, on Flickr by John L, on Flickr by John L, on Flickr by John L, on Flickr by John L, on Flickr by John L, on Flickr by John L, on Flickr
 -
I wasn't quite ready to do more to the Taube (I've done well and want to build my skill before rigging) so I decided to start something else. With the wife away for the weekend I wanted to do as much as I could. Due to this I haven't taken as many progress shots to show you, but most of you know what I'm about now.
-

Hark!! the HERALD, engines singing...
pinky coffeeboat posted a topic in Work in Progress - Aircraft
...sorry. Hi, I received this kit just before Christmas and did a quick "comment" on it over in the Rumourmonger section. It's part of an ever expanding range of much neglected airliners being put out by the Russian model making company called Eastern Express (EE). The celebration amongst airliner modellers with each new release is tempered slightly by the high prices being asked and in some (but not all) cases, less than perfect fit. I've bought quite a few of their kits and some range from OK (Fokker F-27) to actually very nice (MD-87 and the McDD T-tail range they have). Hopefully this one will build up to be, if not very nice, then OK. Box art consists of an actual picture of the subject but some of their releases do feature a bit of drawn artwork, but some of it is a little bit suspect... Fuselage halves: Wings: Engines: and all the rest: Overall, the model isn't too badly made but there are a couple of small issues present, and but nothing insurmountable. The kit is available in four versions at the moment and I chose Channel Express, though I was, and still am, tempted by Air UK. I'll be starting it very shortly and it will be squeezed in amongst this lot - F-rsin ATR-72 (Flybe Nordic), Hasegawa YS-11 (Phuket Air), Eastern Express F-27 (yeah, I know - Air UK) and Shorts 360 from the same company (American Eagle). There are others that aren't on the bench at the moment but they may make a background appearance as I progress with this one. Jeff- 13 replies
-
- 11
-

-
- HP Herald
- Eastern Express
- (and 1 more)
-

Revell A350-900 1/144 'Skyteam' Vietnam Airlines
phil1 posted a topic in Work in Progress - Aircraft
Revell A350-900 1/144 'Skyteam' Vietnam Airlines On first impressions I thought this was quite an ugly aircraft but having seen it recently at Miami airport in Qatar airways colours I was quite surprised to see how elegant an aircraft it actually is. It's size is also quite deceiving especially in comparison to similar widebodies. Anyway I decided to buy the kit by Revell. It's a typical Revell kit, a lot cruder than zvezda with quite a lot of excess plastic clinging to numerous parts but nevertheless nicely detailed. One wing is warped which is nice so I've had to deal with that before i do anything by heating the plastic and laying some weight on it overnight. The kit comes with Lufthansa colours which i noted that all Lufthansa a350s have a SATCOM (or wifi not sure) antenna but the kit does not come with one Braz sell a few antenna's but knowing which one is a bit of a nightmare. Braz sell the 'SatCom CNA-2102 Antenna' for widebody airliners but it doesn't look right on reference shots of the A350. Does anyone know which type of antenna the A350 uses?? (placed near the tail) the obvious choice would be to make one but I rather find out if Braz do one for the sake of perfection. Progress and pics to follow..... -
 Here are the first four aircraft built as a project to represent aircraft associated (by me) with Filton airfield from the 1960s until the airfield's untimely closure in 2012. There will be more to follow, with an F111 and Concorde in the pipeline. All aircraft will be built in 1/144 scale, which is a little limiting but does mean the collection will not take over the entire house. More pics and details of the individual builds to follow. Some aircraft associated with Filton airfield in the 60s and 70s by jonbru0903, on Flickr From left to right in the picture above we have: G-AXLR, the VC10 test bed for the RB211 engine, initially designed for the Lockheed Tristar; D-BABC, the third prototype VFW-614 based a Filton for a few weeks as part of the development programme for the Rolls-Royce/SNECMA M45H engine; XA903, probably the third best known Vulcan, used for testing the Blue Steel missile among other things prior to arriving at Filton to be modified to carry the Rolls-Royce/SNECMA Olympus 593 engine for Concorde. Later it also tested the Turbo-Union RB199 for the MRCA/Tornado; Finally, on the right, G-AMPO a DC-3 used in the communications and transport role, primarily in relation to the Concorde flight test programme based at Fairford. Some aircraft associated with Filton airfield in the 60s and 70s by jonbru0903, on Flickr
- 37 replies
-
- 18
-
-
- Filton airfield
- Vulcan
- (and 5 more)
-
While I,am slowly working on HMS Eskimo in between giving my eyes a rest I have started on this fun build it will be OOB (Honest) after fighting all the little brass bits this is a bit of stress relief I had planned on doing this for the Pacific at war GB but it did not quite fit into the right criteria for the areas stated in the South East Asia campaigns so going to build it anyway where it fits with all floaty things I was inspired to get this kit a few years ago at SMW after following a great build by Gremlin 56 (RIP my friend) so will be trying to get some where near the top quality job he managed to pull off I will also be putting it in a small diorama trying to copy from the box art the colour scheme I will be doing And the cargo M4 Sherman's M8 Greyhound and Duce and a haff 3 of each beefy
- 89 replies
-
- 17
-
-
Hi Chaps. I am normally an Aviation modeller so somewhat new to this area of the site. As well as modelling my other interest here in Thailand is diving. One of the regular dive sites is HTMS Kram which was a WW11 landing ship medium. It looked a lot like this..... I decided to join my hobbies and make the kit above into the Khram. Revell released the kit in 2 versions, early and late. It appears that the Khram is an inbetween version with the gun turrets of the early version but the 40mm front barbette of the late. Of course by the time I learned this I had bought the kit and made a start. Planning to scratch build the different parts I built up the hull then posted on Britmodeller to see if anyone had the necessary parts spare. To my great surprise Bootneck responded and I found myself with the parts needed. I'll pick up the thread now with the cutting away of the early bow and assembly of the new parts. Here's the early bow semi dismantled and the rest of the hull as it is. I'll post more later. Colin
- 16 replies
-
- 6
-
-
- Royal Thai Navy
- 1/144
- (and 1 more)
-
Hello, This is my rendition of the early Vulcan B2 XH556 depicted as in No.230 OCU Finningley, ca 1962. The pic of the original is shown below. The Pit-Road/GWH kit and excellent Fundekals decal set inspired me to tackle the Vulcan subject. To portray the early B2 airframe the kit had to be backdated a bit - the nose cone and a tail-tip antennaes as well as in-flight refuelling probe had to be removed. Hopefully the coming GWH Blue Steel release will make things easier. The by-product of this build is the ShelfOddity PE set. MrColor GX Cool White and GX100 Super Clear III lacquers, which allowed for easy surface polishing, made the painting a relatively straightforward task. Finally – a big thank you to Leszek lejgo_inc for taking the photos. The mind-boggling task of preparing the final pics was my share. Beginning of 1960s, RAF Finningley. Waiting for the sunrise. The overall view. The bottom side – airframe from 230 OCU depicted here just started getting dirty. A couple of details. Thanks for viewing and best regards, Marek
- 34 replies
-
- 63
-
-

-
 Hello, I'm new here! I had the good fortune to discover Britmodeller recently and have been reading my way through all the fantastic builds, reviews and discussions presented here. I've been so impressed and inspired by all your talent, humour, enthusiasm, insights and cups of tea that I thought I'd sign up perhaps try to take part in some small way. I didn't want to show up to the party empty handed however, so I thought I'd show some of what I'm working on at the moment. I should probably come out with it straight away and say that I'm rather into 1/144 - for better or for worse! The scale has come a long way since the bad old days of Crown and Revell micro wings. There's some great stuff out there nowadays. Although sometimes things do take the odd step backwards... They say misery loves company. So here's my Zvezda 1/144 Fairey Battle. 😅 ********************** I've been cracking on with this for a good long while now, so I'll break it up into a separate posts to get things up to speed. I've always loved the Battle. It was on my wishlist of Airfix kits as a nipper but never seemed to appear in the shops round here. Decades later, and I was still wanting one. When the Zvezda kit arrived I snatched one up quick, hoping for a fast and accurate build. Instead I got a Monopoly counter. A wargamer's piece that could be assembled in minutes and was best admired by setting it upon a broad table, and standing arms folded and well back! So... Have at it I said. The first thing I did was to sand off the fabric effect from the rear fuselage. The Battle is an all-metal aircraft and only the control surfaces were fabric covered. Once that was done I shaved down the location lugs inside the fuselage to give them a loose fit. It makes it much handier to open and close the two halves doing a lot of test fitting and measuring. The measuring is where things began to get a little out of control. Using Richard J Caruana's scale drawings and a lot of photographs I was able to start taking spot dimensions to check accuracy of the kit. As I went I found that there were quite a few key areas where Zvezda's Battle was coming up short. A little later I also obtained some slightly better drawings by Kenneth Merrick and was able to use these too. Starting out with the fuselage, I took the position of the leading edge of the wing as a sort of datum and began checking everything from there. The length of the nose was good. The position of the forward canopy was just a shade too far forward and easily corrected. The sides of the pilots cockpit were cut too low and needed some work to build them back up. The decking behind the cockpit was meant to be curved rather than flat. These things seemed fairly straightforward and I planned to make a new canopy so I wasn't all that concerned. The further back I went the more serious things became however. The rear fuselage was short be about 2.2mm. Good enough for 144th is a phrase I never liked. It's the same as saying 9mm is near enough for 1/32. Imagine if Tamiya were out by that much on one of their Spitfires. People would be howling! I was able to trace the fault to the area between the two cockpits. Adding a spacer there would make the observers position the correct length when complete too. Below are a few shots of the build thus far. The plan is to open up the cockpits and show them with a new set of canopy pieces in the open position. The cockpits have been cut out and given a more accurate outline. A temporary decking piece is in place (I later decided to make this from brass) and I've started doing the setout for the rear cockpit opening. By now I was getting nervous every time I got the calipers out. The cowling was too sharp. The tailplane too short. The wingspan was pretty good and I didn't think to look much further than that. Later I discovered that the chord of the wings was just over 1mm too narrow. It's that slab of a wing that is one of the key features which really identifies the Battle, so I resigned myself to having to fix it. Shortly after that I also found that the wings sweep back too steeply by about 2mm at the wingtips. Add to that a number of serious issues with the underside of the wings, and I very nearly put the whole lot in the bin at that point. Eventually though I plucked up some courage and got out my trusty jewellers saw. I cut the wings down the centre, then scored the wings at the position of the undercarriage (the width of these is correct for 1/72 by the way) and bent the leading edges until they pivoted forward. After that I added strips of styrene to get the wings to the correct width. Getting there... After all that I began work on the rear cockpit area. I thinned down the sidewalls of the fuselage and corresponding area between the wings so much that I began to break out in a sweat. I couldn't just detail the side walls of the fuselage as the wing root joint would be much too visible from inside. Instead I made a U-shaped tub from brass that fitted up under the sill of the cockpit aperture. I added a floor and some sidewall structure from styrene and sprue. The first try at this was a little too shallow for the plethora of Vickers drums and other equipment, so I thinned things down even further and made a new-improved tub that looked much better than the first (took a quarter of the time too!). Lots of priming and putty followed in order to correct the fuselage profiles. The decking between cockpits was cut from brass and the holes drilled and widened with the tip of a scalpel. Cutouts for landing lights were made, and various other fiddly bits. I'll leave it there for now. I hope you like it. I'll add some more soon. Thank you all!
 -
I have managed to find the original thread that I had started for this build over in the WIP section, and I am ashamed to say that this has been sitting around the bench since October 2016. During that time it has suffered some minor damage - losing the tail from one of the wingtip launch rails, so that will need a bit of repair work. Here's a link to the build progress I had made. This is how things have stood over the past two years. by John L, on Flickr I made a bit of a restart last night by painting the undercarriage bays, inner areas of the doors, legs and wheels. by John L, on Flickr This shouldn't take too long to complete, then I can get started on the 1/144 Eurofighter.
-
I present in no particular order the dozen 1/144 airliners which I finished this year. I haven’t really been as productive as the number suggests - several of the models are delayed 2017 builds which for various reasons weren’t finished until early this year and some are older models which have been refurbished and repainted usually, although not always, quicker than building something new. The better and/or more interesting builds have been in RFI but several are appearing here for the first time. Thanks for looking and I hope you like my civilian collection. Happy Christmas and see you in 2019. Dave G Condor Boeing 707-430. Heavily modified Minicraft kit with decals from various sources. British Airways Boeing 767-336(ER). Revell kit with Two Six decals Air France Airbus A319-113. Revell kit with F-DCAL decals. Cambrian/BOAC Vickers Viscount 701. F-RSIN kit with Two Six decals Flybe Bombardier DHC-8-402 Q400. Welsh Models kit with RJS decals Hapag-Lloyd Express Boeing 737-4K5. Daco Skyline kit with mixed BOA, Drawdecal and Brasil decals. Built for the Boeing 737 STGB. LOT Boeing 787-85D. Revell kit with F-DCAL and Authentic Airliners decals Air UK Fokker F27-600. Doyusha kit with Two Six decals. Donbassareo Airbus A320-233. Revell kit with BS Modelle decals. Britannia Airways Boeing 737-204. Airfix kit with Two Six decals. SAS Scandinavian McDonnell-Douglas MD-81. Minicraft kit with Welsh Models decals. BOAC Cunard Vickers Super VC-10. Roden kit with Two Six decals.
-
Hello fellow modellers, finally there is this rare occasion in the space-time continuum when the wife and kids are away, I don't have to work and I find enough will power to start a kit, so let's start while motivation is at max level....I think you are all familiar with the kit, it's the... i tried every possible way to upload the pic....does it work?
-
Hi, A small blast from the past. The model represents JB-2 Loon, #902 belonging to the newly formed USAF, Alamogordo proving grounds (later Holloman AFB), New Mexico ca. 1948. The launcher with RATO bottles, front propeller, finer surface details and engine pipe plus its front support were scratch built. The wing was also repositioned - moved to the rear a little bit. It was my first approach to the glossy white paint (Gunze Sangyo C series) and it is a bit overdone. The panel lines (in fact welds) on the engine were drawn with very sharp pencil on matt Olive Drab paint and then the whole thing was weathered with artistic oils. First, a photo of the original airframe: Source: The Internet A few shots from production hall... ... and the final result: Enjoy! Marek
-
 It has been in the works long enough. Resin, vacu canopy and decals from Miniwing. Cannon fairings courtesy of Master. Brass by Shelf Oddity, which means it is the test article for the brass parts - an awkward way to promote our product and equally awkward way to excuse imperfections. First two photos with my trusty companion, who did the part chopping: and lent a helping brush: Now, the Attacker himself: "We there yet?" Thanks for watching!
 -
This has been trundling along for a while, this build. But a burst of energy (oddly enough as I was off work sick) has seen it over the line. The FM-2 Wildcat needs no introduction, and if it does then there are plenty of better written potted histories than I could manage. Suffice to say it was the last of the Wildcat line, with a more powerful engine and a larger tail to compensate. The Sweet kit is also well known. The only edits I made to it were to put a spare seat in the cockpit (can't be seen); to widen the diameter of the cowling (as the Shelf Oddity instructions wisely advise); and to put the prop in my dremel to lathe down the somewhat exaggerated staggered hub into a spinner. I was very tempted to use the lovely Shelf Oddity etch set for this (https://shelfoddity.com/index.php?route=product/product&product_id=58 quite challenging-looking but I think I'd be up to it). In the end, though, I've decided to save that or another 'cat... I did use the superb (https://shelfoddity.com/index.php?route=product/product&product_id=25) Shelf Oddity decals. These were an absolute joy to use, even considering all the many many little stencils I had to put on. Not a whisper of silvering and all perfectly well behaved. There is a small etch fret as well, so you can put rocket stubs and other little details on. I plan to do the blue and natural metal ones the decals provide for, so will use the full detail set and the subject-specific etch on a future build. The Naval Air Modification Centre (NAMU) trained mechanics and had a number of bright yellow aircraft assigned to it (including a rather fetching Helldiver). Here's my Wildcat parked up in September 1946... As well as being used to test things like HVAR rocket, they were used as trainers and tugs... I sprayed the whole thing in Mr Hobby 329 which worked well, but required quite a few layers to get the right depth and shade. I used oils, pencils and pastels to weather (I refuse to believe that a bright yellow radial remains clean for long). I was particularly smug about my little pitot which I scratch built... The aerials at the back caused me some grief, but I got there in the end (kept reminding myself that it was better than trying to rig a Gladiator...) And that's that. With something totally unrelated but also on the bench... And now this goes to join its sibling Wildcats... Thanks very much for looking!
- 10 replies
-
- 23
-
-
Just finished today. This is the 1/144 scale Hurricane Mk I by Sweet. Finished as YB-J of 17 Squadron during the summer of 1940. The cockpit was dressed up a fair bit and a new canopy was made. I also whittled down the propeller blades and moved the elevators. These aircraft by Sweet are great little kits and come two in a box. If you ever get the chance, I definitely urge you to have a go!
- 27 replies
-
- 56
-
-
-
Inspired by this topic I bulit my own Beluga too. Here it is:
- 22 replies
-
- 39
-
-
-
Bud Anderson is part of that rare breed of fighter pilots who first saw combat in piston engines fighters in World War Two and whose last combat mission was over the skies of North Vietnam. He claimed 16 and a half aerial victories (no strafing victories in there) making him a Triple Ace. There will probably never again be another pilot to equal this. Anderson flew with the 357th from Leiston and was its top scoring ace. He has remained lifelong friends with Chuck Yeager who also served in the 357th and once said of Anderson ‘he’s the best fighter pilot I ever saw’. Anderson named all his aircraft 'Old Crow' after a brand of Kentucky Bourbon. I imagine there was a good backstory and probably a wild party behind that, though Anderson claimed to be teetotal...! Anderson’s first aircraft was not his recognisable Old Crow Mustangs but a P-39Q Aircobra while on a training squadron in New Mexico. Although the aircraft was much maligned by US pilots, Anderson liked the nimble little Aircobra: “Actually I enjoyed the ’39—it was fast and looked good. I just wouldn’t want to take it into combat.” This is the F-Toys P-39Q which I repainted. I replaced the pitot with something less cannon-like, but otherwise OOB. Different sources give different views on whether this had a red tail or not. I went for a red tail, because it was more fun (and the squadron aircraft were repainted with red tails for war game exercises, though there is nothing suggesting this was done on Bud Anderson's P-39). A good, clean build with few fit issues. I had to strip off the canopy pre-painting which was tricky (and it's still a little too thick but I can't do anything further on that). The Revell MicroWings P-39 is a useless old mould, replete with acres of flash. But it does come with some nice decals for Anderson's P-39, which I could repurpose for this build. No issues with these - they worked well. In March 1943 Anderson was posted to the 363rd FS of the 357th FG, flying the Merlin-powered P-51B. The 357th was the second P-51 Fighter Group formed (after the 354th 'Pioneer' Group that Sweet caters for in this scale), but the first assigned to the 8th Air Force on long-range bomber escort duty. On 27 May 1944 Anderson (who by now had scored several kills) was caught in a dogfight with a veteran Luftwaffe 109 pilot. In a series of 'boom and zoom' vertical maneuvers, which pushed the aircraft to the very limits of what they were capable of, Anderson managed to get some shots into the 109 which crashed. Subsequently some historians have offered to try to identify the Luftwaffe pilot (who was obviously very experienced). Bud Anderson's response was typically modest and quite moving: he didn't want to know, there was no prestige in it; the German 'was just some guy trying to kill me, that's all.' In his second tour in late-1944, Anderson flew the P-51D, which I've made here. This was initially olive drab, but returning from one mission over the frozen wastes of northern Germany, Anderson remarked offhand to his crew chief that he felt conspicous flying a dark-colored P-51 against the white landscape. To his great surprise next morning his Olive Drab/Neutral Grey aircraft was gleaming polished aluminium. “Otto Heino, Mel Schuenemann, and Leon Zimmermann had stayed up the whole night through, hand-rubbing the paint off with rags soaked in gasoline. In the process, they had rubbed most of the skin off their hands. No one asked them to do that. No one expected it." I've modeled Anderson's P-51 after perhaps a couple of missions. I've left things quite clean and polished, bar some mud and exhaust staining (it was a cold, wet winter after all). This is obviously the Platz P-51. The Platz 'Aces of the 8th Air Force' box offers decals for this version of Old Crow and the olive drab version too (Cartograf and very nice) but I went for a mixture of those and MYK decals' offering. The MYK decals are superb at conforming to complex curves and were better for things like invasion and ID stripes, but some of the Cartograf decals were a bit sharper in terms of details - like the kill markings. I love the whitewall tyres - so cool and come as decals which makes life easier... Overall AK Interactive Aluminium, but I varied some of the panel colours with a variety of other shades. A fun build - I can't get enough of these Platz P-51s (which is fortunate as several boxes of the new issue just landed on my doorstep!). I suspect I will try and build several other of Bud Anderson's mounts, including his F-105. What an amazing man. Thanks very much for looking - as ever! Angus
- 12 replies
-
- 23
-
-
I love my 1/144 ww1 and early aviation but have been getting frustrated trying to get the poor choice of kits available to work well. I managed it with the Fokker eiii but the Sopwith Pup has been an absolute pig and it's gone back on the shelf, not something I normally do. I just feel like I'm putting in most of the time correcting errors instead of enjoying building due to poor kit accuracy. I'm fairly confident with my modelling skills and have scratch built before, but never an aviation subject. So I'll jump in at the deep end with a 1/144 Rumpler built Etrich Taube. One of my favourite aircraft. I have been especially encouraged by recent examples of early aviation models posted here.
- 55 replies
-
- 1
-
-
- 1/144
- Scratchbuilt
- (and 1 more)
-
 Eastern Express was not known for quality kits not too long ago. But they changed significantly and their Boeing 717 (McDonnell-Douglas MD-95) kit is a superb kit in every aspect. They recently released other Douglas airliners,such as the MD-87,DC-9-30 and MD-80 along with others. The MD-87 is already in my stash and the MD-80 is to follow but the Boeing 717 is now the first one that I have built. It is very detailed,although in my opinion they overdid it with the landing gear.It looks teriffic but there are so tiny parts,its almost impossible to hold them with a tweezer.If they snip off...its a victim for the carpet monster...it happened to the front landing gear which I had to replace with a piece from a AZ-Model DC-9-30... The fit is quite good but its not Revell Airliner standard and all parts need careful cleaning and dryfitting.If one's aware of that,the build is straight forward. The other thing that impresses me with those new Eastern Express kits, is their quality improvement on their decals.They are superb and nice to work with and Eastern Express offers some very interesting paint schemes on each of their airliners,which makes it difficult to make a choice... I really liked the Qantas Link scheme with the Tasmanian Devil I painted the whole fuselage with Revell gloss white,the wings are Testors aircraft grey and the metall areas are Revell metallics. Clear coated with Future. Hope you like her
- 21 replies
-
- 35
-
-
-
- BOEING 717
- EASTERN EXPRESS
- (and 1 more)
-
Revell's Boeing 707 kit has also many decades on its shoulders and had countless re-releases over the years. It represents more a 707-100 but Revell marketed it as AWACS,Air Tanker and in various Airline markings that are mostly 707-300 versions. They even released it as a United Boeing 720 ! Despite that,it is a nice little kit that can build up into a model that looks like a 707,although the fit is not the best. The worst part are the wing halves.For some unknown reason,Revell decided to split the wings right through the flaps which makes it very difficult to fill and sand the seam without erasing the engraved lines. For my build I used the AWACS kit,as I was unable to find the original Lufthansa boxing for a reasonable price. I wanted to build it in the Lufthansa scheme as a childhood reminder of mine. The Revell 707 was amongst my very first attempts as a kid in airliner modelling.The result was less than stellar but I had lots of joyful playtime with it back then. This time of course,I wanted to build it properly,so that the Revell Lufthansa 707 will finally find its deseved place in my collection. Its very difficult to find decal sets that actually match the Revell kit,and in my strive to rebuild it mostly out of the box,I had to find an original Revell Lufthansa decal set. Luckily I was able to track an almost pristine set down on ebay. The cabin windows are printed on the blu stripe but they are not very straight aligned.I used new windows from a 707 detail set that i had to apply individually to cover the kits ones. The cabin doors are taken from an Airfix 727 set and the rest comes from the detail set or spares. Painted entirely with Revell enamels, Enjoy
- 13 replies
-
- 30
-
-
- BOEING 707
- REVEL
- (and 1 more)
-
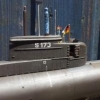
There are some accuracy issues with this kit, such as wood cladding on the metal cones which I had to replace with smooth iron. I'm trying to make realistic wood and iron plate textures. I still have to apply rust and weathering and detail parts, it looks quite flat and cartoony until I do so.
-
In 2012 I started on these: https://www.britmodeller.com/forums/index.php?/topic/234931616-a-pair-of-dc-9/ and finally I have finished them. SAS DC-9-20 I used LN-decals for it. They were hard and a bit brittle, I don't know if they are old. I have had them for some time now. Finnair DC-9-50. TwoSix decals was used on this one. They were soft and flexible but a little bit on the thick side.
-
I have managed to finish some old kits this summer. Boeing 727-200 A rather quick build. Less than two month. Decals from 26 decals. Well not a Swedish plane but Denmark is close enough. I have wanted a Sterling 727 since the 1970's and finally I have one. The Caravelle's wasn't as fast to build. I thing that I started on them around 2006. Decals from F-DCAL But I should have bought new engines for it but I didn't want to dig in to references so I built it out of the box. Not a Swedish plane but it says SAS on the side. Good enough for me. I think these decals came from F-DCAL as well. Thai Airways International was founded in 1960 as a joint venture between Thailand's domestic carrier, Thai Airways Company (TAC) and Scandinavian Airlines System (SAS) In 1977 the Thai Government bought out SAS and THAI became fully owned by the Thai government. I had built this Air France plane back in 2006 and after I had finished it I found decals for SAS and Thai so I had to buy more kits. Built straight out of the box with the decals supplied in the kit.
- 14 replies
-
- 31
-