-
Posts
211 -
Joined
-
Last visited
Unkempt's Achievements

Established Member (3/9)
792
Reputation
-
Up on ebay, just bought one. https://www.ebay.com/itm/326067649448
-
Oh, that's a good idea. Might try that. Of course, since posting that I found a bunch more stuff about it at http://flyingmachines.ru/Site2/Crafts/Craft28645.htm - including the fact that they got in through a trap-door on the top. Amazing.
-
Wondering if anyone can help. The Avro Type F was a 1912 enclosed cabin monoplane. There seem to be at least two full size replicas and lots of photos of the original available, but I can't find a single good shot of the interior - in fact, I haven't even been able to work out exactly where the seat is or how you got into the thing. Anyone got anything that might help? Or know how accurate the replicas are? Thanks!
-
Ah well, worth a punt. Good luck!
-
Just a thought re: the USB sticks: it might be that the printer is only recognising USBs with certain file systems on them. I just looked at the one that came with my Phrozen printer and it's FAT32; most USBs these days use NTFS. You could try formatting one of the sticks to FAT32 and see if that works. If all this means nothing to you, take a look here: https://www.freecodecamp.org/news/how-to-format-a-usb-drive-to-fat32-on-windows-10/ - especially the bit 'How to use Windows File Explorer to format a USB drive to FAT32'. !!! This will wipe the USB stick! Don't format anything that has data you need to keep on it !!!
-
Ah, well, here's the thing... you know how, in the first post, I was cocky enough to explain how to make a replacement cockpit? Turns out I shouldn't have been quite so confident. I messed that up, put it to one side for a couple of days and, well, time makes a) fools of us all, and b) most of an Edgely Optica. So, bearing in mind that I haven't yet got a successful replacement canopy (and also managed to lose the exhausts somehow), I think this is how it's going to look for the end of this build: And there it is, for now. I'm thinking of getting one of those vac canopies for it; I certainly want to finish it off, I think the livery came out nicely and I like the look of it, so maybe you'll be seeing it in RFI in a month or two.
-
Very quick update because I haven't done one for ages: struts, rigging! Still to do: cockpit, various details (tailwheel etc), paint touchups! ... also, now I look at that pic, try and clean some of that overspray off the windows. Bah.
-
Slow and steady wins the race, I hear. I think that might be a lie though... I did my decals. The library's closed at the moment for plague reasons, but luckily my wife works there so I got her to print them out. First go they came out about half size. No idea how. Next go, they looked OK. Close up - there's some smudging. Luckily I printed out four times as many of everything as I needed. I thought I'd try one of the smudged ones on my test I-16 to see that it worked OK. Oh hey, look at that. Thing is, I have white decal paper and transparent decal paper, and I meant to give her transparent, but I am a fool who had actually forgotten that I had white paper to start with. Luckily most of it is going on the white part of the plane anyway, so I lucked out a bit. Going to need a few little touch ups, and I'm not sure what to do about the underside code. Blow another sheet of decal paper, I suppose. Still, getting there! Pretty sure I can get this done before the build finishes. To do: attach top wing, struts, rigging, paint touch ups, cockpit + glazing. Maybe I can get another post out in less that a fortnight next time...
-
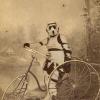
the Lindberg Line 1/48 Deperdussin 1911
Unkempt replied to chrispisme's topic in Work in Progress - Aircraft
Love these kits, I built the Martin-Handasyde a while back. Surprisingly good for their age. I wish we had some new tool pre-WWI stuff in standard scales, you can't even get a decent Wright Flyer which is usually regarded as quite an important part of aviation history. -
Well, I've been slacking off... sorry for the delay, a lot's been happening over here in the last few weeks. Still, I did manage to get some stuff done. First, I managed to knock the box over and completely lose the wheels. Good start! I found some subs in the spares box. Can't remember where the wheel outers came from (maybe a walrus?) but I know the hubs were a pair of tank wheels. They fit quite nicely: Got that all together and got some white on it: ... and then got some baby blue on the bottom I'm using 'Tru-color' paint for this one, mainly because the local art shop got some in and nobody but me ever seems to buy it, so it's going cheap right now. It's mainly for the train guys and that blue is 'Psg. Car Int. Lt. Blue' if anyone wants it. Sprays nicely though and surprisingly easy to clean up. That's about where the plane is now, but I've also started to look at decals. I need to match the codes and the airline logo; I think I'll paint the red lines, although I might change my mind later. So far I've got this: I tried to match the airways logo with a handwriting font but they were terrible; then I had the idea of looking on their website and yep, there's the logo right there. Just needed to change the colour to match. The serial codes I've nearly got a match for but the 'G' isn't quite angular enough. I might replace that with a cleaned up version from the photo. It all needs much more faffing around with scaling and colour matching and so on. And that's it for now.
-
Thanks chaps! Sorry, going a bit slow here. Moa, yes, the canopy is a little bigger but only by the thickness of the material and it's very thin; as I said, I might need to redo the canopy later, so I might try sanding down a little. Dom, that amazing, that's almost exactly what mine looked like - I wonder what percentage looked like that? Luckily everything else is looking fine and the fit so far has been very good, unlike some other builds in here. Anyway, I have been sticking a few things together: ... and painting a bit... ... and masking, masking's always fun Current state of affairs: I think I'm going to do lower wings, then paint, then upper wing. then finish off. Hopefully the next bit should go a little more quickly. I also need to start working on my decals, so that's a bit of fun photoshoppery when I'm not sticking or painting.
-
OK, canopy time. I've started by filling in the partial canopy I've got to create a correctly shaped (but full of plaster and filler) positive mould. This gets me the shape I want to do the mould with. Next, I found a bit of transparent plastic to make the new canopy out of. I always use some clear plastic bubble packaging for this; NOT bubble wrap, but the stuff on a cardboard backing that holds e.g. tools or whatnot when you buy them from a shop. This kind of stuff. You want a nice big flat bit of that. I didn't get a pic of the bit I actually used but it's similar. Now here's the tricky bit. You need to heat up that flat piece of plastic until it's soft and floppy. Doing it over an electric hob works. Ideally you can make a frame for the plastic to hold it while it heats up, although I didn't for this one. So, hold the plastic over the heat until it's soft, and then plunge that positive mould right into the soft plastic . I didn't get any photos of that bit because it's a two, preferably three-hand job. If everything goes right then you get something like this: It'll no doubt take several goes to get it right - I've done this several times before and I managed to get this one on the second go which isn't too bad. Trim off most of the excess: - you can see the mould former still inside the moulded transparent plastic. Separate them out: The new one's on the left there. It's very thin and fragile. You'll need to trim/file/sand it to final shape, and then a wash/coat of future to finish it up. I'm fairly happy with this one and I'm going to start in on the real build now, though I'm not going to rule out having to do this again at the end if I can't get it to fit properly or mess it up at the final fitting. Fun times ahead. Next up will be the interior. And I'm sure I don't have to say because we're all very sensible here, mixing melting plastic with electric hobs can be dangerous, so don't drop it or let it catch on fire, as that would be Bad.
-
Thanks for the encouragement chaps. Rabbit Leader, yes, that's the one I found but I can't find a local one (I'm in the US) and getting one from NZ would cost more just in postage than I paid for the kit. Moa, my error seems to be across at least three panels and I don't think I'm up to a neat repair. I'm going to do the canopy first though, I've decided, just to check that I can before moving on. Re interior colours - I did do an image search and found nothing, but I have recently been informed that 'moving pictures' are a thing these days. (What wizardry is this?) And here's a video of the very plane, complete with a few interior shots. Black and white for the passengers, interior green with black panels up front. Lovely.
-
Here we go with (another) Dragon Rapide! Lovely plane, reasonably simple kit but good for its age. I got this in an unmarked box from a guy on EBay but it's definitely a Heller so here it is: Instructions: Well that looks pretty straightforward. Judging by the style this is quite an old edition I've got here. Part 2: Blimey, I'm not reading that lot. More importantly, here are the bits: Looks like everything's present and correct, and a quick fuselage/wing dry fit looks like nothings too warped. Except this little fly in the ointment: Yeah, that's not going to work. I'm aware you can get a vac replacement for this but they don't seem to exist on this continent so I'm going to try a plunge mould for a replacement, which I have sort-of successfully done before. I did know about this before I bought it, part of the reason it was so cheap, so I'm not complaining. Oh, and the decals look a bit ropey, but I'm not going to use them. I'm going to have a crack at the 'Scillonia Airways' G-AHAG. Normally I'd stick a picture in here but I can't actually find a non-copyrighted one so if you want to see it, have a google or click this here link. I'm going to try printing my own decals, again something I've done a couple of times before, except this time it'll involve dodging the plague while using the local library's laser printer. I won't be adding anything except the new canopy and rigging so hopefully a relatively straightforward build. First up will be the interior, just as soon as I've finished squinting at photos to try and work out what colour it is, because all the photos I can find are exterior. Unless anyone's got a pic of the inside?
-
I just won an auction for an unboxed 1/72nd Dragon Rapide and, turns out, it's a Heller - I think I can wait a week or two to start it so I'm in.


