


IanC
-
Posts
3,767 -
Joined
-
Last visited


IanC's Achievements
")
Very Obsessed Member (5/9)
8.8k
Reputation
-
 That came out very well indeed. To me, the whitewash looks more realistic than the artfully chipped and worn variety more often seen on models.
 -
VESPID MODELS 1/72 Tiger I (Early Production), Kursk,1943
-
All done, after a coat of AK ultra matte varnish and a bit of weathering with enamels and pigments. I enjoyed the build despite a few constructional hiccups along the way, but there's no denying, I prefer sticking Tamiya kits together! Thanks to everyone who followed along. 🙂 The obligatory paint pot picture! Best wishes, Ian
-
Crusader Mk.l. 1/35th scale. Italeri.
IanC replied to Bullbasket's topic in Work in Progress - Armour
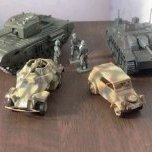
I've been doing a bit of internet research into Italian armour. These two shots are from the Italian State Archives: http://dati.acs.beniculturali.it/SecondaGuerraMondiale/ This can also be seen on the Wikipedia article on Bir el Gubi: -
Crusader Mk.l. 1/35th scale. Italeri.
IanC replied to Bullbasket's topic in Work in Progress - Armour
Interesting project. I've been reading about the action at Bir el Gubi, during Op Crusader, where 22 Armd Bde lost 50 Crusaders to the M13/40s of Ariete division. Is it possible the photo shows one of them? I shall follow along with the build! -
Certainly. Some people are clever enough to be able to build the link and length tracks so they can be removed for painting, or indeed build them as self-contained wheel/track units separate from the tank itself. I can't seem to manage either in this scale. What I try to achieve is a smooth track run with no gaps or kinks, which I find easier to do before any paint is applied. For the painting itself, I undercoat everything with Tamiya black. The airbrush lets me get into all the nooks and crannies (on other models I sometimes paint the hull of the tank before beginning wheel assembly, or paint the backs of the wheels on the sprue). I use a thin brush with some dilute black to get into any bits that the airbrush missed. Then it's on with the dark yellow and camo, this time trying to avoid getting the paint into the crevices and shadow areas. That done, I paint the tyres and parts of the tracks covered by the dark yellow. Absolute precision isn't required because the next stage - the weathering - hopefully covers up any ragged areas and blends it all together! I hope that's of some use to you. Ian
-
Thanks Simon. Well, actually, I built the good old Tamiya 1/35 Tiger in the same scheme many moons ago. But I sold it to a collector, so technically you're absolutely right! 🙂
-
Austin Healey 'Frogeye' Sprite - +++ Finished +++
IanC replied to CliffB's topic in Baby Boomers GB 1946-1964
I love it! Congratulations on a very fine build, Cliff. -
Nearing completion - the various bits and bobs have been painted with Vallejo Model Color, and the decals applied after a coat of Tamiya gloss. It's also been given a pin wash with Abteilung oils. I went with the kit supplied markings in the end as I couldn't justify buying an aftermarket set just for one model, so it's not a very original scheme. I forgot to mention that I left off the PE engine grills on the rear deck deliberately. I feel the real things are too fine to be replicated realistically in this scale. All that remains now is the matt varnish and some weathering.
- 55 replies
-
- 10
-

-
David August - Times Who? What? 😄
-
Excellent work. You've really made that dark gray scheme look interesting! The exhausts are very realistic too.
-
Another cracker. Love it!
-
A good bit of progress today with the basic Dunkelgelb and camo applied using Tamiya paints. Detail painting to follow...
- 55 replies
-
- 11
-
-
One of the best small scale Doras I've seen. Terrific paint work.
-
Airfix 1/72 P-51D Mustang simplified starter kit - due Spring 2024
IanC replied to klr's topic in The Rumourmonger
I just bent mine back into shape after heating them in some hot water for a bit. Had to do it for all four of the Mustangs I've built. I never could get the control stick out in one piece. 🙂
