

Baz962
-
Posts
21 -
Joined
-
Last visited
About Baz962

- Birthday 02/12/1962
Baz962's Achievements
")
Newbie (1/9)
9
Reputation
-
They must have been a trial, especially around the front sidepod area. Brave man!! I bottled doing the green bodywork decals very early in the build, just used them as a template for masking tape instead.
-
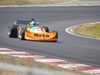
Hi, This is my first finished F1 car in about 30 odd years Kit: 1/20 Tamiya Aftermarket: Tabu & Indycal Decals. Scale Motorsport seat belt buckles. Scratch built belts. Paints: Zero, Tamiya acrylics and Alclad. There is a WIP somewhere, but can't yet figure out how to post a link to it! Thanks for looking.
-
Starting the beginning of the end now. The kit decals for the side pods were pretty nasty (old I think) and were silvering up something awful. Also managed to place one in wrong position, forgetting it overlapped the joint between side pod intake and the engine cover. Damaged it beyond reapair teying to remove it. Was stuck for a while, as couldnt get hold of replacement set anywhere,but luckily Indycals recently released a set of replacement/sponsor decals, which have helped me reapir my ham fistedness. All of the sub assemblies are decaled and have received a couple of coats of Zero clearcoat, now letting them dry for a day or so. Not sure whether to try polishing up or not yet; don't feel brave enough! Need to finish off wing mirrors and decide how to apply the 'mirror' finish to other side, probably use bare metal foil again. Pleased with how decals have gone on though. Just a few odd jobs to finish off and we'll be finished.
-
OK so we had a spare decal So the old, incorrectly aligned decal was smoothed over, and partially removed, new decal carefully cut around and placed in correct posistion Phew! Lesson learned; more care and attention required in future.
-
Nearly sorted now actually, and ridiculously easy! Because I chose to mask and spray all the green areas, rather than use the green decals over the yellow, I have a 'spare' decal to cover the incorrectly aligned one. Just need to carefully cut round it and apply! I'll put some images up tomorrow.
-
Believe it or not, I had already sprayed another 2 coats of Clear, only on that one part, purely to see how the the finish would look, and I don't fancy trying to clean that, then move the decal. I am happy overall, and learnt another important lesson!Cheers anyway and thanks for looking in
-
Considering the seat belts are decals, they look great. I have a couple of Revell F1 kits in the stash but no DTM's.......yet! Looking good so far
-
gasdriverca & Mafney I have buckled down & enthusiasm re-kindled! Made a start on decals, nose and front wing end-plates. One disaster already, Decals on the suspension cover are wrong way round/upside down. Ah well it was late!!! Have managed to get rid of most of over spray on the inside of the cockpit. Cotton bud and a tiny, tiny application of celluose thinners. Will touch up the inside of cockpit surround later. Ditto for the digital display inside cockpit. Bit blurred, but compared to image in earlier posts, an improvement.
-
Ferrari 312T4 - 1/20th Model Factory Hiro
Baz962 replied to Mark's topic in Work In Progress - Vehicles
Now following this with interest, as I have the Monaco version in my modest stash. Looking really good so far though. -
Revell 1/8 Corvette Stingray
Baz962 replied to roymattblack's topic in Ready For Inspection - Vehicles
What a great build. Loved the write up. We'll done Sir! -
Red Bull Renault RB 6, Tamiya 1:20
Baz962 replied to Sarcococca's topic in Work In Progress - Vehicles
Really enjoyed looking at your build so far, beautiful work. So neat. -
Has it really been 9 months since I updated this? Blimey time flies! I actually packed kit away when we went on holiday end of May last, then didn't look it it again till mid Summer, and really seemed to loose the inclination to do too much, not helped by the fact one of the white upper front wing planes has dissapeared (probably one of the cats) and I badly oversprayed the inside of the cockpit. Just goes to show you can never mask too much. Anyway a few images to show where I am now; Managed to overspay the decals inside the tub, And the driver display! Lost one of the white upper wing planes, and had to build another (left hand side) Undertray and radiators installed, might risk weathering the radiator cores with a dark wash too add some depth. Lots of the component parts ready, just need to push myself to finish, really lost the love for this kit. Dry fit of progress so far; Loads more still to do, but think I'll get some clear coat on, and apply some decals. Might then start to feel a little better about the whole thing.
-
Borrow a hand-held hair drier from the lady in your life, set on the lowest warm setting. I find this usually softens the decals up a treat, and persuades then to fold over curves more easily. Just be careful!!
-
I'd be in too, although not sure what with yet.
-
Maserati 3500 GTI -- Monogram 1/25
Baz962 replied to cmatthewbacon's topic in Ready For Inspection - Vehicles
Beautiful car Beautiful work Inspirational!
