


Iain Ogilvie
-
Posts
4,848 -
Joined
-
Last visited
1 Follower

About Iain Ogilvie

- Currently Viewing Topic: Mustang IV 'Dooleybird' Query
- Birthday 22/05/1966
Recent Profile Visitors


Iain Ogilvie's Achievements
")
Very Obsessed Member (5/9)
1.3k
Reputation
-

HMS Victorious (1961) in 1/200
Iain Ogilvie replied to Dancona's topic in Work in Progress - Maritime
Wow! How on Earth did I miss this one - absolutely superb project! Iain -
Brilliant! Don't suppose there are any plans out there for this airframe? Iain
-
Brilliant work! And some photos/info I hadn't seen before. Must pay a visit to Eastchurch Aviation Museum sometime... Iain
-
1:32 Hawker Siddeley Andover E.Mk 3A - 3D Print
Iain Ogilvie replied to Iain Ogilvie's topic in Work in Progress - Aircraft
No, that's not the issue at all! Surface prep is reasonably quick in most areas using primer and wet and dry. Yes - it's work, but it's really not that taxing. The model is taking time to get to this stage largely because of the modifications I've chosen to make - on a large scale model. It's rare that I leave *any* kit alone, let alone a very limited run 3D printed one. I'd hate to put off prospective customers - Toshihico has designed and printed a great product IMHO - but you need to go in eyes open and understand it's a canvas. Way better than scratchbuilding, or a vac/resin kit as a starting point in my opinion - but they *will* need modelling work. Go in with that mindset and you'll enjoy the project. I've chosen to remove the nacelles and flaps from the wings - so that's a lot of clean-up required from that - and that has taken most of the time. I strongly suspect Ladislav could run off some engines/nacelles in 1:72 - drop him a line, he's a really helpful chap! Have fun, Iain- 86 replies
-
- 2
-

-

-
- Andover
- One Man Model
- (and 1 more)
-
1:32 Hawker Siddeley Andover E.Mk 3A - 3D Print
Iain Ogilvie replied to Iain Ogilvie's topic in Work in Progress - Aircraft
More wing and fuselage prep this evening - and decanting that spray can filler primer into a cap so that I can do some pin-point filling with a brush - including some smoothing of the side window apertures.. Fuselage interior tube has been given a final coat of filler primer and, once this is sanded back, I'm going to spray the interior colours of White, Light Blue and Grey. A dry assembly of the fuselage yesterday has shown that even with the rear and side doors open - it's only a few areas of the interior surfaces that will be visible - so I'm going to kick my usual OCD into touch on this and go for a 'looks good' were you can clearly see the surfaces and 'that'll do' for the rest. This means that I may be able to get the Port and Starboard fuselage halves together - and the tail section bonded on in the near future - which will be a BiG step forward psychologically. I'm back to not being able to put this one down at the moment - but letting things dry fully between filling and sanding means I have time to do some other stuff too... Pix when I've sprayed the interior colours - and I have the wing sections fully prepped and back into grey primer. Iain- 86 replies
-
- 1
-
-
- Andover
- One Man Model
- (and 1 more)
-
1:32 Hawker Siddeley Andover E.Mk 3A - 3D Print
Iain Ogilvie replied to Iain Ogilvie's topic in Work in Progress - Aircraft
With the wings getting there it was time to try out the new Dart nacelles for the HS780 designed and printed for us by Ladislav Hančar: HS780 on the left, HS748 on the right - quite a difference! HS780 nacelle prints - port side upper and lower removed from supports - starboard side as supplied. If you're not used to working with 3D Printed resin parts then all I can advise is take your time, use really sharp/fine side cutters, work methodically from one support to the next - and, whatever you do, don't drop them on a hard surface as they will probably shatter! Clean off any residual 'nubs' with a fresh scalpel blade and then true the surface with a good quality file. Ladislav tweaked the fit of the original HS748 components to fit the One Man Model printed parts from photographs I took - and has got the fit incredibly close! In these images the parts are just approximately placed in position on the wings - very pleased! Some fettling will be needed, but nowhere near as much as I'd been expecting. Onwards and forwards... Iain- 86 replies
-
- 6
-
-
- Andover
- One Man Model
- (and 1 more)
-
1:32 Hawker Siddeley Andover E.Mk 3A - 3D Print
Iain Ogilvie replied to Iain Ogilvie's topic in Work in Progress - Aircraft
Time for a long overdue update - I have been tinkering in the background - quite a bit of work, but not a lot of noticeable progress - such are the ways of a build like this. Wings - surface sanded with coarse wet and try on my sanding bar - followed by a couple of coats of automotive grey primer - followed by a few coats of my favourite yellow filler primer: Marks are where some slightly uncured resin (old stock - and may not have been mixed thoroughly enough) has bled through the paint. These areas have been scraped back to solid material using a small, round edged, scalpel blade. These areas will then be filled with superglue and, once that's dried, smoothed off with a little filler. This will be mostly hidden by the nacelles - but it's well worth stabilising the area to prevent issues in the future. Other than that, they are coming along nicely and won't take much now to bet perfectly smooth, ready for surface detailing. Prep work has also been ongoing with the fuselage interior - smoothing print lines and the front/rear joint in preparation for paint and detailing. Current plan is to assemble the two half shells, add the tail unit, and clean the joints before inserting the floor section, with internal sections, from the front afterwards - a little like a ship in a bottle! 🙂 Iain- 86 replies
-
- 2
-
-
- Andover
- One Man Model
- (and 1 more)
-
Pups and Bulldogs, East Leeds Airport (Church Fenton) 1st July
Iain Ogilvie replied to Mr T's topic in Aviation Photography
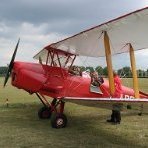
Hi Mr T - sorry - just spotted this - lovely images! We were there in G-BZXZ/XX629 - have lots of images from the day which I can post if there's interest - here's one from the formation that afternoon: Very impressed with Church Fenton/Leeds East! Iain -
Hi Troy, Correction on the Eduard instructions - from their other 1:48 boxing - calls out Ocean Grey rather than Dark Sea Grey - but could easily be a typo/error: Just had the 'Tempest Squadrons of the RAF - by Chris Thomas' arrive and that helps - have 'Tempest: Hawker's Outstanding Piston-engined Fighter by Tony Butler' on the way tomorrow to see if that has any images. Have looked to see if I can just get a copy of the Eduard 'The Ultimate Tempest' book - but all routes lead to buying the whole kit - and I don't build 1:48 - so, yes, would love to see a relevant scan if possible? iain at aeronut.co.uk. Regards, Iain
-
Brilliant - many thanks Troy - will see if I can get hold of a copy. Since I posted I found some archive images of Tempest IIs on the dump at Butterworth. Iain
-
Hi all! I'm just about to start spraying up a 1:32 Tempest II that's been sat on the shelf of doom for waay too long and restore some MoJo. Really want to do a late Firedog 33 Sqn machine in the last camouflage - as an old friend of mine, Chris Armstrong, was an armourer on 33 during the Malayan emergency - he primarily worked on the Hornets - but I believe they were just transitioning from Tempests when he arrived. Sadly Chris is no longer with us to advise. I'm led to believe the last scheme they wore was PRU Blue undersides - Dk Green and Dark Sea Grey upper surfaces - painted over the silver finish - which in turn was painted over their original camouflage. My options, so far, appear to be: PR771/5R-D - red spinner PR805/5R-S - blue spinner (Eduard 1:48 kit has this option - but calls out Azure Blue/Dk Green/Medium Sea Grey as colours?) Does anyone have any more thoughts/input on the subject - and any pointers to period photos - apart from one image I'm drawing a blank... Iain
-
1:32 3D Printed RAF Boeing P-8A Poseidon
Iain Ogilvie replied to Iain Ogilvie's topic in Work in Progress - Aircraft
Hi James, Base 3D model at 1:100 was done by 'sandman_d' and was available on Cults - but it's not currently listed I'm afraid: https://cults3d.com/en/users/sandman_d/creations Might be worth dropping him a line if you're interested? Iain -
1:32 Hawker Siddeley Andover E.Mk 3A - 3D Print
Iain Ogilvie replied to Iain Ogilvie's topic in Work in Progress - Aircraft
The nose section is getting there - but still some areas to sand back/re-profile. I've marked the areas to be reduced with the letter 'x' - and a dot where I need to add a little to the nose to make it just slightly sharper. This is after a lot of pouring over photos and comparing with the printed parts. I think it will still be a little 'jowly' in plan view - but I don't think it'll be *that* noticeable on the finished model. If I can get these tweaks done by the weekend I can do some surface detailing of this area - and make a start on the interior... I might even get some filler primer on the wings. Really enjoying this - and the strength of the printed parts makes things so much easier than a vac! Have fun... Iain- 86 replies
-
- 5
-
-
- Andover
- One Man Model
- (and 1 more)
-
1:32 Hawker Siddeley Andover E.Mk 3A - 3D Print
Iain Ogilvie replied to Iain Ogilvie's topic in Work in Progress - Aircraft
Now - back to those wings... Earlier on I'd posted images of the assembled wings - minus the removed flap areas. The flap areas need boxing in - both for neatness - and for strength. I wanted to get these boxed in before smoothing and truing up the wings. Photo below shows the Starboard wing (upper in photo) with new styrene sheet sections added - and Port wing (lower) withe the edges trimmed back to the wing surface/rear edge after allowing the Plastic Weld to dry off for 24 hrs. Vertical section is about 0.5mm thick - horizontal is 1.5mm - wing now a lot stiffer - and straight along the rear edge. Flaps will need to be drawn up in CAD and printed on my 4K resin printer - and will be fitted in the fully up position - so no detail needed inside the flap area. Easier to cut sheet over-size and trim back - note that rear edge is not the trailing edge - that will be formed by the flap sections when eventually fitted. Below is the Port wing - which has had everything trimmed back and a start made on sanding everything flush along the wing surface - in this case using 60 grit Glass Paper on a flat surface - a la vacform... Hopefully get some of the 'low' areas on the wings filled and sanded later in the week. Model on dudes! Iain- 86 replies
-
- 5
-
-
- Andover
- One Man Model
- (and 1 more)
-
1:32 Hawker Siddeley Andover E.Mk 3A - 3D Print
Iain Ogilvie replied to Iain Ogilvie's topic in Work in Progress - Aircraft
More finessing on the nose section - now with a few layers of Filler Primer applied for final shaping. A few blemishes filled with Revell Plasto filler. These parts spend their life in the warm airing cupboard when not being worked on - to ensure that every layer of primer and filler is properly dried off at each stage. As the nose is a very obvious/most looked at section of any model it's important it's as good as I can get it. Back in a mo... Iain- 86 replies
-
- 3
-
-
- Andover
- One Man Model
- (and 1 more)