

Arie
-
Posts
362 -
Joined
-
Last visited
Recent Profile Visitors


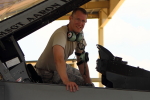
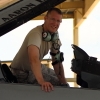
(510x640)-Copy(95x120).thumb.jpg.33073138e01aa81779639a845926753e.jpg)


Arie's Achievements
")
Established Member (3/9)
279
Reputation
-
Exquisite...truly!
-
F-16C Block 50 "Mig killer" Tamiya 1/32
Arie replied to Tomas Pelej's topic in Ready for Inspection - Aircraft
Got to second that--as another former '16 chief, you nailed this my friend! The banged-up ladder is awesome & the wheel bays are practically inspectable--an absolutely sensational Viper! Okay, so this is the crewchief coming out--strictly speaking, you still need a few "remove before flight" tags. Pure trivia at this point--to consider the jet "safe" on the ground, we also "pin" 1. the ejection seat & canopy jettison handle in the cockpit (l/r front of the seat & left cockpit wall) , 2. the tailhook (midway down the shank), 3. the external tanks (inside of the wing pylons), and the Emergency Power Unit (EPU) (left side of the fuselage, aft of the inlet.) If you're depicting the gun as loaded, you'd also have one next to the vent door on the forward, underside of the left wing--as I said, pure trivia--but that's what we modelers thrive on, right? Safety first I'd link some pics, but I don't want to detract from this awesome build--there are likely plenty of references if you're so inclined. Again, thanks for sharing, I'm in awe! Arie -
1/72 Beech twins--MC-12 Liberty & RC-12 Guardrail
Arie replied to Arie's topic in Ready for Inspection - Aircraft
I am not 100 % certain, my kit only had one set of engines, which were separate parts from the wing. The fit was poor, and it would have been nice if they were one piece! I know that the earlier C-12 variants had different engines with a more circular air inlet. Otherwise, I'm not really sure... Cheers, A. C. -
1/72 Beech twins--MC-12 Liberty & RC-12 Guardrail
Arie replied to Arie's topic in Ready for Inspection - Aircraft
The antenna arrangement in the instructions is accurate for the aircraft depicted, as far as I can tell. If you compare photos, the MC-12W has flown in a variety of arrangements--the original aircraft were literally purchased from private owners & converted. As a result, no two aircraft were identical at the outset. Later aircraft were new-build from (then) Hawker-Beechcraft, and are much more standardized (roughly 2013 and beyond.) Mine is a poor guide, since I'm planning to add the SATCOM hump, I configured as a late-model aircraft, but haven't finished yet... Good luck on the kit! It was honestly a lot of fun, minus the aforementioned frustration. Thankfully, you won't have to repeat this ugly mess! : Cheers, A. C. -
1/72 Beech twins--MC-12 Liberty & RC-12 Guardrail
Arie replied to Arie's topic in Ready for Inspection - Aircraft
You & me both! I'd love to build a few more, but cost + pain of working with what's available is a real show-stopper. I'm hoping Amodel will come up with something--their just released C-12J (Beech 1900 commuter airliner) is fantastic, though my copy seems to be missing the military-specific equipment sprue. Such is life! Cheers, Arie -
I've long been a fan of the Beech Kingair & so decided to take on two, very different kits--Mach 2's RC-12 & RVHP's MC-12. The Mach 2 kit was a pig (surprise, that!) and basically required a complete re-work. The engine nacelles represent the very-early C-12, with the round profile and had to be re-sculpted with milliput & profanity. The undercarriage was unusable, and I swapped them for part from the spare bin. Most of my effort was expended replicating the various structural reenforcements, lumps and bumps of the RC-12--I decided to model the latest RC-12X, instead of the kit-intended K-model, which required sculpting the ironing-board SLAR antennas on the aft fuselage & building-up new wingtip pods. I used the spare vacuform canopy from the RVHP kit--they pack it with two!! RVHP is the exact opposite of Mach 2, and the MC-12 Liberty is no exception--it's lovely! Warning on the vacuform canopy though, it fit the Mach 2 aircraft, but was too wide for it's intended kit!! In retrospect, I should have shimmed the resin fuselage with styrene sheet before joining! Lesson for next time. Only major mod was cutting out the crew door & adding an operator's station--I still aim to sculpt the aft SATCOM hump to make it a later version of the MC-12, though it's finished as an early version for the time being. Both kits were expensive, but the MC-12 set a record for damage to my pocketbook! I think it was worth it & my wife has come 'round Amazing what flowers will do!! And the MC-12!
- 15 replies
-
- 24
-

-
Orange Gannet--Revell's 1/72 Gannet T.5--Pics added!
Arie replied to Arie's topic in Ready for Inspection - Aircraft
I painted it with Modelmaster's non-buffing aluminium--best I can tell, the Gannets were painted a lacquered silver, rather than being natural metal. A. C. -
This project began as an Ebay mistake--a poor resolution photo/seller mis-ID as a 1/72 scale model meant my brilliant "deal" wasn't much of a catch after all. Not one for self-pity, I decided to take on making this toy into a decent model. The battered hulk wasn't much worse than the original model, in terms of usable parts--the toy props had to go as did the massive rivets, cockpit windows were never part of the kit, nor was a nose-wheel bay. I decided I wanted the aft door open, so I sawed the aft fuselage off, built a cockpit, weapons bay, and aft cabin plug & sealed it back up. Then the sanding began--the odd hump for the weapons bay was ridiculous, as were several other contours back by the tail. I sanded all the way through the fuselage, had to fill it with milliput, and even still wasn't able to eradicate the hump and still blend the fuselage with the wings. The scratch built undercarriage are 1/144 scale, but the rest of the model must not be, because the bay doors dragged before I was obliged to clip them--don't try closing them, they won't fit The engine nacelles were upside down--well, you get the picture... Decals came from an RCAF CC-140, a larger scale police car set & stock stripes--still not 100% satisfied, but it came out better than it was! AND before....
-
Truly lovely--definitely deserves the honours! I'm not certain why, but too-wide vacuform canopies seem to be a common problem with resin kits. I've built two resin kits like that--one, RVHP's 1/72 Beech MC-12 Liberty was an otherwise fantastic kit. Its disappointing to spend that much on a kit & have such serious problems, but you've overcome nicely! Well done indeed... A. C.
-
SF-5M AE.9 Ala 23 Spanish Air Force 1/48
Arie replied to exdraken's topic in Ready for Inspection - Aircraft
Lovely build! Did the practice bombs come with the kit? I love the alternate loadout shots--nice touch! A. C. -
Put Your Sunnies on, 1/72 Hasegawa RP-3D "Paisano Tres"
Arie replied to wallyinoz's topic in Ready for Inspection - Aircraft
Great looking bird! Always love the Orions & you can't go far wrong with bright orange! Cheers, A.C. -
Orange Gannet--Revell's 1/72 Gannet T.5--Pics added!
Arie replied to Arie's topic in Ready for Inspection - Aircraft
Glad to hear you avoided my mistake--I didn't weigh-out what I put in initially & ended up having to drill out the nose and cast a solid lead plug to fit! Might be a good choice to close the bay too--between the flaps & the bay doors, there's loads of gubbins hanging off, ready to accidently snap-off. Truly looking forward to seeing your build! Cheers, A. C. -
Orange Gannet--Revell's 1/72 Gannet T.5--Pics added!
Arie replied to Arie's topic in Ready for Inspection - Aircraft
Per request, here are a couple of shots of the whole "family". The AEW.3 is the Airmodel vacuform conversion with components from Frog's kit & a generous amount of re-profiling & scratch building. The Trumpy kit is a mutt of a different sort--Gannet nerds will note the Brawdy tailcode are wrong for the late-style roundels--I'm converting it over to the Lossie station flight bird, which is the only one I've seen sporting the late-style roundels, which I prefer. In any case, I still need to swap out the tail codes & serials, but am being a bit lazy & don't fancy taking the folded wings apart, decaling, and replacing, as you can see. Many thanks for all the kind words...Without further ado! -
Orange Gannet--Revell's 1/72 Gannet T.5--Pics added!
Arie replied to Arie's topic in Ready for Inspection - Aircraft
Thanks for the kind words--the faded effect is a multi-layer ordeal. I start with a white basecoat to intensify the final colour, then overspray with yellow. Some paints actually fade to yellow, then white, so this layering leaves me the option to either not fully over-paint, or lightly sand back to reveal the base colours. For the final Dayglo, I started off spraying the panel lines, then very lightly sprayed the rest of the top panels, giving the underside thicker coverage. I felt I overdid the orange, and actually went back with a very thin mixture of white/yellow and highlighted the middle of the most faded panels. My airbrush is very basic & has some trouble controlling coverage in small scale, so some of you with better kit might be able to get even better results. Cheers, Arie -
Orange Gannet--Revell's 1/72 Gannet T.5--Pics added!
Arie replied to Arie's topic in Ready for Inspection - Aircraft
Many thanks all, I definitely can do--I'll get the camera out for a 'family photo' after work--still getting 'round to building a COD bird, but it's in the queue!