


chrispisme
-
Posts
370 -
Joined
-
Last visited
-
Days Won
1
Recent Profile Visitors
1,740 profile views


chrispisme's Achievements
")
Established Member (3/9)
2.3k
Reputation
-
It's Lou IV Captain but not as you know it.
chrispisme replied to stevej60's topic in Ready for Inspection - Aircraft
Oh you are a bear poking trouble maker aren’t you!? nicely done! -
Well done!
-
1/48 Academy A-10C Thunderbolt - "Hoosier Hog"
chrispisme replied to eng's topic in Ready for Inspection - Aircraft
Love it -
When you want a U-2 R (and later) but have a C in the stash. I've added a few bits and pieces here and there to make it "look" like a R. It's the very old C kit the spine cut down, some 1/35 Blackhawk fuel tanks, parts from a Trumpeter 1/32 mig 29 and various other bits added (awaiting decals) some pics of the "scratch stuff" Thats it, in a nutshell as always, striving for mediocrity Thanks for looking
- 4 replies
-
- 28
-

-

-
P-8A Poseidon MRA.1 "Pride of Moray"
chrispisme replied to gengriz's topic in Ready for Inspection - Aircraft
Beautiful piece of work! -
The Mighty Concorde (a French one though)
chrispisme replied to TheFlyingDutchman's topic in Ready for Inspection - Aircraft
A thing of beauty -
Agreed! beautiful job on that!
-
This was a used/ started kit (all the upper and lower wing halves were joined) there were no decals and a couple of missing parts (nothing big) I Started it last Sunday, finished today (Saturday) but there's very few parts to the kit and fit was fairly good I added tape seatbelts brake pipes and ignition cables...and a bit of paint Thanks for looking
- 3 replies
-
- 18
-
-
Hold my beer....Trumpeter 1/32 CF 121 Redhawk
chrispisme replied to chrispisme's topic in Ready for Inspection - Aircraft
thanks! -
Well done sir! be warned the (Tamiya) Tomcat is addictive! I built one, loved it so much built 2 more then a trumpeter 1/32! I think I’ve got that monkey off my back.
-
Not so much a "Ready for inspection" as just another finished model. This is a WHIF project based on a April fools joke (google Mig 21 redhawk) the model is painted with Alclad metals, Vallejo and, Tamiya ascrylics and a Kg of putty As always, striving for mediocrity The fit of the canopy(s) wasnt great and I didn't get it perfect, my clearcoat blemished the bare metal on the port side behind the cockpit (I may try polishing that out) I added an aoa vane and cobbled together spare decals from other builds, mostly Leading Edge decals, some Hobbycraft Canada and Revell 1/32 Huey
- 4 replies
-
- 19
-
-
Lockheed HC-130N Hercules
chrispisme replied to Romeo Alpha Yankee's topic in Ready for Inspection - Aircraft
Awesome!! -
Trumpeter 1/32 F-14D with a buttload of resin
chrispisme replied to chrispisme's topic in Ready for Inspection - Aircraft
Thanks so much mates! -
Trumpeter 1/32 F-14D with a buttload of resin
chrispisme replied to chrispisme's topic in Ready for Inspection - Aircraft
The cuts made to remove the kit parts are critical and there’s a cast flaw on one of the intakes (which Cris at Zacto owns up to in his instructions) and indicates the easiest way to fill the resultant gap. I made all my cuts with the issue in mind thinking I could alleviate the problem with the foreknowledge in mind, nope it still ends up having a gap (although slight) at the rear edge of one Zacto engine intake where it meets the kit part. The instructions aren’t very clear on how to cut the upper wing outflow vents, I cut one of mine (the first one) in the wrong place and had to re-install and fill some kit plastic. The open wing Bladders have to be thinned where they join the upper part of the fuselage to lower them or a step will occur. I’m not sure if the closed wing bladders have the same issue. if you haven’t got them, definitely go get the Reskit F-14 landing gear with wheels these things are a work of art all on their own. I took the ones I bought to a club meeting for show and tell and the folks there were jaw dropping gob smacked, I did nothing to my landing gear but paint them and glue them on…they even fit the Aires gear bays like a glove. thanks for the encouraging feedback/ positive comments! -
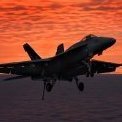
First the disclaimer/ excuse I try and I try but I'll never build a perfect model I bought a ton of resin upgrades for the model, not so much to make an accurate kit but to prolong the build as I seem to burn through my stash in the winter months (I'm sure it's understandable when winter is around -32c without the wind) In any case I figured the build would, with all the add on's get me through the winter...I was wrong Included in the build are but not limited to, Aires resin cockpit and gear bays, Zacto intake correction set, Phoenix pallets wing bladders, Reskit main gear legs, weapons, exhausts and wheels and a Master turned metal pitot (not seen in these images) As usual, striving for mediocrity and my first attempt at a heavily weathered naval fighter Thanks for looking stay safe
- 13 replies
-
- 61
-
-
