

CamberrySauce
-
Posts
107 -
Joined
-
Last visited
Content Type
Events
Profiles
Forums
Media Demo
Everything posted by CamberrySauce
-
Hi all, Thought it was about time that I joined in with the group build. I was initially planning on doing either a 1/72 Blenheim or Typhoon but then thought I'd try something a bit different. I've always liked the look of the British Pacific Fleet aircraft so I thought I'd go with a Corsair Mk II and a Avenger Mk II. I've gone with the tried and tested Tamiya F4U-1a kit for the Corsair Mk II. In order to make sure it is all good for the group build I will be adding some 500lb bombs with some British styled bomb racks under wing. For the Avenger Mk II I'll be using the Hasegawa kit, I've been looking for said kit for quite awhile and it's been nigh impossible in NZ. I was able to find this Hobby 2000 boxing at one of my local stores which was quite the find. As with the Corsair, I'll be adding British styled 500lb bombs and bomb racks in the bomb bay. I'm not 100% whether the BPF utilised British or American pattern bombs but I prefer the look of the British ones. For the decals I'll be using ones from Xtradecals. I'll also be using bombs from the Airfix RAF Bomber Resupply Set and some spare British styled bomb racks from an Airfix Swordfish. Hopefully I'll be able to make a start on these soon. - Cam
-

Special Hobby 1/72 Spitfire F Mk.22
CamberrySauce replied to CamberrySauce's topic in Work in Progress - Aircraft
Hi all, Finally got time to lay down some paint on the interior bits. Usually for British Interior Green I use XF-71 but for a change I decided to try the AK Interactive Real Colours RAF Cockpit Grey Green. Seemed to spray pretty well so might be a contender for my go to paint range. After the cockpit interior bits were all base coated I add some additional PE details such as the seatbelts and the instrument panel. I then went on to paint some detail bits with some vallejo acrylics, not 100% how accurate it is but it breaks up the monotony of the cockpit and adds some visual interest. Everything was then coated in a gloss coat in preparation for a wash and some additional weathering. Thanks for checking by. - Cam -
Special Hobby 1/72 Spitfire F Mk.22
CamberrySauce replied to CamberrySauce's topic in Work in Progress - Aircraft
Hi all, I had a bit of time after work today so I made a start, I wasn't able to do too much but I made a solid start of the interior bits. So far all the bits seemed to fit well, as mentioned previously, I could not find the instructions for the PE parts so I focused on the most obvious bits (i.e. the seat, headrest armour). Here's a comparison between the styrene seat and the PE seat. Personally I prefer the thinner, more in scale PE version so I'll be going with that. The instrument panel was also sanded smooth in preparation for the PE alternative. And here's all the bits ready for priming and then a bit of cockpit interior green. Hopefully I will be able to crack on with the painting soon and then get underway with the detailing. - Cam -
Hi all, Been awhile since I've posted a WiP on here but I thought I'd get back into. After a few headaches with a FAA Hellcat Mk. II I've been working one I decided to take a break and start on a kit that I've had lying around for awhile, the Special Hobby 1/72 Spitfire Mk.22 Here are the obligatory sprue shots. Everything looks good, quite looking forward to adding the resin and PE detail bits although I can't seem to find the instructions for the later. Hopefully I will be able to make a start on her after work tomorrow. Should be nice quick OOB build to restore a bit of mojo after the hellcat fiasco. - Cam
-
Very nice finish on the bucc! - Cam
-
Airfix 1/72 Mosquito B.XVI
CamberrySauce replied to CamberrySauce's topic in Ready for Inspection - Aircraft
Thank you all for your very kind words! -
Bomber/Strike/Ground Attack GB Chat
CamberrySauce replied to Col.'s topic in Bomber/Strike/Ground Attack GB
I've got an Airfix Typhoon that has been languishing in my pile of shame for quite a while as well as a Blenheim which I've also been meaning to start. -
Bomber/Strike/Ground Attack GB Chat
CamberrySauce replied to Col.'s topic in Bomber/Strike/Ground Attack GB
Count me in (if it's not too late). I've got a few kits I've been meaning to start and this group build finally gives me the motivation to make a start -
Airfix 1/72 Mosquito B.XVI
CamberrySauce replied to CamberrySauce's topic in Ready for Inspection - Aircraft
Thanks Thank you! -
Airfix 1/72 Mosquito B.XVI
CamberrySauce replied to CamberrySauce's topic in Ready for Inspection - Aircraft
Thanks Thank you for the kind words Thanks very much -
Hi all, After a bit of hiatus I thought it was the right time to get back into modelling. To get back into the swing of things I decided to go with the relatively newish Airfix 1/72 Mosquito B.XVI. Kit was a joy to build with no major issues with fit. Painted in the usual way with Vallejo Model air and Tamiya acrylics. Wasn't 100% sure on how to weather the bird but I did my best and took some creative liberties. Constructive criticism is very much welcome!
- 15 replies
-
- 53
-

-
Looking good so far -Cam
-
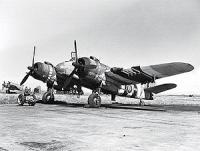
Hi all, I've just done a quick google search of TE456 and this image comes up, I believe these were the colours prior to Auckland Museum's repaint I'm quite glad now that I haven't yet started the kit as this is a very helpful and interesting discussion. - Cam
-
Thanks
-
Hi all, I'm in the process of building an Academy 1/72 F4U-1 modified to a Fleet Air Arm Corsair Mk.II operating in the Pacific theater and I was wondering about the colour of the wheel wells. Was it the regular US interior green colour or was it Sky like the underside? - Cam
-
Hi all, I completed this kit around the beginning of the year and along got round to photographing it now. I found the kit to be rather enjoyable as I did not have major problems with it. As for the painting this was the first that I attempted pre-shading and post-shading. I used my usual Vallejo model air colours with weathering done with a dark brown oil wash as well as some chalk pastel smoke stains. Constructive criticism is very much welcome!
-
Hawker (Siddeley) Gallery
CamberrySauce replied to Enzo the Magnificent's topic in Hawker (Siddeley) GB
Hi all, Here's my Academy 1/72 Tempest Mk V done OOB painted with Vallejo Model Air paints from the late RAF fighters paint set- 50 replies
-
- 20
-
-
Hi all, Sorry for not posting for a while. Over the long weekend I was able to get a lot done First I prepared the model for decals and then applied them I was really impressed by Steve's technique for academy decals and it worked a treat After that was dry I started the weathering, I used one of the MiG oil brusher for the wash and I think it turned out fine In this photo the right wing has had its wash and the left wing hasn't. It was at this point I got a little to carried away and forgot to take photos but to sum it up, I masked the canopy, added some chipping and stains and finally a matte coat to finish it off. Thanks, Also what do I do when I'm done in a group build?
-
Hi all, I apologise for not posting recently but I've quite a bit of progress since the last post. First of all I got the underside painted up and attempted some post shading as well, I'm sure how well it turned out but I kinda like it. After masking up the underside the next thing to do is the upper surface, first up is the ocean grey After that had dried I applied the masking for the dark green as well as respraying some pre shading lines I also went out based on @stevehnz's very helpful comments and got some Pascoes floor polish for the gloss varnish Next up is the varnish and decaling Thanks for checking in -Cam
-
Hi Guys, Got some progress done yesterday. I did some preshading, not my best but it'll do -Cam
-
Thanks very much Steve, this is all very helpful Made some progress today, I applied the primer coat (Which is just Tamiya Neutral Grey) -Cam
-
Hi Guys, Just a quick update today, I got the fuselage all buttoned up as well as the wings. Next up primer -Cam
-
Thanks very much Steve, this is all very helpful for me I'm going to go out get some Pascoes stuff when I can. I was also wondering if it's good for dipping canopies into to make them nice and clear? I made some progress yesterday, I got the internals painted up and prepared them for brown wash Thanks for checking in -Cam
-
Unfortunately I have not been able to find Klear where I live Do you know of any alternatives in NZ?
-
Thanks everyone for the nice comments I'm contemplating getting the Xtradecal sheet because I've never had any good experiences with academy decals. The other day the airbrush nozzle finally turned up so I'll be carrying on with this build tomorrow -Cam
