-
Posts
1,465 -
Joined
-
Last visited
-
Days Won
2
Pat C last won the day on January 5 2023
Pat C had the most liked content!
About Pat C
- Birthday 08/05/1970
Profile Information
-
Gender
Male
-
Location
Croydon
Recent Profile Visitors
4,356 profile views
Pat C's Achievements

Very Obsessed Member (5/9)
1.9k
Reputation
-
Westland Gazelle HT2 - Airfix 1/72 - 705 NAS
Pat C posted a topic in Ready for Inspection - Aircraft
Been a while since I posted anything due to an N gauge railway side project but here are a few pics of the old Airfix Gazelle kit in the markings of 705 NAS shortly after it would have entered service in the mid 70s. A few mods were made to try and improve the kit, most notably making new larger cabin doors from clear acetate and then making the aperture for the cabin side windows appropriately smaller and adding aclear acetate windows there as well. These aircraft had no fenestron cover on the starbd side - i just flattened off that side to give the impression of there being no cover but a lot more detail could have been added. I also added a small amount of detail to the rotor assembly just to try make it look a bit busier. Paints were a mix of Hunbrol Orange H18 plus H209 Day-Glo Orange and Xtracrylix Light Aircraft Grey. Decals came from an old Modeldecal sheet although the orange "66" on the front came from a Microscale railroad sheet!! There is as much tungsten putty as possible rammed into every space in the cockpit area to keep this from tail-sitting and I lost count of the times I snapped the skids of during the build. A nice addition to the FAA collection in the end though :-). Hope you like !! Pat- 6 replies
-
- 51
-

-

-
I found using the poly made them marginally more robust , at the expense of totally gumming up my airbrush. The bin beckoned.
-

Lynx HAS3 - Gulf War XZ230 - Hobby Boss 1/72 (modified)
Pat C replied to Pat C's topic in Ready for Inspection - Aircraft
Thank you!! Just a bit of wood covered in stuff used for doing model railway tarmac - I suspect it is paper with very fine wood chips dyed grey glued to it 😃 -

Lynx HAS3 - Gulf War XZ230 - Hobby Boss 1/72 (modified)
Pat C replied to Pat C's topic in Ready for Inspection - Aircraft
They are the HB doors - the Airfix ones are very thick and I didn’t have the will to thin them down for this build!! I think for an accurate Lynx you would probably end up with a kit that was mostly Airfix tarted up by bits from the HB one. I took a pic of the upper door rail area of the Lynx at the Museum of Army Flying , and compared it to the HB effort, and there was very little similarity!! thx for all the kind comments. Pat -
I think that looks very nice - you have a got a great finish from a brush. Gloss varnish is known for darkening the appearance of "dark" colours so what you describe is not unexpected! Pat
- 11 replies
-
- 1
-

-
Another one from me today. This is Hobby Boss 1/72 Lynx which has been augmented with the old Airwaves Gulf War set, a couple of Sea Skua from the Airfix NATO Weapons set, replacement resin sponsons, plus part of the engine bay cover from the Neomega Super Lynx set. Untitled Untitled A couple of tweaks were made to the base kit - as has been noted the main rotor sits significantly too high above the top of the aircraft but this is a relatively easy fix to trim away some of the bottom of the rotor assembly. Hobby Boss have also, in my view, done a poor job in representing the prominent upper door rails on the real aircraft that jut out markedly from the fuselage side. I ended up using rails from a trashed Airfix Lynx, which were trimmed down a little (Airfix have them a little large to accommodate a working door). Bulged cockpit doors were sourced from another HB Lynx which is destined to be a donor kit for a Wildcat. Untitled I used the Neomega replacement engine decking as this incorporates the "cow horn" intakes that were found on this and later model Lynx, however I thought that this was too slab sided and ended up cutting it up and just using the small section with the cow-horns on, preferring the kit effort for the rest. The weapons pylons were a combination of the kit part with scratch built outer sections. Untitled Decals were from a combination of an old Modeldecal set, spares box and the kit. I did a major boob with the Union Jack - the Modeldecal ones have the white section as clear so the Dark Sea Grey shows though - I could not find a pic of XZ230 showing this and other pics of GW Lynx show this as white so I ripped off the decals and replaced them with ones with a white background. A couple of days later I found a splendid colour photo of XZ230 while leafing through Fleet Air Arm Helicopters Since 1943, showing that Modeldecal was correct 😣. Cue some very painstaking painting over of the white sections of the flag!!! Hope you like! Pat Untitled Untitled Untitled
- 12 replies
-
- 45
-

-

-
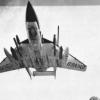
Completing this kit was a bit of an odyssey which began years ago with picking up these markings for £1 from the decal bin at a show because I liked the markings, having problems finding the Fujimi kit which a few years ago was quite hard to come by, trashing the first attempt, buying another kit and set of decals, wrecking those decals, buying more decals until you finally have the finished form!! The Fujimi kit has a reputation for being a tricky build, particularly where you join the complete nose section to the complete fuselage section - my first attempt ended with a slight twist to the nose section which was impossible to correct without breaking the kit apart at which point I decided it would be easier to start again from scratch. The slat tracks are also very delicate and if I was to do another I would probably remove them all at the start of the build and glue on at the end to avoid snapping them off and losing them during the course of it!! Unlike many of the old Microscale sheets it was easy to find a couple of good pics of this actual aircraft, including a spectacular mid-air shot of it dropping a couple of napalm tanks on a training mission from the early-70s. Colours were Gunze Aqueous Light Gull Grey over Gunze White, with Gunze Insignia Red for the tail and slat bays (the decal sheet has a large red decal for the entire tail but it became obvious that this was never going to fit properly). It was necessary to divide the hawk on the fuselage side into two to get it to fit properly. All in all much more of an adventure (and expense) than I anticipated but a spectacular looking bird to add to my USN/USMC collection. Pat
- 7 replies
-
- 39
-

-
Looks pretty good to me !! Which parts on the kit did you find problematic? Pat
-

Seafire XVII - Sword 1/72 - 736NAS
Pat C replied to Pat C's topic in Ready for Inspection - Aircraft
This was from the 5 kit boxing which I was unable to resist buying 😁. I know what you mean about the Mk XV !! It went together fine and didn’t put me off building the others in the box although am currently doing a Jays Mk47 which is a little more tricky. -
Shockingly I think this is my first completed Spitfire family kit in the 45 odd years since I started building kits!! This is from the Sword family of Seafire kits, and I think the XVII is the best looking mark of the Seafires, particularly in this colour scheme. Seafire Seafire One tip I picked up from this site is to insert the cockpit after the fuselage halves are joined - it can be inserted from below. Much easier to get it to fit that way. Make sure to do this before attaching the wings 😃. Seafire Otherwise this was a relatively straghtforward build - paints used were Gunze Aqueous Sky and Xtracrylix XDSG with decals coming from the Freighdog Brits At Sea II sheet. Pat Seafire Seafire
- 21 replies
-
- 66
-

-

-
Bear in mind Caseys recipe was for Humbrol 96 which is not the same colour as RAF Blue Grey as found on RN Helicopters. Shouldn’t be a problem getting the Hataka paint from Poland - I’ve ordered from that particular Polish EBay shop without difficulty before. But looks like there are also UK stockists who would sell just that paint if you do a bit of Googling 😃 Pat
-
You can get individual Hataka paints - I can see RAF blue grey on EBay at the moment - would be £5 incl postage from Poland. I have that paint and it looks a pretty good match. Pat
-
Thanks Dave - much appreciated. Pat
-
I’m using the Falcon one although will not use the front fuselage. As am doing a late Neptune with the big glazed nose and sting will just move the radome, build up the cockpit area to take the new vac canopy and add a couple of windows to the Hasegawa front end.
-
Tother one !!!


