


glueman
-
Posts
143 -
Joined
-
Last visited
Content Type
Events
Profiles
Forums
Media Demo
Everything posted by glueman
-
Fantastic job, well done!! Love the extra detailing on those parts of the rings that are under construction, and on the other parts. I might follow your example (if I may) and add some extra detailing to mine, which is at the priming stage at the moment (and has been for a while). Pete
-
Rebuild of the Lunar models Discovery from 2001
glueman replied to glueman's topic in Work In Progress - SF & RealSpace
I think it is a combination of all three ... but mostly the model surface. This is an older resin kit that has been painted before. TBH it's very frustrating at times. It looks good when I'm spraying but when dry it has the coarse texture and also with the odd dot or two of paint. -
Rebuild of the Lunar models Discovery from 2001
glueman replied to glueman's topic in Work In Progress - SF & RealSpace
I've recently been thinking about Shades of Grey ... Before I get banned ... it's shades of grey on the Command module ... honest. I've been following a guide on a facebook page for painting the command module which involves applying different shades of grey with sections masked before applying the next shade. The process is repeated several times to build up the different grey tones. The order I applied the paint is as follows (all are Tamiya acrylics): XF63 German grey (darkest) XF53 Neutral grey XF25 Light Sea Grey XF80 Royal light grey (lightest) The photo below shows the different greys but also scratch marks caused when I was removing the masking tape. As I knew which grey I had applied where I could spray over the region to remove the scratch marks The final should have been flat white (XF2) with a few drops of XF53. However, I over did the grey and it came out looking too grey when compared to the spine and the engine block, which are almost pure white (XF2). So I had to mask off the grey areas and apply a white coat again (bottom photo). I still think the grey areas are too obvious and so will probably apply another mist coat of flat white. Does anyone have any handy tips on how to apply a thin mist coat? My aim is to blend in the different grey tones a bit more so that they are not too obvious. Thanks -
Rebuild of the Lunar models Discovery from 2001
glueman replied to glueman's topic in Work In Progress - SF & RealSpace
Thank you Bill. Your Discovery is fantastic ... amazing!!! I hope mine turns out as well as your version. In my version of the kit the command module was hollow but the shape of the void was very irregular. In places the thickness of the resin material was very thin (e.g. at the pod bay doors) but in other places very thick. Would have been quite a job to make the void the same shape everywhere. I've decided that my Discovery will be in "cruise to Jupiter" mode with all the lights switched off and everyone asleep. Pete -
Rebuild of the Lunar models Discovery from 2001
glueman replied to glueman's topic in Work In Progress - SF & RealSpace
Thank you. I did think about adding some extra details like an interior pod bay but it would have involved building all the interior from scratch as the version I have is not at the same scale as the Moebius kit; the currently available interior sets and extras don't fit my version. Scratch building the interior would have added months if not years to an all ready long and very protracted build. -
Rebuild of the Lunar models Discovery from 2001
glueman replied to glueman's topic in Work In Progress - SF & RealSpace
Thank you. I'm good at starting new projects but very slow at actually finishing them. I have quite a few builds that are WIP ... but very few that are actually finished. Pete -
Rebuild of the Lunar models Discovery from 2001
glueman replied to glueman's topic in Work In Progress - SF & RealSpace
It's been a long time since I last worked on the Discovery. It's quicker to walk to Jupiter than it is for me to finish off the build. But we are getting there, slowly slowly catch the gravitational pull. Recently I've been priming the surface using the Tamiya Surface primer spray. This stuff is really good and covers well. However, it can't mask the imperfections and tiny bubble holes of the original surface which you can see on the bottom photo of the engine section. I've reached a point in this build where I just want to push on to the end and not try to make a 100% perfect model. Next step ... proper painting with colours (mainly white and various shades of grey). -
Harkonnen ship from the 1984 film Dune
glueman replied to glueman's topic in Work In Progress - SF & RealSpace
Thanks Pete in Lincs. That's very interesting about the fine misting of light grey for weathering. I might give it a go, see what happens. Yep, that version of Dune did have some very odd but really interesting designed space craft ... that's probably why I like the design of the film. Cheers Pete (also in Lincs) -
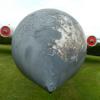
Hi everyone, Been a while since I last posted on the forum. Been very busy with one thing and another ... Over the past few months I've been working on a little 3D printed model of the Harkonnen ship from the 1984 film Dune. This model was purchased as a 3D printed model from Shapeways. The kit comes in two parts ... and is about 15cm in length and 13cm wide when put together. It is printed from what is called sintered nylon which when viewed really close up looks like lots of tiny little balls. This stuff is almost impossible to work with as you can't sand it smooth and is difficult to cut. The only solution was to cover the model in automotive filler-primer (I used a brand called autotek). You apply a coat, then sand a bit ... then apply another coat etc. until you get a smooth finish. This is a photo of an early stage in the process. Took me ages to get the smooth finish. After several coats of filler - primer it was time to starting the painting. I used Mr Surfacer to fill in the remaining irregular surfaces ... to some degree of success. Then it was time for the paintwork. I was aiming for a rather gritty, grubby 'used' look like in the actual film. I first applied a flat black base coat then used Mr Gundam metallic gunmetal grey (UG05) as the top coat. This came out as being a bit too sparkly for the scale of the ship so I applied several coats of Tamiya flat clear to tone down the speckle effect in the paint. Burst rust colour was used for the inserts and some minor weathering on the body. I couldn't really do much as this model is only 15cm in length and it's quite hard to 'weather' a dark grey model (I didn't think ahead in other words!!). Finally, I applied some Tamiya weathering products (gunmetal grey, soot and silver) to give it a bit more of a worn and used appearance. Added some fine brass wire for the sticky out bits and some gold paint on the detail on the 'crown'. I'm pretty happy with the result given that this was the first time I had built and painted a 3D printed model. I have another version of this ship at a bigger scale that I'm currently working on. This last photo is in black and white. It's actually quite tricky to photograph being so small and almost uniformly grey in colour. This is some variation in the dark grey tone but it is a bit too subtle for the camera.
- 2 replies
-
- 15
-

-
Provence Moulage 1/43 Toyota GT1
glueman replied to glueman's topic in Ready For Inspection - Vehicles
Thank you M. I don't miss that life style at all. -
This is not your usual Ready for Inspection post. It is more of a Celebration of Modelling post. The model in this post is a Provence Moulage 1/43 scale resin kit of the Le Mans Toyota GT ONE which I bought in September 1999. At that time my job was taking me all around the world, on average 1 week in every 4 weeks continuously for nearly 4 years. During that time, I was living in a digs (in a pub) Monday to Friday on the eastern side of the country then driving back to the western side of the country Saturday and Sunday to be with my wife and 2 year old daughter. My globe trotting life sounds glamorous ... but the novelty very quickly wears off. One hotel room looks like the next (in those days, most hotel rooms were decorated with various shades of brown) and every TV had the same 100 channels of rubbish to chose from. So to keep me sane I turned to modelling. These 1/43 scale cars were just the thing. Small enough to tuck away in my suitcase with a few tools and some glue. They helped to pass the time in the brown hotel rooms. Each car had it's own build diary so that I could keep a track of what I had done and when and in which hotel. This little car went with me to Houston, Bergen, London (several times) ... and the most exotic of all ... The Palace Hotel in Khartoum, Sudan. During lockdown and the new normal I decided to finish off this model. It wasn't because I had to ... it was because I wanted to as the car and others like it kept me going when things got a bit rough. Unfortunately, various parts have gone missing over the years such as the windscreen, head lights and some photo-etch parts. Some of the decals didn't work properly even after long periods of soaking in water. So there are bits missing ... but that doesn't matter to me. The finished car is more than the sum of its parts. Hope you enjoy my little Toyota GT ONE.
-
Wow, that is such a fantastic build and presentation. Well done Sir!!!! I may get round to finishing mine off one day. Hope it turns out as good as yours!! Pete
-
Hi everyone, Have just purchased this kit which contains a series of different coloured powders to simulate weathering. Has anyone used the Revel weathering kit? Any hints or tips? Would it be ok to use the powders on surfaces covered in matt paint or should I apply a thin cover of satin finish first? I’m assuming that when I’ve finished the weathering I apply another coat of finish. Many thanks Pete
-
Having watched a few videos on YT I'm now trying out the droplet method whereby I add thinners (first) and paint (second) to the AB cup by counting droplets from a pipette. I've been using the ratio 2 (paint) to 1 (thinners) mixing in the AB cup (10 droplets thinner - 20 droplets paint). Results are brilliant, much better than before. Also ... I've splashed out and purchased a Neo for Iwata AB ... and boy does that make a big difference. Using the right tools for the job certainly does help to build confidence. Thanks again for all your helpful suggestions. Pete
-
Thanks everyone for your comments. The X22 ... I was following some of the paint schemes described in the Sci-Fi work in progress which described adding X22 to the matt paint. Hopefully, I will get round to doing more tests over the next few days. I can build ... but I can't paint. Bane of my modelling life Pete
-
Thank you Kev for the link to the videos, and also Tim for the brush tip. Do you add the thinner with a brush (before the paint) or do you use a pipette? Cheers Pete
-
Hi everyone, I’m struggling trying to get the right consistency of paint (paint to thinner) for my airbrush. I’m using a KKmoon AB at 18-20psi. I’m trying to get a ratio of about 60:40 thinners to paint as follows. I have a thimble that I use to measure out the paint: half thimble xf83 + half thimble x22. I mix that with one full thimble of Tamiya thinners. That should give me a 50:50 thinners to paint ratio but the paint is always way too thin when on the model. I’m at a loss as to why the paint is so thin every time. Hope someone can point me in the right direction. Many thanks Pete
-
Fantastic Plastic 2001 Space Station V
glueman replied to Hamiltonian's topic in Work In Progress - SF & RealSpace
Fantastic work. I'm following your build with interest. What primer did you use? I'm thinking of using Tamiya Surface Primer followed by Tamiya Acrylics when I finally get round to painting mine. Cheers Pete- 50 replies
-
- 1
-

-
- 2001: A Space Odyssey
- Space Station
- (and 1 more)
-
Fantastic Plastic 2001 Space Station V
glueman replied to Hamiltonian's topic in Work In Progress - SF & RealSpace
Oh ... better had go and check my completed rim. Fantastic work in getting it to fit properly again. Pete PS: Mine appears to be ok. I have it in a box supported on a thick piece of polystyrene block with a hole cut out for the central hub part- 50 replies
-
- 1
-
-
- 2001: A Space Odyssey
- Space Station
- (and 1 more)
-
Fantastic Plastic 2001 Space Station V
glueman replied to Hamiltonian's topic in Work In Progress - SF & RealSpace
Looking fantastic!! I'm not sure about you but I had to have several stiff drinks when I was adding those PE parts. You are right, they need loads of dry fitting and minor trimming to get them to fit properly especially on the rims. I ended up trying to make little 'nipples' of superglue on the rims to make the join look like something ... a pseudo coupling feature thingy. Pete- 50 replies
-
- 1
-
-
- 2001: A Space Odyssey
- Space Station
- (and 1 more)
-
Fantastic Plastic 2001 Space Station V
glueman replied to Hamiltonian's topic in Work In Progress - SF & RealSpace
Looking forward to seeing your progress. I was thinking of adding some extra detail inside the docking bays just to give them a bit more texture ... but never got round to it. Now that I have a bit more free time I might re-visit the project again. Pete -
Fantastic Plastic 2001 Space Station V
glueman replied to Hamiltonian's topic in Work In Progress - SF & RealSpace
You are making fantastic progress on your build. Really enjoying your progress. Not sure if this will be of any help, but here is a link to my build. The build has stalled ... along with a lot of my builds ... big sigh. Pete- 50 replies
-
- 1
-
-
- 2001: A Space Odyssey
- Space Station
- (and 1 more)
-
Rebuild of the Lunar models Discovery from 2001
glueman replied to glueman's topic in Work In Progress - SF & RealSpace
Hi everyone, Sorry for the long delays in this re-build of the Discovery. Life is getting into way again. Made some progress with the nozzles and engine block. I'm in the process of adding some extra panelling on the engine block as the surface is a bit too flat and boring for a kit of this size. Needs a bit more surface texture. I've also made a new circular 'disk' that will go at the end of the spine so that it is more in keeping with the 2001 version of the Discovery. Close up of the engine nozzles ... dry fit of the parts. When I fix them into position, they will all align up and touch each other side to side. I know they lack the surface detailing and are not 100% perfect ... but they are miles better (and more interesting) than the original nozzles. I took the plunge and bought a EVA pod from Shapeways. This pod is the smaller of the ones available at 17mm in diameter. Although it 'looks' the right size for the pod bay doors, I suspect it is still a tad too big for the pod bay. I've not yet made up my mind whether or not to open the pod bay doors HAL gg -
Rebuild of the Lunar models Discovery from 2001
glueman replied to glueman's topic in Work In Progress - SF & RealSpace
Thank you. Yes, I do appear to be replacing many old parts with new, scratch built parts hence the reluctance to splash out and buy the new Moebius kit. Would be interesting to tot up all the extra expense I've incurred so far on the build (e.g. new steel rod for the spine, Blue Stuff ... card ... glue ... and lights for the command module ... plus all the thinking time on how to actually do something). Regarding the Moebius kit ... they do say ... never say never. Look forward to hearing about your build. Pete -
MOEBIUS MODELS 2001 DISCOVERY
glueman replied to rockpopandchips's topic in Science Fiction Discussion
It's a bit of a challenge restoring the Luna Discovery ... but I'm getting there It doesn't make things any easier when the Moebius version is so much better. Looking forward to your build log. Pete