
Leaderboard


Popular Content
Showing content with the highest reputation on 16/01/18 in all areas
-
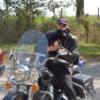
Hi guys, another year, hope you're all fighting fit and raring to go. This is a pre-production build of the new Airfix B-25C/D Mitchell that I finished in November for the January issue of Airfix Model World magazine. A great little model of a very impressive aircraft. There were a couple of issues with this example though, one possibly to do with the pre-production nature of the kit, the other more a simple fix really. On this example, the height of the right side of the rear fuselage where the tailplane sits was some 2mm higher than the left which meant that the horizontal tail sat at an odd angle. Some simple, but careful filing of the fuselage top surface was needed to bring everything into line and hopefully, this problem is only restricted to this example, but it's something to look out for. The other issue concerned the location of the main gear legs which is a tad suspect as the leg just clips into a shallow trough on the undercarriage roof which led to a decidedly wobbly assembly, especially with those big balloon tyres. The easy answer was to add a couple of brass rods to each leg to stabilise the parts. Thankfully these are hidden inside the nacelles and can't be seen from the outside. I realise this doesn't sound ideal for a new release particularly in regard to folks new to the sport but hopefully, full production kits will improve on things. The rest of the kit is good though as ever some details aren't quite correct such as the fact that Desert Warrior had a .50 cal position in the lower right position in the nose glazing meaning that I had to drill out the glazing and fit a gun from the spares box. The canopy pilots side window had a noticeable flow line so was removed and an acetate replacement added. This, in turn, meant I could have the window open adding a bit more interest. Decals are good and went on without issue and the choice of markings was definitely interesting. Optional parts are included for the two versions including engine nacelles, dropped or raised flaps, positionable flying surfaces and different windscreen framing. The bomb bay is nicely rendered as are the four 500 lb bombs complete with stencil markings. Look forward to the RAF Mitchell II later in the year... Hope you like it. Cheers Melchie25 points
-
Hi all, Here are a few pics of a kit I completed during the Christmas holidays. It is the FW 190 A8 kit from Eduard in the Weekend Edition boxing. I encountered the known problems coming from the over engineering of the kit, if you want to build it fully closed (you can see that the left gun panel does not fit very well); A part from that I enjoyed the build. The paints are Gunze acrylics and the markings are from the box. The weathering is done with Mig Ammo washes and pigments. I hope you will like it, best, Christian.15 points
-
This is my first post of a completed kit, but first, the 'back story';Harvard KF314, A & AEE, KB-50J 0-905356, F-101C, F-100D, B-66, Acklington, 15 Sept 63 fw by Philip Pain, on FlickrHarvard KF314, A&AEE, Acklington, 19 Sept 64 (1) fw1 by Philip Pain, on FlickrHarvard KF314, A&AEE, XD452, 66, 7 FTS, WF390, O, Acklington, 18 Sept 65 fw by Philip Pain, on FlickrHarvard KF314, FT375, KF183, A&AEE, Bassingbourn, 28 May 78 (2) b1fw by Philip Pain, on FlickrHarvard KF314, A&AEE, Greenham Common, 26 June 77 pfw by Philip Pain, on FlickrHarvard KF314, Old Sarum, 2015 by Philip Pain, on FlickrThis was my favourite Harvard of all time, one of three airworthy survivors with the A&AEE at Boscombe Down, until it was sadly destroyed in a fatal accident in 1982. It was at my first ever air display at RAF Acklington in 1963, and at two subsequent displays in 1964, and 1965. It re-appeared at Greenham Common in 1977, and with with its two companions at Bassingbourne in 1978. All that now remains of it is its fin, on display at the Old Sarum Boscombe collection in 2015.For my RAF Ouston model collection I planned to do a 22 SFTS Harvard, circa 1947, and trawled the internet and my library, looking for photos. The obvious choice would have been KF341 coded 'FCIY' for which there is a good photo. But I didn't have a letter 'Y' on my decal sheets. So back to the internet, and after much digging I found a Dutch website with some cine film clips taken at Ouston when Dutch Navy pilots were on a 22 SFTS course. 'FCIY' was much in evidence, but there were also shots of 'FCIT', serial barely readable, but quite possibly KF314. I can't find any history for KF314 before 1982, but this was too good an opportunity not to miss - my favourite Harvard!Harvard KF314, FCIT, 22 SFTS, RAF Ouston, c 1947 (1) w by Philip Pain, on FlickrHarvard KF314, FCIT, 22 SFTS, RAF Ouston, c 1947 (2) w by Philip Pain, on FlickrHarvard KF314, FCIT, 22 SFTS, RAF Ouston, c 1947 (12) w by Philip Pain, on FlickrHarvard KF314, FCIT, 22 SFTS, RAF Ouston, c 1947 (15) rpw by Philip Pain, on FlickrHarvard KF314, FCIT, 22 SFTS, RAF Ouston, c 1947 (19) w by Philip Pain, on FlickrHarvard KF314, FCIT, 22 SFTS, RAF Ouston, c 1947 (19) bw by Philip Pain, on FlickrNeedless to say the kit and conversion from T-6G Texan to Harvard 2b was a sob, this being the original Heller mouldings, repackaged in this case by 'Encore'. It was in translucent white plastic, and needed white undercoats to try and stop the interior green colour, and filler showing through. I daren't hold it up to the light! The longer Harvard canopy was cobbled together using the back end of an Airfix Canadian Chipmunk canopy, plus the long Airfix exhaust, modified to include the cockpit heater pipe. The propellor has had balance weights added, and the engine interior had to be hammered out of the cowling, as my first attempt to glue it resulted in it being wonky, and the prop jamming against the cowling. Since taking the photos, the fuselage area behind the exhaust pipe has been painted metallic.When modelling a Harvard, the devil is most definately in the detail. I think that my tailwheel is the wrong type (Texan), but looking at the photos of the real thing (above) I'm not so sure, and it appears to change. The nav lights can be anybody's guess, the canopy framing changes with the passage of time, and overall I have a suspicion that KF314 was rebuilt after the war with Texan components, or vice versa? Anyway, thanks for looking.15 points
-
Recently I've been gluing something up from time to time. It fell on this tinware. the "challenge" was repair a trailing edge. Those who know the model, know what's going on. The second "challenge" was making a good shape of cokpit wholes . This element in the version straight from the box, unfortunately got bad shape to, and this is a quite important place.14 points
-
Well here's my latest, the Tamiya 1/72 Spitfire Vb in the markings of Doug Brown's "Wine, Woman and Song" of 485(NZ) Sqn. I had a few issues along the way and this certainly wasn't the most trouble free build I've had but I'm pleased she's finished and especially due to the fact that Doug was a golfing mate of my father and I'd been lucky to visit Doug on several occasions to talk about his time flying Spits. So from a personal level this one is a little bit special. In several places (including the DK Decals sheet) I've only seen Doug's "Wine Woman and Song" portrayed as BM199 but I have a lot of info and photos of 485 and I was able to ascertain that this aircraft is actually BM200 so I ended up cannibalising the DK sheet to make the serial correct. In terms of the kit itself, well it does have some shape issues and the dihedral is not pronounced enough but it goes together very easily. The decals are typical Tamiya which I always find problematic at least in one of two areas - with this one the wing walkway lines suffered slight silvering. The DK Decals (dodgy serial aside) are excellent and went down absolutely flawlessly, I'm really thrilled with them. Unfortunately the research for this 485 Sqn Spitfires sheet has a lot of inaccuracies (not just Doug's aircraft) so if you are planning on using it, do your research first! I had an issue using Decalfix for the first time on the port underwing roundel and as a result I left it as is as it actually gave quite a good impression on the paint on the roundel having chipped off. However for the rest of the decals only Micro Sol was used. I still need to add a rear vision mirror on the top of the canopy as the kit doesn't come with one but for now I'm calling this done. In all honesty these photos aren't the best. The sun has only just returned here in Arctic Norway and lighting is completely artificial and not terribly good. I'll take a couple of better snaps and post them here when we get some sunshine. And here's the details: Paints: Humbrol enamels (163, 106, 64 and 90) brush painted Gloss coat: Pledge Extra Protection Wax (Scandinavia's bottling of Multi Surface). This was the first time I used this stuff having not brought my Klear over when we shifted country and I am completely pleased with it both as a gloss coat and canopy dip. Decals: Tamiya, DK Decals and Carpena Matt coats: Humbrol 49 and Windsor & Newton Matt varnish Weathering: Enamel sludge wash, pastels and artist pencils Build thread here: http://www.britmodeller.com/forums/index.php?/topic/235026927-tamiya-172-spitfire-vb-485nz-sqn/ Thanks for looking, Tim12 points
-
Recently completed build of 74`s T.5 when based at Leuchars. Kit is 1/48 scale and by Sword. Thanks for looking.11 points
-
At present he slumbers like Great Cthulhu in his Big Boy Bed, and like Great Cthulhu, he'll arise when the stars are right to cause incalculable destruction. 20180115_160003 by Edward IX, on Flickr For some reason, both of my children can only sleep head down, butt up, which is pretty much a surefire way to die from SIDS. And yet here we are. In fairness to The Weebs, he insisted on accompanying me outside to shovel the snow that had fallen today, bundled up in about sixty layers and carrying his own tiny plastic shovel. It's fair to say he was about as useful as a chocolate revolver at the OK Corral, but the sturdy little chap not only stayed out the entire time I shovelled, he wanted us to stay out longer and shovel as many other things as we could before we died from exposure (I'm extrapolating here). When I brought him in, he received a hero's reward of hot chocolate, which I firmly believe is earned by anyone who goes out to shovel snow. Everyone else was in bed by 9:30 tonight, so I got to work on the engines for the Bisley, having definitely settled on using the Airfix parts. 20180115_225833 by Edward IX, on Flickr As you can see, I'm using the resin desert carb intakes from the Barracudacast set here. I'll gussy up the engines with a wash and probably some pigments on the cowl and the exhaust pipes (I did all four, but only felt like popping one in the teeny-tiny light box). The Bisley's exhausts (sometimes) fed into hedgehog exhausts, so I'll have to figure out how to bodge everything together at a future date, once again screwing Future Me until I suddenly become the one being screwed. 20180115_225904 by Edward IX, on Flickr11 points
-
Thanks Simon Brian told me that the modified exhaust was to 'help with the CO problem in the cabin' and, presumably, also provides some hot air (if that were needed). Thanks Rob Yes, do try to get to Telford, it'll be good to see you. Thanks Bill I had trimmed me bottom but the head still fouled on the canopy. I remember lowering the seat in the real thing so chopping the seat too was allowed! Glad the parcel arrived and I hope you can make use of the paper. Thanks Giorgio - now I just need to try to get the rest of the model to a similar standard! Thanks John Thanks Cookie - I have two of the Master Tools chisels and they're really sharp - handy for this sort of job Thanks John - my poor eyes I've drilled a hole for the pipe into the fuselage: Location for pipe by Ced Bufton, on Flickr and sloshed some iron on the exhaust: Iron on by Ced Bufton, on Flickr Just waiting for the canopy to be masked and then this lot can go together:10 points
-
Eduard's now OOP 1/48 Fokker E.V, built mostly OOB save for the gorgeous Master turned brass MG cooling jackets and barrels. Lovely little kit, although getting the wing straight & level was a PITA. Constructive criticism welcome! Cheers, Tony Bell9 points
-
Probably one of the worst airfix Spitfire's I have done took me six months to beat into something looking like a spitfire. But I won't be doing any more. So I will leave up to you to judge9 points
-
A recently-completed pair of Italeri's very build-friendly 1/72 AB-204B/UH-1F, built pretty much out-of-box. The Dutch Navy markings were courtesy of the kit's decal sheet. The Swedish 'air ambulance' markings were based on a photo of a preserved museum aircraft, made up with Internet images and printed as home-made decals from my PC. And my sleek Swedish beauty: A very clean and trouble-free little kit, great fun to build. Hope you enjoy!9 points
-
This was a short project to relax for a while! I finished the 1/72 Airfix Curtiss Hawk 81-A-2 as a P-40B AVG machine, basically out of the box. I only added break lines, PE iron sights, simulated the canvas interior of the wheel wells and opened the cockpit. Nice that the kit provides the correct pitot tube. I had some fitting issues around the cowl, but nothing really serious. I used the kit decals, correcting only the colors ans corners of the sharkmouth. I issued the camo patron on Tamiya masking tape from the excellent Osprey AVG publication. Hard camo edges make this task easier. The pilot figure comes from the Hasegawa WWII pilots set. Hope that you like it. Marco9 points
-
I was quite keen to get on and finish the early RN bridge,and see if the PE bits I'd drawn would fit. It is quite fiddly but works,and looks ok,though as usual the camera is harsher than the eye and in real life I'm pretty happy with how it turned out. Early RN bridge 1 by plastichacker, on Flickr Early RN bridge 2 by plastichacker, on Flickr I still have to trawl my photos and try and sort/date the sensors fit for several of these early Attackers, as I intend on having several models for my collection,and they will probably be different as per the prototypes. Ditto the camo schemes they sported. mtd9 points
-
Hi, this is my first biplane... A Eduard weekend edition (but i took more than a weekend to finish it) Some pictures8 points
-
This is the finished product of my first Cut-away model. The kit has a complete interior, and was a quick build.8 points
-
First up: Rob, Ced, keith, james, Johnny thanks to all of you for the kind comments about's Raph's helicopter - he was dead chuffed at the praise and really enjoyed the personal reminiscences Bill & Crisp. He's at that age where hearing from those who've 'done it for real' is just a knockout, so went around with a big grin last evening after reading those posts. Look who arrived today Tomo: The Pelican 9 Formation Breakdancing Troupe! The chaps up front seemed to do ok for cushions but the paisanos back in the rear had to slum it with webbing seats back in steerage. Who said the US is a classless society? [this space reserved for @Procopius to insert pithy rejoinder] No wonder there's anecdotes of the 'recovery pole posse' lying out on the spare parachutes playing cards during the long flights out from Hawaii on these missions... Thanks Martian. At this stage I'd find it very hard to start a build now without having technical references such as parts or maintenance manuals to hand. I'm currently flicking through one for a Mil Mi-4 and having all sorts of fun deciphering Cyrillic... Unsurprisingly I'm still occupied by cockpit seats. back in the summer iirc I commented favourably on much of the cockpit moulding Italeri did on such features, and indeed they're not too bad at all; with the subsequenbt passage of time and access to aforementioned reference materials though, I've decided to make some improvements in a few places. Here'sthe pilot and co-pilot seats when last you would have seen them back in August: The have a shufti at the actuality: (Another image I can't recall the original of so if you were the poster let me know and I'll give you full credit....) I think you'll agree they captured the broad outlines ok, but with that gap between headrest and chiar, it's no suprise the contour saws came out and they were lopped-off. Out also as you can see with the 3mm micro-chisel in order to removed that parellel tubing running up the back that the headrests slot into. I learned pretty quickly using this delightful little chisel that sticking the bit that your chiselling into some White-Tak to holdit steady avoids a slip and a dodgy flesh wound. What was it Blake said about the price of experience...? Those moulded parts were then replaced with 0.5mm brass tube, and some bent 0.3 mm rod for the parts that the headrests are mounted on completes the modification: Adjustable headrests in 1/72 - is this a forum first? Some Milliput roughly shaped around the top of those and left now to harden before sculpting back to an appropriate shape. Last job of the day was to whip out the contour saw for and remove the outer triangle of plastic on from the pilot and co-pilot seat mountings: I'll gussy-up something perforated and triangular as replacements for those bits next time. I'd noticed recently that the CPU temp on my laptop had been peaking rather hot of late when doing anything processor-intensive so took the thing apart for a look inside and found both fans pretty choked with dust: The machine's only a year old so shows you the perils of having it anywhere near a modelling bench. A soft makeup brush got rid of most of that and another handy use for the airbrush was to blow all of the resulting dust out of the innards. Operating temp is down by about 10-15°C on average now so just shows you.... Take care til next time! Tony8 points
-
Thanks Bill - always nice to raise a bit of nostalgia! Enjoy the decal paper; a good home for the extra packet I ordered in the middle of the night and a little thanks you for all the work you did on the Boultbee for me Wings onto fuselage. The lump glued to the top of the wing fouls on the inside of the fuselage but with a bit of sihrsc action and then some finer filing the joins started to click. Glued in and clamped: While that was drying I masked the canopy. I got out my 'Maketar canopy survival kit - ultimate canopy masking solution' and once again failed to find any useful bits other than two trianges for the front: Masked and glued by Ced Bufton, on Flickr One of the hardest masking jobs I've done as the frames and canopy gaps get mixed up but I know I need to do some Filmoplast work for the extra frames later so I'm not that bothered. I want the Gator's Grip on the canopy to dry overnight so I painted up the wheels with some 'AK True' steel and Mr Hobby Tire black and then on with the first coat of Colourcoats Azure Blue: Azure - lovely by Ced Bufton, on Flickr Great colour. I'll be spraying the rest, just for Jamie Stynylrez black primer first to try to get rid of the yellow and do some basing... what do we think?8 points
-
Well, it seems that I finally managed to finish something... After what seems like an absolute age I mustered up the strength to finish it and as always there are a million things to do in the end. Here is the rather portly looking Mk XII in all its glory: Painted with Tamiya, weathered with some oil, and a few washes from MIG. See the WIP here8 points
-
It wasn't really the finish that caused me to prefer the Colourcoats enamels, but the color itself - they are just so much more accurate than anything else I've tried. That being said, it is hard for a gloss acrylic to beat a gloss enamel for finish! (but Lifecolor is very nice at self levelling with the Future concoction) Yes, every color seems to act a little different. I had a gloss blue (not during this build) that was already so thin, that even with no thinner added, I had to really back off the pressure in order to get it to spray well. The Future trick works really well with Lifecolor and Vallejo, I think it's because it thins while maintaining some cohesiveness so that the paint doesn't just 'spider' everywhere. I've also had luck using airbrush medium as a thinner (I think for much the same reason), but the Future mix is cheaper. Agreed! Lifecolor works great in thin coats - sometimes I'll spray a coat and then just hit it with some air from the airbrush (without paint) and then immediately hit it with the next coat and repeat until it's how I want it. But be careful, if you over do it, the coat will dry before it's levelled and you'll end up with a bump or two, but if you get 'into the groove' of it, you can watch the paint level out then dry right before your eyes - pretty fun. The first time I used Lifecolor (on the Tornado ECR below), I was a little heavy handed, but I can report that even when 'pooled' it will self level and dry very smooth. If I remember correctly, this was around the time we met here on Britmodeller Giorgio! It's true, it's true, as your wonderful pics show CC! What kits are those? It makes me want to get started on a TSS Corsair. Building it side by side with Hellcats makes the Seafire seem almost like a kayak - something you wear rather than ride, while the Hellcat seems almost like a tractor, with the seat setting up top, high on this mechanical beast. This may sound like I'm mocking the Hellcat, but I'm not (well, a little - come on, it's gigantic), because there is a method to the madness: the engine is huge, and the pilot needs to be able to see over it to land safely on an aircraft carrier, so they're perched way up top in a fuselage that slopes away in every direction.8 points
-
Hi All, Here's the Meng Hilux with ZPU-1. They can't call it Hilux but it is! My first Meng kit and I found it a bit of a fight - some black sprues which were hard to work with, plenty of flash and lots of location holes too big for the pins on the part to attach. I persevered and am reasonably happy with it - would like to try the bigger Land Cruiser with heavier gun but not sure I have the patience. I looked for some arabic script decals but was unsuccessful - I think its based on a vehicle used in the revolt in Lbya Usual comments and criticism welcomed Thanks David7 points
-
Here is my latest build, Revell 1/72 Rafale M. Humbrol and Tamiya spray paints, tamiya acrylics for details. Nice kit and I would give it another go. Biggest tip...don’t drop it as there are so many bits that stick out that will break off! Any comments advice or tips greatly received...thanks for looking7 points
-
Just completed in the Work In Progress - Vehicle section, may as well put them here too I guess! Lamborghini Miura, P400, converted and backdated from the later type 1/24 Hasegawa Lamborghini Miura SV version.6 points
-
Afternoon all,I was at a local Sunday market just before Christmas and tucked away on a bric a brac stall was a couple of Beaufighter's and a couple of Vampire's so negotiated one of each both still sealed up so fortunately the Mk X is an option so good excuse for a build. Box art. Inside the content's were in a poly bag and the decal's look OK,stand is a bit wild though.6 points
-
Hello all, Here is my recently finished 1/48 Italeri A-10C, in the markings of the 354th Fighter Squadron, who were deployed to Incirlik Air Base in Turkey in 2017 in support of Operation Inherent Resolve. The build thread is here Extras used included Eduard Etch for the cockpit, Quickboost engine faces, Pavla seat, SpeedHunter Graphics decals and numerous weapons from the spares. I wanted a heavily weathered jet and this was achieved with a mixture of paint, dry brushing and pigments. Onto the pictures: Despite my best efforts, it's a tail sitter, hence the blu-tak under the nose wheel! Thanks for looking. Dave6 points
-
Many thanks for the comments, and more progress made today; More progress today;Wellington T.18, Matchbox kit (15) w by Philip Pain, on FlickrDon't normally bother with crew figures, but the Matchbox cockpit is so bare that it needs something to fill it. The scratch built instrument panel is also ready to go in, not that much of it will be visible.Wellington T.18, Matchbox kit (16) w by Philip Pain, on FlickrA nerve wracking time cutting down the GR.14 glazing, followed by tentative cutting back of the Mosquito nose. Very pleased to say that there was no need to worry about joining the two, as they will butt-join without needing to cut a large hole in the glazing. Filler will complete the join. The radar nose still needs a bit more taking off the back end.Wellington T.18, Matchbox kit (17) w by Philip Pain, on FlickrAlso sanded the tail fairing and applied a test coat of primer. Nearly there, but it needs more of a curved shape to the top. More to follow .....................6 points
-
To quote an old Rap song from the early 90ies....Whoomp, there it is! After the Lancaster this is the second 4-Mot my dad built. Revell USA kit with Superscale decals and Gunze/Tamiya acrylics. Regarding that the molds are 39 years old the fit was surprisingly good, only the clear parts aren´t the best anymore. The model shows an aircraft of the 416th BS in Italy 1944. Respect for those young men who climbed into these flying coffins mission for mission.....the Luftwaffe was not that threat anymore but the Vienna area (to which they often headed) had the second dense flak defence after Berlin. After being awarded with a Distinguished Unit Citation while serving with the 12th AF for a mission during the Big Week, the 99th BG earned a second one with the 15th AF for a successful bombing mission against the Wiener Neustädter Flugzeugwerke (20km away from our hometown) on April 23 1944 without any losses. After a fellow modeller pointed out that the oil streaks in the hot air outlet area on the upper wings don´t go with the openings but the small space between the openings because the oil gets divided by the air, I did a quick fix with the help of Tamiya´s weathering sets. Does not look optimal but ok. Gotta fix this maybe someday with airbrush.6 points
-
Maybe in years Will. Not so sure about common sense I've added the new spare track hangers on one of the stowage bins. The retaining pins were still to be added here. I'm leaving the spare tracks off the other bin and I'll just have the empty hangers, but I've had to fill the mounting holes for the original kit parts before adding the new parts. I've finished adding the rollers and whatnot to the angle bracket on the back as well. I had to scratch build a new bracket for the forward facing roller, as the kit part pinged off into the ether The hanger brackets have got some tiny weld beads that more than likely won't show up on the final build. They do add a bit of extra reinforcement to the brackets though. Oh, and I really need to deal with that seam gap on the corner of the bin The suspension units have now been added to the main hull and I've also started building up the turret including the fake gun/broomstick. All the stowage boxes are only loose fitted at the moment. There's still quite a bit to add to the rear deck before I can think of attaching them permanently. At least some paint's hit it though, albeit only a bit of black primer around the wheels Andy6 points
-
Hello all ... I think Im calling this done. The only thing i cant add is real mud. As there is a good deal of snow and frozen ground currently. I think i will wait till the spring for that. So here are my last photo’s of the Achilles. Final turret photo’s. Next up is everything together including M2.50. And antennaes mountedi went a full 3” or 12 feet on the antennae as the photos all looked quite tall. I hope this meets with everyones expectations. Id like to thank everyone for the help and for making this a very enjoyable first group build. Dennis6 points
-
Hello all, Just finished this new tool Airfix Avro Lancaster B.III last night. I did it as ED927, AJ-E, which was lost near Haldern in Germany before hitting its target, no survivors. I quite liked this kit, even though it came with a warped nose on one fuselage half, which was corrected with some hot water. One thing I don't like though, are the wingtip lights and windows on top of the fuselage, Airfix should have done those in clear plastic. Top colours are Humbrol 29 and 163, bottom is a 50/50 mix of Tamiya XF-1 Flat Black and XF-17 Sea Blue. The exhaust streaks were done with pastels. I painted the Upkeep mine in some rusty red color (Revell 83), because from what I've read about it, most were still in their red oxyde primer when they were used. There might be many errors on it, but I don't claim to be an expert on Lancaster, and I mostly just followed the instructions. Thanks for looking, and I hope you like it. Pete6 points
-
The MkIX is catching up with the MkVI... which means it's nearly time to make a start on some more MkVbs. This one: (as suggested by PC) and this one: (the winner of the popular vote). I plan to make a start on them on Wednesday. Thanks for looking.6 points
-
Hello All, this is my first post on joining this forum. Matchbox 1/72 Wellington (PK-402) to Vickers Wellington T.XVIII (T.18) An extensive trawl of the internet seems to show that no one has yet attempted a Vickers Wellington T.18 (I'll use arabic numerals for ease of comprehension), which was the 1945 conversion of the Wellington GR.XIII (GR.13) to produce a radar trainer for Mosquito night fighter crews. Only some 80 conversions were made on the Blackpool production line, and they continued in limited post-war service until replaced by Bristol Brigand trainers in the early 1950s. Despite much searching through my extensive library, and on the internet, I can only find photos of just five examples, mostly single side-views which do not reveal the full shape of the radar nose, nor other details. Only one photo shows any sort of unit markings, and accurate plans are non-existent. There was also a similar Wellington T.XVII (T.17), converted from the Wellington GR.XI (GR.11), but I can find no photo of that variant at all. Wellington T.18, Matchbox kit (1) w by Philip Pain, on Flickr Started off with the Matchbox fuselage, adding and painting the internal silver framework on the windows. The internal nose detail was left off (it can be inserted later), because the fuselage walls are quite thin, so the wings will be glued on early, and reinforced internally with spars to strengthen the model. Wellington T.18, Matchbox kit (2) w by Philip Pain, on Flickr Wellington T.18, Matchbox kit (3) w by Philip Pain, on Flickr There are two 1/72 Mosquito radar noses available, as optional parts in the Airfix, and Matchbox Mosquito kits. In this photo the upper one is Airfix, and the lower one Matchbox. The Airfix example looks a very odd shape in profile, and tapers too much in plan view. Neither example seems to completely match the Wellington nose-job, which seems not to taper in plan view. However the Matchbox is the closer match, and can always be beefed-up with filler later on. Wellington T.18, Matchbox kit (4) w by Philip Pain, on Flickr So how do you turn a Mk.10/Mk.14 kit into a T.18? The photo shows the bits available - the Matchbox radar nose; the GR.14 upper nose glazing; and the B.10 lower nose section. After much research into the numerous vagaries of Wellington marks, it became apparent that the way to tackle this conversion is to first aim to produce a GR.13 (the real time basis of the T.18 conversion). The GR.13 retains the bomb aimer's window underneath, but with a lengthened nose to match the size of the GR.14-style upper glazing, as shown in the following photo; Wellington T.18, Matchbox kit (5) w by Philip Pain, on Flickr The upper glazing will have to be reduced in size vertically, and the lower nose extended forwards with modelling putty. The upper glazing has the correct profile for the top and longer contour of the T.18 nose. But the big uncertainty is to where to make the join between the upper glazing, and the lower nose. As best as can be deduced from photos, it appears that the lower nose probably extended up as far as the gun turret mounting ring. This would make sense as the gun turret mounting structure could be used to mount the radar. So in this photo it will be the bottom of the glazing that is removed, and the B.10 turret level retained. Wellington T.18, Matchbox kit (6) w by Philip Pain, on Flickr Clearly a lot of the Matchbox Mosquito nose structure has to be removed, leaving just the nose cone as shown by the engraved line. A corresponding hole will have to be cut in the upper glazing. It is impossible to tell if the two will fit together, and the plan is to start 'big' and whittle back until (hopefully) the two match. But if the Mosquito nose cone can not be made to fit, then 'Plan B' is to use a block of balsa wood, and whittle it to shape. Wellington T.18, Matchbox kit (7) w by Philip Pain, on Flickr Next problem is the faired over tail turret on the T.18. This feature can be found on other marks of Wellington, and published plans often show it, but these plans seem to retain the shape of the gun turret, as if it was still there, with some fabric glued over it. In reality, photos of the real things appear to show a more rounded shape, with details of the internal framework showing through the fabric. Incidentally, in this photo the rear window shows the wrong shape for a GR.13/T.18, which should be hexagonal. This will be achieved in the final painting of the model Wellington T.18, Matchbox kit (8) w by Philip Pain, on Flickr So the mounting of the rear gun turret has been cut off, and it has been filled with putty to close off the gun barrel openings. It is now being used as a 'plug' to seal the rear fuselage, and also as a basis for the putty which will cover it, sanded to the required shape and detail. Wellington T.18, Matchbox kit (9) w by Philip Pain, on Flickr Wellington T.18, Matchbox kit (10) w by Philip Pain, on Flickr The Matchbox tailplanes are correct for the Mk.10, having a straight horn balance and curved leading edge. But later production Wellingtons (including late T.10s) had a different tail with compound leading edge and angled horn balance. The fabric covering on the outer part was replaced with a metal skin. Wellington T.18, Matchbox kit (11) w by Philip Pain, on Flickr Scratch building an instrument panel, as my Matchbox kit didn't come with one. Wellington T.18, Matchbox kit (12) w by Philip Pain, on Flickr This area of the nose will be visible through the bomb aimer's window, so to hide the turret mounting and add some detail, a false panel has been scratch built. Wellington T.18, Matchbox kit (13) w by Philip Pain, on Flickr The wings have been glued on, and a re-inforcing spar added between them. These wings were started 20 years ago, but that was as far as the kit got at that time. A scratch built bulkhead has been added at the front, this is purely to stop dust entering the fuselage when the 'nose-job' starts. Wellington T.18, Matchbox kit (14) w by Philip Pain, on Flickr The first coat of modelling putty over the tail turret. It will be sanded to a better shape once dry. Tailplanes left off for now to make it easier to work on the tail fairing. That's it for today, and thanks for looking.5 points
-
Hi there ! I want to share with You my recently finished project - Tamiya 1:48 P-47d "Smokepole" flown by Lt. Hal Dunning and Lt. Doug Towner on Saipan in 1944. I added rivets and some details on engine. Decals used: SuperScale 48-1099. For national insignia I used diy masks. Paints used on this bird: Gunze H-52, C-12, C-22, SM01, Tamiya XF-4, XF-53, cockpit colur is a mix XF-5 with XF-50. Weathering done with use of oil paints. Feel free to coment.5 points
-
Merry Christmas to all! here my last build in 2017: Eduard`s nice MiG-21bis. Add a metal pitot by Master and some PE´s by Eduard. Decals for are Croatian AF MiG-21bis D are out of the box.5 points
-
Hello mates, This is a test if i can receive any reaction at this time (t-online.de). I will be busy for the Nuremberg Toy Fair soon, but after, if you like, i will make more pictures for you of my quite ripe missy, more than 18 years old now... Cheers, Thomas5 points
-
This was a small kit, with very few parts but it turned out to need a lot of extra work. I really should have made a WiP since there was so much to do and so many pitfalls. Bullet points... --The cockpit floor is far too wide for the fuselage and needed significant thinning in order to bring the halves even somewhat close together. Even then, I needed Evergreen shims in the nose and in the underside with liberal amounts of putty. --The cowling didn't fit very well at all. I had to actually spread open the fuselage halves in order to fit the cowling smoothly. Then the shims came into effect (see above). --The very clear bubble top was fine except that it was far too thick at the base and would not fit the fuselage without very wide gaps all around the bottom edges. I used the Dremel to grind down the interior thin enough that it sat evenly around the whole of the cockpit. --The decals, while very thin and requiring almost no setting solutions at all, were so delicate that too much solvent dissolved them completely. This happened to a couple of the stencils. Thankfully they are minuscule and you cannot really see where they should be if you didn't know they should be there at all. The serial number decal on the port rudder folded onto itself and could not be salvaged. I tried to save it. I also tried to fake it using bits from the Bottomless Bag of Leftover Decals but to no avail. --The markings were a bit orange. They really should be red. I've been to Lebanon. They're red. Hence the colour discrepancy between he hand-painted rudder and the roundels. Other than that, it was a fun and quick build. For your perusal... I had a good time building this kit. I'd build another in Canadian markings given he time. As it is, it makes a fine addition to the Middle-Eastern shelf and I keep it next to the Israeli Fairchild in hopes of détente. --JDCM5 points
-
She sure was. Here she is with her first Squadron5 points
-
We've never Harvard so good. This is looking quite tickety-boo and do my eyes deceive me or or you dipping a toe into micromodelling with that exhaust Ced? That slope. It is slippery.... Tony5 points
-
We all asked that in April 1982!5 points
-
Some oils has been applied. I still need to do some dark streaks.5 points
-
Jonners, you're being too hard on yourself. I'm pretty sure a lot more than that is working against Scotland. Oh, very well, I'll get my coat. The engines look good! I was thinking of painting the engine covers, then adding the exhausts, and then assembling the whole egg to add after painting. I figured that would save masking the faces.5 points
-
It can be frustrating with variations between paints even within the same range, so that every rule of thumb has caveats. One thing that helped me, that I read somewhere on the net, is to place a drop of thinned paint on a vertical plastic surface (like a plastic mixing cup) and watch how it runs down. If it runs freely leaving an opaque trail, then it's about ready. Another thing I've just started using is a MAC valve attached to my airbrush hose with a quick connect 'above' it, so that it can be used with all my airbrushes. A lot of the fancy expensive airbrushes come with one attached to the airbrush itself, but the inline one is cheap and can be used for any airbrush. If I've over thinned my paint, I can just dial the pressure down a little and get it to spray how I want. It's really just a way to cheat! In fact, I've gotten in the habit now of dialing the pressure around and doing quite a bit of test spraying with each new color change in order to get everything 'dialed in' nicely before applying any paint to the model. I think it's easier to adjust pressure with the MAC valve than with the regulator at the compressor, because any pressure change is instant - the regulator has to open its own valve to change the pressure within its trapped volume and you have to wait a few seconds to see where you're actually at, plusthe MAC valve is conveniently located right next to the airbrush. I have my compressor regulator set around 30 psi, and then can adjust the MAC valve to spray anywhere under that, down to zero. It is a golden age that we live in! I've had trouble finding Xtracrylics here in the states, and then when they can be found, you have to be careful of 'shelf sitters'. It is pretty amazing that the Seafire even worked in my opinion. A short range interceptor adapted for carrier use seems like an iffy proposition, but Mitchell's design rose to the occasion once again, and with its famed performance still largely intact. Once again, not to denigrate the USN designs, as you say, they had a range more useful for Pacific operations, and I shudder to think of the operational losses if the USN operated the Seafire in the same numbers as the Corsair and Hellcat. But then there's that, all the cool fighter pilots would rather be seen in a Spitfire, that's for sure.5 points
-
Hi all, When posting shots of my aircraft builds, I'm often asked where I obtain the display cases I use to both display and protect my models. The cases are made from 3 mm thick clear acrylic for the covers and piano black acrylic for the bases. The cases are very well made and sturdy. The clear covers fit onto a rebated shoulder on the base so can't easily be knocked off. I also have made the angled mountings for the model information plaques on the display bases. I get all of my display cases made to measure by a guy called Paul Moss, who runs an on-line business on EBay. www.inperspextive.com I just email him with the dimensions (internal) I require, then he'll send a PayPal invoice and once paid it takes around a week for the case to arrive. [email protected] I've had 12 cases from Paul so far with no problems. The cases are very well made and sturdy. The cost is not that cheap, but you pay for what you get. As an example my last case to arrive, which was 9 1/2" x 9 1/2" and 4" high (For the MicroMir Fokker E.V) cost £35 (including postage). I SHOULD POINT OUT THAT I AM NOT ASSOCIATED WITH 'INPERSPEXTIVE', BUT AM JUST A SATISFIED CUSTOMER PASSING ON INFORMATION FOR OTHER MODELLERS. Cheers for now, Mike5 points
-
A few tweaks: the British did not differentiate between the F4U-1A and the F4U-1D. The Mk.II was an F4U-1A/D built by Vought, the Mk.III the same built by Brewster and the Mk.IV the same built by Goodyear. Agree though that the more expensive and rarer F4U-1A kit is the best option for Mk.IIs, Mk.IIIs and early Mk.IVs (earlier prop, Brewster bomb-rack and (can't remember for sure here) a central drop tank of the pattern used extensively by FAA Corsairs). The -1D is best for later Mk.IVs (wider prop, bomb pylons - though the twin droptanks and HVAR rockets will not be required). Agree that the Revell "F4U-1A" is a big disappointment. The Academy Corsair is to my mind tolerable but trails in the wake of the superlative Tamiya kit. depicting a front-line Corsair will normally (Never say, "Never"!) require addition of small intakes to the fuselage sides and a large outlet to the fuselage underside. The Fundekal transfer sheet instructions, available on line and a work of reference in themselves, show what's needed. a few Corsair IIIs did sneak through to the front line: Fundekals provide transfers for one in the BPF. the FAA did not deploy the Helldiver in the Far East. Only one FAA Helldiver squadron was formed (in the UK) and disbanded before undertaking any operations. The FM-2 would be fine for a Wildcat VI of which one squadron reached the Indian Ocean. I try not to clutter my mind with the Dark Side and so am unsighted on the Hobbyboss kit but I would expect any F4F-4 kit to be a good basis for a Wildcat V (FM-1): several squadrons operated these in the Indian Ocean but none AFAIK in the Pacific.5 points
-
HOW DID I MISS THIS? This only confirms it, time spent with family is time wasted. You see, Mr. Dapple, my plan is simplicity in itself. You'll show me how to build the kits, and then I shall build mine myself, later.5 points
-
I got a coat of Aluminium - well, Citadel Runefang Steel - on the interior parts: I gave the interior a couple of coats of black wash to tone the brightness down a bit and to add some definition the the moulded detail; I also did the little detail painting required - brown seat straps, a bit of black on the joystick and the rudder footrests, and then joined up the fuselage without remembering to take any pictures of the completed interior The main landing gear legs are moulded as part of a fuselage insert, which should make it quite strong as well as ensuring the correct angle to the legs - a nice bit of design work from someone who is obviously a modeller as well as a kit designer I suspect: The part itself fits perfectly and the back part of the nose is then added: I then started on the engine section and to be honest I was rather dreading it, the Skoda-Bristol Jupiter engine has no less than eight separate exhausts and these are provided as separate pieces. Cleaning the parts up proved to be less of a bind than I had expected when I got on with it, and once again some very good engineering meant they all fitted where they should remarkably well - if you are building the kit at any point just ensure you follow the instructions with regards to the part numbers of the exhaust pipes and that you remember which side is the top of the engine. As I was planning to leave mine un-glued for the time being for ease of painting I marked the top centre of the engine with a red T and added the pipes from the top downward with no issues at all I've just joined the upper and lower wing halves, hopefully later today I can add the empennage Cheers, Stew5 points
-
Hello all ... I am going to call this one done as i cant add real mud at this time. To much snow and frozen ground. Hope it meets with everyone's expectations. Thank you for an enjoyable first group build. Dennis5 points
-
5 points
-
Thanks, presumably that will be Black Green 70 I'll keep that in mind, just in case I have been demoulding the bitsanbobs with varying successes, some of the latex didnt mix well enough so one half drop tank, and one half wing fold detail bitz shifted a tad I will remould the bad bits tomorrow whilst waiting for that to happen I also began making the little bits that hang down at the tail end The Hold-back ready for use when I have added a little bit more work to it The tail bumper is next and is similar to the hold-back but less girder-ey, working on that now5 points
-
In other progress - I was looking at diagrams and pictures of 'the real thing' and noticed the exhausts - which are absent on this little kit. There are suitable gaps... The gaps aren't very big - but I couldn't resist the challenge of trying to build some exhausts. The exhausts themselves have a metal sleeve around them - probably to stop troopers burning their ankles. So I did some measuring and got some 2.5mm rod and drilled a 1mm hole all the way through it... ...but that just looked like an exhaust - not a sleeve - so it was time for a trickier bit of fun - using a 2mm drill on the 2.5mm rod to leave a 0.25mm sleeve at one end... ...nerve wracking - but worth it I think - next the 1mm rod needed bending - more fun... As I only drilled out one end of the rod to 2mm the other end was just drilled to 1mm and so the exhaust was allowed to 'float' in the sleeve - here is the finished article... That was a fun little project that kept me entertained whilst the troops were drying between coats - all good fun4 points


This leaderboard is set to London/GMT+01:00