
Leaderboard


Popular Content
Showing content with the highest reputation on 13/01/18 in all areas
-
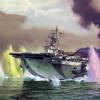
Hi folk's,and to celebrate I thought let's go small,Spadad tipped me off about these little Revell gem's so here's the Seahawk the Blackhawk is next on the list, what a superb little stress free build it was,even a passible front cockpit and at just over six quid good value for money especially if you're pushed for space. Anyway firstly the this is how small it is shot and thanks for looking in.23 points
-
Hi all and here's my first finish of 2018, built for the Flying Boats GB here. This is Revell's 1989 boxing of Monogram's 1957 issue Grumman Hu-16 Albatross finished in US Coastguard markings for S/N 7240. According to the Coastguard Aviation Association, S/n 7240 began it's career on 25th August 1961 based out of San Diego before moving to a number of different bases. She was detatched to NAS Quonset Point for 4 months in 1967 and would have worn the scheme of that time with a hi-vis orange nose. (I went for the later scheme she wore) After 2 years in storage at Davis Monthan in the early 70's, she was overhauled and re-entered service at Cape Cod in July 1972 and then Miami and San Francisco among others. Her last flight was 10th August 1982 out of Cape Cod. The build thread is here but to recap: Kit: Revell 4280 Paints: White from Halfords spray can. All other colours Revell Acrylic, brush painted. Klear, Flory Models Wash, pastels. Decals: PrintScale Grumman Albatross 72-136 Extras: All rivets sanded off, panel lines rescribed. Basic interior added to cockpit. 20g weight in the nose. If you look beyond the simple details like the engines and overscale landing gear, the millions of rivets and lack of any detail on the inside, she's actually quite a nice simple build. My efforts at rescribing were ok and I'm really happy how she turned out in that iconic USCG scheme. Definitely one of those aircraft that's in need of a 1/72 re-tool. Revell_1_72_USCG_Grumman_Albatross (2) by Dermot Moriarty, on Flickr Revell_1_72_USCG_Grumman_Albatross (1) by Dermot Moriarty, on Flickr Revell_1_72_USCG_Grumman_Albatross (3) by Dermot Moriarty, on Flickr Revell_1_72_USCG_Grumman_Albatross (5) by Dermot Moriarty, on Flickr Revell_1_72_USCG_Grumman_Albatross (6) by Dermot Moriarty, on Flickr Revell_1_72_USCG_Grumman_Albatross (7) by Dermot Moriarty, on Flickr Revell_1_72_USCG_Grumman_Albatross (8) by Dermot Moriarty, on Flickr And with my Hobby Boss Jayhawk. Revell_1_72_USCG_Grumman_Albatross (9) by Dermot Moriarty, on Flickr Thanks for looking and enjoy your modelling! Cheers, Dermot23 points
-
Airfix Be2C built straight from the box, only addition is Uschi Van Der Rosten rigging ( Superfine 0.001mm-super duper thin!) White was Halfords spray, everything else brush painted with Vallejo acrylics. Weathering with Games Workshop washes/inks Still needs a couple of bits of tidying up, but putting it aside after all the rigging!! Temporary base for photography, will get proper base done with figures at somepoint. Very impressed with the engineering of this kit, very nice build17 points
-
Just finished the 1/350 Zveda version of HMS Dreadnought. A little rigging light at the moment. Decided to have a go at placing the ship in a seascape diorama.15 points
-
For the F-104 Lockheed Starfighter STGB here is my finished Lockheed NF-104 A Starfighter Aerospace Trainer for which I used the Italeri 1/72 F-104 A/C kit as a basis for my conversion. Scratch built modifications include the housing for the rocket motor below the tail and the extended spine which accommodated the motor fuel feed lines and throttle control linkages, Extended wingtips and RCS ports top and bottom, extended air intake coves, larger area vertical tail and a lengthened nose sensor boom. Additionally I have modified an astronaut from the Airfix Lunar Module for the Pilot. The model is finished in Bare Metal Foil and Sainsbury's very best basics thin sandwich foil! The specific Aircraft markings and badges were home printed. I've mounted the finished model on an acrylic rod set into a cheap MDF plinth sprayed gloss black with a name plate because I've always wanted a nice desktop model. For reference I used the excellent and informative Air Force Legends Number 204 Lockheed NF-104A Aerospace Trainer booklet by Scott Landis. The NF-104A was intended to help familiarise Pilots with the rigours of low lift/high drag flight profiles and the required reaction control systems for high altitude flight. Would I foil an another model? Yes, but not at 1/72 although I do have a couple of 1/48 kits that would look great in foiled NMF.12 points
-
Hi all, I am sure you have all heard the same story a million times before but I have been lurking on these forums since before 2012. I loved building models by the dozen as a kid and built a few tanks in my 20's, but this is the first model I have completed in about 20 years. Seeing all the amazing models on display here over the years finally drove me to give it a go for old times sake. I chose a Churchill from a local model shop as there is one on permanent display in a town about 20 miles from my house (Carrickfergus) and I got my photo taken at it a while back. Tried some new techniques to me like sponge weathering (disaster), Flory washes (very subtle after the varnish went on, but I think worth it) and Clear coat before decals (can't believe how good they came out). Vallejo matt varnish worked like a dream too - I have an airbrush and compressor I bought from a failed attempt to complete a model about 8 years ago. Bit of a difference in colour between my tank and the one on display, but it wasn't really about accuracy, just getting a model off the bench, and I am totally chuffed with how it turned out, even though I probably did over-do the "toothbrush" mud splatters effect a bit. Plus I probably should have waited and taken the photos in full daylight, but patience isn't one of my strong points. My next model will hopefully not be one that was first on sale when I was born ( the 70's). Straight out of the box except for the aerials from Ebay.11 points
-
This Sikorsky S-64F is presently on a job near Keith. It is ex 69-18473,a US Army CH-54B. If anyone interested I will send more to Julien for walkaround.11 points
-
My last year's model just finished. Starting set - Yahu IP, Eduard seatbelts, Malius Manu decals.11 points
-
Here is my first bird from 2018! A Spitfire mk14 from Academy. It was a fun build. Here is the building thread: The final photos: IMG_8840 by basco.br1, en Flickr IMG_8841 by basco.br1, en Flickr IMG_8842 by basco.br1, en Flickr IMG_8843 by basco.br1, en Flickr IMG_8844 by basco.br1, en Flickr IMG_8845 by basco.br1, en Flickr IMG_8846 by basco.br1, en Flickr IMG_8847 by basco.br1, en Flickr IMG_8848 by basco.br1, en Flickr Hope you like it!! Cheers Bruno.- PS: It's missing the yellow tips on the blades. I'm waiting a new humbrol 15411 points
-
QANTAS PB2B-2 Catalina Academy PBY-5A and Red Roo PB2B-2 conversion with Hawkeye decals.11 points
-
It's a hazy one, certainly. I once, struggling to think of something socially acceptable to say (a struggle I often lose), told a friend his wife looked "practical". He's never quite forgiven me. I'm not sure I'd go so far as to use Mrs P as a good example of a typical American woman. I love her, but she's incredibly weird. Yes, but I have very low self-esteem, so not for long. Always wanted to be a writer, but things didn't really pan out, in the end. Unless you count tweets, which I don't. In the vanishingly small universe of bar association social media managers, I'm generally considered to be reasonably funny/decent at my job, but it's...it's not a cutthroat field, you know? Heavy with goodness, Jonners, heavy with goodness. Blenheim news: I sanded down the nose clear parts a bit to improve the fit and (hopefully) make them look slightly less egregious: 20180112_235143 by Edward IX, on Flickr 20180112_235205 by Edward IX, on Flickr 20180112_235158 by Edward IX, on Flickr Once it's all masked up like this, there's only so much sanding a man can do if he doesn't also enjoy retracing his footsteps, of course, and I don't, which complicates things. I then figured "well, why not?" and slapped the wings on: 20180113_000031 by Edward IX, on Flickr These butt-join against the fuselage in semi-recessed slots that are an entirely different cross-section to the wing (mercifully larger rather than smaller, though) The butts* of the wings are terribly, terribly uneven, and of course a lot of enthusiastic sanding may not so much as have corrected this as made one wing too short or something awful like that. Looks okay...for now, though. 20180113_000045 by Edward IX, on Flickr I think it's close enough to the Airfix one to be okay, but because I'm gonna have to fill in the wing-fuselage gaps, it will be impossible to correct once the kit is painted...and I'll be adding the landing gear after I paint the aircraft. 20180113_000525 by Edward IX, on Flickr Exciting. I also used some PPP to try and kind of fill in any gaps on the Blenheim I: 20180113_000114 by Edward IX, on Flickr * Heh. Butts.10 points
-
Williams bros 1/72 Northrop gamma I love williams bros kits, they need work but always come together nicely. detailed the cockpit and engine. rescribed it!! The decals are the ones that came it the box, so about 35 years old!! coated with liquid decal film and they worked really well. Massive thanks to @JWM for the canopy after i snapped the kit one. thanks for looking.10 points
-
Here's my Hasegawa 1/35th scale Melusine. First model I've actually finished to completion in something like 8 years! Cheers Richard.9 points
-
Ive always like the lithe looks of the early 109s and have wanted to build one and finish it in the classic Battle of France/Britain 65/71/02 for a while, so took the opportunity to gram the dragon kit out of the stash I started off by riveting the parts using a Rosie The Rivetter tool following plans I found in the Aero Detail volume on the 109. It was actually easier than I imagined. Apart from Master Models barrels for the wing guns, the model is OOB, and went together well aside from getting the cowl to sit down over the guns. I ended up just gluing the barrels to a plasticard bulkhead i made and glued to the inside of the cowling. There is still a step between the engine and gun cowls that i am not happy with. Prior to painting the model I used black watercolour to apply a sludge wash, then wiped off the excess leaving the black just in the rivets and panel lines. A sort of pre wash!!. The colour coats still allowed the rivets and lines to show through. I did it this way as I did not think my rivets would survive the subsequent paint coats. Montex masks were used to airbrush all national insignia apart from the swastika which is an xtradecal item. The raven, shield and werknumber are decals from the montex set The aircraft was flown by Lt Walter Schneider and proved quite hard to find photos of, I eventually turned up two. I also found it quite interesting researching Schneider. He survived the France campaign and The Battle of Britain with around five kills only to die in a crash in 1941. I found the Dragon kit enjoyable to build apart from the cowl Thanks for looking Bruce9 points
-
After many problems and some accidents the kit is finished.9 points
-
Here's mine, Revell's 1989 boxing of Monogram's 1957 issue Grumman Hu-16 Albatross finished in US Coastguard markings for S/N 7240. According to the Coastguard Aviation Association, S/n 7240 began it's career on 25th August 1961 based out of San Diego before moving to a number of different bases. She was detatched to NAS Quonset Point for 4 months in 1967 and would have worn the scheme of that time with a hi-vis orange nose. (I went for the later scheme she wore) After 2 years in storage at Davis Monthan in the early 70's, she was overhauled and re-entered service at Cape Cod in July 1972 and then Miami and San Francisco among others. Her last flight was 10th August 1982 out of Cape Cod. The build thread is here but to recap: Kit: Revell 4280 Paints: White from Halfords spray can. All others by Revell Acrylic, brushpainted. Decals: PrintScale Grumman Albatross 72-136 Extras: All rivets sanded off, panel lines rescribed. Basic interior added to cockpit. 20g weight in the nose. Revell_1_72_USCG_Grumman_Albatross (2) by Dermot Moriarty, on Flickr Revell_1_72_USCG_Grumman_Albatross (1) by Dermot Moriarty, on Flickr Revell_1_72_USCG_Grumman_Albatross (3) by Dermot Moriarty, on Flickr Revell_1_72_USCG_Grumman_Albatross (5) by Dermot Moriarty, on Flickr Revell_1_72_USCG_Grumman_Albatross (6) by Dermot Moriarty, on Flickr Cheers, Dermot9 points
-
Consolidated PBY-5A Catalina - c1950. Minicraft 1:144 scale. Paints: Humbrol spray cans and Vallejo Model Air; plus Tamiya X-19 Smoke for landing light lenses. Decals: kit decals. WiP: Here The DF loop, Yagi antennas, pitot tube and other minor items are scratchbuilt additions; otherwise a straight from the box build.8 points
-
Thanks John - I have the same problem with Mrs B; she's started the year with a list of 'things we can do around the house together'. Are your thoughts in the right zone? Correct. All DIY, no re-enactments of 'those days'. Ho hum. Now, where's that picture of Mae West... Hi Jon (and Bill). Sorry, should have been clearer. Fat exhaust is from the Airfix kit. If I mould another I still have a chance of building that too. If I sort out the canopies too. More doings. It's been some time since I molded but I did remember that getting the flow and avoiding bubbles is key. I'll try the 'pre-load some and then force it through' method so I made some flow points: I'll leave that here for a while so that people can shout if it's not going to work. Two equal portions on the bench: Release agent applied, left to dry and then the top squidged on making sure to fill the hole first (I hope). First coat of 'Light Brunswick Green' applied to the seats and other bits sprayed: Lunchtime!8 points
-
And with the last bits of the u/c added along with the floats and drop tanks, she's done. My first flying boat build and my first finish of 2018. I'm really happy how it came together in the end and while the light in the photos washes out any detail, trust me it's there! Revell_1_72_USCG_Grumman_Albatross (1) by Dermot Moriarty, on Flickr Revell_1_72_USCG_Grumman_Albatross (2) by Dermot Moriarty, on Flickr Revell_1_72_USCG_Grumman_Albatross (3) by Dermot Moriarty, on Flickr And alongside my Hobby Boss Jayhawk.. Revell_1_72_USCG_Grumman_Albatross (9) by Dermot Moriarty, on Flickr Will post some more pics in the Gallery. A big thanks to Jaime, TonyTiger66 and RobG for leading this one and especially for extending the deadline - otherwise I wouldn't have got finished in time. Until the next time, enjoy your modelling. Cheers, Dermot8 points
-
Well the first layers of paint are on the bigger parts - about three thinned (with water) layers of Acrylic Humbrol 155 - Matt Olive Drab: I'm sorry they’re a bit dark but it's still very early here and the colour didn’t look right at all under the electric light. I'm going to start weathering these next - concentrating on the lower areas before I attach the running gear and tracks. Comments and suggestions welcome. Kind regards, Stix8 points
-
Apologies for the lack of actual modelling this evening. Mrs 06/24* and I have been for our first night out as a couple, just the two of us, in about five years. In the years before and after 06/24 minor's diagnosis such a luxury was pretty much unthinkable, and it is reflection of how much progress he has made, that tonight for the first time in perhaps ten years, we went to a rugby match together. And Edinburgh won. So although no plastic has been cut, or paint sprayed, tonight has been bloody marvellous. *Like Mrs PC, Mrs 06/24 seems to improve with age. I, on the other hand, get wider and balder with each passing year.8 points
-
Hi, here my first pictures of the Sunderland. Sorry for low qualitiy but have to use my mobile phone camera. At the moment i completed the cockpit, with Eduard parts, and the underbay. Colros are Tamiya and wash from Florymodels.7 points
-
Hey guys, I did a quick build of the mini falcon. I really liked his little kit, wish I’d picked up a Star Destroyer one when my LHS had them. It’s so tiny, here it is next to my Falcon fridge magnet beer bottle opener: And just for fun here it as the cover of the Sculpting the galaxy book: If you’ve seen these and wonder if you should grab one then I heartily recommend that you do! Cheers, Tom7 points
-
Consolidated PBY-5A Catalina - c1974. Minicraft 1:144 scale. Paints: Humbrol spray cans and Vallejo Model Air; plus Tamiya X-19 Smoke for landing light lenses. Decals: all decals and walkway areas are homemade. WiP: Here7 points
-
Fixed that one for you, steve.7 points
-
Content withdrawn - I will NOT be threatened by a moderator, simply because I queried the actions of another...7 points
-
I just signed on with Flickr to try to get some pictures up here and on the other forum(s). Didn't get it to work on the other, so maybe better luck here... This is the Revell 1/48th P-47N. I chose this one over the Academy kit based on reviews, availability, and price. Not a bad kit. The metal finish is Testors spray can silver with various panels masked and brush painted with Testors small bottle gloss silver. The markings are my interpretation of photos of 36th FG P-47Ns in Panama 1946-47. I received one photo from the daughter of a former 36th FG pilot, and another was posted on Hyperscale by Mark Allen M after I posted the other one. Both showed the scalloped rudder markings and an aircraft number on the nose. During the war, the 23rd Fighter Sqd color was yellow. It seems that during the deactivation/reactivation period, and the move from Germany to Panama, that the squadron colors were changed and the 23rd became the blue squadron. They switched with the 53rd "Tigers", which makes sense. The 22nd "Stingers kept on as the red squadron. If this works, I'll try to add some more photos of my collection over the next few weeks. Mark V7 points
-
Hi there ! I want to share with You my recently finished project - Tamiya 1:48 P-47d "Smokepole" flown by Lt. Hal Dunning and Lt. Doug Towner on Saipan in 1944. I added rivets and some details on engine. Decals used: SuperScale 48-1099. For national insignia I used diy masks. Paints used on this bird: Gunze H-52, C-12, C-22, SM01, Tamiya XF-4, XF-53, cockpit colur is a mix XF-5 with XF-50. Weathering done with use of oil paints. Feel free to coment.6 points
-
Hi, A small Finish trainer plane, V.L. Pyry II. It is said that she was a very good construction. More about it one can read here for example: https://en.wikipedia.org/wiki/VL_Pyry or here http://www.aviastar.org/air/finland/vl_pyry.php Kit is by AZ, the main improvment is only in lamps (landing lamp and navigation lamps). Decals from box, scheme from Kauhava pilot school. Comments welcome Regards J-W6 points
-
Finished this in November. Enjoy and tell me what you think! WIP:6 points
-
More etch today!!6 points
-
Thanks Bill. Got up and kept on a bit this morning. First stroke of work on the Box since August and slowly feeling my way way around the structure again... What do they say about pictures in relation to 103 words James? It seems fitting in its own way that I'm starting this resumption of the build with correcting a problem that I've found with the kit in the cockpit area. Being able to rely on manuals rather than a sole interpretation from photographs has been handy in this instance in sorting out what's happening at the interface between the flight deck and rear fuselage. I think Italeri made the recess into the cockpit floor too deep in this area (marked in red): I discovered this in finding from the manual that there is a collapsible seat for the crew chief in that region (shades of the Do 18 - not another bloody collapsible cockpit seat - they're following me around!!!!) I won't pretend that I'd noticed this previously from reference photographs - something felt slightly 'off' looking at the kit part back in the summer but I wasn't perceptive enough spatially to identify the root cause then. The 'once you see it' effect of course means that looking back at those same photos now, you can clearly see where the cockpit floor level comes back much closer to the fuselage door, making for a much smaller 'lobby' than the kit provides: (My apologies to the original poster of the above image btw - if it's yours please let me know and I'll give full credits) In kit terms, that difference amounts to almost 7mm, which I've since reinstated: Additionally, the parts manual reveals a corrugated panel running from the radio-ops table to the floor, onto which the crew-chief's seat is mounted. You can just make out the edge of this panel frame right in this screen-grab from a Youtube clip: This element to has now been added from plastic and scrap PE: The depth of that recess looks better now in comparison to the actual aircraft, whilst providing the required surface onto which the crew-chief's chair is bolted: The chair itself is a simple frame and angled bracket affair for the seat cushion, with a padded back and headrest mounted onto the bulkhead above the entrance to the flight deck (again shades of the one on the Do 18...!!) The seat framing started off as some 0.4mm brass rod shaped in the PE bending tool, completed with some squished 0.5mm brass tube soldered on in order to fabricate the wall mount: I'll cut through that flat tubing in the middle later on, just to leave the mounting points on either side. The bracket was similarly bent from brass rod and held into place for soldering at a tricky angle with a haemostat (chapeau doffed to @Nigel Heath for that tip!): The solder is the same 145° wire from Eileen's Emporium that I've pretty much come to rely on for soldering at 1/72 scale: One of the knacks I've found over time for producing such three-dimensional pieces - especially where they might have the inconvenience of angles to deal with as is the case here - is to try and identify how few parts it takes to build such a structure, without sacrificing accuracy of shape. In this case, it only needed three parts and four solder joins. Fixed into place with CA: In the shot below you can see where I snipped through the top strip in order to leave just the mounting plates that affix the top bracket to the wall: The lower mounting should similarly have been cut through but I decided to leave it intact in order to provide a larger contact area for gluing strength. With the head/backrest supported over the top of the door, you can hopefully begin to see from the above that the Flt.Eng. sat facing forward on that seat for take-off and landing (giving four crew in the cockpit and the remaining pole operators/recovery crew seated beside the cable-deck in the rear at such times), with the seat itself presumably folded flat up against the side of the radio table there during flight. The dimensions of that lobby look more consistent with actuality and we can move on with a clear conscience: What next? Well, the intention over the next few weeks is to work steadily on adding detail and tidying up the existing innards here in preparation for painting the insides. That includes the FLOPDO (I'm not going to type 'flight operable door' each time...) of course, which along with the fuselage needs some work on producing various grades of perforated metal framing at various stations. My dear Mater having thoughtfully provided an RP Toolz Punch & Die set (how did she know? ) as a Christmas present, I'm hoping to do a considerably better job on such matters than my earlier cock-eyed attempts... With the complexity of these various internal bits then, most of the sub-assemblies will be painted prior to final assembly, and of course will someone please please please not let me closeup the fuselage without adding the crew to Pelican 9! I hope your weekend is going ok chaps. I'm off for an afternoon nap. Tony Sometime later that afternoon: Aircraft in flight yet Flight Eng. chair down? Maybe it got knocked back down by clear air turbulence...? Who knows....6 points
-
De-bolingbroked, sounds painful, but was actually quite easy: Rings by jongwinnett, on Flickr6 points
-
After the excitement of Christmas, back to the model I managed to get the rest of the struts attached and can't help thinking must have been frustrating for a lot of kids back in the day. They weren't too much of a problem for me using tweezers and liquid glue to gently coax them in situ not to mention sharp scalpel to cut them off sprue... but for a kid modeller without those tools - a nightmare Anyways, it's looking a lot more plane like and I can proceed to painting after the engine cowling is attached. The wheels roll by the way, not that we are into that sort of thing6 points
-
Work on the deck hardware & vents continues. Three vents are located on the forward deck & one on the port side of the bridge. These vents are similar to the British designed MTB's vents, but the air inlets are rectangular instead of round. An additional vent is located ahead of the starboard MG turret. These deck vents were made from plastic sheet. Four mushroom vents (two to be located amidships & two near the stern) were made from plastic tube & straight pins. Here's a photo of the deck hardware & vents completed to date, ready for a coat of primer; And a photo a deck hardware & vents with primer applied; I'm using the exhaust mufflers from the Revell kit. I thought this would be easy, but I ended up spending over two hours scraping, filing & sanding the exhaust parts to remove mold lines & flash. Once this was done, I drilled out the exhaust pipes for added detail. Here's a photo of the muffler parts waiting to be primed; Next up, more work on the deck including adding bases for the gun mounts. Thanks for looking in. John6 points
-
I was thinking sand and brown OK Kidding OK I did get fed up with all this trendy bendy wings palaver though Ditch the folding stuff and glue it together and begin painting, what do you think? maybe pull the brake panels back together too OK but it was nice to see a Buccaneer in the all together just for a bit6 points
-
Short S.23 Empire C Flying Boat 1:144 vacform by Welsh Models Paints: Vallejo Model Air Decals: from kit except some homemade to replace damaged decals WiP here Some doors, hatches and wing platforms opened for future diorama setting. Starboard outer engine cowling opened, with scratchbuilt engine; plus cowling case on wing.6 points
-
I've finished my second ship build, Revell's 1:400 Queen Mary 2. I'm not sure if there's already a completed build on here - the search results brought up a lot of unrelated threads, so apologies if this is a repetition. This build took me a long time, having started in September, but I've lost most of the WIP pictures after a problem with my phone. It sits nicely alongside my 1:450 QE2, and I will try to take more photos in better light. Again, I used the water effect for the pools, and I bought the Artwox wood decking, which was an absolute dream to work with. I regret not being able to find one for the QE2, however, I got the Trumpeter 1:350 Richelieu as a Christmas present from my parents, and I was able to find an Artwox wood deck for that, which I am looking forward to building soon.5 points
-
This was an entry to our annual club comp. entitled "What If"..... Jet Provost T5 (Sky kit 1/48) Germany won the war........ Bit of fun ...hope you like Please feel free to comment Thanks for looking Dick5 points
-
Hi, Considering that this Aurora kit is almost 50 years old it is not that poor IMO. Since I built the Monogram reissue more than 20 years ago my memories have more or less faded but I still remember three major problems: In those early days kits with opening doors, bonnets and even boot lids were rather popular even if their usually poor fit spoilt the appearance of the model when closed. This applies to the Aurora kit, too. Making equal gaps and gluing these movable parts shut flush with the rest of the body was rather laborious. The optically extremely distorting glass parts for the windscreen and the side windows were unusable and had to be replaced by clear sheet. The rear window was still just acceptable but today I wish I had replaced it, too. The kit had massive „wire“ wheels, similar to those of Tamiya's Morgan and Jaguar Mk II, but rather clumsy by comparison. As usual I made a set of real wire wheels. Since the (whitewall) tyres of the kit were very crude I replaced them by better ones from my spares box. I mixed a green metallic that was obviously popular on restored vintage Aston Martins because green metallic was (and still is?) Aston Martin's racing colour. Overall the kit was certainly far from being perfect, that may be the resaon why you don't see it finished very often. Nevertheless with some effort it can make a nice model.5 points
-
Greetings! Another vintage kit, this time the 1/72 Focke Wulf FW56 Luftwaffe advanced trainer from Heller. Mostly straight from the box with just a few minor additions. Decals from the AirModel kit. Markings and paint scheme are for "Yellow 27" of Jagdfliegerschule 101, Zerbst for 1943. Many thanks for having a look, your questions and comments are most welcome. Bill5 points
-
Just to the left and below my shot are 124 (or 142..can't remember) electricity pylons which are going into the Drummuir area. She was shipped to Montrose,assembled and flown to a temporary heli-pad. Balfour Beattie is the main contracter and their guys on the spot thought my son and I totally mad to do a 420 mile round trip to photograph a helicopter. They're probably right!5 points
-
Fast pace already! Good thing you stop for meals, so that I can keep up Ciao5 points
-
Getting closer to the finish line.5 points
-
here should be ok http://www.celebrityimpersonators.com/cp/maewest.html5 points
-
No chance of these then!5 points
-
I've had a mini-revelation this morning; I need to stop worrying about finishing the model and enjoy each of the steps, relaxing over the work. Better late than never eh? Copying a decent(ish) exhaust then. Out with my old Dad's lino-engraving tools: Yes, I have lots of other scribers and things, but nostalgia sometimes wins Cut a slot with a #10a and blobbed with a black felt tip so that I can see what I'm cutting: Gouge, cut, trim, sand and I have a hole: Out with the quick-setting two-part silicon molding stuff my daughter uses for ear molds: I know I need to leave that to go off and maybe apply some release agent otherwise the next lot will stick to it. See, I do learn. Sometimes.5 points
-
Cheers fella, the welds on that first one are a bit chunky, but they're in the right place. On the second I got the scale about right, but mucked the positioning up.....Still it is what it is (as I've frequently been known to say at about this point in a build): Seems like an awful lot of faffing about for not many bits! The bogies look unpleasantly like something from the old Matchbox 1/76 kit at the moment, but adding the return skids should fix that. PS - Doesn't show in that shot, but I've textured the transmission cover/differential housing/whatever.....Stop snickering, I did not spill my glue, I use Tamiya for gluing, this was done with Humbrol Liquid Poly, deliberately! PPS - Just look at the stress marks in the ends of the swing-arms on some of those bogies, that's from forcing the wheels to snap into position, even after they had been relieved with IIRC a 1.6mm drill!5 points
-
After scouring the Internet for subjects i came across this image of a storage box on the rear of a sherman, and calliope no less, so I've scratched one up similar, a bit of a tidy up to do when the glue has set properly Cheers Glynn5 points
-
Hello everyone, Time for another installment. Prior to really getting into the painting, several more bits much be dealt with. I'll begin by addressing the "afterburner" intake scoops on the lower rear fuselage. As provided in the kit, they look like Figure "A" above -- little tapered boxes with no inlet opening. As seen on the lower figure, I have filed away a rudimentary opening it the front end, and shown at Figure "B", I've sanded down the backside of the kit part a few thousandth, to allow a thin plastic backing to be added, where the whole front of the intake will clear the fuse. The whole thing should be rounded on the inside and out to match the curvature of the fuse, but I'm not THAT dedicated! In the next pic, one side has been installed, and the arrow indicates where the excess plastic "backing" still needs to be cut off and sanded: In the end, they look like this: The next view shows more added bits: Figure "A" shows the added pitot tubes. The kit did not provide any, but I was able grab the unused ones from the Fujimi A-7D kit, that I converted into the YA-7F. One word of note here -- some pictures show these "devices" to look more-or-less as shown here, but some pictures seem to show them more as angle-of-attack" indicators. Anyone with further information? Figure "B" denotes the cooling scoop for electronics, also not included with the kit. Mine is made from a rectangle of thicker plastic card, 8mm x 5mm and tapered down at the rear, sort of like the rear scoops. Figure "C" are the kit fences, but mounted slightly outboard of the position shown on the kit. The next picture shows the pitot tube again, as well as the front scoop. Also circles are the vents on the fuse side -- on the left side a round vent, and two smaller ones: I don't know how well the vents will show up on the finished model -- I'm just hoping that they'll hold a bit of dark wash. The next view shows the vents on the right side of the aircraft, one rectangular and two smaller round ones (maybe slightly oval, but I didn't have a suitable scribing template): The two smaller ones should be exactly atop one another, but I missed a bit. Sorry about that. Well it's off to the paint booth. More anon. Ed5 points


This leaderboard is set to London/GMT+01:00