Leaderboard
Popular Content
Showing content with the highest reputation on 12/12/17 in all areas
-
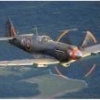
ISAF - Task Group "Black Cats" - 51 Stormo Afganistan 2009 Kinetic model with a few resin and PE details. Invite25 points
-
Here is the original Ju88 built mostly out of the box with vac-form clear parts and replacement wheels. I used Model Master paints. Decals from the decal binder.22 points
-
Hello modellers! I´m glad to be able to present another finished model after a long time. Is a Lockheed AH-56 A Cheyenne in 1/72 made from the 1967 Aurora kit. Have always been interested in this helicopter since I had a quartet card game as a child with the Cheyenne being the ultimate joker, outperforming all the other copters by lenght. Wondered why it was never went into mass production until later learned about the mix of technical problems, interservice rivalary with the Air Force and a shift of requirements that not oly ended the AH-56 project but Lockheed´s rotary aircraft ambitions. I managed to get the kit in June- not a real bargain, but the first affordable kit since I started my search and it was mint in box. References were easy to find and even so only ten prototypes were build, many airframes survived and there are a lot of pics available in the internet. Nevertheless I bought the Warbird Tech book Volume 27 by Tony Landis and Dennis Jenkins for further information. Right from the start it was clear that I wanted a later prototype use in the weapons test program and I opted for the No 7 prototype. Unlike the Legato resin version, the Aurora kit depicts a very early prototype with narrow wings and except for the nose turret, no weapons or pylons. I started with detailing the fuselage halves and vacuformed a thinner canopy. A rotor axle with brass bearings from an old PicooZ remote controlled helicopter was glued to the inside, allowing the main rotor assembly added later and spin freely. The wings were extended with styrene sheet, the nose extended and the cockpit, except for the seats and pilot´s instrument panel, completely scratchbuild. The 30mm belly turret was made from a F-14 reccee pod, whereas the nose turret is from a slice of an F-16 drop tank. Both turrets are movable. From the main rotor only the blades were used, extended with plastic sheet and sanded thinner. The blades were pinned with small nails to a piece of sprue, serving as rotor axle. The gyro needed several attempts until I was happy with the mix of needles, wire insulation material and shrink tubing. The pusher prop and antitorque rotor are completely scratchbuild from plastic sheet, nails, needles and sprue. It took nine small holes to drill into the center of the antitorque rotor to fix the blades, detail it and allow it to spin! The underwing pylons were crafted from leftover F-4 Phantom pylons, rocket pods from the Hasegawa weapons set. For the TOW launchers three pieces of Q-tips were glued on styrene sheet and brought in shape with epoxy glue and putty. Other material used were nail-art rhinestones for the beacons, hairs from a broom for the rigging on the gyro and hypodermic needles as gun barrels. As a gimmick, the gunner seat and gunsight were glued on top of the sensor pod allowing to turn the seat from the outside to depict this unique detail from the real thing. Painting wasn´t too complicated with olive drab over all with only a little weathering. Started with a preshading first but found out that this effect seemed too exaggerated for a prototype aircraft. Decals came from kit, sparesbox, and my printer. Except for a little yellowing, the kit decals performed extraordinary well considering it´s age of 50 years! I´m really happy to have this bird in my collection and will relax now with building an old Hasegawa T-33. Mario21 points
-
Finishing up my Mirage bent, this time a mirage depicted late in her career with the RAAF, wearing a by now tatty looking grey scheme, with evidence of many maintainers boot marks and grubby hand prints all over her. Armed with an inert load of two Magic2 missiles and a Matra. One tank still is still painted in the old standard scheme I still have a two seater to do, but Im a bit "mirage out" at the moment Paint is by tamiya, boot prints were done by applying random splurges of oil paint, then stippling them with a dry brush. The 79 SQN decals are by caracal from Mirages over Australia, Part II Again, thanks for looking Cheers Bruce21 points
-
DSC_0012-16 by jean Barby, sur Flickr DSC_0006-28 by jean Barby, sur Flickr DSC_0003-33 by jean Barby, sur Flickr DSC_0008-25 by jean Barby, sur Flickr DSC_0006-26 by jean Barby, sur Flickr DSC_0006_2-4 by jean Barby, sur Flickr DSC_0003_2-7 by jean Barby, sur Flickr DSC_0002_2-8 by jean Barby, sur Flickr DSC_0004-93 by jean Barby, sur Flickr DSC_0003-90 by jean Barby, sur Flickr DSC_0011-35 by jean Barby, sur Flickr DSC_0006-67 by jean Barby, sur Flickr DSC_0003-81 by jean Barby, sur Flickr DSC_0001-80 by jean Barby, sur Flickr DSC_0001_2-5 by jean Barby, sur Flickr DSC_0013-23 by jean Barby, sur Flickr DSC_0008-42 by jean Barby, sur Flickr DSC_0004-60 by jean Barby, sur Flickr DSC_0007-39 by jean Barby, sur Flickr DSC_0004-50 by jean Barby, sur Flickr DSC_0004-29 by jean Barby, sur Flickr DSC_0003-28 by jean Barby, sur Flickr DSC_0009-13 by jean Barby, sur Flickr DSC_0005-22 by jean Barby, sur Flickr DSC_0002-24 by jean Barby, sur Flickr DSC_0005-1 by jean Barby, sur Flickr19 points
-
Hi folks, Seems my models are like London buses: you get nothing for ages and then two come along at once. Whilst finishing off my Seafire I was also bringing this to a conclusion. I've always liked the yellow & black checkerboard markings of the 353rd Fighter Group, and have long wanted a Mustang in those markings. But in1/72 scale, decals for Slybird P-51s are very hard to find, particularly with the excellent Barracudacals set now discontinued (or so it seems). Still, I found the website of Draw Decals who provide a set for a warbird two-seater which is painted to resemble The little Witch, which was flown by Lt Don Schoen in early 1945. The kit is the 1/72 Airfix, which is an easy build. I filled in the wing panel lines, modified the fin fillet to the earlier Swayback style, and added cockpit rails. Otherwise it's pretty much out of the box. Paint is Alclad Polished Aluminium for the natural metal areas, and plain Aluminium for the wings. Tamiya olive drab on the nose and black on the rudder. Here are some piccies: Ths spinner is Xtracrylics RAF Trainer Yellow, lightened a touch to match the decals as best as possible, with Tamiya black rings. A bit fiddly but it came out OK. I kept weathering to a minimum: a thin pin-wash, a couple of streaks here and there - nothing major. I was originally thinking of displaying the model wheels-up, with radiator door slightly open and flaps partially deployed. Then I changed my mind, but by then the flaps were stuck on. This presented a dilemma: as Mustangs were parked with flaps either up or fully down, how to display an accurate-ish model with flaps only partially lowered whilst on the ground? So I decided to add the pilot, and display the aircraft as though he's got flaps for take-off, with clamshell doors closed. Pity the propeller isn't spinning... Don't read the data panel: there are some inconsistencies... I also realise that I should have blanked off the flare tube for this particular aircraft. Doh! The nose decals behaved very well with a bit of help from the Microscale solutions, though I did have to cut them a couple of squares-worth to make them conform better. The fuselage codes are slightly incorrect in terms of style for the original Little Witch, as they are spot on for the modern recreation. I chose to chop them up and reassemble the pieces make them look slightly closer to the originals, i.e. a narrower font. Doesn't look too bad. The serials are a mixture of Draw Decal and Kits World. Other stencils are from the kit. Here's the slighly reshaped fin fillet, which was a relativley straightforward job. I also scribed the horn balances on the elevators. Photos of the modern Little Witch can be found at the Website below. https://forum.keypublishing.com/showthread.php?90644-Lt-Don-Schoen-(353rd-FG)-to-be-re-united-with-quot-The-Little-Witch-quot Which is where I also found the pictures of the original aircraft: Number four for the year! Hope you like it. Justin17 points
-
My first armour project inspired by a visit to the Somme in September 201715 points
-
Hi All, Finally, I managed to complete the first model for this whole year. Somehow finding time for hobby was especially complex. Hopefully I will now gain some speed and would be up to my building plans next year And it looks like there has been a lack of T-birds recently on this forum so here is another one! This time it’s Canadair CT-133 Silver Star in its earliest version of RCAF markings. Model is built from Sword kit combined with excellent Leading Edge decals. Sword kit requires some effort to allow for clean assembly. The worst thing in Sword’s kit is the canopy. Front screen does not match in shape and width to the main part. So you can either model canopy open or look for a replacement. In my case, my brother helped me with vacuum pressed canopies that he did earlier for his Sword’s F-94 (it has same issue). Some extensive sanding and dry-fitting was required to make sure canopy sits right on the fuselage. Other changes: lower parts of intakes were cut from large lower wings/fuselage part and attached to each of fuselage sides for easier clean up of seams inside of intakes exhaust tube was replaced with a circular one added pitot tube in front of nose gear and fuel discharge tube on the aft starboard beneath the stabilizer sanded fuel tank fillers from outer sides and cut them through in inner sides of fuel tanks Also some mods were required to convert later service period T-33 into an earlier CT-133: equipment cooling vents in front of the canopy were sanded off as these were added later in T-33 life removed 4 of 6 gun port covers (Canadair CT-133’s had actually only two guns!) and drilled out 2 remaining gun ports drilled starter exhaust on the aft port side, removed US-version exhausts repainted some cockpit PE in black Otherwise Sword’s kit is pretty decent for a short run kit. As a benefit, Sword supplies resin gear bays, ejection seats and painted PE fret for cockpit and for some external bits. Resin wheels were the only purchased aftermarket. On to more photoes: And some family shots. First, with its British cousin that was also a very successful conversion of an early jet fighter into a T-bird: and second is my full collection of jets with centrifugal compressor engines - could not stand making a collective shot of fatty (or not that fatty) buddies Thanks for looking! Merry Christmas and Happy New Year to everyone! Dennis14 points
-
Hello Folks This is my latest off the bench and represents a few firsts for me. - First 1/32 in a long time, - First time using MRP paints, - First time using Montex masks. - First time using a turps based panel line wash. Eduard(Hasegawa) P-40N A29-607 BU-G as flown by Sqn Ldr John Waddy, 80 SQN RAAF . All but the kill tally and tail code are painted on using Montex masks. Kit stencils. I love the MRP paint and will use it again. The Eduard kit gives you resin wheels and exhausts and some etchy goodness. Hope you like my BU-G. Cheers Andrew P.13 points
-
Good day all, It has been quite some time since I last posted a completion here so I thought I would dig out my most recent. The first up is a Gloster Gladiator built straight OOB in the Finnsh scheme. Painting was entertaining because I chose to spray so had very tight masking and also the two tone nature of the body work did provide a bit of head scratching but in the end it came through fine. The paints are my trusted Model Master Acrylics which seem to react nicely to my heathen painting attempts. I also had a good go at rigging this thing, after a few nights of mind boggling, eye straining effort it also came good. I used fine stainless steel wire from my secret stock (Gnome ECU OTG tell tale wire for those in the know) cut to length, rolled straight and then CA'd into place (several times in some instances!) All in all quite happy with this, went together well and apart from a couple of broken struts didn't provide any snags at all. Not sure what happened here, the flash seemed to pick up some speckling that cant be seen normally. And here she is amongst a line up of my collection of Airfixs fine array of newly tooled stringbags Cheers now Bob12 points
-
12 points
-
Hello; Here's my latest built: Eduard's 1/48 Fw190D-13 W.Nr.836017 Stab./ JG 26. It's a great kit, but not perfect. The main colour is Tamiya and the decals are from the kit. I built oob. All comments very welcome. Cheers, Cristian Zarichta11 points
-
Hiya Folks, Smaller than my usual fayr,.... I wanted to see what an all white RCAF Canso would look like before I build a 1/48th scale one,....and I was quite impressed,....although not too keen on my diddy effort,....the glazing framework sent me cross eyed now that I have to wear glasses and this was the reason that I didn`t even attempt scratch building the radar! I also had a strut ping off while carrying it to be photographed,...but having been on the shelf of doom for over a year,....I`m calling it done! It was painted mainly using a white rattle can but with detail work by brush and the decals were from the spares box and generic sets,..... Aviaology will be covering this and other RCAF Catalina/Canso option in some forthcoming sets in 72nd and 48th scales and I already have my pre orders in! And here is the model; My Grandad was based in Iceland with the RAF during WW2 and so I`d like to dedicate this one to him, Cheers Tony11 points
-
Greetings! Great kit from Jo-Han perhaps 50 years old, but surprisingly well done with recessed panel lines, excellent fit and additional parts to build the A6M2-N floatplane version. No interior cockpit details, so I scratch built a basic cockpit. Kit decals and canopy were missing from my example and replaced with Airfix spares. Compares very well to the more recent Airfix kit as shown in the photos. Colour scheme is based on more current information, the mauve colour shown on the box art is no longer considered accurate by many. Many thanks for having a look, your comments and questions are most welcome. Cheers, Bill11 points
-
Hi folks - here are a few hasty RFI pics of my recently completed Seafire III in 1/72. A really enjoyable build, using the excellent Sword kit. Essentially out of the box, with a little bit of tweaking here and there. Pictures: The model represents the aircraft flown by Sub Lt Victor Lowden on the last day of World War Two, 15 August 1945 when, in the Fleet Air Arm's last action of the war, Lowden shot down two A6M5 Zekes and shared a third. Lowden's flight from 887 Squadron FAA was flying top cover for a bombing raid on the Japanese mainland. Lowden was the first to engage the enemy and the last aircraft to land back on HMS Indefatigable. Soon after he did, the ceasefire was announced. I used a print (pictured below) as a reference for his aircraft, LR866, which was an early FIII but which survived to the end of the war. The print can be found at: http://www.aviationartprints.com/aviation_art.php?ProdID=4080 For those interested in the Seafire, I can't recommend highly enough the following Website which as a wealth of info: http://www.armouredcarriers.com/seafire-development/ And if youre interested, here's the WIP I did on the build. I've now finished three this year! Justin9 points
-
This is 1/2 of the Eduard "Dual Combo" kit. A gift from my mentor Ken Henderson...a fantastic model maker. I went for the most interesting scheme, and paid dearly as the decal I needed broke into many parts. Getting it back together took almost as long a building the kit. Not perfect, but here is #27 for the year. My first build since September. Built OOB and rigged with .005 Ethicon stainless steel. All paints are MM, and I did use the p/e seatbelts.8 points
-
I'm calling this one done. Construction was fine, good detail and value for money and enjoyed the build immensely, especially the painting. Painted with Vallejo Model Air. This is actually the Limited Edition Aces 7516 kit but I just could not get inspired by the decal options so I got some Kits World decals for Salem Representative instead. Obviously the decals with the kit will get used at some point on another P-51B . Flown by Lt Ralph 'Kidd' Hofer who I was not familiar with until I saw the scheme, really interesting character who sadly did not survive the war. You can read about him here (some great photos too): http://www.americanairmuseum.com/person/1757868 points
-
Most recent build completed today, the loads of fun Meng Toon tank, Sherman M4A1. Build playlist here: kellys heroes oddball sherman tank 5 by mike michael michaels, on Flickr7 points
-
The old Airfix kit from the 70s, got tougher as it went on, but I finally wrestled it into a Canberra as best as my somewhat limited ability allowed. It looks ok from a distance. Impressive that the decals were perfectly useable after so long too. Satin dark sea grey spray and Tamiya XF-81 green upper, Revell 'light grey' satin spray below. I tried to sand the nose into a more realistic shape after reading a couple of threads on here too. Not sure how accurate it is now but it looks more or less right, I think (!) I do love this era of RAF aircraft, especially ones with massive serials under the wings and bright squadron markings. Critique, praise (unlikely!), ridicule or any other reactions all welcome, it's how we improve. Not too harsh though, I'll never make the IPMS. And yes, it's a tailsitter; I put a bit of blu-tack under the nosewheel!7 points
-
Not a recent build, but this Trumpeter kit was a good kit with no obvious hang ups. OOB build. Fits nicely and not long after it was finished, an ex RN serviceman who served on Carriers post WWII ended up purchasing it. Paints are from the Gunze range & weathered with artists pastels.7 points
-
Here's the old and new Hurricane by Airfix. The old one is first and the second one is the new "rag wing" kit. Compare and contrast. Old New Old New Old New7 points
-
Thanks Giorgio! A little more micro-welding to follow tonight....and then I want to stop doing that for a bit now....it's getting obsessive! Thanks Jaime. I just hope that Watson's book on Germany arrives before Christmas now. I don't suppose it mentions Herr Dornier by any chance? Painting them without snapping anything off will have to be done as delicate as handling a reactor fuel rod! I seem to keep discovering lots of little jobs along the way Phoenix that always makes the painting stage seem to be 'about a fortnight away'...which seeing as that nearly takes us to the end of the GB is not actually a movable feast any more! That seems about right to me Benedikt! Thanks Ced - 'gunthingies' they shall be from now on. I like the sound of that! Well. It started this evening with me deciding to press on and get the fuselage detailing finished. A quick job methought and to begin with it proceeded quite well, getting some parallel lines addedalong the top of the fuselage, all the way along from front gunthingy to the 'hump' that the aerial loop sits on: There's some kind of curved cover that crowns the fuselage between rear gunthingy and the hump, which I added from metal foil just to raise it slightly proud: Up for'ard, the paralell lines are crossed by another set just behind the cockpit: I know not the function of these, in terms of why they are raised so from the otherwise aerodynamically smooth skin of the aircraft. Due to their small size I made these out of the smallest hair-like Slater's microrod that I had, and once the glue had cured, sandned them down to a squarer profile: Prior to doing this, I'd also added some panel lines and rivetting. Not a whole shed load, only those elements that seemed to stand outr repeatedly in photos, namely a longitudinal panel line that runs down the side of the fuselage on each side from bow to tail: plus a few rivet lines where the viuewer's eye will be drawn to specific features on the fuselage like the cockpit: and portholes: That is as far as I want to go in terms of creating a semi-realistic representation, as opposed to turning the aircraft into a diagram... One set of features that has almost been fetishistically tormenting me (largely due to their visual prominence yet miniscule size) on this aircraft are the sets of cleats on both sponson and bow. There is not rational explanation behind this torment, save that they looked extremely hard to build and...well...you guessed it: I had to have a crack at scratchbuilding cleats in 1/72 didn't I? If anything you can blame @Tomoshenko for these urges - if you haven'tseen the jewellery that he's been adding to his droolsome Fury I urge you to do so with all haste: Right. I've no idea how to build cleats so let's start confidently by cutting up some 0.44 mm rod and tube: The closeups might look a bit bigger tonight as I've devised a poor man's macro by sticking one of the spare magnifiers in from the visor I got at Telford in front of the camera lens. Not optically 'pure' but it does give a handy blowup. The lower set of rod with the flattened ends are intended to form the base onto which the other rod parts are soldered at 90° in order to form a T-shape: the respective parts are each about 2mm long, taped down here in readiness for soldering: As always, not a pretty sight when fresh out from under the hot rod: But a process of gentle filing starts to bring out some essential cleatiness: Why am I reminded of the pickaxes of the seven dwarves from Snow White? 'Hi-Ho. Hi-ho, It's off to the Dornier Flugzeugwerk we go...' The bow set CA'd into place: Looking dapper enough: Same again on the stummel: All four in place: G'night all. Tony6 points
-
The masking is fine - there is a lot of it, but what do you expect with odd-shaped bi-plane amphibians...? Fairey Delta 2 it ain’t! However, from here onwards the build is going to take a lot of planning. I’ve already said I want this model to look realist9cally shabby - like wot a Second Line veteran airframe probably could plausibly look after almost 5 years of war when she’d flown constantly. Then you have to factor in the rigging; she’s definitely going to be rigged (f’narr)... so you come to an issue of the order in which you do things. If build, clean up, prime, paint, weather (my normal M.O.), then you either have to paint & weather around the copious amounts of rigging (which would be really hard to do if you bear in mind that my weathering method of choice involves oil paint)... OR you have to rig it after you have finished the lot (which means glue [probably CA] on top of paint and a real challenge rigging some parts - notably the engine nacelle). Neither of those is a great option in my eyes. At the moment, therefore, I am experimenting. I plan to paint and at least partially weather the whole aircraft now - i.e. with fuselage complete, but wings still unbuilt. I have been really impressed by the excellent fit of this kit, so I’m rather relying on this remaining true with the wings. My current plan: - paint all wing parts - do at least some weathering - seal the finish with varnish - thread rigging through (already drilled) holes in upper wing - glue upper wings - using a combination of Airfix’s clever engineering of the struts and the bi-plane jig already shown in this build, build AND RIG all of wing assemblies, but 1) leaving the underside of lower wings off until rigging done, and 2) building wings separate from fuselage. I think this should work because of the peculiar lay-out of the Walrus; you can effectively build it in a modular way (much be;oved by ship modellers, which even now remains my first love). Module 1 fuselage with rigged engine nacelle and centre section of top wing; Modules 2 & 3 the wings. IF this works, the only realiy hard bit will be rigging the wing floats. But we’ll see! If the wing fit is rubbish and we need filler or sanding, then this won’t work. I foresee much dry fitting in my future!6 points
-
Thanks Bill, Keith and Simon - it may be a bad decision but I think @Beard has had success with them before. Thinned he says. Hmmm. We shall see! A little bit of mojo to attack the u/c doors this afternoon. I dry fitted / sanded [repeat] one and then saw that the parts have 'ledges'; perhaps that's why they don't fit? Untitled by Ced Bufton, on Flickr (That tyre looks horrid - it will be attended to). Sanded off the ledges and behold: Too small now. More rats. Should have stayed with the dry fit method. Lesson #362 learnt. I've been staring at photos of the prop (hence the order for the markings transfers) and decided it's not flat black (as I had already painted it) so it got a coat of something glossier: There's going to be some Micro-meshing in my future. I think I'm ready for filler now. Mojo required.6 points
-
Before I sprayed the sealer coat of Tamiya Clear there were a couple of jobs to do. First up was to enlarge the turret opening so that it would take the Asuka turret. It needed to be increased approximately 4mm in diameter. Once this was done, I moved on to the front glacis plate. The two brackets which the gun travel lock sits in were too low down, so I had to remove them and reposition them further up the plate. Once these were in the correct place, I was able to fix the travel lock in place after distressing the top part in line with the actual one. The gun on Champagne doesn't sit right down in the travel lock, it sort of hovers above it. Just as well, because I had glued the gun and mantlet in place and the gun wouldn't go down any further. I thought that I should revisit the decals that I had wrongly applied. First, on the rear hull plate, I carefully scraped off the incorrect serial number. I did the same with the one on the glacis plate as well as the tricolour which once the gun travel lock was moved upwards, would be in the wrong place. It should be between the two brackets. I mixed up a small amount of Tamiya XF58 and XF3 and touched up the scraped areas, and when this had dried, I applied some Johnson's Kleer ready for the decals (the correct ones this time). On the glacis and rear hull plate, I placed two oblong pieces of black decal to act as the backing, followed some time later by he serials. The tricolour decal that I had didn't have the white outline around it that it should have so with a shaky hand, I painted it using a 10.0 brush. Not great but it'll have to do. While I had the brush handy, I touched up the torn squadron marking on the right side of the hull. The close up makes it look worse than it actually is. The photos of Champagne on the Shaddock Free site show a tank which to me appears to have been recently repainted. An exhibit like this which has been open to the elements would at least have rain streaks running down the vertical surfaces. I wouldn't expect scuff marks on the turret and hull, usually made by the crew's boots, or excessive chipping, so with that in mind, I decided that the weathering process would be light. It didn't need another gloss coat because I wasn't going to do any streaking with oils or use any washes, so the next step was to was to give it a coat of matt varnish. Then I got to work with the pigments. I used just two different pigments, namely Carr's Coal Black and Mig's Allied Green Fading. The black was applied with a thin brush around any part that dirt would accumulate around or shadow areas and along panel lines. I also used it in conjunction with the Mig fading to simulate rain streaks or any drain off areas where accumulated dirt and water would run off. I kept it fairly simple as this is a model of a static display tank and not one in service, and so with that in mind, I called it a day. It'll be a little while before this appears in RFI as I need to build a base for it. I want to try and replicate (not exactly, but near enough) the place where Champagne sits today. The ground around it is covered with small stone chippings and my idea to reproduce this in 1/35th scale was to use some budgie grit, but having looked in the pet section of the local supermarket, it doesn't appear to be something that they sell over here, so I'm going to have to find an alternative, perhaps some course sand. Anyway, thanks for looking and the comments. John.6 points
-
Greetings, Heavily modified Revell kit from 1975 of U-47, a type VIIB U-Boat, depicted as U-251 a Type VIIC boat. Finished in a wood & acrylic display case with battery powered LED lighting. Insignia and colours are for U-251, a type VIIC. The hull and deck parts are from the u-47 kit along with some interior parts. The tower and deck railing are spares from the more recent Revell 1/144th Type VIIC kit. Most of everything else was scratch built or came from the spares bin. Model is bolted to the back panel of the case with interior LED wiring passing through the hull and back panel to a separate battery pack and switch. Out of the box, the interior configuration of the kit is glaringly wrong, but has potential. I enjoy scratch building and the challenge of improving these old kits, so this project was very satisfying. Many thanks for having a look, your questions and comments are always welcome. Cheers, Bill5 points
-
Having very recently felt flushed with success at painting up 2 figures for my husband without making them look like googly eyed monsters, I suddenly went crazy and agreed to paint 14 (yes 14!) figures for our next model making project. We're building the MiniArt tram and we're making a nice non-military diorama to go with it. I bought the MiniArt german sitting civilians, tram crew with passengers, the 1930's-40's German civilians and Frau Muller with her bicycle from Master Box. So far i've discovered that 1:35th figures are terribly tricky and photographing them is even harder! I'm doing my best to replicate the images on the box art (I will for ever more despair that MiniArt decided that one particular lady would look lovely in a tartan coat!). I'm just less than half way through, here's the line up so far:- First we have the old lady from the 30's to 40's set, now in the images she's supposed to be looking shocked looking at bombed out stuff, but as trams aren't really all that shocking I turned her into a smoker with the addition of a little brass rod. First she looked like a scary gremlin, but I fixed that eventually. She's standing with her one armed friend, who was actually the first to get painted, he actually has an arm and a suitcase now. I actually enjoyed giving him pinstripe trousers, which are surprisingly effective. I'll have to include a completed picture of him at some point when I can be bothered to faff with the camera again. Next I painted the man I call the grumpy gentleman with the mustache. The next one is my favorite so far, I added a little pattern to her headscarf which was fun. Finally my latest completed figure was the trickiest, yes it's the lady in the tartan coat, this was horribly tricky to achieve but I think I just about pulled it off. Irritatingly cameras have far better vision than we do! I'm working on another couple of figures at the moment, another lady and an old gentleman. I'm hoping by this evening i'll be another figure down!5 points
-
Working on the Matchbox 1/76 LRDG diorama set. the build nearly didn't happen, as the decals were missing. Thankfully, one of the Britmodeller members donated a set. Finished this Jeep last night, great fun, but going crosseyed working at such a small scale..5 points
-
Built OOB, only added FODs on intakes. Used Agama alcohol based colors.5 points
-
There seems to have been a few of these posted up recently, and way better than mine, but heres my interpretation of the kit done in Royal Australian Air Force 3 SQN markings. The tail flash and this particular scheme called the Lizard scheme were both short-lived. The frill neck lizard on the tail dart being replaced with the 3 SQN winged grenade, and the EDSG of the lower surfaces being replaced with Light Gull grey The kit is certainly not my favourite, fit being not so great, and moulding quality poor for a kit released so recently paint is by Xtracolour with decals from caracal. Centre line beam comes from PJ Productions with bombs from a Hasegawa weapons set Resi-art resin wheels replaced the rather poor kit offerings Thanks for looking5 points
-
He hasn't bought a nightclub in Berlin and gone all Weimar on us has he? 'Willkommen! And bienvenue &etc....' If a venue called Cabaret Etch appears in the nightlife listings, well know...5 points
-
Just whilst I was meandering mentally through the groves of poddery this happened Eastern Express's repop of my old friend the Frog/Novo Gannet, something seems to have gone on whilst I had my back turned or come off Because I did buy the Airwaves interior but rejected it in favour of the Pavla resin I thought I'd give it the courtesy of a proper build, just in case it turns out nicely Shall we see over the next few weeks as the COD aircraft gets her act together? It might be a very nice item in which case I will opine to you for free No, no charge5 points
-
Nice pick Tony. I always liked the bulky look of the Norseman. I built a Chorozsy Modelbud kit of it a few years ago. I'm pretty sure that it was a resin copy of the Matchbox kit but the floats were not quite right, being a little too round in cross section. All yellow is nice and bright but any of those would be great. (the Canadian ones of course not Aussie!). Cheers5 points
-
4 points
-
I've been trying to find one of these kits for a reasonable price for quite some time and fianlly I managed to snag one that didn't make the wallet have palpitations. Due the excitement of getting this, I had to put the current Walrus build to one side and start this almost immediately! Its not a difficult kit to build, considering it is a limited run from the 1990s. The biggest problem I had was with the metallic finish! There are 3 shades of metallic paint: Dome and Skirt: Mr Color Aluminium airbrushed Shoulder vertical bars: Mr Color Aluminium brush painted Horizontal shoulder bands: Mr Color Chrome Silver aorbtished Neck rings, eye stalk, gun and manipulator arm: Tamiya X-10 Gunmetal airbushed. The hemispheres on the skirt and the disks on the eyestalk are Tamiya X-14 Sky blue The main shoulder structure behind the bands is Tamiya XF-19 Sky Grey The main neck structure and skirt base is XF-1 Matt Black Sink Plunger XF-69 Nato Black Eye bulb X-18 Semi Gloss black with a circle of white decal from an old decal set and my punch and die set This was built to represent a Mk 3 Dalek which was first introduced in the Bill Hartnell story The Chase and lasted into the Tom Baker era. In particular I've gone for the colour scheme from one of the Daleks in "Death to the Daleks" from the Jon Pertwee era . This is the box it comes in: There are two types of kit that were produced, this one and one that represents the Peter Cushing movie Daleks, which had bigger skirts, different lights on the dome and claws instead of sink plungers. The content of the kit is not huge Its odd that these photos don't show the metallic paint finish on the skirt very well, probably because I'm not using the flash in the camera! This pic from during construction shows the metallic paint much more effectively I've very pleased with the result - apart from the hassles with the metallic paint, it was a fun build and only took about a week - one of my fastest builds! The main problem I have now is I WANT ANOTHER!!!! Black and Gold next time Here you go with the best Dr Who intro there is - okay I'm biased, JP was MY Doctor when growing up Edit: I forgot to link to the WIP thread:4 points
-
2017 wasn't quite as profilic as I had hoped, but putting out 3 kits this year is actually a huge lot more than I'm used to , so it isn't all that bad! First up was the good old Monogram 1/48 Harrier in the '70 Nato vs Warzaw pact GB: Next up was the good old Hobbycraft 1/72 DeHavilland Canada Caribou in the DeHavilland GB: and last up was the not so old, but still good Dragon 1/72 Mercury rocket in the Prototype and X-planes GB: Merry X-Mas to all from snowcovered Kolt in Denmark Hans J4 points
-
Hi All, Dave here. It's great hearing about so many of us returning to the hobby after a being away for some time. Scale models have been a hobby of mine since I was old enough to build my own SnapTite model. Unfortunately, work and other obligations kept me away for the past few years, but I'm hoping this board will help fuel some inspiration and "stickwithit-ness" to complete some of my in-progress kits. My primary focus is automotive, but have mad respect to the amazing military/aviation builders out there, and tempted to try my luck at other model types. A couple pics to prove that I do complete a kit once in awhile! Cheers4 points
-
I have also added the pilot's instrument panel. I painted it black and dried brushed it with silver. Then I added the decals. I kinda messed up and cut out a piece of the decal. It took a while to get the decals to fit. But that little cut will not be so prominent when the panel is placed in the cockpit.4 points
-
Cage aerials, what can I say about cage aerials................... The WEM PE is great but they still take forever. If it helps anyone doing these, I tried about 4 different ways including making jigs and using 0.06 SS wire but ended up with Caenis 20 denier thread. Thread 16 cages onto one line, support the line between 2 pots and then thread the rest of the lines. First time I tried to secure one cage to the lines with superglue to give a fixed start point but the tension didn't work out so in the end I threaded everything 'loose', tensioned all the lines, lined the cages up and then glued them in place with diluted PVA; When glued, thread all the lines through a single 0.3 PE loop (North Star rigging eye) at each end and slide the loop up to form the cone at the ends; The mid point where the lines all join together was pulled in by looping a piece of Caenis round all the lines, slowing pulling it tight and knotting it, the ends can then be used to support the middle of the aerial from the foremast yard. And fitted they look ok. Still need the black paint touching up and the aerials from the transmitter on the aft upper deck rigging to the cages; The anti-torpedo net ended up being lengths of picture hanging wire. Tried wrapping ladies tights around various wires to simulate rolled nets but couldn't get anything consistent; And they got a wash of raw umber oils to simulate rust; Added another missing boom, this time from the aft end, which is rigged to the mainmast; Added the lifebouys (they need a bit of toning down); Some weathering mainly round the bow, and then some greenery with oils (thanks Michael M for the tip); Hopefully the final coat of matt varnish'll will take the shine off the oil. Couple of general progress shots, not much left to do; Cheers Nick4 points
-
He's a bit clingy ain't he? He must really love Buccaneers. Possibly the ship's doctor has been summoned....4 points
-
Thanks everyone and got a bit more done.....buttoned up the fuselage. Matchbox Jaguar T2 PK-128 fuselage_5 by Dermot Moriarty, on Flickr Then added the wings and tailplanes. Matchbox Jaguar T2 PK-128 fuselage_6 by Dermot Moriarty, on Flickr The wing root fit wasn't great so out with the filler. The nose also had a weird step or kink in it just ahead of the cockpit so that will need some fettling. Matchbox Jaguar T2 PK-128 fuselage_7 by Dermot Moriarty, on Flickr I'm calling the seats done and happy how they look based on what I started off with. Won't see that much through the original canopy anyway. Matchbox Jaguar T2 PK-128 seats_4 by Dermot Moriarty, on Flickr Matchbox Jaguar T2 PK-128 seats_final by Dermot Moriarty, on Flickr Thanks as always for looking, liking and commenting. Cheers, Dermot4 points
-
So.. I tried to paint up the seat and while it looked pretty decent I thought I could do better and went a step too far. While trying to strip it back the Simple Green I was soaking it in apparently dissolved the super glue I was soaking it in and the seat bead came off. Instead of trying to refix it, and seeing what Olivier has been doing in this build I thought I'd try to scratch up a new seat out of Milliput. I sanded back the cushion as far as I could and ended up with some holes through the seat back (won't be visible so no worries there). There was still a small step but nothing I couldn't hide I thought... My Milliput experiment was a disaster, it's so incredibly messy and difficult to use I just couldn't get anything I was happy with. Instead of potentially leaving a rock hard lump of misshapen Milliput on my seat I pulled it all off to try again later with some alternative. I think I found it in a putty called Green Stuff (kneadtite) that wargaming miniature modellers use. It appears to be a lot easier to use and mold as it doesn't dissolve in water and holds organic details better. I've got some on order including some simple molding tools (dentists picks with flattened ends and some soft silicon tipped colour shapers). When it all arrives I'm confident I can makes something more cushion like to cover up my plastic destruction. While that particular trainwreck was being cleared up I decided after all to add some scratches to the plywood flooring below the anti slip paint. I just painted these in with a couple of shades of brown then lightly dry brushed some grey oil paint over to blend them in. I tried to keep it subtle and I think the effect adds a lot to the finished look. You might also notice I repainted some of the cables and pipes with a darker black to make them stand out better and add some contrast with the grey black components. I then turned my attention to the cockpit sidewalls. Before I started to paint these up I added the distinctive hole / slot pattern onto the canopy guide rails using embossed some aluminum tape. strip was about 0.5mm thick and holes were formed with a needle, slots were formed with a 1mm micro chisel. They are all evenly 1mm spaced apart. My handy new riveting guide ruler made sure I got this right. I then dumped a whole load of interior green (Gunze H58) on the sidewalls. I'm pleased to say the do look pretty good under paint. Now the momentous (and most enjoyable) task of detail painting starts, I can hardly wait... Oh and this is what the rails ended up looking like under paint. They'll be painted in dull aluminum to finish. Next time hopefully a painted up sidewall or two. Cheers for following!4 points
-
Almost ready to close up the fuselage now, everything is almost ready to go. So the last time you will see most of this again More later Dan4 points
-
Brownish intake interiors if I'm not very much mistooken, too Great photo, will that little man get a trossaching for going to sleep by the right hand wheel? 😁4 points
-
Thanks Bill I must admit I can't resist the occasional stroke or pat. Thanks Keith and Joseph - my mistake... I have no idea really, I should look it up.... Jet-A1, I stand corrected! Very slow progress on the Spit. Wheels glued in and painted ready for door fitting. Stencils and prop marking transfers on their way from Hannants. I'm just putting off the custom transfer production... I have decided to brush paint her with Colourcoats as I want to give them a try and I've yet to set up the spray booth exhaust. Should be fun?4 points
-
I did wonder; it looks like you just happen to have a Lightning in your garage (the way one does)!4 points
-
Apparently the USA is planning on going back (and to Mars) sometime in the nearish future, so who knows? I just hope I can escape my children at long last by heading into low earth orbit.4 points
-
Thank you and yes and they have told their mhh, what can I call that: a story, life, leaving and forgetting and getting it back or not? Don't know. This is the red one:4 points
-
Just before I started faffing with cable ducts these things happened. I masked the cans so I could add some Chrome. Aaaand PING! Then gave everything a top coat of Vallejo for metalics. soooo shiny. Takes a while to dry so that is why I moved onto wings and things. the flaps got glued, these were wrongly numbered in the instructions too. What’s with this part of the kit? The wells look like they might have had an upgrade since the 90s but not much. I need to make this. look a bit more like this. First I think I’ll tackle the rivety bits with some quiche foil. first draw the shape with ze pencil. then masking tape to make a mask. Then peel off and cut slightly proud before adding to flat quiche base. I took the kids to the park at this point so you’ll have to wait until tomorrow. Another closed school day so we might be in luck. see y’all tomorrow. thanks for dropping by and special thanks to @perdu and @rob Lyttle for the super handy photo ref. Johnny part time.4 points
-
So-o-o-o-o many schemes So difficult to decide Maybe all over white was a good-er idea Back over there, where the Gannets fly free, I mentioned making the slots in my Buccaneer main gear covers James wisely suggested using my Buccaneer wheel door slotting tool So I did Here the slotter has made the impress in the door, basically like this The small slot screwdriver has been heated in the penny light flame and impressed into the cover There are a pair of recesses in the door inner panel, probably so the door can close with the wheels tucked away My Expo driller with a small round burr bit fitted has whipped off all the excess plastic from inside ready to be tidied up The darker areas are shadow inside making them less reflective A flash of Appliance White will tidy the holes no end ciao4 points
This leaderboard is set to London/GMT+01:00


