Leaderboard
Popular Content
Showing content with the highest reputation on 23/10/17 in all areas
-
Hello! This is my latest build which I have used as a test bed for some new paint and weathering techniques that I wanted to try. I love the look of beat up F4U Corsairs from the Pacific Theatre so I have attempted to get the sun beaten look on this model. Let me know what you think! Kit: Hobbyboss 1/48 F4U-1 Corsair (early) Aftermarket: Barracuda Decals/Attack Squadron resin wheels/Eduard P/E seat harness Other enhancements: Scratch exhaust stacks/fuel filler cap/ drilled out bulbs in formation lights. Paint: Tamiya Acrylics Weathering: AK Interactive washes. This Corsair was operated by USMC Squadron VMF-222 from the Solomon Islands during 1942.26 points
-
Hello, Here is my Mirage 5 BA in BAF No. 8 Squadron as part of the 3 Wing at Bierset during late ‘80s. The Mirage 5 BA was optimized for ground attacks and was in fact a version of the Mirage IIIE as used by the French Armée de l'Air but equipped with less sophisticated avionics. KIT The model is based on Italeri Mirage IIIE/R in 1/32nd scale. This kit is good in size and shapes. Details are generally good but sometimes are a bit poor especially panel lines due the shared molding with the IIIC kit. CONSTRUCTION I found a little bit confusing the Italeri instruction sheet, it could be due the common parts with the IIIC kit. To convert the IIIE kit into a 5 BA I had to change the following airframe parts: · Replaced the IIIE radome with a longer and pointed radome: started from the resin part made by Renaissance Model I had to reshape the contour, re-scribe all the panel lines and re-done the triangular big vent under the radome. · Modified the ventral canoe with arresting hook: I modifid the plastic part of the kit instead of using the resin part; · Added an ECM package at the base of the vertical fin: I used the resin part made by Renaissance Model; · Added an ECM fairing above the rudder: I made this part was from scratch; · Added a chaff&flares launcher under the rear fuselage: I used the resin part made by Renaissance Model; · Added and air scoop on the left side of the rear fuselage: I made this part was from scratch; · Modified the Instrument panel: I modified the plastic part and decals; · Added the small intake and a couple of aerial blades under the nose: I made this part was from scratch. Other than the modification listed above I had to add more details using aftermarket as a resin ejection seats, resin wheels, resin ATAR 9 exhaust, resin LAU-32 rocket pods. I made from scratch the ventral pylon, the rocket pod adapters and the FOD for air intakes. I added some details such as hydraulic pipes and electric lines into the undercarriage bays, undercarriage legs and cockpit tube. The pitot tube is turned metal set from Master. I tried to add some missing details around the fuselage: · Panel lines under and above the fuselage; · Fuel drain points and intakes; · All the aerial antennas; · Cannon’s barrels. A couple of Mk.82 retarded bomb where donated from the Academy’s F/A-18 kit. COLORS & MARKINGS I choose to do a BA in wraparound scheme of the ‘80s. The BA48 took part in a secret air combat training with the RAF Harriers based at Gütersloh in April 1982, so the pilots of the 3 and 4Sqn could prepare themselves for air battles in the imminent Falkland conflict with Argentine Mirage IIIEA and Dagger. Other than the 8 Squadron badge on the vertical tail the BA48 spotted a 1 Squadron badge (zapped, I presume). Paints were from the acrylics lines of Gunze and Tamiya. Squadron markings, serial numbers and stencils are from DACO and Renaissance Model decal sheets for the BAF Mirages. Some RBF tags were added to finish the model. And now some pictures of the completed model. CIAO! Piero21 points
-
All done Some details The Kit Kinetic 1/48 Mirage IIIE/O/R/RD/EE/EA Kt No 48050 Aftermarket Eduard Mirage IIIE PE set Bombs from Hasegawa Weapons set A Edaurd Fabric RBF's Decals Carcal decals Kit Decals Paint Mr Color Lacquers for dark grey and underside grey Mr Hobby H73 for the olive drab/green Tamiya NATO Black/ semi gloss black Vallejo Acrylics for details Tamiya Olive Drab for the base for the bombs, Mr Color Olive Drab (No 304) for the tails with other shades of OD/green. Gaianotes for the Gloss coat Gaianotes and Dullcoate for the flat coat Weathering Artist Oils for the wash Coloured pencils, pigments, pastels and Tamiya Weathering sets for the various streaking / grime marks More details and images on the above at my blog20 points
-
Following on from my post with the Airfix NA39, built oldee stylee, I thought I could get away with elaborating a bit as to how I build and collect. I'm a bit odd in that I model the model, rather than the real thing. My ideal build is one you might have seen in a model shop window when you were a kid. Following that logic to its natural conclusion, a Model Shop would be nice as well! I model the nostalgic side of the hobby. It takes all sorts... Here's my old hobby room. It was the spare bedroom in the flat I lived in. I built it to work in and display my kits and builds. The room was about 12x8 with a full length window along one long wall. The shelving and storage underneath was built by me out of old sheets of shuttering ply. Pegboard laid over stringers on the walls gave it a nice old feel. The display here was set up to show the guy who organised the Airfix exhibition at the RAF Museum at Hendon a while back. I told him this lot was a sample and could be expanded in any direction if needed. Get me and my showing off! He left and never got back to me. The display above was a general Airfix one, these two shots show a more Type 3 setup, circa 1968 or so... The room did sterling duty for the ten years we lived there. Recently we moved to Cambridgeshire, loosing the room. I now have to build a Hobby Room Shed in the garden of our new place. I intend it to look like a full on Model Shop inside. If your gonna dream, dream big! The downside is that most of my stash is stored away in the loft, awaiting the new shed. That should happen next summer if I get my finger out. Enough waffle, here's a few more vintage builds... Thanks for indulging me, Tony.18 points
-
Hi everyone. Much to my own surprise I find myself completing yet another Airfix Vulcan, this time though a commision build, which is just as well as I have no more space for another one. The brief was to finish it as XM575, in the dark sea grey wrap around camo, in 44 Sqdn markings based at RAF Waddington circa 1982 ( XM575 now resides at East Midlands Aeropark). The build was with all the usual well known fit issues, but this being my third Vulcan build I knew what to expect and how best to get around them. All panel lines were rescribed and I added a little extra detail in the rather sparse wheel wells. I also replaced the kits very poor jetpipes and added a set of my own turned brass 301 series jet pipes. I used the Flightpath photo etch set, along with a metal undercarriage set and a Master re-fuelling probe. Decals used were a mixture of Freightdog's 'Gods of Sea and Fire', Airdecal's 'Camouflaged Vulcans' , Fundekals 'Vulcan B.Mk 2' and the Airfix set provided in the box. Painted with Xtracolor enamels and finished with Alclad semi matt cote. Thank for looking, all C&C welcomed. Finally here she is with XJ824 built a couple of years ago.18 points
-
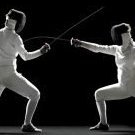
"First Gulf War - escape to Iran" - battle history of Iraq Fencers. Trumpeter model with many details, EduardPE, resin - KomplektZip, Armory, AM, Aires etc15 points
-
14 points
-
Dear fellow Britmodellers, this is Airfix new 1/72 Messerschmitt Me-262 A1a built with the addition of Eduard photo etch & Master pitot tube. Painted with Gunze/Mr.Hobby acrylics. Photographs by Wolfgang Rabel. A detailled build review will be featured in an upcoming edition of Scale Aviation Modeller International. Thanks to Airfix & Eduard for the review samples. Greetings from Vienna!13 points
-
I started this one when the civil group build on the Hyperscale Group was mooted early this year. The fact I spent 3 months in England plus it being a difficult (for me) build it took quite a bit of time to plod my way through to finishing it. Matchbox Stranraer kit (which I bought the previous year at an Old Warden Air Show), with home made decals of the early QCA scheme.. This aircraft crashed killing all souls on board, RIP. I have a few bits missing from the kit including an "ADF football" so still a few things to do including fabrication of a stand for it.. I hate flying boats and amphibs on beaching gear etc, either flying or on water for me, no I wont be rigging it, life is too short. I can't believe this thing actually flew, so much aeroplane for so little internal volume!13 points
-
Dear fellow modelers, Posting my first full resin creation, it is the rendering of the Sharkit SNCASO Dever, a "paper plane" out of the 50's This company produced also some aircraft which actually made it into flight testing, such as the Trident for example. A fabulous era, when nothing seemed impossible and every month a new project came alive. The Dever reminds me also of "Blake n Mortimer", "Tintin", "Yoko Tsuno" and "Buck Danny" comic stripes in which similar rockets and planes can be seen. Dever: Sharkit Citroen HY: l'Arsenal 2.0 Ground Crew: Hasegawa & Italeri (ex ESCI) Missile: Sharkit Missile dolly: Scratch evergreen (+ wheels from Hasegawa) Windsock: AIM72 Metal Colors: K-Colors Decals came from various bit n pieces On to the pics: Hope you like it Cheers b.12 points
-
hello guys I'd like to prsent my latest model Spitfire Wing Commander Aleksander Gabszewicz- 131 fighter wing commander. https://en.wikipedia.org/wiki/Aleksander_Gabszewicz Model- Eduard Mask- P-mask Paint, enamel Model Master enjoy the photos. Short WIP12 points
-
By the mid 1980's, the RAF were looking towards replacing its fleet of aging Eagle aircraft (TSR-2). Looking to the future, they wanted an aircraft that would be able to survive the modern, and future, battlefield. Around this time, the USAF were looking for the Advanced Tactical Fighter (ATF), and two designs were in contention, the YF-22 and YF-23. With the YF-22 winning the contract, Northrop looked around for other uses for their design. BAe approached them with a view to a collaboration. The design was tweaked to suit the RAF's requirements, which mainly included adding a second seat, specialist avionics, and strengthening the airframe for lower level flight. The result was the Black Widow B.1 Kit is the Hobbyboss 1/48 YF-23, with a scratchbuilt rear cockpit and a modified 1/32 Hawk canopy. 20171021_001358 by Paul Carter, on Flickr 20171021_001409 by Paul Carter, on Flickr 20171021_001420 by Paul Carter, on Flickr 20171021_001511 by Paul Carter, on Flickr11 points
-
Good day, gentlemen. It's my next model. Made riveting, all edges sharpened.10 points
-
Mengs 1/35 scale King tiger or Bengal tiger as the correct translation from German word Königstiger. And that animal name was the reason to start this. As “Beast of Nature” was the subject for a scale modelling show in Friesland and also for the upcoming IPMS euro scale modelling on 25 November. However my last tank build experience was over 25 years back. Thought it would be an relative easy build. I was totally wrong! By that I meant the painting and weathering job. Not the superb plastic fit. Only one intervention was needed to align the suspension (those axis were the wheels are mounted on). From late 1944 the Tigers camouflage scheme were (factory dilivered) hard edged patterns. At SennelÄger (Germany) Schwere Panzer-Abteilung 509 (sPzAbt 509) received their new Tigers ausf. B in the last months of 44 till January 45. It was then hastily send to Hungary where they were partly white painted for the operations in winter conditions. From 18 January to 9 May 1945, sPzAbt 509 was continuously involved in offensive fighting in Hungary and (until the surrender to Americans) in Austria. So instead of using simple hand airbrush spay technics a lot of effort was done to simulate the hard edge pattern. To give the model more colour appealing I did not paint the tooling on the hull sides white. But I suspect that in real those tools were also white. The tracks are from Dragons mini tracks series and the tank crew figures from MiniArt. The display is made from wood, filler and bakers flour. Some steps from the construction process followed with final outdoor photographs . Thank you for watching.10 points
-
Ooops. Completely oblivious to the fact that we'd punted over to page 20... I have vague recollections of something like this being a regular fixture of pub toilets in Somerset back in the mid-70s Tomo. I presume an army lorry full of the stuff was stolen on Salisbury Plain and did the West Country publicans for years as no-one in their right mind would nick the stuff... Still available apparently for those indefatigable of bewtock: http://www.independent.co.uk/news/uk/this-britain/minor-british-institutions-izal-toilet-paper-1727294.html Isn't that step 1 of the 'instructions for use' printed on the side of the packet? My thread. My beautiful thread... gone forever.... What did they take them to the management in?... Trying to elevate this thread - if only all too briefly - to something approaching decorum, I just thought I should interject a few pictures... Last thing before bed last evening I had one final fit to get out of my system and gave the fuselagfe walls some of the liquid/powder treatment: This time round I did another little variation by flicking black powder paint onto the surfaces whilst they were still wet: Like an outbreak of measles eh? From experience I had every faith that once dried in there would be something of interest left behind once nature had run its course. Sure enough, the lividity was diminished considerably when dry: A bit like the reverse of when stones that look more attrractive on the beach when wet and rather plain when you get them home, here you actually want the effect to diminish of its own accord: That'll get some further working-over with RLM02 again later on. I say, who's this just popped up as I was typing? My thanks to you for that Johnny. I'm going to leave those seats in their natural state to avoid compromising the current appearance. One thing I need to put time aside for at some point in the near future is play around with matt and gloss varnishes in combination, not just on things like leather, but to try and make some progress at producing the anisotropic shines and lustres you see when the light hits an aircraft from different directions. Onwards... A quick test fit of the (now-glued) gondola to see how it sits into the fuselage: On the actual aircraft there should be s light 'lip' visible around the front where the kuhler panel are, but from the doorways backwards it needs to be flush with the top ofthe fuselage. There weren't too many problems with joining the gondola halves - at least none requiring bags of filler - but I did discern a slight disparity between the two halves that needed some scraping-back with a new scalpel and sanding flush. The very front of the gondola matches fine: ut you can see the dichotomy on that rear curve: The top is not too bad at all, but like the 'nose' of the gondola, a smear of filler here and there along the seams is necessary: The 'flare' at the rear of the gondola needed sanding-down however a bit in order to get it to mach the angle and thickness of the trailing edges of the wings that join it on either side: Egad. I'm starving and off for nosh. Happy modelling all! Tony9 points
-
OK - (Small) Update #4, In between work, family and more house renovation projects, I managed to get a little bit more done on this Tempest. I'm still tackling the more tedious bits of this model, so started to work on things I like to call "The Make or Break" part of a build. Those nice smooth wings needed a few panel lines to live 'n them up a bit, so out came the Dymo tape, Scriber, another Coffee and a few deep breaths. I really hate scribing, it's so hit and miss and the proof is really in the pudding once the first Primer coat is laid. I'm still undecided about colour options and am in two minds to go either a Silver finish or one of those odd Slate Grey, Earth Brown camo jobs. If I go silver then that means that I'm relatively happy with my scribing and sanding abilities - so odds on it'll end up a camo job! I thought long and hard about this, however I had severe doubts that the Falcon Vax canopy would sit flush with the kits cockpit opening. When I build up the courage, I will attempt to crack the one piece Vac canopy in two, this is risky, however I believe that it will fit a lot better and save some pain in the long run. I will probably have to tart up the cockpit a bit more than what I was intending, however you wont see too much through that small opening. Now the Matchbox kit has a large recess at the rear of the cockpit opening to fit the intended canopy. This is nothing like the real thing, so I decided to glue a few curved bits of plastic strip, which were then filed flush to conceal this ridge. Next up was another nightmare area, which I believe was more self induced by my previous chopping and re-attaching of the leading edge intakes. To fill the large gap between the wing and fuselage join, I once again glued a small piece of plastic strip along the open gap. This was left to dry and then sanded until smooth. To be honest, it's not perfect and in my over enthusiasm to get this area right I managed to cock up the intake opening and induce a small shelf along this join about the width of my index finger!! I've taken some plastic off the outer higher side, but still think it will need a little more removed before it looks right. That Camo finish is looking better all the time!! That's about it. I'm still waiting for the right engine nose piece to arrive via the post, hence the rather unorthodox way that I've started to assemble this kit. Cheers.. Dave9 points
-
Thanks for all the comments folks. I made a start on the cabin rear bulkhead this afternoon. Fly don't really provide a lot of interior detail, and if you check around photo's of the 1:1 you will spot a whole load of bits and pieces that need added (if you feel so inclined). First up this afternoon was a small rack on the port side, as well as an opening in the bulkhead through which a bunch of cables disappear (eventually). Then came removal of the awful quilting attempt. My replacement can be seen just to the side - I used some of the tinfoil alluded to previously, and just glued onto a piece of kitchen towel - this gave enough strength to the tinfoil so that I could rustle it about a bit to stop it looking so uniform, yet prevent the tinfoil from tearing. I then made up the cartridge stowage box from a piece of brass 'C' channel capped with styrene on the ends. This is where it all starts to become a bit ehrrr airy fairy for want of a better term. The kit doesn't really do a good job of duplicating the cabin interior either in content or in form. The shape of the rear bulkhead is all wrong I'm afraid. You can see my pencil marks on the bulkhead to mark out where the driveshaft meets up with the bulkhead. It's too low, and it doesn't allow me to position the cartridge stowage in the correct place - but better some place than none eh? Frequent test fitting is required to make sure it still all goes together. Then some other gizzits and greeblies were added. Some kind of electrical plug (I think) and a mounting for the flare pistol. Then primed and painted, and the first transfer is on ! The "Cartridge Stowage" is a bit over-scale, but better than nothing. Fly would actually have you put it on the forward bulkhead, but I don't think I have ever seen cartridges stored in that location. I also made some comms cable by wrapping some fine wire around a drill bit - just placed on top for the moment. There's a few more of these to be added throughout the cabin. I also noted that my alclad matte is no longer looking matte - it's taken on a sheen which I'm not sure I like. There's a few alclads that I really like - matte being one of them. However, I find that Alclad's packaging leaves a lot to be desired. I've had several caps break on me, and little coned insert never stays attached to the cap like it's supposed to. The mate was one of the bottles where the cap broke, and I've been sealing it with electrical tape. It looks like it may have evaporated to a point where it no longer can be used - kinda sucks since I still have half the bottle left. I guess I'll be buying some more of that very soon then. The pistol handle was carved from a piece of scrap, and wiped over with some filler to make the cover. I doubt if it will ever be seen once the fuselage is all buttoned up. Some cabling detail started on the starboard side. I don't have any white cable in the right scale so some is on order while I try and find other parts to work on. Even the red looks a bit thick in this photo - I may change that out if I can find any thinner diameters hiding away in my scrap box. Switches were made by cutting small rectangles of plastic and inserting a small piece of wire for the switch. You can just about make one out on the doorway pillar. (the winch switch will come later!!!) Oops - looks like I need to add a small piece of black cable between the rib and the red box - I didn't catch that earlier. After going to all the trouble of cutting out the quilting, I found that I needed some support for my tinfoil effort and stop it falling through the hole. C'est la vie. There's still plenty of detailing to be done on the interior, but I'd like to get some more cabling in place first. Hopefully I've ordered cable which will be in scale. It looks like I may have to start on the seats soon - I bought in plenty of brass rod for that effort, but by the looks of some of those photo's, I need to spend a few hours tidying up my work area.9 points
-
For no other reason than I had not built a 109 (or any German aircraft for that matter) for decades, I thought that I would give my Spitfires and Hurricanes a play mate. So I thought I’d have a go at the latest 109 in 1/72 from Airfix. I will hold my hands up and confess that my knowledge of Luftwaffe types is rather sparse and this is built straight out of the box, paint potlets and all. My only additions are Tamiya tape seat belts and the censored tail marking (courtesy of a transfer sheet from SAM in the 80’s!). Not my best by any means, but I’ve now started to redress the balance in the balance of air power over Max Headroom mansion. The kit went together well enough, but the aileron mass balances, wing gun barrels and tailplane bracing struts barely made it off the sprue. I have fine toothed saws, a sharp blade and sprue cutters and I had to be very careful in separating them. The aerial mast however didn’t survive separation and what you see is cobbled from the spares box. Enough words then, here is my fourth completed model for the year. .....and here are some of its new friends I have at least another couple of Spitfires somewhere. I have a 190 in the wings ready to give help if needed! Trevor8 points
-
8 points
-
Hi all - very long time, no speak - but I thought some might be interested to see latest on this project - fuselage now together - so starting to look like a Constellation! Can you tell what it is yet? Note - wings not fully seated at roots yet as I need to make openings for the flap area. Also nose is dry fitted, but needs a lot of work before fitting - as does the dorsal radar 'fin' which needs to be a lot thicker - so please be gentle with any observations at this stage plaese! And to give scale, an Eduard 1:32 Bf109E: Definately feels like we're getting somewhere at last! Have fun! Iain8 points
-
Hello folks, And another Airfix Scooter. Pure pleasure... Continuing with those colorful Navy birds, this one is from the "Flying Ubangis" VA-12 I used Xtradecal Sheet. They are thin and good, settle well too, but the instruction sheet... beware, because they're full of errors ;-) Got myself trapped on a few details with the 102 Dagger sheet and now again with that A-4. Colors used: White from K-Colors FS16440 from AK FS36270 from MRP (for the anti glare) Alclad Aqua Gloss as varnish Cheers b.7 points
-
Hello folks. The 150° Gruppo Autonomo flew MC 200 before switching to MC202 and the horses were weary and tired from constant use in the desert in 42. I used a picture of the plane inAli d'Italia book n° 8 page 37 to weather my Mqacchi accordingly. The Italeri model is a basic kit to start with but needs a lot of improvements to reach a decent representation of the real thing. The canopy and the cockpit are from Pavla, the whell bay and connection cables are scrachbuilt using pictures of the real thing to be correct, all rivets were filled and sanded,and more details had to be scratchbuilt. All markings but the insignia of the "Gigi tre osei" were home made with the Silhouette. So here are the pictures: DSC_0001 by jean Barby, sur Flickr DSC_0002 by jean Barby, sur Flickr DSC_0003 by jean Barby, sur Flickr DSC_0003 by jean Barby, sur Flickr DSC_0005 by jean Barby, sur Flickr DSC_0006 by jean Barby, sur Flickr DSC_0007 by jean Barby, sur Flickr DSC_0008 by jean Barby, sur Flickr DSC_0008 by jean Barby, sur Flickr DSC_0009 by jean Barby, sur Flickr7 points
-
Got the top colours on yesterday. I used Xtracrylics Extra Dark Sea Grey and Dark Slate Grey, but lightened them both a touch with a couple of drops of white. Thinned with Xtracrylics thinner and a couple of drops of Galeria Fluid Retarder, they sprayed beautifully. I did the Dark Slate Grey first, and then masked off using the blu-tack sausage method, hoping to get a nice feathered demarcation: Here the EDSG has gone on: And with the masking removed, hey presto! Just a couple of spots on the left wing where the masking tape has pulled up some of the Dark Slate Grey, but that can be corrected and overall I'm pretty happy. Justin7 points
-
Thanks Ian Nope, the new 'Spitfire' will stay on the desk... it's not even good enough for my ceiling! I've spent most of the day editing the video and 'converting' the 360 clips I want to 'flat' video. Then importing it to iMovie and painstakingly editing it to include some of the photos. Only to find iMovie can't render the movie at the end; it crashes. Rats. I shall persevere! Talking of perseverance, while videos were processing I did some on the Gosling... It should come as no surprise that the tailplanes don't fit: Untitled by Ced Bufton, on Flickr They need to 'meet' at the front and, of course, fit without a gap on the join. After much fettling I got it to fit(ish) and glued them in, supported with BluTak: ... and then blobbed some Humbrol filler on the front ready for sanding: Next a quick look at the gear doors: ... showed the usual flash. Ugh. BUT where do they go when retracted? There's not much room with the wheels in: RC groups has the following image for the Goose: So it looks as though the lower support goes in behind the wheel.7 points
-
7 points
-
One of the only rules I remember from my MBA marketing courses is "Sometimes, there's a hole in the market, because there's a hole in the market", meaning that there appears to be a need to fill, but it hasn't been (or there were failed attempts to do so) because there really is insufficient demand. If there's a long-standing hole, you need to examine the reason for it very carefully before deciding to fill it. For decades, one of those holes has been a 1/72 injection-molded kit of the NAA FJ-2/3 Fury. Sword is to be commended for not only stepping up to the hole represented by the FJ-2/3 Furies, but recognizing the small, but to some significant, differences between the -2 and -3 fuselage and later wing. My hope is that if sales are good, they will rearrange the -2 or -3 molds or create new ones from the master models and produce a blue -3 configuration (basically the -3 fuselage and -2 wing) with decals to match. They do plan to produce a 1/72 injection-molded kit of a different long-neglected U.S. Navy carrier-based jet next year and I'm lobbying them to also take a chance on another one. However, that bright future for modeling fans of U.S. Navy aircraft is at least in part dependent on the success of these three kits. In my opinion, admittedly without doing more than examining the contents and dry-fitting a few assemblies, these kits do the type justice. The few nits that I have identified so far (see http://tailspintopics.blogspot.com/2017/10/sword-172-north-american-fj-23-furies.html) should not be a deterrent. Moreover now that these kits are available, I doubt that another company will issue an FJ-2/3 Fury in 1/72 scale, and in the event that one does, it is unlikely to be a "better" one. In other words, if you want 1/72 kits that fill holes in your collection of U.S. Navy aircraft, please buy these kits. Don't write them off as having fatal flaws based on photos, speculation, or snarky comments and wait for a better one. Don't even wait to buy these—their initial sales success will almost certainly increase enthusiasm at Sword for filling holes like these. I can also assure you that Sword is intent on achieving accuracy. The fact that they went to the trouble of producing a different fuselage and wing for the smallest of differences between the FJ-2 and -3 is proof of their dedication to it. That they didn't achieve perfection is because it's very, very hard to do so.7 points
-
The Ilyushin Il-96 (Russian: Илью́шин Ил-96) is a Russian four-engined long-haul wide-body airliner designed by Ilyushin in the former Soviet Union and manufactured by the Voronezh Aircraft Production Association in Voronezh, Russia. It is powered by four Aviadvigatel PS-90 two-shaft turbofan engines.The Il-96-300 is the initial variant and is fitted with Aviadvigatel (Soloviev) PS90A turbofans with a thrust rating of 16,000 kgf (157 kN, 35,300 lbf). Development started in mid-80s while the first prototype flew on 28 September 1988. The first Il-96 entered service with Aeroflot in 1993.[citation needed] Range with 262 passengers and fuel reserves (for holding 75 minutes at an altitude of 450 m) in a two-class configuration is about 11,000 km (5,940 nmi), allowing flights from Moscow to US west coast cities, a far improvement over the Ilyushin Il-86. A highly customized version of the Il-96-300, called Il-96-300PU is used as the primary aircraft in the Russian presidential aircraft fleet. Four were used by Russian president Vladimir Putin, and by Dmitry Medvedev as VIP planes. The VIP aircraft is operated by Russia State Transport Company.[8] The Cuban leadership use IL-96 300. There were plan to produce a variant dubbed Il-96-300V which would include two sets of Airstairs in it.[9] All pleasant viewing! Regards, Yuri.6 points
-
At last! I have finished something, and here is the first of my Roden Brits. courtesy of Ray at 26 decals I have been able to build one of my favourites and on that I both worked and flew on. Be easy as like many I on here I do this for fun and relaxation. I hope you like it and there are more to come. Of course looking back at the photos I realise that I have not fitted the anti clonk light underneath. Hey ho back to the bench with it.6 points
-
6 points
-
Dear all - Apologies, but not been on the forum for quite a while........... Therefore, posting up some pictures of my recently completed Wingnut Wings Sopwith Ship's Camel which was quite a long build for me. This is the second WNW Camel I have built and did learn a few lessons from that first build. That said, I think this is one of Wingnut's more trickier kits and the decals don't seem as good (a bit thin and brittle) as normally supplied - perhaps it's just me though. Decided to add a bit of interest this time round by displaying on base representing a wood deck from a towed lighter (well that was the idea anyway!) with a RNAS resin pilot figure. I'm generally pleased how this one turned out as I found it quite an involved build. This also took gold (together with one other of mine) yesterday at my local model club internal competition for aircraft. As always, built OOB and brush painted. Rigged with combination of 2lb fishing line (wings, undercarriage and tailplane) and Pryme (ailerons, rudder and elevators) elastic thread. Regards Dave6 points
-
Looking good Tony. For your next build should it be a British aircraft: Best used for anything but it's intended purpose!6 points
-
All decals on except for the serials and those on the tailplanes and landing gear doors. From here I need to gloss those small parts and place a protective coat over the main aircraft. The fit of the tailplanes isn't perfect, so I think I'll mask up the area, fill, smooth and spray before I place the serials, as that's the area that needs the most work. I moved away from the Gunze gloss coat to Tamyia X-22. I've found that Gunze's gloss doesn't seem to cure. Not sure what the issue is. Not the first time I've had it happen either. Maybe I'm laying down the coats too fast? Anyway, X-22 came to the rescue and dries rock hard.6 points
-
Hi Ced; both of those reasons occurred to me too, so I imagine there is some truth behind both (and I wouldn't be surprised if the issue of reflection might have been behind the RAF's decision to switch to black for the interior colour before the war's end, and with the Luftwaffe's switch from RLM02 to RLM66 for their interior colour). However I can't remember whether I actually read this somewhere or just tried to fit a logical reason to the change of colours... Thanks Jaime, and thanks - and welcome - John The various panel dials etc. are provided as transfers - the background colour is not provided so you have to paint the panels black before applying the decal: I prefer this to a pre-printed black background as I don't like using 'neat' black or white paint, it looks a bit too intense to me and I prefer to use very dark grey or very light grey respectively. There wasn't very much detail painting required for the waist and dorsal gunners' station, just some gunmetal on the spare cannon magazines and some dirtying up of the interior: I'm pretty sure none of that will be visible anyway. The forward fuselage interior was a bit more involved, with the panel transfers and a bit of black on the control wheels and bar: The nose section has a couple of spare cannon magazines; the grey bit at the right is the cannon mount which needs to be painted grey-green like the rest of the interior: And here is the dorsal turret and tail turret cannon mounts: I drilled out the end of the cannon barrels because I could. Now I can start assembling and adding the crew members; there are six different poses, A to F: There is a bit of repetition but as noted earlier I shall mix and match where I can to reduce the potential uniformity of the figures. In order to keep track of who goes where I marked six milk bottle caps 'A' to 'F' so I don't end up trying to cram a gunner into the pilots' seat: So that's the fruits of my weekend, I hope to get the crew together in the coming week... Cheers, Stew6 points
-
A good days work on her today, I got a coat of satin varnish on, the undercart almost complete, she looks almost done but I still have a lot of small detail things to add. John6 points
-
Hey you lot. One step closer to crazynes with a few hours painting over last night and this morning. After the chipping fluid we go with a pre shade. Top. and bottom. Then a thin blue coat, And another layer. Looking cool I just need to add a lighter pass to the panels by adding white and a double amount of thinner. I really thought that I could go at this with a coarse brush and water. I thought wrong. What the hell? Total bobbins. I was doing this while running around picking the boy up from cubs and walking the dog. (Not all at the same time obvs ) I decided to cut my losses and re spray to get her back to square one. back in business. this time I went at it with a cocktail stick and a little water. more defined for sure but missing something, I want this pass to be over the top as I do t know where the black paint will be weathered but it still looked forced. I had my slim Flory sanders and some micro mesh sticks handy so I passed over the initial scratching with a front to back whaft. lookinh better. I did a lighter more subtle pass on the underside. The top looks really REALLY worn, I'm not worried about this as only a small portion of this paint work will be visible in the end. The underside ware is more like what I'm after on the final pass. I've done a gloss top coat and I'll do a Flory wash before another chipping fluid pass and at last some black. or maybe a salt pass? Who knows? I'm making this stuff up. more tomorrow. Take care guys. Oh, oh, nearly forgot. I did a cheeky dry fit too. so looking forward to getting the cat black! Johnny paint chips.6 points
-
Hi all here are some pics of my latest project, it's ICM's lovely 1/48 Dornier DO-17Z built and painted as a DO-17z-3 of the Ilmavoimatt (Finnish Air Force) and finished in a temporary Winter scheme. I thoroughly enjoyed this build and found the kit to have the right mix of detail and ease of build and can highly recommend it and also the decals by SBS Models which are superb. Anyway here are the pictures; If any of you haven't been along to the Radial Engines Rock GB (which I built this for) then I recommend popping along and having a look at the cracking models in the gallery and those still in wip, there are some great ones to look at. And if you like the colour scheme (and who wouldn't!) there is a Winter War GB proposed which I suggest you have a look at and sign up for. Here is a link to the build of her; Thanks for looking, and as usual all comments and criticisms are gratefully received. Craig.5 points
-
Hopefully my first of many entries into this group build, it's the good old Stuka kit. First of all the artwork featuring a diving Panzerknacker. And now the parts. Briefly. The Stuka is one of the Matchbox kits that until now I have never built, I remember the artwork well and always fancied it so looking forward to this. The parts look pretty good so at the moment I'm thinking that I will just follow my usual Matchbox kit building procedure. I will be building the revell kit alongside it to help as a guide to improvements, depending on which version I build the Revell kit may provide a few spare parts to the Matchbox build. The Matchbox build will have to be the canon armed JU87 G, the Revell build probably a winter camouflaged JU 87D, in which case the Revell guns and decals will most probably find themselves on the Matchbox build.5 points
-
My second build for this will be another Hawker product, namely the Hurricane. Since both this and the Tmpest are quite similar I hope they will keep things ticking over whilst the other kit dries. Simple paint schemes will help! The only addition will be some Master 20mm cannons, if I can remember where they are...5 points
-
Good evening one and all. Adding to my little collection of Prototypes, experimental and research aircraft is this my latest model, YF4K Prototype at the time of its' first flight 27th June 1966 and flown by Joe Debronski. The base kit is the Fujimi F4K kit of which much has been written and with good reason, it is a superb kit considering it's age and went together with no real issues. During the build I moved the 2 lower auxiliary doors further forward as per UK Spey Phantoms, adding some detail to the u/c bays and airbrake wells and scratchbuilding new seats, although, I have to admit these may be wrong due to the fact I could find no decent pics of the MB Mk 5 with the sugar scoop head area. No photo etch was used so no mirrors adorn the canopy's. All the tubes were removed and replaced with Albion Alloys tubing. On the paint side of things Mr Colour White for the underside, Humbrol Dark Sea Grey for the top surfaces and Alclad for the metal areas around the exhaust. Everything was sealed with Alclad Gloss Coat The markings were from RAM models sheet of early British Phantoms and were very delicate to say the least, even in water extreme care was needed and using X20A to settle them was a no no, I tried on a never to be used decal and it just disintegrated. Anyway they did settle with the use of Mr Setter and Softer but there is some silvering. Thanks to those whom answered some of my questions regarding this build and helping me finish it. Hope you like her and thanks for looking. Disclaimer; All the usual cock-ups and mistakes apply!5 points
-
In April this year Wingnut Wings released 'The Duellists' double kit depicting an actual incident that took place in the Great war, when 2 pilots from 4 Sqn Australian Flying Corps shot down and captured an LVG C.VI. The review is here. RFI of the Camel is here. One of those 2 Australian pilots was Harold Kerr, and his great grandson Andrew recently saw the review and got in touch, sending me the following account; "I am the great grandson of pilot Harold Kerr. I just wanted let you know that you got it a little bit wrong, the account of the duel is in the book titled 'The last great air battles', there was not that many in ww1. Harold Kerr was the pilot that hit power lines, he shot down the LVG and upon doubling back to confirm he had 2 Germans on his tail and he dove to get them off, couldn't pull out of it and hit the power lines. When he crashed he headbutted the mounted Vickers machine gun and compress fractured a big part of his skull and broke everything. He ended up being in hospital until long after the war finished and strangely enough next to the 2 Germans from the LVG he shot down. His mates took his gold cigarette case and fob watch as he was left to die from all his injuries but he got better and lived till he was almost 90. I have a clock which his mates made out of the centre piece of the propeller from the sopwith as the blades were snapped off, also his leather flying cap it is very frail and was damaged during the crash. I also have a photo of him in the plane if you would like it. I like to think of him as I have broken all bones a couple of times in horrific accidents and am still kicking on. Harold was in the light horse earlier in the war and was in heavy fighting at Quins post in Gallipoli, I have a letter he wrote home and he was very positive talking about all his friends that had been killed in the previous couple of days as most of them died. Harold was shot through the chest just above his heart, he survived and was discharged after which he joined the RAF and became a Sopwith Camel pilot." Would we like to see the pictures?, you bet we would! Huge thanks to Andrew for sending the following photographs; Harold Kerr in his Camel; Harold Kerr; Harold's wings; His medals; Leather Helmet; The prop boss 'clock' And the LVG after capture; Fantastic to see these and what brilliant family heirlooms to have. Priceless! Again huge thanks to Andrew, nice one mate! Cheers John5 points
-
Hi Mates, got back from Canada last Saturday and I got a bad flew, thus I’ll stay at home for a few days. I slept all afternoon and Saturday night, but yesterday I got to my working spot, (the living room) and built the last bits for my Jaguars’ nose wheel bays: the gear locking system and the cyinder which control the side doors’ opening. I added the last pipes and this morning I got started with the paint work. First I sprayed a coat of back , followed by a coat of zink chromate and one of Future, to get a gloss surface before applying a black Tamiya wash stuff. Then I brush painted grey the cylinders and pipings, with blue and yellow collars every now and then and the red plugs for the battery cables. Then I oversprayed a coat of Xtracrilix matt clear. Here are some pictures: Front view Side view A few more from different angles: Very very slowly my Jags are progressing. I’ve got a few more days to spend at home, so I’ll try to maximize my time modelling. I’ll keep you posted. Ciao Massimo5 points
-
Thanks for digging that out Nigel - I wasn't aware of his work. He has a fine ability to bring luminosity off of a sheet of paper hasn't he? We are all Europeans united in kitsch after all Benedikt! You're a sweetheart Keith. My thanks for that info. The former doesn't always guarantee the latter of course, so I've been lucky so far! Don't pretend there isn't a fnaar to be had in that apparently innocent phrasing! Thanks for that Ced. Cherry Pink will do me.... It fell off the back of a tripod! Honest guv. They seem a bit harder to source than a few months back Mr. T - I hope that SBS haven't stopped manufacturing? As you so rightly anticipated, I've been slavering over their meshy goodness. I'm pretty sure that it was Jay's that I got my Falcon FAA canopy set from back in the Sea Venom days - at the time I remember being knocked out by how quickly they arrived up North! Need. Want. This news displeases me greatly Tony. I will endeavour to keep the modelling entertainment at a premium for you. What about a Heyford/Dornier mobile Benedikt?5 points
-
Bit more progress, she's coming together now! Foremast rigged, Uschi line standard; Main mast added along with aft 2 turrets; A bit more rigging on the main mast where it attaches to the deck. The last bit which connects to one of the torpedo net booms will be fitted after the net shelf and handrails. And the foredeck rails fitted along with post to support the wire that runs from the conning tower tower to the forward flag pole. There's a similar one, but thinner, on the aft most turret that serves the same purpose but you can't really see it in the pic posted. Unfortunately the WEM rails don't have a gap for the top of the ladders so they've been cut to create a gap, I'll fix a bit of wire each side next weekend then the turret can go on; Thanks for looking Cheers Nick5 points
-
By close of play for today I've managed to construct most of the underlying structure for the 2nd bank. I will have to extend the wall to the front edge of the diorama, but otherwise that'll be it. Then I can cover it with PoP, then PVA and get on with the grassing-up. The grassing-up will be very quick indeed. Then I can add the barbed wire fence (another quick job) and maybe a telegraph pole. The black area of the base (the bit where I went mad) will now feature the foundations of an old water-mill; just a couple of courses of stonework and a bit of old cobbled floor. But then the 'present day' farmer may have used this area as an animal pen/sty/storage area, or something. I will have to see. So another evolution possibly? Anyway, here's the bank in position, complete with supporting wall along the left edge (This will require some additional work but will mostly be hidden behind the rushes) The farm track will be immediately to the right of this bank. And here's a plan view of the 'cattle wade' area. TFL Badder.5 points
-
So, first time in ages I've sat down to do any modelling and what better way to ease back in than with a (some) Matchbox build. First off, one of Hawkers finest in the form of a Mk.II Centaurus engined Tempest. This will be built pretty much straight from the box so as to reduce the amount of frustration I feel....hopefully. The obligatory runners pic posted via the app on my iPad. Hope it's not too big... And this is where we are of last night... Hopefully more can be done in between re-decorating my house this week.4 points
-
Loosely based on scenes in The Last Samurai, (well, very loosely I guess), this one started off like this; And ended up looking like this; The figures are from Andrea Miniatures, First Legion, Aeroart, East of India and Pegaso. The bridge and toro gate are aquarium accessories, and the trees, static grass and the resin water are among various stuff kicking around in my diorama spares boxes. Cheers H4 points
-
Good evening Gents. A little more on the Cat tonight. A Flory wash before the push into DaRkNeSs!!!! I top coated in Tamiya gloss and then sprayed with Flory black. then after drying a bit of a dusting down. Getting there, I think this is the most steps I've ever done before the final paint job. looking really worn now but more needs to come off. That's better, if I ever do a corsair I'll know what to do. Im really quite happy with that. seems a shame to cover her up. But needs must. Btw does anyone know where I can get som Daco Red? Everywhere seems sold out. I can sense those thick Academy decals lurking in my future. any hoo that's it for now. I top coated again and will let her dry. I just have to figure out the next steps. fun times. thanks for dropping by on this soggy Monday evening. Take care and Happy Modelling chaps. Johnny.4 points
-
Thanks All, Bit the bullet and tackled the upper wing. Had the location holes out by a smidgeon and had to redrill. The engine framework is a great help with these type of aircraft and I added the inner most interplane struts before up ending onto the wing. Once set into position it was a case of cutting the struts. Haven't got much Contrail left so had to use Evergreen 020 x 040 strip. Will rig the wings next before tackling the tail. Regards, Steve4 points
-
It's been a very long time since I posted anything but I was in the modelling mood and decided to do a quick weekend project to make sure I could still wield a knife, glue and airbrush! I picked this kit up a while back - as with all of these little models there are only a few parts so it goes together very easily. The silver is Tamiya acrylic. Other paints are either Tamiya or Vallejo. I now need to get a couple of models off the shelf and finish them!4 points
-
Hi Modelers one and all. Been very lax with this project, but with Telford looming, I'm pulling my finger out and pulling out all the stops to get this finished ready for Scale Model World. A quick view of how it looks at the moment, this is the final position of the main items, fuselage, wings etc. Strops from Kit Form Services, plus some of the workshop tools. I have finished the main structural elements, fuselage, wings and now started on the workshop area and tools. Wing in its maintenance frame.. Another shot of the frame plus the propellors on a pallet. Started work on the oxy-acetylene trolley set. A few shots of the bench and working area... Added electrical conduit on the wall, going to add and whiteboard, plans etc later. Thats it for this weekend, got a long weekend starting Friday, so looking to finish this project. Cheers Richard4 points
This leaderboard is set to London/GMT+01:00


















.thumb.jpg.158e2e086d45b8f96b7d93b8bee8dc21.jpg)


