
Leaderboard

.thumb.jpg.d17ff607fc7e89ed057e63fcb6f2a888.jpg)

Popular Content
Showing content with the highest reputation on 18/10/17 in all areas
-
This Puma is built from the original Matchbox issue of the kit: It came in it's three colour glory! Dating from the 80s the kit lacks the finesse of newer models, but has some nice features. Panel lines are raised, so I engraved them, and the interior is a bit basic so I enhanced it with plastic card, wire, and various bits from the good old spares box. I painted her with Xtracolour enamels. So here is my early Puma HC-1 as they first appeared in RAF service, before they started adding all those extra bits. Thanks for looking Angelo.32 points
-
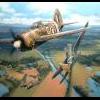
On Friday 21st May, a A-4Q Skyhawk of CANA 3 Esc flown by Lt Cmdr Philippi was shot down near Swan Island in Falkland Sound at approx 3.12 pm by Lt Morell RN in No.800 Sea Harrier XZ457 using a Sidewinder. The A-4`s had just completed an attack run when they became aware of a pair of Sea Harriers attacking from behind. The Argentine`s jettisoned their fuel tanks and bomb racks, increased their airspeed and got as low as they could in an effort to escape. Lt Cmdr Philippi A-4 was hit and he ejected safely.29 points
-
Hi everyone, On a roll and finished two this week ! You know, sometimes, you get the urge to build something that you know is going to be too big to go anywhere but think....who cares- I`m building one regardless........ Well here`s my example : Trumpy`s 1/48 Skywarrior that I`ve just put the finishing touches to. Built and loosely converted to represent a RA-3B from their KA-3B kit Finished to represent an aircraft of US Navy, VAP-61, based at DaNang, Vietnam around 1969 Modifications include adding the fairings on the fuselage and defining the camera hatches on the lower forward fuselage, filling in various unwanted panel lines and bomb doors....... drilling the port holes and filling with Krystal Klear and what looks like an IR Seeker on stbd side as well as making some new antenna Made life very difficult by lowering the flaps and apart from pitot tube and decals the rest is from the box Apparently the paint scheme wasn`t too popular as crews preferred all over black. Hope you enjoy, thanks for looking Cheers Russ27 points
-
Having had some time off work - I decided to tackled this kit - which has been sitting in the stash for some time. All in all it's a nice kit to make. The cockpit is a real joy. Lots of detail, nicely designed, goes together very well. I sprayed it Tamiya gunship grey, then sponged on vallejo neutral grey, and pale grey to break up the surfaced and create some highlights on rims of seats etc. Once the cockpit is done, and the canopy masked off the rest of the kit is actually extremely fast to finish. The part count outside the cockpit is pretty small. I used the Eduard masks for this, as the idea of doing it myself was too terrifying. There was a fair amount of sanding needed to get the transparent parts flush with the wing roots. Once the plane was together I decided at the last minute to go down a 'what if' route. I am a bit bored of doing the usual green / grey splinter camo, and had some rattle cans knocking about that would allow for a desert version. I haven't seen any photos of a Bv-141 in the desert, so this is all a bit fanciful. Once the main 3 colours were on, I did quite a lot of post-shading using white and umber oil paint - put directly on the kit then blended in roughly in panel areas. Quite happy with how it went, once I practice I think it will be better at keeping it to the right areas and accordingly it will look better. Finally I splodged the with humbrol weathering pigment 'sand yellow'. The landing light is a little bit of kitchen foil. Seat belts are wine bottle foil. Thanks for looking - all criticisms welcome! Bruce19 points
-
.18 points
-
The Tupolev Tu-22M (Russian: Туполев Ту-22М; NATO reporting name: Backfire) is a supersonic, variable-sweep wing, long-range strategic and maritime strike bomber developed by the Tupolev Design Bureau. According to some sources, the bomber was believed to be designated Tu-26 at one time. During the Cold War, the Tu-22M was operated by the Soviet Air Force (VVS) in a strategic bombing role, and by the Soviet Naval Aviation(Aviacija Vojenno-Morskogo Flota, AVMF) in a long-range maritime anti-shipping role.[2] Significant numbers remain in service with the Russian Air Force, and as of 2014 more than 100 Tu-22Ms are in use.[3]18 points
-
Ok i started this build back in July and had to shelve it temporarily due to paint shortages through mid August. But Im going to consider this done with the exception of some Do not step decals and weathering. I should add these were the worst decals I’ve dealt with in 30 + years of model building. The glue was so thick everytime i worked with the decals it felt like my hands were covered in vaseline. Mind you i work with water in the 120+ degree range. I know how to work with Japanese decals. They were so slimy and did not want to work to well. I had two complete sets of original decals to work with i was able to save just two each of the white base and red field “omega” tail decals. The glue i blame on hasegawa the bad decals due to improper storage. This is one of many kits i was given by a friend who cleared out his storage unit stash. He didn't want to transport them 1000 miles so i was allowed to take anything i wanted. Thank you my friend. So without further boring you with a long write-up i give you my Fg.1 Phantom Circa 1975-1976 Ark Royal Cruise. The original teaser photo ⬆️ And the rest pf the photo’s. ⬇️ Ok some detail shots first up is the spey engine i used real foil stained with cooked eggs. To this i stained it further by adding some blue and copper tones drybrushed onto the foil. ⬇️ And the cockpit’s ⬇️ The eagle eyed among you will have spotted the Two different drop tank paint schemes. Thats done on purpose. During my research one of the members directed me to the Ark Royal’s Cruise books and when digging throught the assorted photo’s i found this photo i reprint here giving full credit to the Ark Royal crews and association. ⬇️ If you look closely i duplicated this pattern. I found everything from all white to all Dark sea Grey to mixed variations. So I lay my self on the Forums bench and await your decision if it meets the criteria for an Fg.1 Phantom from #892 Squadron. I’d like to add Great Thank You’s to all the members that gave me helpful advice in my Cold war question thread. This was a duel build with my EE F.3 Lightning. If anyone is interested here is a link to view that RFI. I say Thank You in Advance Dennis16 points
-
My first submission for review, so be gentle with me. Airfix Vampire T.11. Brush painted with Humbrol Enamels. Quite a nice little kit that went together well. £2.99 from a local Bargain Store! Fire Away!15 points
-
Hi everyone, When the model of the AMK kfir came out, I did not resist to start it. The decoration is a mixture of AMK decals and Isradecal. I paint it with the IAF colors of Mrpaint at free hand, exept for the identification mark of course. It's a very nice kit, for me the best Kfir in 72° scale. See you soon for the C7 Cheers Joel11 points
-
Ту-22 - машина «105», продукт «А», «с» (НАТО: Блиндер [5]) - советский тяжелый сверхзвуковой самолет большой дальности, разработанный Туполевым. Построен в бомбардировщике, ракете, разведке и помехе. Предназначен для замены флота Ту-16. В дальнейших удачных вариантах Ту-22 были заменены различными сериями Ту-22М, Ту-22 в вариантах разведчиков, а глушители действовали до начала последнего десятилетия двадцатого века.11 points
-
Well it's finally finished and installed in its display frame/storage box. I hope you've enjoyed the voyage as much as I have This shows it being used freestanding, equally it could be hung on the wall I have since added the clear acrylic making it dust proof but this makes it difficult to photograph .... WIP here https://www.britmodeller.com/forums/index.php?/topic/235019376-clyde-puffer/&tab=comments#comment-2683480 A big thank you to all who have supported me on the trip. A special thanks to Bob @ShipbuilderMN http://www.miniatureships.blogspot.co.uk/ who was the inspiration behind this voyage. Now I have proved the concept it is my intention to go on and build a series of boats around this scale. This hopefully will include Sailing inshore fishing boats, Coastal traders both steam and sail but that's all in the future Kev11 points
-
I'm satisfied based on @Navy Bird's experience using Eduard MDC on his Sea Harrier and my own previous efforts with wire, that an etched MDC can be made to conform to the canopy- and so as an avoidance activity from proper modelling I've continued to play with the MDC etching process My first effort (above) was reasonable but I was a unhappy with how rough and crude the the edges were generally. After a bit of reflection I decided that the problem was with the inkjet Artwork not being black enough and letting some UV leak through the black during the UV exposure process. The problem that gave was that it allowed the parts of the negative resist that I needed to remove with the developer solution (and so didn't want exposed to UV light) to in fact get a little exposure to the UV light, which then hardened the unwanted resist a little and made it partially resistant to removal by the developing solution. This then meant that the brass needed longer in the developing solution to get rid of the unwanted (but partially hardened) resist and in the process the properly exposed and hardened resist making up the pattern for the MDC got a little softened and the edges got eaten away a little and became rough and a bit crude. Anyways. The solution (short of buying another printer!) was to sandwich 2 sheets of printed OHP slides together to make up each side of the Artwork (An idea I picked up browsing t'internet). It needed careful lining up and taping but doubling up this way effectively made the black that much blacker and impermeable to the UV light. So in this picture you're actually looking through 4 printed OHP slides. 2 for the front, taped together; and 2 for the back, taped together; and then the front and back taped at ones side to form a hinge and keep the front and back lined up when the brass was put in between. Clear? I also modified the artwork slightly to open up the zig zags a little and try and improve the chances of a better reproduction in brass. For test I made 2 sets of artwork. One with the MDC in a 0.5pt line (which if my maths is correct is 0.176mm) and one with 0.6pt (0.211mm). And using the above artwork and 0.005" brass sheet (0.127mm) I got these two after developing. The 0.6pt one is on the left and you can see that the lines are bolder. The unwanted resist came off much more quickly in the developing solution and the lines of the MDC came out crisper - which I think showed that I'd correctly identified the problem. And after a bath in etching solution and stripping away the resist: Much neater than my first effort! I could use these The finer lines of the 0.5pt one will probably look better, and being 0.005" brass it's robust enough to survive handling. As you can see - I'm still not quite reproducing the fine detail in the zig zags - and it may well be that I won't be able to with the limitations on my home-brew facilities; but I'm happy enough with these results - and I think they look good enough that I shan't worry too much about it10 points
-
Hi there everyone Well I am 61 years old and in all my time model making I don't know if I have ever built a AFV....seriously...can't ever remember even wanting to build one!......until now! I normally scratch build large scale aircraft and sometimes I like to build a kit ....and usually when looking on my model kit shelf I pass by this L4500R kit ,which I think was a prize when winning at a model exhibition. Well this time I ventured to open the box!....and what I was faced with was stacks and stacks of well molded parts!....and I thought for once I am going to have a go at this. Well I have got to tell you that this kit has re kindled my mojo that was waning a tad!....absolutely fabulous kit produced by ZVEZDA....which I guess you AFV heads out there know already!....it was such a pleasure to build and living in Bulgaria I found the subject interesting as I see a lot of really old trucks (all be it Russian and not German built).....every part fitted together perfectly which made a nice change to some of the aircraft kits I have built in the past! Any way.....not being AFV expert I built this OOB...and will possibly make some sort of diorama which it is crying out for at a later stage! Any way enough chat....here it is....... I do hope you have enjoyed looking at these photos as much as I enjoyed building it I am now officially a AFV fan! Cheers Fozzy9 points
-
My attempt at the old 1962 Airfix B-17G "a bit of lace" kit, built as part of the radial engines group. I know a lot of people will have fond memories of this old kit and it's artwork, I know that I certainly do. With four new B-17s in the stash I was not looking to get anything accurate, detailed or impressive from this build, all I wanted was a nice neatly built retro looking model of this old favorite. Unfortunately this old kit is an absolute stinker to build, the reason why is because the kits many transparencies are simply the wrong shape and size and do not fit the fuselage. Before beginning the build one of my main hopes was to keep as much of the riveted surface detail as possible, the reality was however a choice between keeping the rivets and the windows fitting neatly, and the windows won. I could of course have kept the rivets on the wings and tail but decided it was better to keep everything looking the same. What you see here is a sanded down finished model with a two tone salt weathered alclad finish. I decided to model "a bit o lace" as it was before it received flak damage to the rudder but with the earlier damage to the port wing. All original parts except a few guns and windows. The last picture is of the Matchbox B-17G kit, which as much as I love Matchbox was another stinker to build thanks to its transparent parts. It is a toss up which is the worst kit of these two kits to build. I am happy enough with the finished builds though.9 points
-
Here are the Bandai mini kits Tie Advance & Tie Fighter. I have wanted to pose these fighter together as seen in "A New Hope" for some time. I finally finished the base today and took some shots. Also gave me a chance to watch the movie again....for research purposes. For the Death Star surface I glued plastic sheet to wooden base. Drew a random pattern, scribed in all the line work, cut up two thicknesses of plastic card and glued them down, added some smaller pieces to the tops of those already down. I then primed the base with Matt Black laquer, airbrushed a mid grey to that panels, then blended in with an overall spray. I then took a light grey and randomly sprayed in panels and the like and finally finished off with a dry brush of the same grey.9 points
-
I'd like to show completed work at the very first. I was always want to show a group of planes one by one rolling in sky by modeling, but couldn't fine a good way to show that, until one day, a friend introduced me Eduard 1/144 Spitfire, then suddenly I got an idea! That is use this 144th kit, along with a 72nd kit, mix these two scales into one diorama. 72nd one on near side, the 144th one on far side, that should show a “near big and far small” view(or perspective view? I don't know correct way in English, sorry). Then set each of them in a particular angle, so that may work. Since Spitfire has been chosen, I though story background should best to show some British way, and, with a warm story such as back home could be better than a combat story. The famous white dover cliff no doubt is the best for this story. So, I thought: that it, start to built it! I choose Eduard 144th Spitfire Mk.IX, and an Italeri kit as 72nd one. Painted with late RAF camouflage, and very light wethering, after all, wethering isn't the point, right? Notice the pilots, these two kits didn't contain, so I cut two plastic stick, painted with brown, to simulate a pilot Then drill a hole, for TAMIYA clear plastic pipe, which is the way to fix plane on the background. Notice these two pipes are on different angle. Searched a high quality photo of dover cliff. That is really beautiful! I hope someday come to see the cliff myself. I cut a plastic board to brace the photo frame. And superposed three plastic board for hold the plane and pipe. Also drill two holes on the picture, well, seems I need some practice for drilling on paper··· To show the spinning propeller is another keypoint. I chose a cell phone screen film, cut a circle with circle cut. Then cut paper templet to paint the spinning propeller. At last, assemble Spitfire into the frame. And adjust two planes' angle, make it looks like the 144th Spitfire is leading the 72nd Spitfire rolling and return to airbase. Complete! I quite like this picture, it seems like two planes are flying into a dream. Thanks for review. Good luck for all of you my friends.8 points
-
Hi all, After a long absence of model building, i finally got around to completing some builds. The Airfix Mig kit was alright though it wasn't the best. Constructive criticism welcome8 points
-
Probably not oil dotting, I think; these aircraft weren't in service for long enough to get seriously faded (not least because they didn't go to sea). I might do a little, but having seen @woody37's fabulous results with pastels on his Lincoln, I think I'm going to do any further weathering that way - after all, one of the points of this build was to try new techniques (actually I have used pastels a bit, so it wouldn't be completely new to me). Thanks for the compliment; I try to build something that looks at least plausible - wartime aircraft certainly got into a right state at times, but this is 4 years later on an RNVR Squadron which only flew at weekends, so they FR46s weren't thrashed to death. Less is more! Anyway, the transfers / stickers / decals are all on: The only markings now missing are the yellow cut marks around the canopy (which will have to await unmasking, obviously), plus the side numbers (the yellow 104 marks). The side numbers are going to be sprayed through Montex masks, just like the under wing serials - I have left them until now because I thought it was going to be tough to line them up with nothing else around. The undercarriage also awaits - it's ready, but won't be going on until all painting & weathering is complete. I am away all day tomorrow, but reckon we're pretty close to RFI now. Crisp8 points
-
This started life in the AFV section and now has found a new life or end of it's life at the Wreckers,will post up pics as it progresses,Thanks.7 points
-
Oh frabjous day! Calloo!!! Callay!!!! Having taken the plunge and procured the old Contrail 1/48 Vildebeest kit, I decided to make one last push to see if I could find any positive serial number/code letter tie-ups for the airframes based at Seletar, Singapore at the time of the Japanese attacks. Fortunately, the ORBs for both 36 and 100 Sqns have been digitized by the UK National Archives and so, though it cost me a few quid, I decided to procure the F540 and associated appendices for both units covering the period from the outbreak of WW2 until the records expire in late 1941. The 100 Sqn records were pretty useless. The ORB for 1941 focuses more on postings and promotions than on actual aircraft operations, although it does mention a few accidents involving specific airframes (serial number only). The appendices (which list actual aviating events) all carry a truncated serial number "K.63." for every airframe, so no positive identifications at all. Hardly helpful! The 36 Sqn ORB is no better than the 100 Sqn one....but the appendices. Ahhh, the APPENDICES!!!! I've managed to gather a list of airframes from the appendices covering the period January 1940 thru October 1941. Even better, some of the records also tie the individual airframe code letter to the serial number. Based on the info from the 36 Sqn records, I've compiled the following list of airframes operated by the Sqn: K4156/T Photos from Ron Reid (RNZAF Proboards) show this airframe in the high-contrast scheme pre-May 1940 (not listed in the 36 Sqn Appendices, although some serials are hidden by the binding) K4161/G Still on strength 23 Aug 41. Bloody Shambles Vol 1 says destroyed on 10 Dec 41 but has 2 possible alternatives (in collision with Vildebeest K6402 or ditched due to running out of fuel). K4166/S K4167/M Still on strength 14 Aug 41 K4168/F Still on strength 14 Aug 41 K4169/A Still on strength 16 Sep 41 K4170/U Taxied into storm drain 22 July 1941. Still on strength 15 Aug 41 K4173/W Still on strength 14 Aug 41. According to account of Ivor Jones (see Post #41), K4173 was the aircraft in which his friend, Phil Hay, was killed. K4175 K4176/L Still on strength, 17 Oct 41 K4179/H Still on strength 16 Sep 41 K4180/C Overturned during FL on beach in vicinity of Rompin River, Pahang, 6 Aug 1941 K4181/O K4185/E Stalled on landing 28 May 1941 K4186 Overshot ldg Seletar, taxied into ditch. Dmg wings, lower centre section and engine bay, 6 Nov 1941. K4188/R Still on strength 17 Oct 41 K4599/D K5186 K6387 Still on strength 17 Oct 41 K6392 Still on strength 16 Sep 41 K6394/B Crashed at Jemerang near Mersing, Johore, 23 Jun 1941 K6402/J Still on strength 15 Aug 41. According to Bloody Shambles Vol 1, destroyed in collision with Vildebeest K4161, 10 Dec 41. RED SERIALS indicate airframes listed in Bloody Shambles Vol 2 as participating in Endua Raid. Given that most of the above serials make repeat appearances in the Appendices throughout 1940, it seems logical to assume that 36 Sqn's airframe holdings remained virtually static (ie there wasn't much exchange of airframes between 36 and 100 Sqns). I'm therefore reasonably confident that individual airframes wore the same code letter throughout the period in question. The serial/code tie-up for K6402 OE-J is also confirmed from photographic evidence in Bloody Shambles Vol 2 p.18. Bottom line is that, for the first time, I've been able to pretty much confirm a serial/code tie-up for at least 6 airframes that participated in the Endau Raid. I know this isn't of great interest to many...but it's a massive step forward for my research (and please thank me for NOT sharing with you the Snoopy happy-dance I did when I realized the Appendices provided serial/code tie-ups!). Like I said....Oh frabjous day! Calloo!!! Callay!!!! Cheers, Mark7 points
-
An order for a friend born in Algeria, a P-47 D-30-RA of EC 1/20 Aurès-Némentcha, based on the Oran-la-Sénia base in 1956. The squadron kept its p-47s until December 1957. They were returned to 2/20 ... which kept them in flight with great care until September 1960. For the anecdote, it is the plane I have just mounted that will "let go" the last French driver on P-47! Model Tamiya 1/48 transformed into D-30, very easy assembly, I added only the harnesses and brake hoses Just still small concerns with decals Berna Decals ... which do not stick well and do not react to softener products Another pictures on my FB's wall: https://www.facebook.com/jbfrenchfrogmodels/7 points
-
Hi All, So this is about the 5th kit since I started into this wonderful hobby, learning as we go along. Several mistakes in the past 4 kits but hopefully it will improve with age. Got this kit about 2 months ago but was too afraid to mess it up given the costs. Well here goes with the first part been the amazing cockpit. Still a bit more work to complete and finish off the ejector seats. Building this out of the box with no upgrades. Vallejo Black Primer - Primed all parts. Mr Hobby Aqueous - Cockpit - Dark Sea Grey - H 317 Mr Hobby Aqueous - Buttons/Screen - Red Mr Hobby Aqueous - Buttons- Yellow MR Hobby Aqueous - Dials - White Humbrol - Black for the cockpit panel detailing Humbrol - Silver for dry-brushing Super glue the really small cockpit parts I thin the Mr Hobby paints with IPA, it works the best in my opinion for Tamiya as well. Humbrol/Vallejo thinned with Ultimate Hobby thinners. Managed to get sometime in between busy working days. Installed the cockpit Started working on the engines using Mr Metal Color Iron. Love how this gives a weathered look after buffing as some of the dust remains.7 points
-
Good evening everyone. For my next project I decided to do something that wasn't bare metal or camo. I had a Monogram F8F in my stash for a long time, but dreaded the thought of building it, since the decals had yellowed terribly. At last I decided to build it. I thought I'd either try to fix the decals (put in sunlight to get it white again), or find replacement decals, or just use some of my many spares and build a "generic" Bearcat without unique markings. But "luck" wasn't on my side. I couldn't get the decals white again, couldn't find replacement decals and couldn't get my head around building a Bearcat with generic markings. After all, this would probably be my first and last Bearcat, since there aren't a lot of them available in 1/72 out there (the only other one I'm aware of is the Revell, which is the same sprues, just different decals). In the end I decided to use the decals as is and see how it turns out. So it turns out the yellowing of the decals aren't terribly visible against a the glossy sea blue paint scheme! Despite the kit's age, I really enjoyed building it - and someone once told me enjoying it is the whole point. Won't win any model-of-the-year awards, but I'm pretty pleased with how it turned out. I used Tamiya's AS-8 Navy Blue rattle can spray, and the other bits were brush painted with Humbrol Acrylics. Cheers Jimmy6 points
-
Pegaso Models 1:96 points
-
On the Sword kits the tailplanes-fuselage join is basically a butt-joint, so pretty fragile. I decided to drill a bit of wire into the end of each tailplane, and slot that into a correctly-located hole in the other surface. It still won't be super-strong, but maybe slightly better than without it. And suddenly we have an airframe! Blu-tack is so great for those da-ga-da-ga-da-ga moments... Justin6 points
-
evening folks & thanks Dave, that is indeed a very useful shot so, a few steps forward in recent days... starting the skinning process - first a rough panel in plastic card..made by taking one straight edge and matching it to the airframe, then marking & cutting to get the rough shape involved as they are generally curved and fortunately only curving in one direction I can get away with just heat shaping the panel over a boiling kettle - I tape it so it is in the loose shape I want, hold it over the kettle's steam and then pop in the freezer for a minute or two.. ..this forces the plastic molecules to move & reset to a new shape... .. I then put liquid cement over all the stringers on the fuselage and spot CA'd the panels into position - it wasn't too neat so a bit of P38 filler evens out the form..... ..the engine cowling is proving tricky - the 'double bubble' of the big air scoop under the cowling just could not be done in one go, so I decided to shape the top part, which is very Spitfire like, so that it curves down and inwards at the lower parts where it intersects with the air scoop.. ..also the bit of fuselage directly under the spinner needs making & skinning so it would be easier to do this if there were no air scoop yet.. ..then I will probably add a plunge moulded part for the lower element... ..also the 'ear' air intakes on the top of the cowl were not as per the plan or formers I made, so quite a bit of shaping & reshaping has gone on up to now & I am still not quite happy with it.. ..then shot some high build primer to unify the surface and see whats what.. coming together... while I am here, and I hope this is allowed - if anyone has the Firefly from the Cockpit book seen here that doesn't want silly money for it, please PM me - an old ebay listing has it for £10, today its £70 + £30 postage! TTFN Peter6 points
-
Hi there I thought I would like to share my heavily modified 1/16 Heng Long Taigen Jagdpanther that I build during the the 10 months until August. Not sure about the final weathering though.5 points
-
This is one rescued from the shelf of doom, a Dynavector 1/48 Scimitar F1 , nice vacform with a fairly easy build , but not helped by my decision to fold the wings. Seemed to lose interest about half way through the build so it got left for about 12 months, but decided to get it finished , after all the Scimitar is one of my favourite aircraft. Finished in Halfords finest, EDSG over appliance white, with scratch built ladder and intake blanks. Aircraft represents a machine of 800 Sqd FAA in 1961.5 points
-
Hi all,This is brought about by a SU-27 airport scene, showing the ice and snow began to melt under SU-27, and it’s also the first Russianaircraft to try.Because the hatch connection of HobbyBoss is so terrible ,I consider my canvas cover up, canvas using the recommended method to a friendZhong, who interested can find his tutorials. The scene platform also get lots of proposal of many friends, thanks a lot!5 points
-
According to Collins on line English Dictionary Alchemy is the power to change or create things in a way which seems mysterious and magical. And seeing as each of the chemical processes involved in this etching lark is mysterious and magical to me then I guess Alchemy ain't a bad description...... But as for the frozen, wind blasted North........I'll have you know it was a benign 8 degrees with only 3kts of wind when my missus dragged me out of bed at 6'oclock this morning to go for a run.........No anti-run excuses to be found in the Met forecast/actual - and believe me I looked. Beautiful? - perhaps ('tis a value judgment after all).....but the efficacy remains an imponderable5 points
-
A quick update. Wings glued on rear and front; some gaps being filled in between wings and fuselage. First some shims of thin plastic card, and should be OK with a bit of Mr Surfacer 500 over the top... Underneath it looks to have settled down OK. Studying photos of the Mark III revealed that those aircraft with the tropical carburretor intake used a one-piece panel under the cowling which incorporated the oil cooler cover and the intake cover too. The little door for the extenal starter was not present. So I'll be filling the panel lines and removing the little hinged door represented on the kit. Here it is done, and I've cemented in place the carburettor intake which, with a bit of trimming, fits pretty well. Must say I like that combination of short nose, big carburettor intake and 4-bladed prop - classic Seafire III traits. I'm mulling over whether to trim off the last 2 inches of each propeller blade which was often done to prevent pecking on the deck on take-offs and landings. Something to think about closer to the end. I've also removed the post on top of the rudder which seems to have been removed on many Seafire IIIs as later they didn't use the radio wire running from mast to rudder. I've drilled out the ports for the .303 guns: And, what Seafires are all about. It's interesting to read that many pilots thought the A-frame arrestor hook to be superior to the later Sting-type, I understand as the A-frame was closer to the centre of gravity and seemed to retard the landing more progressively. Personally as an aesthete I prefer the Sting-type as it looks less agricultural. The Sword hook on the Mark III kit looks a little meagre, so I've beefed it up a touch with some scrap sprue and Mr Surfacer 500, and given it a coat of aluminium paint to get the idea. That's all for now - thanks for looking. Justin5 points
-
Thanks Keith - more filler is no surprise I guess Thanks Stew - she is a good looking bird isn't she? Probably the main reason I haven't binned the kit yet! Thanks Jont Thanks Jaime - I have to keep 'stepping back' from the horrid detail on the kit to look at the overall model, the only thing that keeps me going! More filler this morning. Just for a change I thought I'd give Squadron Green a go - Nigel uses it so I'm hoping some of the skill will rub off: Untitled by Ced Bufton, on Flickr It's coarser than the Humbrol and smells funny but it goes on well - not 'hot' like the Humbrol and seems to start drying faster. That said it sands very well and seems to only 'stick' to the gaps: One of the problems with this kit is dealing with the joins without sanding away the angle on the hull. Hopefully I've sorted it by sanding at an angle from both sides rather than across the join. A reducing number of parts: Including these nasty floats and even nastier struts: Note how the moldings make the tips of the floats 'vague'. The locating pins are also far too fat so they got chopped off. Now ready for some final attention; yes, a bit of filler: I've also cleaned up the tailplanes and filled the ejector marks: Next I decided to glue in the canopy: 'Fits where it touches' as my Mum would have said... in other words, it doesn't fit. I needed some strong glue to hold in sides so out came the 5 minute epoxy (another Nigel recommendation). I don't use this very often and have the 'easy use' twin tube which of course had gummed up, but only one of them. Consequently when I pressed the plungers I got a LOT of one compound and none of the other. I know it's messy anyway but this is ridiculous. Hopefully some of this is the right mix: I then searched for something that would hold the clear part in the fuselage and NOT get stuck to the epoxy. The only thing I could find was my self-closing tweezers: We'll have 'some fun' later if they've stuck to the epoxy. Gulp.5 points
-
Engine installed.5 points
-
Thanks Tony and Keith Coming close to the last bits now, thank goodness: Although, guess what, the fuselage needs filling.5 points
-
Thanks for the interest At the moment I'm drilling, sawing, hacking and so on Beefy Lord Nelson is already in the queue Bugle, if you're undecided have a look at this: CO2 emission norms AD 1911, no Cat and no DPF5 points
-
With Mrs Martian and the camera back from Chernobyl I can now bring pictures of progress that was made before I had to go to Oxford on parent duty. Detail painting has begun and the anti-glare panel and navigation light panels have been painted black. Next up is to finish the detail painting and get some coats of clear varnish on the model prior to decaling. Thanks for looking Martian5 points
-
Thanks for the compliments guys. After the week of traveling hell it was nice to get back to the basement. It's a bit of a mixed bag this update - it started off reasonably well and I was really happy with how the fire extinguisher turned out. Isn't it amazing how something so simple can make you feel good. I also remembered to add the missing ribs from the cabin bulkhead. Here in all it's macro-fied fugliness is the cabin bulkhead. Nasty I call it. From all the research I have done, these panels were never painted with anything approaching neatness and the black anti-slip coating always looked like it was applied with the hangar floor brush. However, when you try to replicate an untidy finish, it always looks like the proverbial pile of.. doesn't it? I'll console myself with the fact that it's better than the kit offering. Some weathering wouldn't go amiss though. Definitely a lot happier with the extinguisher - I had to search to find a bit of green transfer to use as the label and ended up stealing a bit from a sometime future Whirlwind build. The clamp is made from flattened lead wire, and I finished the extinguisher head off with some model master jet exhaust. I thought brass paint looked too well, brassy. A few bits of paint here and there. Valves and unions were highlighted in flat aluminum and steel with a little dab of red and yellow here and there to try and pose as labeling on the tubing. I also added two small gems as exit lights with several dollops of clear red to try and darken them down a bit. The port side was then given a gloss coat followed by some Flory washes. It's looking a bit gruesome in this photo - particularly around the windows. Try as I might, I just couldn't stop the old age tremble when trying to paint the "rubber" surround. Thankfully, most of the mess is on masking tape, but I might still try and tidy it up a bit more. Oh, just in case you were wondering - the washes have not been cleaned up yet. Honestly.... Then back to the bulkhead again. The small T handled thingy was added, along with another sort of nose shaped protuberance just below the extinguisher. Then... Something I had completely forgotten about and did not include in my last Wessi build, was the fire axe. I came across it in a photo the other day - a fire axe and a small object from Messrs. Smith & Severin ...aka I completely missed them in my last build. So, in process additional bits.... Then the only way I could think to try and make a glove was to use a bit of milliput. There are some folks on this site who are amazing sculptors, and I know for certain that I will never be one of those. However, with a bit of fettling, filing, sanding, painting and weathering, I might be able to make one of these attempts look something like a glove, especially when I hide it behind some webbing straps. Time will tell. (what a clipe that time can be) and while the milliput was mixed I used the leftovers to try and start on the ducting - looks like it needs a bit more work. Not really a great deal of progress, but at least heading in the right direction. I shall now head off and clean up some of those washes.5 points
-
Hi folks, Here are a few images from the Film and TV GB I participated in a few years ago whereby I built the Phoenix from the Jimmy Stewart (i.e better!) version of the film Flight of the Phoenix using the Italeri C-119G kit. The photos aren't great but the model is packed away so I can't take new ones at the moment. Hope you like it. Mike4 points
-
I had been after the 1\350 scale one but this on is just a good. Once again a straight oob build4 points
-
Many years ago - well 2012 to be exact I started to build this kit for a GB on another site (UAMF to be precise) however part way through I discovered a major problem with the kit I'd bought of eBay and gave up the build at that time. Ever since its been languishing on the shelf of doom until I did some sorting out last week and picked this up again. I'd bought some aftermarket stuff to go with it to improve some parts of what is essentially a very basic kit I'd bought the resin cockpit set that was intended for the Trumpeter kit. This meant in needed a bit of fettling to fit this one, but I reckoned it was possible. So here is the sprue shot - can you spot the problem? Anyway, so I started building and the cockpit went in okay Bit closer The wings went together okay Then the problem revealed itself... Yup thats one SINGLE tailplane - the other one was missing! Back in 2012, I'd only been back in the hobby about a year and a half, so this was enough to put me off the kit and it got pushed back into the shed. Since then of course I'd built some truly ridiculous things (bar armour Scimtars, giant Oil Platforms etc etc), so the challenge of scratch building a new tailplane crossed my mind as being an interesting and doable challenge - lets face it, I've overcome worse problems in my modelling career! I've got one tailplane so this can be used as a template, so I cut up some 1mm plastic card and sandwiched it with some .75mm card and slathered it with filler... Then after several sanding, shaping and more filling sessions, it got given a coat of Mr Surfacer 1000 from a rattle can This has been sanded a bit more, some surface dimples filled again and more sanding and now its currently got a new layer of Mr Surfacer 1000 drying to see what it looks like. I've decided to build this as an Australian plane in sky and EDSG, so looking forward to progressing and finishing this after all this time...4 points
-
So I got a bit more done on the Mustang.First of all I sprayed the landing gear with some Tamiya Flat Aluminium:IMG_1294 by Neal, on FlickrThen got masking for the second camo colour Tamiya XF81 RAF Dark Green:IMG_1273 by Neal, on FlickrThen got the bird in the spray booth, it is really difficult to get a good photo as the LED lights are blue (if anyone know if you can change these please let me know):IMG_1275 by Neal, on FlickrAnd here is the end result, quite happy with it, the colours certainly look right, I've used a little artistic license on the exact camo, but references are not the best anyway:IMG_1291 by Neal, on FlickrIMG_1293 by Neal, on FlickrNext step is to remove the masking from underneath the wings, mask up the yellow bands on the leading edge of the wing, spray those then mask up for the invasion strips.Neal4 points
-
I didn't after my first rough-edged attempt - which is why I experimented with 0.5 and 0.6pt But I do now.... I've actually already amended the artwork to 0.36pt (which took all of about 30 seconds) which equates to 0.127mm and so is the same line width as the thickness (depth) of the 0.005" brass sheet. Such apparent accuracy is misleading rather than realisable with my inkjet printer and amateur processes - but it's definitely worth having a go with a thinner line. Blimey that's proper clever engineer type thinking - you've gotta remember that I'm only a driver-airframes cum reluctant lawyer - that said a few moments on google suggests that cheapo mini aeration kit can be had for under a tenner....... One thing tho' - at the mo' I've only been using about 50ml of etching solution in a small beaker and I don't particularly want to use very much larger quantities of solution in a larger receptacle. I'm not sure if any sort of aeration device would work with such small quantities. Yes it's crisp but if you look closely I think some of the fine definition is being lost in the UV exposure and then a bit more in the etching. I s'pect you're right about the bubbles tho' I think wot we need is man of engineering ability and know-how (i.e. hendie ) to get etching.........there must be lots of bits of Wessex and Pullman carriage that are crying out to be etched......4 points
-
Those on the right look best to me too Just thinking it over, Hendie and Fritag combining to bring quality etch to the modelling fraternity Kinda warms the cockles of your heart doesn't it They do look brilliant Steve Well done 👍4 points
-
Hello Z, it certainly does. Hello Jaime, I used to line up all the aircraft on the flight deck when I was a kid with my model carriers. Airfix Victorious was my favourite. Are the links below what you wanted? https://www.scalemates.com/kits/114967-tamiya-78007-uss-enterprise-aircraft-carrier https://www.scalemates.com/kits/149924-trumpeter-05602-uss-essex-cv-9 https://www.scalemates.com/kits/104538-trumpeter-05607-uss-saratoga-cv-3-1936-1940 I've painted some of the main assemblies. I used Tamiya XF-3 yellow. I will give the paint a few days to harden, then I'll polish it with micro-mesh. This way, I find when I apply a wash, the areas that have not been touched with the micro-mesh (around raised detail), will stain more, and hopefully highlight the detail. I want to see how the detail stands out after weathering. When I do glue the fuselage sections together, I will have to touch up the joints, and weather those areas again. Well, that's plan, I'll have to wait and see if it works out. I've not started painting the interior yet, as I can make more progress this way with the time I have at the moment. Thanks for looking, Joe.4 points
-
Hitting the 'LIKE' button does nothing for your own reputation, unless you hit it for every single post and people notice, and then you get a reputation for being a trollop. (Unofficially) There is no count on how many 'LIKES' you give. Likewise, there is no count for how many times you use the 'dog poo' Emoticon when commenting on someone's work! On the original point though, someone with a high 'community reputation' COULD be called an asset to BM. If every member of BM produced mediocre work, the site wouldn't be able to compete with other similar sites. We NEED good model-makers, i.e. those who tend to attract the most 'LIKES', to draw in the new members, whether they be beginners, or highly skilled. Visitors to the site will gravitate to the most recent posts, or those that grab their attention, but mostly to those topics with the most 'views'. Those topics (and therefore the poster) tend also to have the most 'Likes'. In other words we need the odd Black Forest Gateaux amongst the Spotted Dicks, the odd Lemon Meringue amongst the Rhubarb Pie in order to whet visitors' appetites and get them to sign up. Badder. (Cheesecake addict)4 points
-
Thanks very much gents; apart from the section between the waist/dorsal gunners' and the tail gunner's positions there is detailing for most of the interior and it is convincing enough for me. Ced - now the interior parts are together I can start putting the crew in their relevant positions. I wanted to do as much of this as possible so that I can attach the pilots' arms when they are sitting in front of the controls and make sure it looks like they are holding the control-wheels and not just vaguely waving at them; the same goes for the gunners and the guns. In the meantime I mixed up some interior green. Hasegawa themselves are a bit vague about the colour, suggesting a 50% mix of Mitsubishi Interior Green and the other 50% one of three different dark greens, so there is some room for conjecture there. I mixed up a tin comprising of about 50% Colourcoats ACRN28 RAF Interior Grey-green and 50% ARB14 Dark Olive Green and I'm happy enough with how it came out (at least in the absence of a more precise colour description of the original interior). I mixed up a whole tin partly for the remaining items to be painted - the canopy/turret framing, etc) partly for when I build the H8K1 (which has just left the ParcelForce depot in Coventry today! ) and finally because my concoction is actually a good-enough match for Nakajima Interior Green too. The instructions are also a bit vague about which parts of the interior are painted Aluminium, but after studying for some time it seems it is the sidewalls of the waist gunners' section, but not the floor, ceiling or bulkheads. It's feasible and in any case a test-fit indicates very little will be visible in the centre section, so that's what I went for. This is where I am now, ready to start the detail painting, applying the transfers for the instrument panel, radio gear and Flight Engineer's panel and assembling and test-fitting the crew: Cheers, Stew4 points
-
Some of you will recall the disaster that I had earlier in the year with this model when I sprayed her with Tamiya Satin clear and the paint crazed like crazy. Well I spent a few days over our winter sanding the crazing back vewwy vewwy carefuwwy with increasingly finer sanding sticks until she looked like this. http://i.imgur.com/dCRX6AJl.jpg You can see the depth and extent of the crazing. Then I started the respray job by covering all decals ( which curiously had not been affected by the clear coat) with Humbrol Maskol - comme ca. http://i.imgur.com/rNqIw4Ll.jpg Next I resprayed the two greens - first a bronzy olive and then a patchy olive drab to try to replicate the partially weathered RDAF schemes of the 1970s. http://i.imgur.com/Jsb4cOdl.jpg http://i.imgur.com/pXbxX8Rl.jpg THen a coat of Humbrol Satin Clear , the enamel one this time!, and now she is done and here are some shots of her in the early morning sunshine beaming through our kitchen window - there are still a couple of rough patches but she looks a great deal better than the crinkled mountain range effect that I first produced. Hope you like her. http://i.imgur.com/6rgdPCol.jpg and with flash to dull the colours down http://i.imgur.com/PjpF9CXl.jpg http://i.imgur.com/bE1RT4Wl.jpg http://i.imgur.com/aK9Gld1l.jpg http://i.imgur.com/lbXArZQl.jpg http://i.imgur.com/ZzPGPZ2l.jpg PS - sorry about the linked images - I will have to sort out this issue for other posts.4 points
-
Just a quick update. Continuing the effort of cutting holes in my Blackbird for the PE grids. Eight done so far, another 14 or so to go. Plus I will need to cut out part of the nose and main wheel wells for more PE items. If this plane were a boat it would be on the bottom of the sea! To break the tedium I decided to give my aircrew some shoulder patches! At the rate I'm going, I won't be finished with my grid work until this weekend at the earliest. But once that's complete I should be close to buttoning-up the fuselage, and from there the biggest job will be getting a realistically-weathered paint job on this beast!4 points
-
The awful join on the nose pieces has been dealt with as well... +4 points
-
OK first things first Keith thank you for the help, I'm kinda getting there Second thing, online and now Downloading Lazesoft recovery for Win7, burning to CD at the mo' I suppose 'some of us' was having fun boasting about their shining bright apples, at ten zillion quid a go some of us poorer folks will have to work with what we've got instead Now I have the recovery disc, access to a working PC and another elderly led monitor I hope I will be able to rescue the win7 baby and COPY her files into Number Ten Tomorrow will do for that Did anyone see where I left the outer wings of the Bucc? A miracle has resulted in fifty vortex generators arriving on my doorstep, post haste from an Alchimist in the frozen, wind blasted North I now need to finish the inner cavities for the opened out wings to be displayed so I can run the etch tests the Wizard suggests They are beautiful Just noticed I got a couple of this Stunning wasn't it?4 points


This leaderboard is set to London/GMT+01:00