
Leaderboard


Popular Content
Showing content with the highest reputation on 24/07/17 in all areas
-
Hi folk's just to show I havn't gone entirely over to 1/32 scale here's a little quick build of another rag wing Hurricane using LF Model's decal's and mask's(code letter's). Built for the Made in Britain GB,nice challenge painting the codes made easy by the well produced mask's,decal's were more challenging as they have a solid carrier film and need cutting out also the underwing roundel's dissintegrated so I hit the spare's box for the nearest match,thanks for looking in.26 points
-
My latest finished modell. Airfix great P-40B model built as a British Tomahawk from the 112th Sqn in Egypt 1941. S/N AK402 Flown by Neville Duke MTO of RAAF A really nice and relaxing build. But I had to spice it up a little with the addition of Ultracast seat and propeller, Eduard Brassin wheels and exhaust stacks plus PE detail set. I also added Masters dedicated turned brass gun barrels and pitot. The decals are from Kits-World Decals. I also made a gun sight inside the cockpit taken from a Hasegawa Spitfire kit. For being me this was quite a quick build that didn't pose much of a challenge so to add some interest I made a desert inspired base. This is the first time that I've tried to make my own base and considering that I think it turned out quite well. best regards Johan19 points
-
Hello everyone. Here's my latest - Wingnut Wings excellent Le Rhone engined Camel, featured in the latest issue of Model Airplane International. Haris16 points
-
A little of What-if since the Sentry Eagle 2016 is only for ORANG F-15c. It's an 1/72nd scale kit of Academy. For this build I mainly focus on trying out new techniques on weathering and color fading, and also some color variation practice. I took around 1 month for this, the decals are custom printed by Fishbone Inc..16 points
-
Hello! Allow me to present my 1/48 HAF F-16C in special markings. This kit began life as a Revell F-16A. With a lot of fettling and many donations from Hasegawa and Tamiya kits plus an Eduard PE cockpit set, I finally cobbled together something that sort of looks like this: Here is my model, hope you like it. Darren.12 points
-
Hi Folks Built this one alongside the recent F86K painted as usual with Xtracolor HSS and some mixes of the same paint.Decals by Eagle Strike. .11 points
-
If you would that would be lovely. Ok I'll trust you guys. The sun has now got his hat on. managed to please the kids too. just had a double Chinook flyby too. Mega awsome. Have fun! don't make too much mess. Johnny.11 points
-
AML resin. Well, the first look was disappointing: Untitled by Ced Bufton, on Flickr It's the rear of the radiator moulding. That'll have to go. Removed with a chisel blade (still no blood!). Chosen tools today are CA gel (to act as a bit of a filler too) and activator. Method: smear gel around the plastic. Rub activator on the resin. Offer up (why do we say that) resin to the plastic ensuring not to get gel on fingers and aiming for 'best fit': I'm going to say they're a tad undersize. Here's one: Some filler and/or six inch have round second cut action later. Check references, no gaps. Anywhere. Rats. I'm going to assume the resin is the correct profile. Stop me, quickly, if I'm wrong...11 points
-
evening chaps been a while but now the mancave is in full operation - and is already messy I have been watching vids on youtube about weathering and ordered some Mig Ammo stuff to do the U/C. I got the thinners & US Modern vehicles wash and a few other bits and after coating the legs in future set to work... I found it really easy to do once I knew how and in real life the effect is very cool & subtle.. its a bit drowned out in the photographs, but they look suitably realistic & a bit grimy - on the pics I have of Race #80 the wheel hubs especially are very dirty.. here are the legs.. ..the insides of the doors don't really show up but are treated too.. and the wheels - I added a few scratches and the white creep marks.. and the weathered combo.. ..the wheel wells were also too spotless for me, so needed doing too.. ..again a subtle bit of grime adds another dimension.. and all done.. ..now the wells are done I can start to add the final details before the final skinning in that area.. TTFN Peter11 points
-
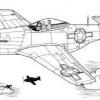
Hi all, This is my build of the Bell X-1 "Glamorous Glennis" aircraft used by "Chuck" Yeager to break the sound barrier on October 14, 1947. It was my entry to the Prototypes, Experimentals, World Firsts & Record Breakers GB. I used the Hobby Craft 1/72 Bell X-1, which I bought second hand in eBay and built it completely OOB. I didn't apply any weathering as the aircraft, being an experimental machine, was constantly taken care of. It can also be seen as representing the aircraft as displayed in the Air and Space Museum in Washington, D.C., which is clean (though hanging from the ceiling). The kit is old (1991), has fit problems in the cockpit and the assembly of the main landing gear legs is very fiddly. However, it is well detailed for the scale and the decals behaved acceptably after about 26 years in the box. The build thread can be found here and my entry to the GB's gallery is here. Here are the general view pictures: IMAG4759 IMAG4760 IMAG4761 IMAG4762 IMAG4763 IMAG4764 IMAG4765 IMAG4766 IMAG4767 IMAG4768 IMAG4769 IMAG4770 IMAG4771 Detailing of the control column, side console of the cockpit and instrument panel (from left to right) : IMAG4688 Cockpit before closing the fuselage (control column not installed): IMAG4692 IMAG4693 Details of the main landing gear and nose gear: IMAG4747 IMAG4748 IMAG4750 Exhausts: IMAG4751 Wing probes: IMAG4752 IMAG4753 Closed canopy IMAG4754 Thanks for looking. All comments are very welcome. Cheers Jaime10 points
-
Here is a Chieftain MK11 I finished a while back. Stationed at BATUS in Alberta in the 1990's. Still learning this new camera, depth of field is a little tricky.10 points
-
Hello everyone, this is my latest work and my very first diorama work. Z-9 Dauphin is Chinese authorised version of France AS365N dauphin. It is such an advanced helicopter for China in 1980s and play a very very important role in PLA's army air force and Navy air force. I like this cute dauphin very much. So, when I got this kit of Dream Model, a plan of build a diorama of the photo above was growing. And when the painting was about to begun, I told my self, maybe I could try more, like make my chopper look like he is flying! So, I got a clear PVC board, cut a circle, then painted four working rotor wings. This part I tried three times. Another part is the grass, I try to make them looks like been blow down. When all finished, last effort is OK for me. Thats all, thanks for reviewing. Have a nice modeling for you my friends.10 points
-
I have finally got round to taking some half decent photos of a commission build I've had on the go, on and off for a couple of years now. Peter Nesbit, nephew of Roy Conyers Nesbit contacted me back in 2015 asking if I could build him a Beaufort L9878 that Roy would have flown in as a navigator on 217.Sqn. It has been a bit of an honor for me that Peter asked me to build this for him as he wanted a model that would be a dedication to Roy and his WW2 exploits. The idea is that the aircraft has just been stood down from a possible mission which includes the torpedo attached. I have opened the clear canopy as the pilot would have been prepared to disembark out the top. Peter also wanted a diorama built including vehicles and equipment from the Airfix RAF Bomber re-supply set. I will probably have a go at the diorama even though I have never attempted one before, unless there's anyone else who could contact me who could do it justice! It has taken a lot longer than originally planned, but Peter has kindly been patient with it. In that time I have completely rebuilt the interior providing as much of the main interior details as possible including pilot, navigator and rear gunner. I still haven't got an airbrush yet, so everything has been applied with a good quality hairy stick apart from the matt coat which was applied from a Humbrol rattle can. The only aftermarket parts used were some white metal guns from the spares box and marabu etched landing lights. I had originally intended on using a vacform canopy which is intended for another kit, but used the landing light vacform cover only. I'm making no apologies for absence of a build thread as I don't always have the camera to hand when building and like to make most use of my limited modelling time to fettle with the kits as much as possible. Many other kits have been started and completed along the way, but this one has been a labor of love. Will be sad to see it go. Also no apologies for the number of images. Thanks also to Frank for the invaluable CD of images from the factory floor, for the interior. Special Hobby 1/72 Bristol Beaufort MW*R L9878 of No217.Sqn Coastal Command St Eval Autumn 1941 by Martin Laurance, on Flickr Special Hobby 1/72 Bristol Beaufort MW*R L9878 of No217.Sqn Coastal Command St Eval Autumn 1941 by Martin Laurance, on Flickr Special Hobby 1/72 Bristol Beaufort MW*R L9878 of No217.Sqn Coastal Command St Eval Autumn 1941 by Martin Laurance, on Flickr Special Hobby 1/72 Bristol Beaufort MW*R L9878 of No217.Sqn Coastal Command St Eval Autumn 1941 by Martin Laurance, on Flickr Special Hobby 1/72 Bristol Beaufort MW*R L9878 of No217.Sqn Coastal Command St Eval Autumn 1941 by Martin Laurance, on Flickr Special Hobby 1/72 Bristol Beaufort MW*R L9878 of No217.Sqn Coastal Command St Eval Autumn 1941 by Martin Laurance, on Flickr Special Hobby 1/72 Bristol Beaufort MW*R L9878 of No217.Sqn Coastal Command St Eval Autumn 1941 by Martin Laurance, on Flickr Special Hobby 1/72 Bristol Beaufort MW*R L9878 of No217.Sqn Coastal Command St Eval Autumn 1941 by Martin Laurance, on Flickr Special Hobby 1/72 Bristol Beaufort MW*R L9878 of No217.Sqn Coastal Command St Eval Autumn 1941 by Martin Laurance, on Flickr Special Hobby 1/72 Bristol Beaufort MW*R L9878 of No217.Sqn Coastal Command St Eval Autumn 1941 by Martin Laurance, on Flickr Special Hobby 1/72 Bristol Beaufort MW*R L9878 of No217.Sqn Coastal Command St Eval Autumn 1941 by Martin Laurance, on Flickr Special Hobby 1/72 Bristol Beaufort MW*R L9878 of No217.Sqn Coastal Command St Eval Autumn 1941 by Martin Laurance, on Flickr Special Hobby 1/72 Bristol Beaufort MW*R L9878 of No217.Sqn Coastal Command St Eval Autumn 1941 by Martin Laurance, on Flickr Special Hobby 1/72 Bristol Beaufort MW*R L9878 of No217.Sqn Coastal Command St Eval Autumn 1941 by Martin Laurance, on Flickr Special Hobby 1/72 Bristol Beaufort MW*R L9878 of No217.Sqn Coastal Command St Eval Autumn 1941 by Martin Laurance, on Flickr Thanks everybody for looking. Edit, I have a collection of build photographs here...https://flic.kr/s/aHskBtrQdE Martin10 points
-
Finally managed to finish this one. The modern decals really help what is a decidedly ancient (1962) set of mouldings -10 points
-
I don't know. I leave the place unlocked for a few days and look what happens. I'm on leg two of the Camping extravaganza. We managed to escape the wet and muddy field with bob intact. I have 4G now so at least I can keep an eye on the old place. Just watch my ruddy carpets. Johnny hollibobs by the way I've only liked a few of the posts as I would run out of likes so consider then liked, like.10 points
-
I almost hate to mention it, but that's far from the extent of my 1/72 Spitfires. No further work done today, as we've hit that point in the pregnancy where "do you want to come with us to get ice cream?" is secret code for "I can no longer catch our hyperactive shout-goblin, and I feel guilty about getting dessert for myself unless I stuff a whole soft-serve ice cream cone down his throat, so I need you to chase him around for the forty-five minutes it takes for the ice cream to melt". Sadder and wiser, I know this now.10 points
-
Another finished model. This time a P-47 D with the colors of the FAB (Brazilian Air Force). The model. The decals FCM 1/48. The finished model. I hope you like it. Regards ajcmac9 points
-
This was a sideproject that I had built on and off between other builds for over a year. The Hasegawa LL200 airliner series contained many popular airliners such as the Boeing 747 in almost every version,DC-10,MD-11,DC-9 and among many others,the Boeing 767. Sadly,most of these airliners from this famous series are no longer produced by Hasegawa and also the 767-200 is unlikely to appear again as Hasegawa modified the molds for the 767-300 which is still available. These models are very accurate and easy to build and in their 1/200 scale also not too big and vitrine friendly. My Hasegawa 767-200 kit was actually the Japan Airlines issue,but I once bought a larger number of decal sets for Hasegawa airliners on ebay,among them this nice Delta Airlines set. It was in pretty good condition despite its age,research showed that the original Delta 767-200 kit was released back in 1982. Some small details such as the cockpit windows come from a newer Boeing 777 Hasegawa set and the coroguard panels are from a detail set.Apart from that its completely OOB built. Paints are the usual Revell and Testors enamels,the whole model was then sealed with MicroScale Gloss clear. The Boeing 767-200 in the depicted "Spirit of Delta" scheme can be seen at the Delta heritage museum in Atlanta where it is preserved. Enjoy9 points
-
(Oooh, I wonder what John said and then deleted? Nothing rude I'm sure) Thanks Chris - from the videos and reviews the Flip looks just the thing. I can't justify one of the metal block things to myself, too expensive for the little PE I do. But then, when I do have some, bending on the mat never seems 'crisp' enough. Hopefully this will sort that out Hi Phil - I do like my tools and the RB Productions chap (Radu) really seems to provide things that fill the gaps (excuse the pun) left by the larger suppliers. Great stuff. Hi Alex - another recommendation for RB, thanks I had a bit of masking mojo this morning so took advantage: Untitled by Ced Bufton, on Flickr That last shot shows why I think the masking set is essential. And also shows how thin some of the frames are. Gulp. Fingers crossed then. Sadly the masks don't cover (another pun, sorry) the Z nose so it was out with the tape: That's where the mojo ran out. Apologies to those who've been waiting patiently (or otherwise) to see how the radiator mods look. I'll have a look at them now.9 points
-
This is my T-62 built as a Syrian machine used during the Yom Kippur War with Israel in 1973. The kit is from Trumpeter, and was lots of fun to build. I understand there are problems with the contours of the hatches, and some other things, but whatever. The kit was a lot of fun to build, and detail. I added by own plumbing for the spare tanks and replaced grab handles with wire. Some day I'll add a figure. Paints are Model MAster Acrylics, and all weathering was done with washes. About four or five different shades. I also utilized some pencil graphite on edges and scratches, as well as baking soda for sandy silt textures. Please excuse the weird colors, this was photographed indoors under two junky lamps.8 points
-
Here's my attempt at the M1 Assault Breacher. A rather tedious build but turned out reasonably well. Still learning this new camera so lots of pics, some in the sunlight and some in shade.8 points
-
This is a year 2000 re-release from Revell USA of the ancient Boeing 707 kit. Originally boxed as United Boeing 720 by Revell USA,its still the same old Boeing 707-100 from many decades ago. There had been some changes in the molds over the years;There are the depicted one that has no cabin windows and the cockpit has holes instead of a clear part ,smaller tail fin without antenna and the very early Pratt & Whitney engines. Later it was released with a clear part cockpit and the taller tail fin with the antenna included and the Pratt & whitney engines that were common on most of the 707s. When I started this kit,I planned to build it OOB with the decals included.As being a relatively new kit (2000) the decals looked great. But when I came to the stage of decaling the model,I soon found out that the decals were not as good as they looked...they completely dissolved into thousands of small pieces floating in the water.... As I already had some troubles with the kits fit,I didnt want to look for a repalcement aftermarket decal set,so I decided to use the Northwest Orient decals from my Minicraft 707-320. This also then included the change of engines to the later ones.Luckily I had a complete set in my spares box. As the Revell 707 more resembles a 707-100 with a shorter fuselage,I had to cut down the decals to fit on the Revell kit. I know its not 100% accurate,but this was more of a salvation job rather than creating a replica of the real thing. The coroguard panels and other details on the wings come from the superb Flying Colors Boeing 707 detail set and these decals cover up some of the blemishes The kit has some serious fitting issues esp.the two wing halves,who are a nightmare to get together and also the engines that won't really fit into the slots. Also the wings were seriously warped,probably they had been in a hurry to get the parts out of the moulds and into the shelfs... I have one more Revell 707 and I think I have to forget about building and painting each components before assembling the whole thing. The finished product is not of my usual standard,there are some flaws,esp. around the engine-wing connections.I didnt bother to fill the small gaps there as I would have to repaint the whole area,but overall it looks quite nice,and when its behind glass the flaws wont stick out much. Hope you like her anyway. Cheers,7 points
-
Hello, I have finally finished one of my longest running models. I got this kit sometime in 2007. I was crazy about having this particular version of the T-34 when it came out, but now I don't remember why. It is one of the 1941 versions, with the small turret, single hatch, and 76 mm gun. I built a generic winter 1941/1942 machine which probably served in the Leningrad area. Its been so long since I built the model (I finished it years ago, and just painted it recently), that I don't recall much of the build. At its core it is the Dragon T-34. Lots of great details, lots of parts, TONS of options. Metal gun barrel, a good deal of PE, clear headlight lens. To those wondering, the rectangular boxes on the hull sides were wooden spare fuel tanks. The round drum tanks common to most Soviet tanks were not fitted to the T-34s from this particular factory. Paints are Tamiya white over MM Acryl Russian Green, various Vallejo browns on the tracks and details. Weathering done with three or four shades of brown washes, and two shades of pigments. I'm not 100% happy with the result, but I'm 100% thrilled to finally have this thing done, 10 years after purchase. One less large box in the stash! Sorry about the weird colors. Photos were taken indoors under crap lights.7 points
-
Decal printed Behemoth Decal. Regards, Eugen7 points
-
Steady on ma man. I've just rubbed some of it back off again! Portholes damage repaired an new openings in right place this time: My thanks Nigel! It did require multiple libations to Bacchus to get there... Cheers Martian! Watching the apparently effortless way you waft a Roc together in a blur of tentacles has been an inspiration along the way whenever I've felt things slipping here. Nuts! For that I'm going to nick one of your techniques (again) hendie - see below. If I hadn't drawn them panel lines on for reference, there's every chance them side door openings might have ended up a tad 'rustic'... It's been a bit of a surprise for me too Rob tbh! 'Never ferment a friend': Old Icelandic puffin's saying. I'd had the shape of the BT rattling round my noggin too TT but you hity the nail on the head! If I can just drape the parachute artfully from the BT in the final display then the resemblance should be complete: Looking at that picture I thought how sad the Puffin's eyes looked - until I looked at the eyes of those fish and realized how much infinitely sadder they appeared to be at the situation... All I do is use an old sealable 10ml paintpot Tony with a bit of sprue bunged in and then pour in some Humbrol Poly Cement or Revell Contacta, letting it dissolve into a thick custard - 70s English comprehensive school dinner would describe the consistency most accurately. Every few months I'll squirt a later of glue on top of the mixture again, this seems to keep it nice and workable and keep any air off of the gloop. That stuff you saw me blobbing on was rock hard by this morning and able to be drilled. Cheers Gondor. Yes - one of the blessings of this particular aircraft is the busy nature of the inside that allows for some cunning camouflage. Chin-up Alex. Just be glad you're not a sandeel in the puffin's beak of life... Spurred on by a rather positive start to the week, I had a lash this evening at getting the BT and vacform fuselage separated. I'd been mulling over the problems inherent in the rather complex set of curved dimensions around the back of this aircraft, both for accurately adding panel lines all the way around as well as for actually segmenting the vacform. On waking-up this morning it was with the realization that I could in fact adopt a technique that I used previously in making a removable radome for the Meteor NF I built last year. Or more accurately, a technique shamelessly pilfered from @hendies seemingly bottomless casket of construction gems. Basically this involves clamping-off a blade and moving the part, rather than vice-versa. This time around, the size of the part in question meant that a razor saw was too small so I clamped a spare Dexter blade at the required height: You can see in the photo that once you have the blade clamped at the correct height, it's simply a case of progressively rubbing the Vacform back and forth gently along the blade, rotating the piece from time to time in order to create a continuous cut all the way around. You want to keep the cutting-pressure gentle and continuous, and also with a longer blade of this kind , check that you have kept it it straight all the way along - hence the reason for using two clamps on it here to avoid any 'bowing' of the blade under the pressure of a single clamp. A couple of minutes of this and: Job done. More importantly, a neat and regular cut all the way around: Childish glee to the fore now, I simply had to tape the parts on for a quick gander: And from t'other side: There is a quiet pleasure in such moments at the bench sometimes, isn't there? It strikes me that the same process used for cutting there might be readily adaptable for scribing panel lines all the way around both of those shapes also, substituting a sewing machine needle for the saw blade. Not rushing into that though now tonight as I want to let tonight's session settle into the grey matter first. Tony7 points
-
Tollerton had an indirect but vital role in the history of my family. In early 1945 my Dad was an Observer on 810 Squadron, based in Machrahanish and working up with HMS Queen in preparation to go out to the Far East (though Hiroshima intervened). He and his regular pilot were sent down to Fairey's Great Western Aerodrome (now Heathrow airport) to pick up a new Barracuda. They got airborne well enough, but as they flew North the weather was getting worse and worse. My Dad, born & raised in West Bridgford (a Nottingham suburb very close to Tollerton) had a wheeze - if they could get to Tollerton before it socked in, he would get an unexpected evening at home. This they did, though he always said the last 10 minutes of flying was very dodgy. The Pilot thus met Dad's sister, & was rather taken by what he saw. After the war he returned & married her, thus becoming my Uncle Ted. All thanks to English weather & Tollerton. Nice Hali-baggery, anyway, Ced!6 points
-
At under £15 for two tractors, two towbars & four Chockheads, I'd say they're a pretty decent bargain. While tractor dries, we build towbar. OK, possibly not the most complicated construction project of my career, but they all count. Yes, it's upside-down. And the apparent asymmetry of the legs is an iPhone 7 lens illusion. C Edit: ...and primed, wiv wheels...6 points
-
It needs someone to make complete nacelle replacements to get them really correct, but I suspect that the price would be prtty high, probably more than the kit itself. It really is a pity that Revell got it so wrong as this is my preferred mark of Halibag, but I'm unlikely to buy one now. The deleted post was about talking to the ' youf ' and getting annoyed about the general lack of knowledge/interest in anything that happened more than 5 years ago. It's a huge generalisation I know, but it does irritate me. Rant over, I bet you wish I hadn't bothered now. Cheers John PS it looks like my days of listening to BBC radio Iplayer may be numbered, because you now have to sign in and apparently they have software which can detect if you are a ' foreigner ' using a VPN to steal their airwaves!6 points
-
Reminds me of Frank Newbould's work, which I'm a big fan of: Your Britain - Fight for it Now [South Downs]. © IWM (Art.IWM PST 14887)IWM Non Commercial Licence6 points
-
I have now finished my model of HMS Victory having applied the wake, the White Ensign, and the flag of a Vice Admiral at the Main Mast head depicting Victory as she was in 1805 prior to the Battle of Trafalgar. In summary this turned out to be a nice kit to build and went together quite easily. There are one or two minor things I would do differently next time. The ratlines were slightly awkward as they had to be trimmed to fit and I could have done better. The other thing is that I would add a small piece of styrene strip so that the yards stand further forward of the mast. I have designs on making more of these and I have an idea of a diorama of a frigate on frigate clash from the American War of 1812. However this is a long term aim and I have plenty of other models to build first. Anyway here are pictures of the completed model of HMS Victory; I will post pictures in the Ready For Inspection forum in due course. Thank you for following and the kind comments, Enjoy.6 points
-
Bandai 1:16 Scale 1914 Dennis Fire Engine Paints used: Tamiya, Alclad & Mr Hobby Metal Build thread: Click here6 points
-
hi all, Here's a bit of a catch up. My computer got a virus, so i wasn't able to post these any earlier, but better late than never eh? I sanded the fuselage with 8000 grit micromesh and then applied a marble-effect pre-shading (messy squiggly black lines) over the whole airframe concentrating on the back end behind the engines. As you know from the first post, i'm doing a Japanese Navy aircraft, so next came some thin layers of Vallejo white on the upper decking. The overall effect was that of a dirty patchy helicopter. Next i masked off the demarcation line with small sausages of Blu-tack and sprayed the lower half of the body Lifecolor Gull Grey. It seemed a bit more like Dove Grey as it had a brownish tint, so i added some light grey to it and went at it again, this time with more realistic results and more in tune with my walk-around photos. After another light sanding, a coat of Klear made it all nice and shiny, ready for the decals. I must say that the Wolfpack decals are excellent. They are fully legible and bedded down really well with DACO setting solutions. The walkways were from the kit and were a little bit more difficult to apply but i got there in the end using some of the spare decals as patches. I certainly wasn't going to mask the walkways and spray them! In my next post, i'll show you some pictures of the real helicopter that i am trying to copy, but for now, that's the basics done cheers Andy6 points
-
Hello, Here is my BAe Hawk T.1 in RAF No. 63(R) Squadron as part of the 2 Tactical Weapons Unit (2 TWU), at Brawdy during late 1979. KIT The model is based on Revell Hawk T.1A in 1/32nd scale. This kit is good in size and shapes. Details are generally good but sometimes are a bit poor especially panel lines. The downside of this kit is the lack of details for the big canopy and canopy. The ventral ADEN gun pod too “skinny” in height and width both. The decals box offers the choice of only relatively "recent" RAF T.1A version. CONSTRUCTION I found a little bit confusing the Revell instruction sheet, but it could be my personal point of you. Because I wanted to build an early T.1 and correct the main issue of thie kit, I had to buy separately aftermarket decals and resin ejection seats, plus a correction resin set for air scoops, separated resin flaps, speed brake and FODs. Eduard’s PE were used for cockpit instrument panels and external details. I added some details such as hydraulic pipes and electric lines into the undercarriage bays, cockpit tube and speed brake vane. The pitot tube is turned metal set from Master. I tried to add some missing details around the fuselage: · lines of rivets in the rear section; · plates at the tail plane’s pivot points; · fuel drain’s points and NACA intakes; · APU’s exhaust; · All the aerial antennas; · ADEN cannon’s barrel. For me the difficult areas of this kit that required cares and a lot of dry-fitting are: . All the wing-fuselage attaching point… it’s a real nightmare to align everything and to restore details and panel lines!!! · Instrument panels, IP’s covers and clear front windshield; · Undercarriage legs and doors. Also, the kit is a real tails-sitter and requires a lot of ballast in the nose and the undercarriage legs are really fragile… COLORS & MARKINGS I love the NATO Dark Grey-Dark Green wraparound scheme of the ‘80s. Paint were from the acrylics lines of Gunze and Tamiya: A semi-gloss black primer was sprayed first all over the model. Squadron markings, serial numbers and stencils are from some Xtradecals sheet for RAF Hawks. Some RBF tags were added to finish the model. I hung a couple of empty SNEB rocket pods under the wings, finished in natural metal with black cap fairing. And now some pictures of the completed model... hope it works!!! CIAO! Piero5 points
-
This is my first thread for Britmodeller and I’d like to share a project I carried out last year. As I said in my presentation post,I spend much time in the UK and when I’m in Cambridge or Bury St.Edmunds for work, in the night I like going for some spotting to RAF Lakenheat and Mildenhall. The Eagles of the C version are my favourites and I really lik the two shades of grey camouflage. It was a very welcomed surprise to see on Hannants’ site the new release by Caracal Models. It took not that long to purchase them, together with the Academy F15 1/48 Model. There are several models, including adedicated box for yhe MISP IIversion, but the price was completely different, there were none avaliable and I like a bit of scratch building, so I opted for the basic version. After having seen so many landings ,I decided I would have represented my Eagle in this configuration, with the nose wheel still lifted and the airbrake open. Eduard set for the F15 C exterior will help! To do something different,…I started from the eshausts!I think the kit parts with the help of the PE parts will be quite accurate, once painted! On the main frame, I started by cutting a few thinds off: the hook frame, not present on the MISP II version… …and the ailerons and flaps from the wings, as I wante d to reposition them in the landing configuration. This kit gives the opportunity to build a C exemple (single seater) or D (double seater) and, as well as two different front sections for the fuselage, two sets of intakes are supplied, as they are positioned at a different angle , depending if the engines ON or OFF. I chosed the lower ones, as my aircraft was to be represented while landing. Next I checked the fitting of the different components of the fuselage and found out the junction between the front halves and the back section didn’t pair very well and there werent any good location pins, so I added some strips of sprue to halp a bit. I’ve used the kit cockpit, as I think it’s a nice representation of the real one , if the canopy is closed. It fitted well and could be inserted to the front section from the back .Once it was completed I would have added it and glued the front to the back of the fuselage. Once happy with the dry fit test, I added a few spacers over the nosewheel bay to get the cockpit into the right place.and started adding a bit of detail to the front panel. Added the PE parts to the nose wheel bay…a really useless job, as I later realized all door are normally closed when the landing gears are out!!! I decided to use the seat from an old Italeri F16,which had impressed me for the detail. I needed a pilot and I found it in an old Hasegawa set.Attaboy!!! It fitted well to the seat… They fitted well to the cockpit… …and the cockpit fitted well to the fuselage! The canopy and windscreen didn’t fit so well, but what I wanted to check at this sage was the final shape of the bird.I don’t go crazy if the dimensions aren’t exactly correct, but I want the shape to be right and give theright idea of theaircraft. So this is what my Eagle was going to look like! I then added two strips of plasticard at the sides, where the canopy frame was going to fit and a plate of the right size to produce a good and strong fitting, once glued together. This is what the cockpit assembly in place looked like. It was finally time for some colour!!!The front panel was painted black with a drop of white, washed with black and drybrushed with grey.Same treatment to the seat. A drop of Clearfix was given to the HUD lens. Some more colour and the seat was ready for …the guy!!! The cockpit was painted light grey, masked with Tamiya tape and sprayed black on the panels. Once fully painted, it looked like this. …and this is how it looked once glued to the front fuselage. I glued the canopy frame too... …and then the time came for our guy! His helmet’s was old type and was filed down, to remove the visor’s cover. At this point I needed an oxygen hose for his mask and wires of different sizes resulted very hepful! With the hose in place and free to breathe, our guy felt much better! He started loosing his greyish shade to recover some colour…finally a happy man!!! He sat on his seat… …and jumped into the cockpit, ready to take off… Wait a minute!Don’t you think it’s a bit early??? After some masking of the cockpit area, the canopy frame inside was sprayed black and then I tried to create some shade in a flat area by spraying a lighter colour , then washed. This was the final look with our guy in place. That’s all for now. See you soon for an update!5 points
-
Hiya Folks, I have always fancied building an Aussie Matailda and a Kiwi Valentine from the Pacific War and here is the first of these,..... the new Tamiya 1/35th scale Russian Matilda kit modified into an Aussie Army one from 2/4th Armoured Regt. at Millat, New Guinea in Sept 1944. I`m not saying that my conversion/ replica is 100% accurate but I made the armoured ring around the base of the turret from plastic card and I used decals from Star Decals set 35-C 1068 to try to replicate tank 72575 named `Courageous' with its little dragon insignia. My attempt at the Jungle Green colour was using Tamiya JSDF Olive Drab with weathering using various MiG pigments,.... the figures came from the spares box,.....the driver wears the issue Khaki beret while the commander is an old sweat and retains the black RTR beret used by some Aussie armoured/recce soldiers from the desert war; Looking at the photos,...I have realised that I forgot to fill the eyes in on the figures,....oh well! I`m not a regular armour modeller and just do it for the enjoyment really as a break from aeroplanes,.....so there are probably quite a few things wrong with it! Cheers Tony Edit,....I`ve just noticed that the crew have gone and put the tracks on wrong on one side,....slackers,.....the Sgt. Major will be having words!!5 points
-
Built as part of a 60th Heller Anniversary group build over on HyperScale's 1/72 GB forum. It's a well-engineered kit, but I made the build a bit drawn out by scratch-building the rather complex missile pylons and converting some RB304 prototype missiles from an old Hasegawa Viggen to the in-service RB04 examples. I also replaced lost raised detail using Archer Fine Transfers' resin panel line decals for the first time. Here're the pylons and missiles in progress: And here's the same kit I built ages ago, re-scribed and converted to a J 32B with scratch-built air-brakes, cannon troughs, and afterburner.5 points
-
Never mond the Puffins or Sandeels, even your Beaver Tail has got sad eyes now. Great work, though that hinged section reminds me of a 70s Smash advert. "They peel them with their metal knives...". [Apologies to any non-Brits and/or people under the age of 50, who have not the tiniest clue what I'm on about, or even what Smash was...] P.S. I have used a similar method for drawing true horizontal lines around the hull of a ship. Works every time.5 points
-
Looks like you're having a good time Johnny. Erm I'm looking after Bill's neighbour's pair of mandrills while he's away and I brought them round to keep the goat company...nothing to worry about...5 points
-
How do you think I feel...? More progress with my dinky wee flight deck tractor. As you would expect, these beasties work really hard on yer average carrier deck, so the paintwork gets pretty rough. On the other hand, since they mostly live in the open air / salt spray etc, they are maintained carefully. It wouldn't, therefore, be realistic to weather them to trashed AFV levels - but it certainly ain't going to be pristine either. An added factor with mine is that it is depicted only a few months after the tractors (and other FD equipment) changed from the yellow colour that had been standard ever since the war, to a much duller dark green. This photo, which I have posted before, was taken during our deployment to the Far East & Oz in 1988 - the deployment during which I took ZE419 for her swim. You can see that already the yellow is starting to show through, and that the are battered workhorses. So... time for some hairspray technique (though I won't be raiding Mrs WAFU's stocks: I'll be using AK Worn Effects fluid, which achieves the same thing). I primed the tractor and wheels yesterday, but didn't take any pictures. Take it from me; it still looked grey - just a little more uniform than when bare plastic. Next step was to airbrush a layer of Vallejo Metal Color 77.712 Steel - I really like these water-based metallics of Vallejo's; I discovered them late last year and have had really good results. It has to be said, however, that shiny steel wheels (insert Stones joke here) look a bit odd... ...though not as odd as a shiny steel tractor! Once all that is firmly cured, next up will be a layer of the AK fluid. Then a yellow coat, which will be weathered. Then another AK layer. Then green, also to be weathered. The end result should be a green tractor which has areas where both yellow and bare metal are showing through. But you'll have to wait for that. More soon Crisp5 points
-
On the job front, Bill, I don't want to count any chickens, but it does seem as though things may finally be looking up - I'll know for sure in the next day or two. I can exclusively reveal that neither the tractor nor any part of my Sea King is made of MDF. Tractor now primed; more soon. C5 points
-
Finished them some time back but couldn't post here thanks to photobucket . Anyways created a new account with Flickr and here they are . Finished in bright schemes , I didn't see any point behind weathering them . Texan - 1/72 academy ; Indian Air Force plane. Gnat - 1/72 Airfix ; RAF . Regards , Basundhar Roy5 points
-
Those are real; nothing will persuade me otherwise. Full stop.5 points
-
I finished this yesterday so here is the promised RFI. Here is the build thread. I thought this was going to be an almost out of the box build but in the end I added or modified the following: Modified the front undercarriage strut and made it so it could be added later on in the build. Added PE seat belts. Added some detailing in the front undercarriage bay. Replaced all the gun barrels with 0.8mm brass tube. Modified the turret guns so they could be painted separately and added later. Used instrument decals from Mike Grant. Added weighted effect to the wheels using heat. Extended the pitot tube with brass tube. Replaced the aerial mast with one from another kit. Added scratch build DF loop. Used Extradecal Swastika decals. Added navigation lights from clear sprue. Added wire brake lines. So nearly OOB then... Here you go: Its a very nice kit and a lot of fun to build, I hope you like it.5 points
-
So the bench is currently a bit of a mess: 20170723_153721 by Edward IX, on Flickr I did rehome some kits, sort of, in an old chest once owned by one of my great-uncles, allegedly his footlocker from his time in the army; I suspect that if that's even true, it's had a hell of a repaint since: 20170723_153729 by Edward IX, on Flickr I unmasked the underside of the Gauntlet (it's been so long, I literally could not remember what aircraft I was building for a second there): 20170723_153754 by Edward IX, on Flickr As you can see, the starboard elevator needs some touching up, which will be fun, I'm sure. Torrential rains have continued this week, and the poor old grotto is being dehumidified, since right now bachtrachian Dagon would feel fairly comfortable in its moist environs. Yes, but unfortunately he's already reached that quantum state some toddlers achieve: light enough to pick up, heavy enough that you wouldn't want to. As a result, the robot hunkered down in place and beeped protestingly. Yesterday the future President of the World threw his food on the ground and informed Mrs P that "bugs will eat it". True, but not desirable.5 points
-
Some holes in the boat Here's the last-seen state of play with this project and I'm happy to say that most of the big pieces are sort-of present now. So I'm quite keen to start sticking things together - but there's a good reason why I can't do that just yet. There are some details that are much easier to add while the hull can still be disassembled. Let's have a go at them now. Submarines have holes in them - that's what makes them submarines, and on AE2 some of these holes were on the flanks of the middle bit, just above where it met the pressure hull. These little holes are important to the whole look of the model and now's the easiest time to add them. I started with a very thin piece of evergreen styrene sheet, cut it to the right size and shape and stuck on a section of plan with all of the relevant details present. I also roughly cut out the points where the dowels will travel through the boat when it's all finished so the sheet doesn't get in the way of assembly. In retrospect I think that I probably could have done this a bit smarter - but there you have it...that's what I did, just cut out some rough embayments. And now I cut out the little vent holes (or whatever they are called). They look a bit rough here but I subsequently tidied them up a bit and don't worry too much because about 80% of each individual hole will be hidden under the saddle tanks anyway. You'll see what I mean soon enough. Also need to cut out the anchor locker (I think that's the correct term). And then I had this... yet more parts to my 'kitset'. So now I have some holes - but the problem is that there's no depth to them. Anyone who peers into the holes when the thing is put together will just see solid Sappelli. This needs to be fixed. Let's drill out the Anchor locker to make a 3D hole in the hull A very unattractive bit of woodwork this; looks more like battle-damage. Grab a fretsaw and start cutting out a larger hole. Clean up the rough bits with a rat's tail file. Drill a whole heap of holes in just the right spots to fall under the holes I've cut in the plastic sheet. And now we have a series of holes with holes behind them...(I've actually made the 'underneath' holes a bit bigger since this photo was taken so don't worry about the small amounts of wood that are still peaking through.) And here's what it all looks like put together. There's a thin sheet of plastic between the pressure hull and the centre bit with defined anchor lockers and a series of drain holes (or vent holes or whatever) that you can look through and see a deep void behind. I'm going to have to judiciously semi-fill these holes so that you can't look straight through the boat, but this will do for now. I'm quite pleased with this step as these are the first details I've added in this project - everything else to date has involved large components. Seeing the first details in place makes it look a bit more like a proper model than a bathtub toy. Best regards and stay safe, Bandsaw Steve.5 points
-
My initial thoughts of a build for this had been to do something like a DC-6 or DC-7 but having had a rummage through the stash I have found a couple of kits that are suitable subjects. This Accurate Miniatures boxing is my first offering and is an original boxing.4 points
-
Finally got this wee 1/350 scratchbuilt beastie finished. Had some issues though - apart from the usual glacial build as I try and figure out how to make something. First I broke the wee USB drive I used to transfer pics from my phone - and which had all the later pics on it. Nae probs, continue pic taking use my trusty old Canon D60 DSLR. Ah, although it's a good camera, it's also an old camera and won't transfer pics from the camera to the PC cos the software is too old. Nae probs, where's my CF card reader... Umm, yes, where is my CF card reader, I had about three of them. Nae probs, buy a new one, wait a few days for it to arrive. Find the original CF Card reader the day after it arrives Get the final build pics and transfer to PC. Finally receive the dreaded "You've been shafted" message from PB. Nae probs, keep the pics, I have copies. So here's the finished article, I've added some with smoke and some without. Which do you prefer? I did worry that I'd added too much rust effect but these wee boats took a serious battering all the time. I was a bit disappointed with how 2D the Tamiya 1/350 figures were but I made a set of binoculars for the guy on the bridge wearing the white woolly pully: It's not very big: And next to a 1/72 Hurri for scale comparison. Hope you like it and happy to receive constructive criticism.4 points
-
You're lucky Bill ( @perdu) is on holiday the same week as you are Johnny, he was the real trouble maker round at the Baron's gaff - led the rest of us well astray he did... Keith as pure as the driven snow4 points
-
Sparrows loaded DSC_0004 by Reinhard Spreitzhofer, auf Flickr DSC_0003 by Reinhard Spreitzhofer, auf Flickr4 points
-
Do we have a GB sig for this GB yet ? If not how about using the picture below, completely biased as it's a Blackburn Perth, but you would have to be built of stone not to be motivated cheers Pat4 points


.thumb.jpg.76f12b87ce9ca9929c9aabdcf8f9d2dd.jpg)


This leaderboard is set to London/GMT+01:00