Leaderboard
Popular Content
Showing content with the highest reputation on 05/06/17 in all areas
-
Just finished this Revell DO-17Z-10. It's the ICM kit repacked and new decals. It will be reviewed in Scale Aircraft Modelling in the near future.18 points
-
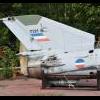
Right folks, here goes. I've finally finished this Zvezda Mig-21 for the 70's NATO v Warsaw Pact GB (with a week to spare) and I've got to say I've really enjoyed this build (apart from the poor fit on the undercarriage bays)!! I've also learned a lot - particularly as this one was completed in NMF - something I don't seem to do very often. This is now my third completed jet, following my F-16 and Buccaneer and I'm currently racing to complete the Airfix Vampire for the de Havilland GB. The model was completed OOB with the addition of a scratched pitot tube as the kit piece was ok but not realistic enough. Completed using Revell Aqua acrylics (which I love for airbrushing - so smooth) and a panel line wash and minimal weathering. Hope you enjoy and as always I'd really appreciate any feedback and comments. Kris PS I think I got carried away on the amount of photos, but hey - who's counting?16 points
-
RAAF Mosquito FB VI, Airfix 1/72. I had a bit of a play with this one by replacing and altering the kits raised detail.14 points
-
If I didn’t know she’s an AAB-1 I would say she’s a Ju-88, bl**dy similar! This particular plane (serial number 7) was built by SNCASE plant in Toulouse and delivered to GB I/31 "Aunis" bomber group on May 8, 1945. That’s why she has no armament and looks very clean.The Hasegawa kit is not very easy to build, the nose is a real nightmare. Eduard Zoom interior set was added (waste of money and time as just the seatbelts are visible), the main U/C legs were moved forward and the wheels flattened a bit. Painted with Hunze H80, decals by PT Decals. Thank you for looking.13 points
-
Hi Folks Another F102 this time from 325th FIS based at Truax Field Wisconsin according to the Superscale decal instructions.Not one of the more colourful schemes but the case XX winged aircraft seem to be more difficult to find in decal form. A bit of confusion reigned as this was a Revell boxing and contained the case XX wings,I thought only the Monogram boxing had this wing,anyway things got sorted.Painted with Xtracolor. Ian [/13 points
-
Not sure. I do have a 1/48 version languishing stored safely in the attic somewhere but I haven't looked at it for a long while. IIRC the mouldings do look very similar and so I wouldn't be surprised if they shared a common starting point - and had faults in common too. Oh - and I'm not saying which of the incorrect panel lines on the 1/72 version I haven't corrected.............. As it happens that has reminded me that my mum won the miss lovely legs competition at Pontins holiday camp when we were on holiday in the mid 70's. I also remember that for competition purposes the families in the camp were divided into houses named after cigarette brands! We were in Embassy Blue that year. I remember that because when my mum was announced as the winner - the compare asked what house she was in, and my Dad (who was bursting with pride) yelled 'Embassy' at full volume - more or less into my right lug-ole, temporarily deafening his young son........ Doesn't that tell you a lot about the 70's? Holiday camp holidays - sexist competitions - and smoking embedded in the culture? Oh and terrible haircuts - I have to laugh when I see my school photographs..... But there were compensations such as wonderful airshows. Memories of Lightnings (in particular) travelling at warp-factor-snot at nought-foot-six with the burners in over the heads of the crowd from behind the crowd line before rotating into the vertical and disappearing into the endless blue........(presumably shortly thereafter landing after declaring a fuel emergency!) Is it any wonder the RAF beckoned? You're too kind Tom (literally). The correct interpretation of events is 'slow and fitful' progress (I'll take the complement about the seats tho' ) and as for the nose gear - I am now on version 2........hopefully improved. After further thought (an exercise that I also indulge in only slowly and fitfully I'm afraid) I decided to junk the resin yokes and use the kit yokes suitably separated from the moulded in wheels and drilled and carved to shape. I think I cast resin copies (I say i think - it was after all a long time ago....) so I'd only have to do the task once - but after said further thought I decided (1) I had doubts about the strength of resin (2) I had doubts about the strength of the Cyano bond and (3) I thought the method of joining the yoke to the lower casting could be made to better replicate the real thing. So: New kit of parts The yokes have been separated from the wheels, opened out and shaped. The stem of these yokes is longer than the resin one so that it echoes the real thing and joins into the 'U' shaped cut out I've filed into the lower casting (see what I mean?). The fit is tight enough and the contact area large enough that I'm expecting Tamiya green cap to provide a strong enough bond: And some detailing to the yokes. Found this truly tiny PE representation of the towing link on the Eduard etch fret for the Swiss Hawks. Challenged my limited PE skills to put a bend into it I can tell you... And I've filed some 1mm plastic rod to a 'D' shaped cross section in order to represent the lug that the oleo connects to: And here are these little adornments glued to the yokes: Once I've finished real-life work today I'm hoping to get the yokes glued into the lower castings and then start on the oleos (for which i plan to use some Albion Alloys slide fit tubing). With a bit of luck this particular bit of fitful progress will move fast enough to let me post some more photo's later today.............11 points
-
The Spirit of Ecstasy... Or 'Ellie In Her Nighty' as we Rolls owners refer to her.. But I learned that the true Spirit of Ecstasy is what one feels when completing an extreme build of a Pocher classic. Here Eleanor is in all her beauty, guiding the path of my Gentleman's Express. Yes the day has finally arrived when all the bits are in one place with permanent (or removable) units all together on four wheels. These are just hasty photos, snapped in the excitement of completion. The portraits for posterity will come after a case and a photo backdrop are completed. I will continue to add those constructions right here in this 3+ year-old thread. I would be remiss were I not to thank so many who made this a magical experience for me. To David Cox of Detailed Model Cars, my deepest gratitude for the techniques he shared with me and the wonderful parts he fabricated to my wishes which set the model aglow. Thanks too to Marvin Meit of Model Motorcars Ltd. for the beautiful bronze, brass, resin, stainless, rubber and chrome parts he makes for these cars which are like Crown Jewels . Many are seen in these shots. I must also express my gratitude to the moderators here for allowing my work to drag on for over 70 precious pages of bandwidth. In that vein, I thank you, the forum members who found this all entertaining, valuable, or laughable. Your questions, advice, and support have made this much more than opening a model box and slapping glue on plastic. Very often I have changed my mind or direction based on thoughts expressed by caring and expert modellers. This thread has brought me a few very dear friends and I would be fortunate to keep them. Should any Pocher builders or RR builders in particular find the construct information of value, I will compose a list of parts fabricated and purchased as well as the modifications herein. Simply, 'thank you' to all and more to come!11 points
-
Hi all... I've been working on this for the last few months and I'm calling it done. It was a kit I got for free a few years ago, and I planned to build it to partner an F-14 Tomcat as I had a decal sheet for both. I built the Tomcat 3 years ago, and finally got this one finished. I used it as a chance to experiment and try new things. It's my first time using an airbrush on an aircraft, and I tried pre-shading. I also used oils for a pin wash on the panels for the first time, though only on the upper surfaces (I used my Florys wash on the underside as a comparison). I used Vallejo Model Air for the main colours, and I liked them, apart from how easy they scratched after being applied. I tried some AK True Metal on some of the exhausts, and also scratch-built some Intake Covers using plastic card, foam and foil from a margarine tub. All in all, I'm happy enough with it. It won't win anything, but it's a nice scheme and some of the new things I tried worked out ok, while others didn't. I'm afraid the photos are a little over-exposed, I'm having a little competition with myself to see which improves first, my modelling or my photography! I added a couple of both aircraft together at the end to give a little comparison. All comments/advice welcome, it's the best way to learn. Thanks... Kit: Revell F/A-18E Super Hornet Scale: 1:48 Paint & Weathering: Airbrushed with Vallejo Model Air acrylics. Weathered with Flory Wash, Citadel Nuln Oil, Oils and AK True Metal Extras: Fightertown Tophatter Anniversary Decals, scratch-built Intake Covers.10 points
-
Based on a fictional event with no doubt a book load of mistakes, but it was a fun build and hopefully something not modeled often before. Thank for looking.10 points
-
Just finished this one, the wife gave it to me for Christmas along with a 'Sit in a Spit' gift card. Did that 2 months ago, so I finally got the model made. Its OOB with Tamiya and Revell acylics, I did use the starter kit paint on the underside but it did not spray well, came out a bit rough. I think the decals are a bit thick, some would not settle into the panel lines, ut otherwise a nice little kit to build.9 points
-
Great Airfix kit with "Xtradecal" and "Maketar" masks for RAF insignias for Hurricanes. Every opinion,especialy about colors is wellcome.Vallejo color were used. Here are some pictures:9 points
-
I see The children have been kept in 'cos it's raining, I suppose they have to go some place to play I begin First u/c bay engine bearer in place Didn't expect the full monte in there, out of sight did you? how much do you see now? except for the castings from today in the background being worked within th earlier pictures Pics if that works out later Have you met the de Havilland Gyron Junior turbojet engine? Allow me Here's a pair of them... And the rearmost u/c bay engine bearer brackets awaiting attention Laters chaps9 points
-
Hi, guys. This is my first post here. I saw this Revell kit in the hobby store and read some awful reviews about it, but I wanted to have a go. I really wanted to see if I could get the nose and visor mechanisms to work. It looked like most people either broke it during assembly, or just gave up and cemented the nose up or down. As you can see from the photos, the mechanism works ok in my model. When I was dry-fitting the mechanism pieces, I thought the pins were too long, and I think this caused stresses on the clear plastic (which is already brittle, and does not flex much). The long pins were causing the parts that form the cradle to bow. I noticed also that the long pins rubbed against the inside of the nose cone, and made an awful scratching noise. With some cutters, I carefully trimmed the pins that hold the visor, and sanded the inside of the nose cone. Inside the nose cone, there is a prominent ridge against which, the pins rubbed. After I cemented the pieces, they were very loose and rattly, but when the visor is installed, they become more robust. I've made no other modifications to the kit (I know the visor is too long, the nose landing gear is too far aft, the tail wheel door is too wide, etc.), but I filled the cabin windows and used window decals from Draw Decals. I managed to complete it during a week off work, and enjoyed it to the point I bought the Heller Air France version. Let me know if you have any tips or advice or opinions that I could apply to the next one! Neil.8 points
-
This is the Tamiya 1/72 F-16CJ. It is based on Col. Dan Hampton's exploits in the second Gulf War (he was in both) as featured in his book "Viper Pilot". The "Gamblers" were apparently one of the few Weasel squadrons which didn't rely just on HARMS, but were intent on killing sites with cluster bombs as well. These were his favorite weapon, featured in many photos in his book. They are Hasegawa CBU-87's with the rear fins slightly redone to make the units CBU-103's. Decals cobbled together from a variety of sources, especially Authentic Decals for the "Gamblers" markings. While there are many photos of "044" online, one of this aircraft with Hampton shows it painted differently than in other photos on the LEX of the tail. In fact, the "Gamblers" had a different variation on the dark gray pattern than on other F-16's, much to my surprise after I thought I'd finished painting it....8 points
-
Here I present my rendition of the Tamiya 1:48 scale Crusader III. I was inspired by Plastix's terrific build in the Made in Britain Group Build (here), and as I had it in the stash I thought why not. It is a purely out of the box build as I have not built an AFV on a larger scale before. It was intended as a quickish build, but then due to a serious of unfortunate events it's taken almost 18 months to finish. That being said, I am very happy with it and am now considering the next step up, a 1:35 Tamiya Matilda. Finished in brush painted Tamiya acrylics, with weathering from water colours and well thinned Italeri acrylics. Build thread can be found here. Thanks for looking, I'd welcome and pointers for future AFV builds.7 points
-
Hi folks, This is the well known 1/48 P-47D by Taimiya. No introductions are needed for the kit as it is well known and is faultless in its construction. I’ve built it to represent “The Reamer’ flown by Lt. Jack H. Reams of the 347FS, 350FG USAAF during their deployment in Italy during 1944-1945. The connection of course being the pilot and my son share the same name, there always has to be a link! I’ve added a few embellishments to the kit by way of aftermarket items. The Master .50 calibre gun barrels replace the kit parts and the kit radial engine has been replaced by a Quickboost item that I’ve wired up with ignition leads. The paint is primarily Tamiya AS-12 decanted and then sprayed through my airbrush. A shade of Alcald (polished aluminium?) covers the gun bay access panels. The olive drab glare shield is Tamiya olive drab with some distempering using a lightened version of the same colour. The yellow chromate in the wheel bays is from one of the Mr Color sets. An Eduard paint mask was helped in covering up the clear parts while paint was applied. The decals are from the Lifelike sheet 48-049. Rick Peck who was involved for the research of this particular aircraft contacted me through my Facebook page and provided some excellent photos of the aircraft. Photos of aircraft from the same FS.FG show the smaller P-51? drop tank on the centreline along with the bazooka tubes being loaded on the out pylons where the 500 lb bombs were hung. I’ve taken a bit of liberty with the load out as I wanted something that was a bit more ‘capable’ when it came to ground attach. So with artistic license in hand I opted for the flat belly tank, bazooka tubes and 500 lb bombs. I like the look of it and the load out gives the aircraft an ominous presence. I did have one balls up this afternoon. While masking the coloured landing lights on the lower out wing, I managed to tear the decal even after it had been well sealed. A cautionary note I guess when using these decals is that the adhesion strength is a bit lower than other so take care if you do need to mask over then. Mine came off even using the low tack post it notes to cover the majority of the area. It’s my first NMF scheme and I’ve got to say that I’m pretty chuffed with it. Even after looking at the photos I need to go back and a address a few spots. Hope you like it too and a huge thanks to Rick Peck for the photos and the good folks over at the Warhawks Facebook group. Cheers, Mick7 points
-
7 points
-
That plastic The blue stuff In all my years of plackyhacking I've never found any polystyrene as damned well hard as that Frog old blue placky? Kids play Airfix recent grey? Pull it apart with your thumbnail Itacraperi? Fallaparteri But the old blue plastic Matchbox used must have been cast from Port Talbot steel infused stuff I was kinda worried about it being brittle too, but it seems to have a decent tool steel quality about it Amazing stuff Today I will be mostly casting a couple more brake tails and making a nose/fan assembly for a Gyron J. If I get a decent master I'll cast some, tailpipe too then they can go either side of the undercart bay If not I'll just make two by hand... I'd like two cast brake petals so I can skip this part on the fold-a-Bucc that's coming next year Don't need to do this stuff twice after all Today will also see me drilling right through the Maintrack intake moulding so the engine can push in from behind Lots to do whilst is raining. ☔7 points
-
Hi ! I would like to present here my model of HMS Warspite from 1942. I finished model I guess 2 years ago. Build is more/less out of the box from Academy premium edition with addition of Flyhawk Pom-Poms and Master Oerlikons. The main focus was to try out working with Pontos PE sets before using it on other major RN battleship project. Jan / Slokavia /6 points
-
6 points
-
Bill & Hendie: Thanks for the feedback lads, I'll take those points on board. Either way this part of the job looks like it will be experimentation-city! I got the buck roughed-out in the shed using the the jigsaw and belt-sander just now: I'd be quite surprised if any of the first attempts turn out to be acceptable but tbh I'm just approaching the whole process as a 'learning-to-vacform' exercise, warts n'all. It might have been easier if I wasn't trying to do it in full view of everyone of course (), and although it will probably work out painful to watch for more experienced hands, hopefully it might encourage others to try this route for themselves if they can see what's involved. Looking through your excellent Sherpa build earlier I see what you meant about using drawing pins to keep the plastic in place when heating Bill, so I shall be nicking adapting that methodology I think later on. I'm not sure how much progress we'll make over the rest of the week as things at work will be pretty up in the air which usually translates into coming home with limited patience left over. A little bit of therapeutic filing here and there mightn't be the worst antidote in the world to such matters! Tony6 points
-
With all the surgery that went on, a re-assessment was obviously necessary to re-familiarize myself with the relevant sets of dimensions. which have - it has to be said - become a little more complex. The new rear profile now: Wider (obviously), but also including the necessity for both newer corner and ceiling profiles, as well as some fidddly business to attend to in order to allow for the protruding wing roots: Gawd but that cut looks brutal, however its not had a proper shave and brush up yet. I mentioned above about changes to the fuselage which. If you recall my previous false start involved spuriously mating a BT to an incompatible clamshell fuselage profile. If you actually look at some of the shots of the rear in the excellent 'J' walkarounds up on Prime Portal that I only discovered relatively recently, it's important not to take note that the there is a greater degree of curvature for the upper fuselage to reproduce, than there is for the shallow lower profile: Image Credits: Bill Spidle http://www.primeportal.net/hangar/bill_spidle/c-119j_walk.htm In other words, the shape of the rear fuselage we're adding on is symmetrical neither in the vertical or horizontal axes. Obvious, but necessary to remind myself when in the heat of transferring those details freehand to paper templates: Although the buck needs to be slightly smaller than the kit dimensions in order to allow for the thickness of the vacform plastic, as a newbie to this process I've taken the precaution of scaling the templates to the actual dimensions, so that I can reduce them most accurately by holding it up against the kit for final shaping in the latter stages: I've also marked in on the side profile the measurement for where the protruding wing root needs to be taken into account also. Those are glued on now with PVA. I'll come back to this later and block out the the main shapes out with a saw. Tony6 points
-
I do not claim master-hood-ship-craft ship Neil, I do like to see if I can get THERE from HERE sometimes though All a game after all This afternoon recovering from a bad day I had a go at doing a bit more, no need to say how today has been bad after all Did Roger mention I was going to be handling sharp tools? Correct Rog but I wouldn't have minded just the one Just one mind you For now I had to cut away the inside wall of the wheel well engine bay to make room for the engine frames and gubbinses The grey piece visible in the hole is the work top in shadow from my hand, the bottom length of blue plastic is part of the actual airframe carried along the bay. It will act as basic stiffness member when its done The huge hole in the kit part is copied over on t'other side Some additional structure needs adding to the wing section by the undercarriage pick up point Look up there, this is a picture of a picture on the amazingly detailed link James (71chally) put up for us, all rights of the copyright owner acknowledged All sorts of building to do Yes I admit I am quite happy to have a little bit more to do Started today cutting out circles with my little swivel knife, I cant bear the thought of ever losing this These circles will become the engine bearer rings later A swift tidy up with the "rat-tailed Draper rough" file, the local hardware guy who used to be a great tool seller went across to hanging card with tools vac packaged to them No proper selection of files anymore, its disgraceful Mind you as he says, "It's only you who has asked for decent stuff in the past ten years how can I survive on that?" He does still have some of the useful nuts and bolts he was wont to sell in the olden days, no market for them either except the 'bay and he cant be assed... Soon going to get them equalised Edwood Woodwood wood 26 points
-
Good afternoon all! It's taken me since Christmas and has been a bit of a cursed build (see below) but here is my first ever He 111: This an aircraft of Kampfgeschwader 55 'Greif' and fought in the Battle of Britain and is actually part of the Airfix BoB 75th Anniversary pack. Built out of the box but with the eduard interior pack and masks for the canopy. I refrained from adding rivets on this one but tried out some new techniques which some I'll use again, some I won't. Pastel weathering for exhaust fumes was a new one for me as I usually airbrush these on. This worked well on the top of the wings, particularly where I laid down white, then grey then finally black pastels to create a heat damaged paint surface and then the usual soot from the engine. This didn't work so well underneath as the lichtblau showed every mistake and worse still, the matt coat started coming away where I tried repeatedly to get the effect I wanted. I ended up correcting with oils as the pastels simply wouldn't stick and I wasn't going to matt coat it again but this now looks overdone for me. Another new technique was stretched sprue for the antenna wire which i'm not completely sold on as it's a little thick for 1/72 and saggy; I may replace at some point but that's it for now. So why has this been a cursed build? The canopy out of the box was warped but good 'ol Airfix sent me a replacement very quickly. The eagle eyed of you will notice I've sprayed more of the canopy on the top two panels than I should have... this is to cover up fogging caused by Tamiya green top. Not that I'm blaming this but lesson learned, PVA glue from now on. Throughout building I had multiple incidents from needing milliput to fill gaps, a split fuselage which needed re-gluing and refilling, poor fitting fuselage windows which aren't the clearest meaning a lot of the interior extras can't be seen very well. I've also lost part of the rudder mechanism and the rudder itself is sitting a little low which I only noticed once I'd started painting. I didn't follow the instructions properly on the tail flaps which meant I had to perform quite a bit of surgery on them to get them looking ok. Here's some of the WIP and more pictures. Hope you enjoy! JB Finally, here she is with the rest of the BoB set:5 points
-
This model I finished yesterday, and I'd like to introduce you. The work of these models, the only problem was fitting glass cabin. Better than I could. Enjoy.5 points
-
When I got back from real life this afternoon I glued the yokes glued in to the lower castings - and this evening I've been mostly messing around with Albion Alloy tubing. On something of a whim I cut of the moulded lugs on the side of the lower castings - which represent what on the full size beast are actually hollow tube spindles - and replaced them with short lengths of brass tube cyano'd into 0.5mm drilled holes: Bit fiddly - but after a short tussle all 4 were done and looking ok: And then I played about with some slide fit tubing to represent the oleo. Thankfully it all lined up ok: And a comparison with the oversize Airfix original. Its not entirely clear to me that the nose wheel leg is a visible or important enough component to deserve such efforts But what the heck - it's made for an enjoyable few hours modelling5 points
-
I can only concur with this post, it is a source of constant amazement to me that we can buy mainstream kits of WWII Luftwaffe and Japanese paper projects yet real and popular aircraft that have sold worldwide are not available from mainstream manufacturers - barking mad if you ask me!5 points
-
H of C ? Pretty damned addictive in a semi-predictable way. You learn nothing new about Washington politicking or indeed human nature of course, but it is powerfully entertaining stuff. The fourth wall cynical schtick Spacey does to camera are frequently highlights of the narrative. Me too Bill. Heading back to those parts at the beginning of July for the See what I did there with that 'Cliff' reference? That's watching H of C for you - you get annoying! Don Roberto I confidently predict that you will be able to get that chin done no problem by following the advice I've been grateful to receive over the last few pages. A bank holiday here today so going to try and put some time in on roughing-out the buck. I've decided to try shaping the fuselage and BT as a single unit, then cut this into upper and lower halves for vacforming purposes. To enable the separation of the BT from the tail once vacformed I'm going to try and include a recessed line in the buck to indicate the required cutting point. I don't know if it will be visible using 1mm card for the process but it would be nice also if I could use a similar method to mark out the lower door and two side doors for cutting in a similar fashion. We'll see, won't we?5 points
-
Evening all It's been a while since any kind of update on this project, but life and a general lack of motivation for it has got in the way over the last few months. However, I have been doing a bit of work on the outboard engine nacelles... The first task was to establish exactly where the outer engines were on the outer wing sections. I used a combination of my plans as well as scaling up the Airfix 1/72nd scale kit's measurements, and then made the firewalls from 1.5mm plastic card - these were stuck to a 'spine' which was cut to the profile of the nacelle which was in turn stuck to the underside of the wing. Confused? May be the following pictures will explain in better... Here are the firewalls in position on the leading edges of the wing: With the firewall and spine on the correct position, I could then begin to build up the basic shape of the nacelle with bulkheads (or formers) which again were checked against the plans I have as well as the Airfix kit to ensure the shape was correct: With the shape of the nacelle sorted, I then began planking the formers with 2-3mm wide strips of plastic card: The extreme rear of the nacelle has a too-steep profile for the planks, so this was made from Milliput and wet-sanded to shape without too much of a headache: And now we have an outboard engine nacelle completed: As you can see from the pictures, the surface is far from smooth. This won't be a problem though, as when the glue is properly cured (and thus there's no more movement in the plastic as it dries) it'll get a coat of car body filler and a thorough sanding, before a few coats of filler primer will be sprayed on to finish the job. Now one nacelle is done, I've got to get cracking with the other. The thought of cutting a load more planks doesn't instill me with joy however, but I keep telling myself it's the last of the main structural work on this project, and then it can be the fun detailing of the airframe. Until next time, Tom5 points
-
Yesterday, I was watching Raiders of the Lost Ark and it was quite appropriate because today I collected the Holy Grail of Bomber Command modelling, the 48 scale Paragon Manchester conversion! Before I go any further, I can't thank to Dennis (Spitfire) enough for selling it to me without needing a mortgage to afford it, so I intend to do it justice and have it done for Telford. Whilst I'm at it, I'm also doing the Paragon 1/48 Lincoln conversion with an equally big thanks to Chris (Cngaero) who sold that to me for an equally reasonable price, that's 2 Christmas's so far this year and we're only in June! That will be published elsewhere in the future, so I can't show the full progress on that one, but will drop a few photo's in along the way. I recently build the excellent Blackbird Manchester & Lincoln conversions, as you may guess, I'm a big fan of Avro's line of props, but always wanted to do them in 48 scale, I just couldn't get hold of the damn resin! The Lincoln was started a few weeks ago, the resin quality is excellent... The base for both conversions is of course the classic but superb Tamiya Lancaster Now for the Manchester resin.....4 points
-
4 points
-
I've had a soft spot for this little beastie since back when I first had the Putnam book of Naval aircraft. I know there is a resin kit in 1/72 out there, but I like scratch-building, and had been thinking to do a Flycatcher for a long time. What ticked it over was the MMP number on the type, with photographs of Flycatchers on the China Station in the late twenties. I have already done the two motors, at least mostly: exhausts I think it best to do later, and one will have the spinner, and so not need frontal crankcase detail, but I have not decided which. Here is how the motors stand now... (a U.S. penny is about 18mm in diameter) These were done as a stand-alone project, with another motor, and how they came to this point can be found in this thread: Work has now been begun in earnest on the fuselages. While straightforward in general, the Flycatcher fuselage is not simply shaped. It is almost as if the designer had been instructed to see to it as little as possible was square to the line of flight, and to choose, whenever faced with the choice, the oddest of internal proportions available. It took some thought to figure out how to start. The bottom of the rear fuselage is where I began. It is a piece of 1.5mm sheet, cut to the guide of a template trimmed from a copy of my Grainger drawing. It is sanded to some curve in section, and tapered down for and aft in profile. Next a stern-post of 1mm square rod was attached at the very end, and sides of 0.5mm sheet attached. These were a bit high, and over-long... They were trimmed down to proper height, and cut off on the line where the fabric covering meets the metal panels at the cockpit. Some spacers were put in for safe handling. The cockpit floor (and attachment point for the lower wings) was added. It is of 1mm sheet, and cut a bit over-size. Rear portion of the cockpit sides were then added, made of 0.5mm sheet. The nearest fuselage shows these, and the floor, all trimmed down to size, the furthest shows them in their raw state. At this point, the rear turtle-deck application was begun. First a sheet of 0.5mm sheet was put over the top. Then the front former (and backing of the seat) was attached; it is a piece of 1mm sheet, square to the bottom piece. I added a bit of color for the inside of the fabric, which might be seen looking straight down into the cockpit, and black tube (0.6mm rod) where appropriate. I got a bit ahead of the photographing here. A triangular 'spine' of 2mm sheet was put in down the center from the cockpit rear to the stern-post, The turtle-back of the Flycatcher is unusually deep, working out to 7mm at its highest point in scale. My usual method is to just put in a solid piece of plastic and sand to shape, but this is too much for any single thickness, or even horizontal laminate. I thought to use long, triangular 'planks' of 2mm sheet (two on either side of the spine), but when I got the first ones on, the gap between them and the spine was so narrow I just started filling it in with shims and trimming them down. At the point of this photograph, the turtle-back is only roughly shaped. I went a little more regularly on the second. I stood planks of 3mm sheet alongside the spine, then put pieces of 2mm sheet alongside these.... Here are both fuselages with the turtle-backs shaped and smoothed. One of these will be a machine off HMS Hermes on China Station, on floats, circa 1926, one will be a machine off HMS Courageous in the Mediterranean, on wheels, circa 1929 Next step will be further extension of the cockpit sides, and interior work....4 points
-
About three years ago, after Airfix released "Folland Gnat" in the 48th scale, I had an idea to create a diorama based on the movie "Hot Shots!". And I even started working on this topic. http://www.britmodeller.com/forums/index.php?/topic/234984908-hot-shots-airfix-148-folland-gnat-aka-oscar-ew-5894/#comment-2048342 But there was a problem - there were no decals. And I had nowhere to print them. So I decided to freeze for a while diormau with "Folland Gnat" and decided to make another, less large-scale, but no less ambitious. So, the diorama based on the film "Hot Shots!" named "Eyewitness".4 points
-
Dear fellow Britmodellers, here's my 1/72 Airfix Mustang P-51D (Kit #A01004A) built straight from the box. Decals represent the mount of Lt. Eugene W. James, 352nd FG, 328th FS, Bodney/Norfolk, England 1944. Painted with acrylics from Gunze/Mr.Hobby and Alclad II. This kit is cheap, easy to build and has very good surface detail. The plastic used by Airfix is quite soft, which resulted in some broken or bent parts. I broke the control column and the blade antenna when trying to remove it from the sprues. (I scratch-built a new control stick and replaced the kit's antenna with a photoetch item.) One of the undercarriage legs was badly bent. Due to the softness of the plastic, the model is in a "wobbly" state, when you touch it, it rocks from side to side! This is the only weak point of the whole model kit. If I build another one, I will invest in a metal undercarriage from Scale Aircraft Conversions. Ok, here's the pictures ... as usual, taken by Mr. Wolfgang Rabel of IGM Cars & Bikes. Best wishes from Vienna! Thanks for your interest! Roman4 points
-
I've had this one slowly being crushed in my stash for ages. Built for a few reasons. 1) the box is massive and in a Revell fashion, collapsing under it's own weight and 2) my first attempt with my Iwata airbrush set-up. It has been a massive learning experience and I know it isn't perfect but I'm getting know to the pitfalls of airbrush painting. - Paint thickness is very import as is accurate and secure masking.Ahem..... - German WW2 mottle finishes are difficult. - I should have put the glazing in place first then masked, not added it last etc. etc. Anyway, it's a lovely kit and quite big when finished. The only bit I had diffulty in was getting the right place for the pilot's armoured seat. It's a shame the lovely cokpit is largely hidden throught glazing. I ended up buying a Eduard masking set as the alternatives of either cutting my own masks or hand painting the framing were not too attractive. I used Xtracrylix RLM65 on the underside which sprayed beautifully. The green top surfaces were Vallejo RLM72 and 73. The difference is very subtle (i.e almost the same) . The mottle was RLM02 again from Vallejo. I did notice that Vallejo RLM02 is a lot darker than the Xtracrylix shade. I then sprayed the top in gloss varnish, applied decals then sprayed Vallejo matt varnish which gave a very nice finish. Thanks for looking.4 points
-
Hello folks , I built this kit as part of the "From Russia with love" group build . This is a fantastic little kit from ICM with the fit and finesse being on par with the best out there . Ideally , the green spots should have a soft edge to them but this being a 72nd scale biplane , it is incredibly difficult to free hand the spots with an airbrush between the wings . Hence , I first painted the airplane green , masked the spots with silly putty and then sprayed on the aluminium . Weathered lightly with oil . Regards , Basu Roy4 points
-
Binh Thuy-Vietnam about 1975......I've tryed to represent the subject of the first picture....in the work in progress there are the information about the kit and the media I used....ciao from Italy,Enrico.4 points
-
Hi lads. This time is another German tank. This kit is old, probably same as me (can't remember). I've add metal tracks, MG metal barrels, home made stowage and some adds on and modifications which Tamiya forgot to do. Obviously is still not perfect, but I am happy. Base is from Miniart and figures from kit itself and civilians form Miniart, Master Box and can't remember who made the postman.4 points
-
4 points
-
Now then kids play nice will you That is how I do my omelettes too, basically less spices more salt a tad more pepper but that continental folding it over stuff? Nah, bung it onna plate and get munching The Gyron J How's it look now Giorgio? And that way hmm getting very blurry tonight better knock off and get drinking methinks Is this any clearer? No that was clappy too but the Gyron is vaguely visible on screen behind For inspiration... This needs the tripod next time Some of today's casting getting fettled I'm hoping to make a pair of complete petals to cast from for the Frog one later, I hope to include the operating gear too And this is for playtime tomorrow, the nose wheel in the kit is usele... pants As I say Playtime4 points
-
Indeed... especially builds as long as this. Seeing it on the bench again has given me some motivation, even if it was only to cut some 'planks' ready for sticking onto the other nacelle. You never know, I may even get some stuck on soon! Tom4 points
-
Good evening, colleagues! This model was started a long time ago, but I postponed it several times due to different reasons. That was not enough information on the navigator's cabin, then exhausting work with undercarriage bay, then... аnother problem's, аnother rit's. And again, and again ... But then I felt ashamed of myself! Gathered with the forces, having thrown all other projects, and AT LAST!!! I FINISHED !!! My Boston !!! Some photos of the assembly process you can see here (if you are interested): http://www.greenmats.club/topic/3519-douglas-a-20b-boston-mpm-172/#comment-41634 All comments and criticisms welcome! Thank's for your attention, Sergiy (48).4 points
-
The generosity of the BM massive is one of the most inspiring and touching things about this site. That's interesting, as I am the opposite way inclined. I get really stressed out hacking chunks out of a kit, even though I can't do the sort of modelling I like without doing so. I only start to feel comfortable once I start filling the voids with white plastic card. There's nowt so strange as modellers I guess! I am looking forward to seeing how the wheel wells come along. Martian PS: Will everyone following this thread please take note that in the foregoing at no stage were wing folds mentioned!4 points
-
Thank you Peter. Hi Glynn and thank you. I did do more on this project yesterday but didn't have time to post any details. The first thing I decided to do was get the hull of the KV-1 up to a similar level of completion as the other two. When I build armour I try to get stuff attached to the hulls and turrets that won't interfere with the main painting process and initial weathering but that will be difficult to attach later without spoiling the paint layer. First job was to attach the angled support struts that run down the sides. When I came to look at these I realised that the backs all have two ejector pin marks in them: So out came the filler and, while it was out, I decided to fill all the holes on the undersides of the sponsons that I felt could be more visible: At least Tamiya didn't leave a large gaps to fill between the hull and the sponsons! Once the brackets were all attached I got all the upper hulls screwed to the lower hulls: Then I started adding some of the parts to each of the hulls. On the T-34 it was things like the forward machine gun, the various grab rails and the engine cover: On the SU122 it was the mount for the main gun and various hatches and covers: Plus I made up the main gun unit: Before adding the grab rails: On the KV-1 I got the engine deck fitted: And added a few more touches to the T-34: You can also probably see the damage I have done to some of the fenders, etc. All three hulls are now just about ready for painting. I'm going to get the two turrets assembled first so I can do them all at the same time. Comments and suggestions welcome. Kind regards, Stix4 points
-
And I´m done... not! I just put some decorative stuff close to my workbench to provide some inspiration. That Heller G-6 gunboat on the right is my first attempt at Britmodeller and its Group Builds Here are the props and spinners. Here´s the quartet as it stands now. My next Bf 109:s will be G-2:s... I hate adding those MG bulges, whatever make the kit is, they are a to get nice. regards, V-P4 points
-
THE FROZEN CHOSIN (Part 3) The diorama isn't quite finished as I'm still waiting for 4 x additional figures and 2 x additional sets of chained jeep wheels to pop through the letterbox, plus I need to add some junk strewn around; bust weapons, old jerry can's, empty ration boxes and so on, but that won't take long to do.4 points
-
The Trumpeter kit finished as the shabby HE+V from the well know photo, mostly OOB with just the radio mast moved to match the position on the original aircraft, and the bomb racks omitted as they don't appear on the photo. This was mainly a trouble free build as I didn't try to correct the kit's well publicised errors or add anything extra - if you like that kind of thing check out Sprueloose's WIP - the main issue came when I tried out the Alclad Klear Cote Gloss. For whatever reason, this never dried and was still tacky well over a week later, I had to go over it with some standard Windsor & Newton just so I could handle it, but by then it was too late, there was a lot of dust stuck to it. The Henschel HS129 that I built in tandem also suffered this, so this is one bottle that will be going to the back of the shelf; the search for a really good gloss varnish continues. Chipping was done using the Vallejo chipping fluid, the real aircraft was even worse, lets say this represents it a couple of weeks before that photo was taken... If some of the markings looked painted on that is because they are! First time I have done this, and the Montex set proved pretty easy for squadron codes and serial number, the roundels and fin flashes are decals though from the excellent Xtradecal sets4 points
-
I got a bit more filling done, the red lines indicate areas to or have been filled which are either fictitious as in the case of the line down the centre of the forward fuel tank or not applicable to the PR.3. The two areas marked in blue are wrong, but I think Airfix may have misinterpreted the line around the fixing brackets which should also be at the front of the tank. John4 points
-
I have finished the canopy framing. As I mentioned, I cut plastic card templates for some of the items. Here is the right rear window frame while still on the decal sheet. And some photos of the completed framing. Now on to the landing gear and fiddly bits.4 points
-
I hadn’t really made up my mind to join this STGB, originally I had planned a 1/32nd Bf-109K-4 or a late model G, but time and work stopped this. Then by chance I happened across one of these little beauties at a price I couldn’t refuse! So I decided to join in with a nice simple build, which will be a nice break from the beast! There is a lot of detail and the moulding look really nice for a limited run model. The only thing is there are no locating tabs or pins anywhere on the model, on a plus side the sprue gates are really nicely done! He even comes with some resin bits as well as PE bits and masks…..though I’m note sure about the rubber tires! Ok the scheme…..I found these and thought they’d be perfect and I planned to do 6o56, which was flown by 1936 Olympic Pentathlon Gold medal winner Hptm. Gotthard Handrick in the Spanish civil war. However as with a lot of my builds of late there is some controversy with this aircraft as to whether it was a B2 model or a D1 model! The only visual difference between the two was the fitment of wing MGs on the D’s and the positions of the Oxygen & electrical sockets. There are luckily quite a few photos of this aircraft that reveal quite a few things, one being there were probably two aircraft painted the same! The one flown by Handrick was a B2 and was later flown by Walter Grabman in 1936 (he scored 7 kills in it, Handrick scored 5). Pictures of this aircraft clearly show no guns in the wings and that the Oxygen & electrical sockets were in the correct place for an B model. The second one is thought to have been a propaganda aircraft used for photos on his return to Germany as Grabman in Spain was still using the original aircraft. There are a few subtle differences between the different photos and the second aircraft is probably an early D model. All the photos of the suspect D model only showed the aircraft to be very clean and with the sharp "H" and 2 kills on the tail. The B model appears in photographs as quite weathered in looks, the style of the "H" is different and there are up to 5 kills on the tail. Anyway I have some nice photos of B model 6o56 looking quite weather worn in Spain, so that’s the one I’ll be building.3 points
This leaderboard is set to London/GMT+01:00






















.thumb.jpg.158e2e086d45b8f96b7d93b8bee8dc21.jpg)
