Leaderboard
Popular Content
Showing content with the highest reputation on 12/01/17 in all areas
-
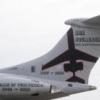
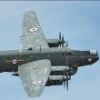
My white 1/144 whale is ready to go public. GWH kit with my pe fret and refueling probe and pitots from Master. This is XL164 B.2, Blue Steel aircraft. Modelled without Blue Steel. With no evidence to the contrary I assumed that when no missile was carried, the bomb bay doors had been replaced. This is an important factor/excuse, as I tried to be reasonably accurate, but still be able to finish the model within a decade. The base is supposed to represent Cottesmore taxiway after storm, drying quickly in scorching tropical sun of England. Why the aircraft itself is dry? - you may ask. Well it has just landed after good weather flight. Post-flight ministerial inspection is about to begin. The Conways were known for their power output and reliability rather than cleanliness: It took some effort to photograph the subtle effect created by polishing panel centers and leaving panel lines matt. As mentioned - it is very subtle, and easier to spot when moving around the model. Shaprer lighting helps to bring out sheen variations (a little)21 points
-
#2/2017 Second Yom Kippur pair is finally finished. Hasegawa kit (VA-55 A-4E/F), decal sheets for Ayits are no longer available or at least hard to get, therefore had to use different sources, the stencils are from the kit, the roundels from the Hobbycraft A-4E/H kit, the numbers from an Isradecal number sheet and the squadron badges from Isradecal Mystere sheet. Gunze acrylics for the camo, Quickboost seat, Snakeeyes, MER and LAU-3 rocket pods from Hasegawa weapon set. The model shows an aircraft of IAF Squadron No.116 "Flying Wing" during the Yom Kippur War in 1973. DSC_0001 by Reinhard Spreitzhofer, auf Flickr DSC_0002 by Reinhard Spreitzhofer, auf Flickr DSC_0003 by Reinhard Spreitzhofer, auf Flickr DSC_0004 by Reinhard Spreitzhofer, auf Flickr DSC_0005 by Reinhard Spreitzhofer, auf Flickr DSC_0006 by Reinhard Spreitzhofer, auf Flickr DSC_0007 by Reinhard Spreitzhofer, auf Flickr DSC_0008 by Reinhard Spreitzhofer, auf Flickr DSC_0009 by Reinhard Spreitzhofer, auf Flickr DSC_0010 by Reinhard Spreitzhofer, auf Flickr DSC_0011 by Reinhard Spreitzhofer, auf Flickr DSC_0012 by Reinhard Spreitzhofer, auf Flickr DSC_0013 by Reinhard Spreitzhofer, auf Flickr DSC_0014 by Reinhard Spreitzhofer, auf Flickr DSC_0015 by Reinhard Spreitzhofer, auf Flickr DSC_0016 by Reinhard Spreitzhofer, auf Flickr DSC_0017 by Reinhard Spreitzhofer, auf Flickr DSC_0018 by Reinhard Spreitzhofer, auf Flickr DSC_0019 by Reinhard Spreitzhofer, auf Flickr DSC_0020 by Reinhard Spreitzhofer, auf Flickr DSC_0021 by Reinhard Spreitzhofer, auf Flickr DSC_0022 by Reinhard Spreitzhofer, auf Flickr20 points
-
Evening gang. Been meaning to post up a few photos of this one for a while and finally got some taken in daylight over the holidays. Worked this one up for the Edgar Brooks Tribute Spitfire STGB using the Special Haobby kit and Colourcoats paint along with only a set of Eduard seatbelts added as extras. Other than the seatbelts and a few minor additions such as the throttle cables and flare rack the cockpit was pretty much that found within the kit... I've read horrible stories about how ill-fitting this kit is but can't say I found any major issues that test-fitting and minor adjusting didn't avoid or cure. I've also read that it's inaccurate but other than the wingtips requiring a few minutes reshaping it looks like a Seafire 45 to me. Painted using Colourcoats Enamel range throughout as my first attempt to use this brand of paint and have to say I loved them. Easy to use and forgiving of my clumsy brush and airbrushing techniques. Always wanted to add a Mk.45 to my small but growing Seafire collection and this one has satisfied my desire19 points
-
Hi everyone, This is the Italeri 1/48 RF-4E phantom, a re-issue from the old testors kit. Interesting fact about this kit is it is the first kit that I have built which predates my own existence with the original kit being produced in 1980 and me arriving in 1983 It is a testing kit to build but I got there.17 points
-
A brief digression, as I've received one of those flimsy folding photobooths. 30 inches by 30 inches is a bit bigger than I expected: 20170111_212252 by Edward IX, on Flickr And I should probably iron the backdrop and really figure out how I want to do things with it. It was $40 for the cube and the lights on Amazon, though, so I figured nothing ventured etc. 20170111_212346 by Edward IX, on Flickr 20170111_212747 by Edward IX, on Flickr 20170111_213235 by Edward IX, on Flickr 20170111_213243 by Edward IX, on Flickr Armed with one of these and a feckless willingness to adjust your white balance, and a low-level understanding of Photoshop, YOU TOO can become a master modeller on the internet. 20170111_213535 by Edward IX, on Flickr17 points
-
Hello folks, This is a mirage 2000B from Kinetic. Actually you can't get a B version straight out of the box because of the cockpit that is rather a 2000-5 version. As well, the engine nozzle is awful, needs replacement or a tremendous amount of work. As usually get the right colours for a "blue" 2000 was a little bit tricky. The aircraft depicted here is from the 2/5 Île-de-France, that squadron is the mirage 2000 OTU for the mirage 2000C, -5, D, N pilots of the french air force. The cockpit is from Wolfpack, the nozzle from Aires and the decals from Syharts cheers16 points
-
16 points
-
Number 3 for 2017 is this fantastic kit from Hasegawa. Goes together with almost no filler required anywhere. Metallics are various shades of Vallejo Metal Color and the other colours are mainly Tamiya.Thanks for looking15 points
-
Good Morning all, First of all I would like to apologise for taking so long to get results to you, however we have been super busy over Christmas and I wanted to ensure that I gave each model a proper looking at and not rush any decisions. Ultimately I found it hard, I made several lists, but would look the next day and change my mind! So, I decided that I should open the voting up to other members of staff in our offices, so I forwarded the threads to 3/4 other members of staff and got their opinions on it too - overall we were all very similar and had a short list of 5/6 builds, I just needed to go through and make that final decision. I would like to thank you all for taking part, whilst I have not participated much (80-90hr weeks over Christmas prevents any social activity!) I have kept an eye on the threads for a while now and enjoyed watching the entries come in. Its always staggering to see what awesome creations you guys make out of what start out as boxes of grey plastic which we take for granted. I only wish I could make my models look anything like some of the entries in this GB - mine typically look similar to an Airfix Quickbuild kit... Lets also not forget to thank Vppelt68 and thepureness for pulling it all together! So, without further ado here are the winners. In 3rd Position Trickyrich, Page 2 - Macchi C.205 - 1 Stormo 79 Squadriglie, Sciacca, Sicily Feb 43 Something a little different and I really like the Smoke Ring decals. Interesting Resin kit too... In 2nd Position PlaStix, Page 4 - 'Kampfgruppe Tunesien’ I think you’ll all agree that Stix has done well here, not only are the builds great he has done a great job in the Diorama and finished it off by taking some cracking photos (photography being another love of mine!) I think I was sold on this from the first image, the shot looking down is fantastic. I looked at the individual build threads too and I have a sweet spot for the 1/48 Tamiya Panzerkampfwagen - you did the kit justice sir. Finally, I love a powered prop so this was just the icing on the cake! and finally, In 1st Position Tomoshenko, Page 4 - Italeri 1/72 Ju-87 B2 Stuka I dont know what it is about this build, but I am man who follows my instincts and from my very first browse through all the entries, this is the build I remembered when thinking back. When I finally had the time to look at individual build threads I was even more impressed as it starts off with some awesome scratch building and the whole build looks well executed, issues aside. I also liked the canopy and I personally hate masking, so good effort there! Prize giving - Jon has the prizes already (I am assuming he hasn't built or sold them!) and we decided that it can simply be down to the winner. I.e the Winner chooses the kit he would like, 2nd Place chooses also and 3rd place receives the remaining kit. I suggest Tomoshenko and PlaStix drop Jon a message so we can get the ball rolling. The Prizes were: Tamiya 1/32 Spitfire VIII Dragon 1/35 Tiger tank from the Tunisian campaign Airfix 1/48 Hurricane MKI trop See a picture here in the Sponsor thread - As a consolation prize to everybody else, here is a 20% off Discount code for orders over £20 on everything in our Models Category. Its only valid until Sunday night and I would really appreciate it if you kept it amongst yourselves here on the forum (I’ll have to pull it if it gets all over the Deals websites etc.) All you need to do is enter JADLAMGB in the checkout once you have over £20 in your basket… use it wisely, grab yourself a kit or two and stock up on some paints and glue... So there we have it, some fantastic entries and an event I enjoyed being part of…Thanks and well done... From Russ and all the team at Jadlam, happy modelling! https://www.jadlamracingmodels.com/13 points
-
Also here is a bonus late Spitfire that is also late. A late late Spitfire. The low back Sword kits come with a spare high back fuselage. The Airfix Mk 22 wing is one of the most elegant 1/72 objects in our hobby. Gwart has shown that they fit reasonably well, so a Mk 21 may be in the offing as well. And maybe a 22, and maybe a 24 if I can get a hold of the Freightdog set for that one while acquiring a Mk 18 rudder or two. That could be another interesting trio. We'll see how it goes. Airfix wing, Sword fuselage. Quickboost cowl, Sword fuselage.12 points
-
I'm in need of a little luck, and as Stew Dapple and Procopius have proven, nothing does so like building Spitfires. I've had a number of Spitfire projects in the planning stages for a while now, and it's time to quit dilly-dallying get something started. I rummaged through the stash - both decal and kit - and have gotten everything together to begin my 1/72 late Spitfire project, which consists of: 1. 32 Sqn Spitfire FR.18 based on This Picture I'm planning on using the new Sword FR XIV kit, with a rudder from the Special Hobby Mk 21 kit. Apparently (after lots of searching here on BM), the rudder used for Mk 21 contra-props was identical to that used on the XVIII, while the five-bladed prop Mk 21's shared the same rudder with the Mk XIV. The wings will also require a little panel line work, but I think I can get it done. The rudders marked up on the SH sprues. 2. 208 Sqn Spitfire FR 18 in the Dark Earth/Light Slate Grey scheme I'll use the AZ Mk XVIII kit for this one. As the Wooksta has pointed out, the AZ kit's rudder is a little wonky and I think I'll try and replace it. I'm the SH rudder on the Sword kit, so I'll try and acquire one of the new Freightdog resin replacements or just invest in another SH kit (I can't stress enough how useful those kits are even if you don't build the actual [some say misshapen] model). I'll also be using the AZ wing as a template for rescribing the Sword kit. Sword wing above, and AZ below. While both the low back FR XIV and Mk 18 had E-wings, the Mk 18 had the C-wing MG panels completely removed, and a Desert Survival kit compartment in their place. Here's a random fuselage comparison: AZ above and Sword below. 3. 612 Sqn Spitfire LF 16 based on this Picture I'm planning on using the new Eduard Mk XVI kit for this one - well I think it will be the Mk IXe overtrees which are identical to the 'early' Mk XVI sprues. I just have to remember to use the proper left cowling half. Also, PC, if you're reading this, note the ailerons askew in the pic, so I'll attempt to take advantage of the unpopular separate ailerons 'feature' in the Eduard kit. I've got the Freightdog decal set for this one (8W-K second from top) - silver Spitfire with mismatched panels, what's not to love? OK that's three!11 points
-
Here's a build I'm doing of K-2SO I'm using a Jakks Pacific Big Fig and adding parts to make it better, giving it a better paint job and changing the pose. After a lot of sanding and filing of the seams I gave it a coat of primer. Then I got busy with the lathe and machined some aluminium rod down to replace the hinges and joints. The first picture shows the replacement joints I made and then there's a couple of pictures of the old joints cut off and replaced with the new ones.11 points
-
As per title..... Short Wheel Base Airfix 1.76 scale Thornycroft Amazon with Coles MkVII crane, Pre/Very early war paint scheme, Milicast Figure ATB Sean11 points
-
11 points
-
10 points
-
Stix thought I should bring together all my different types of build - even though I've only done nearly 5... He got me involved by suggesting I might want to take part in the Starter Kit GB - I said I would, just so long as it wasn't a plane or a tank - and I came across "The Mary Rose" which neatly combined my interest in History/Archaeology with something just a bit different . I really enjoyed making and painting the kit and learned a fair amount of basic techniques thanks to Stix's patient tuition. Then, whilst accompanying Stix to a model shop, I stumbled upon Tamiya's Triceratops kit and have been hooked on dinosaurs and building kits since. Recently, however, I have become interested in the odd shapes of some armour models, although not tanks. My stuff - Mary Rose – Airfix 1/400 Starter Set – in Starter Set GB Work In Progress Triceratops Eurycephalus – Tamiya 1/35 Work In Progress Brachiosaurus Diorama Set – Tamiya 1/35 Work In Progress Chasmosaurus Diorama Set – Tamiya 1/35 Work In Progress And finally a sneak peek at the AFV I was working on at the end of last year andwhich is now almost complete Tamiya's 1/48 Japanese Navy Komatsu G40 - link10 points
-
A little more progress has happened on K2. I still wasn't absolutely sure about the metallic base coat I'd used for the chipping. I was going to tone it down with a coat of matt varnish but after a bit of thought I decided to mist some pale grey over the Alclad which left a nice mattish grey silver. It doesn't actually matter that much as the chips are going to be pretty small, and the subsequent dirt and grime will tone them down anyway The shot above includes the front and back hip/groin parts, which I'd have preferred to attach to the waist section before painting, but the waist has a couple of tiny grill panels that need to be painted in a polished finish first then masked off. The torso also has a bit of polished trim around the neck, so that and the waist have been sprayed with the AK polished aluminium I used for the mouth parts I'll mask off the grills on the waist, then matt down the finish with another grey overspray. I was intending to do the same thing for the rim around the neck, but after a few failed attempts to cut a ring of masking tape with a compass cutter, I'll do it a different way. The rim is less the a mm thick and the tape kept breaking up as I tried to cut it, but I did end up with the left over inner and outer rings of tape, so I'll do the main painting on the torso then use them to mask and spray the polished rim at the end. I'd ordered a jar of Gunze Aqueous H32 Field Grey 1 (Panzer Grey to you and me) for the main finish, as I thought it would be just about the right tone. What I didn't realise until it came is that it's a gloss finish and a little on the transparent side. It was also slightly lighter than I was expecting, so I mixed a drop of Tamiya flat black into it, which lessened the glossiness and darkened it at the same time. After a coat of hairspray I gave the head and hip parts a coat of the darkened grey then, after drying for about 10 minutes, I wet the surface and started chipping the paint. To begin with I used a cocktail stick that I'd sharpened to a chisel edge, but the wood started to soften from the water which was making the chips larger than I wanted, so I switched to using the point of a knife blade. Obviously you have to be pretty careful doing it that way as even a tiny amount of pressure with the blade will scratch the paint down to the plastic, but if you let the weight of the blade skip across the surface, you'll end up with tiny chips I did start off trying to match the chips and scratches to the photo reference of K2, but in the end I just went with the general look of the original. I'm reasonably happy with how the head's come out. The chips are a bit too big, but in this scale it's hard to keep them small enough. The eyes had the holes in the back painted white which goes some way to replicating the look of the real ones Next job is to paint and chip his torso, then I'll have to build up the arms and legs, and decide what pose I want him in, as I'll probably have to glue the limbs in position. Andy9 points
-
8 points
-
Hi everyone! My name is Ernest and it’s my first post here. I’d like to show you my latest 1:72 model – Ilyushin IL-14 from White Eagle Museum (Skarzysko-Kamienna, Poland). This is a scratchbuild model, but fuselage was converted from Plasticart’s Mercure 1:100. More pics you can see here: http://www.pwm.org.pl/viewtopic.php?f=12&t=54241 It’s polish forum, but there is a lot of photos showing the construction progress from start to end.8 points
-
I want to try and finish as many kits from the SoD as I can in 2017 and to that end here's my latest. I do love these little critters from Tiger Models, I still have the Spitfire, the La-5 and a few others in the To-Do pile I hope you like him, I sure had fun building it. Dan8 points
-
I brushpainted with Tamiya when I got back into modelling in 2011, and I think the beautiful woman analogy is apt -- if airbrushing it is like making love to a beautiful woman, brushpainting it is like digging a ditch alongside her in the hot sun. Both methods have the same result (flushed, sweaty, ready for a nap), but the journey is considerably more pleasant with the former.8 points
-
A new Ukrainian model company - name still unknown but reported linked to Art Model - is to introduce at the Nuremberg International Toy Fair 2017 (01-06/02/2017) a new tool 1/72nd Dassault Mirage IVA kit to be followed later by a IVP (P for Pénétration) the version carrying the ASMP air-launched cruise missile. Of interest in the picture 1 is the Hurel-Dubois CT-52 recce pod dedicated to the Mirage IVA & P fulfilling the strategic reconnaissance role. Another 1/48th secret project from the same company should be also unveiled at the Nuremberg Toy Fair 2017. Also a Mirage IV? That's the question. Source: http://www.greenmats.club/topic/2803-mirage-iva-в-172-масштабе/ V.P.7 points
-
Hello guys I show you another work, this time is my first attempt with 1/72 scale armour. It's a FT-17 with cast turret, kit is from Flyhawk and it's really impressive: perfect fit and detail, PE for thin parts and a very smart tracks. The French house is made by Reality in Scale, the base is home-made from turned alluminium bar. Painted with Vallejo Air, weathered with Maimeri oils and Tamiya pigments As Always comments and suggestions are welcome Cheers7 points
-
Thanks Tony, I've enjoyed this build and the bonus is that we aren't half way through January yet and its nearly finished, I do hope that's a good indication of this years productivity!! Done some more work on the weathering since as well as diddling with the detail. In the back ground, the undercarriage is coming together, but we have some of the aerials fitted and the mid upper. Once a final matt coat is on to seal the pastel in, some Tamiya smoke will be added to replicate some oil streaks, these birds were dirty from what I can see on some photographs!7 points
-
Tamiya brushs fine! ..... brushing tamiya paint is a lot like making love to a beautiful woman easy when you know how Rob7 points
-
Hello The first of the year, Spécial Hobby kit and Brengun.photodec Happy tu finist it, it's not a simple things to built...... A+6 points
-
Heres my latest finished build. The new master series 1/48 X wing. Overal a fairly good kit. Pilot was the weakest part. The kit display stand is very over engineered so i made a new one using the kit base and a Bic biro as the mount.6 points
-
I haven't built the AZ Mk XIVs but I have built all three versions of the Sword ones. I can't comment on accuracy as I didn't compare them to any drawings but I can comment on the kits. I found a couple of minor issues with the Sword kits, nothing at all that can't be solved by applying basic modelling skills but worth noting in my opinion: 1. On the FR kit, Sword recommend cutting out holes in the lower fuselage to accommodate vetical camera lenses, which, according to my references were never fitted (I stand to be corrected on this though) 2. Again on the FR kit, I found the camera port to be heavily flashed and once cleaned, very thick lipped so a good going over with a round file is required to make it more presentable 3. On the low back kits the instructions show the rear head armour and its supporting structure as being molded to one of the fusleage halfs. They aren't. They need to be scratch built out of plastic sheet. While not in the least bit difficult, it is a bit of a cheat on Sword's part. 4. On all three versions the instructions show the instrument panel being fitted against tabs either side of the lower cockpit part. Those tabs aren't there. 5. It is easier to insert the cockpit components into the fuselage from below and separately i.e. instrument panel and rear cockpit framing/seat assembly THEN add the lower cockpit part. This means that the IP and rear cockpit/seat assembly are the correct distance apart and don't get pulled out of alignment when being fitted. Other than these very minor niggles, I found the kits to be wee gems. They are currently stalled at the painting stage due to a damaged airbrush nozzle but unless I screw up massively they should turn out very nicely. Just my tuppence worth DC6 points
-
Look what I have just got from Paul Kierstein from the Rev's institute (who gave me the authorization to name him): as a supplementary reply to Sam. As we could imagine, we now have the PROOF that this drawing 2 was labelled 504 (enlarge the photos on the top left corner). These were the plans that Fiat staff made circulate in the factory (there were thousands of Fiat employees and they used that fake name to keep the secret about the new race car, as Sebastien told in his book)... Now, I would like to know if there is a date on this document. Probably, Paul will be able to see it, directly, without any lose of quality. I will ask him to have a look. I would not be surprised if the drawing was done from 1925, which would be very important, to compare with Delage and Talbot drawings, in order to know who the first had this great inspiration to make a very low body with decentred engine and pilot seat between the rail and the transmission shaft... Looking at these originals, I feel like Indiana Jones... And it s not over. The best is maybe to come, even if Mark told me he had good and bad news. Picture yourself that the institute has ..... a Protar built 806 (I am gonna post the photos very soon, let me a little time to find back my spirits. I got the fever, but I think this time, it is not influenza! If you read me, Mark, thanks so much for digging like you do!! But if you want a really accurate model for your institute, you will need to buy another (while you said the institute usually does not buy models... P.S: And Sebastien who thought the Rev's institute would have nothing interesting...6 points
-
I always just prime my props, lay down Tamiya yellow with an airbrush for the tips, mask, then go over it with Tamiya black. It works reasonably well, I think.6 points
-
6 points
-
I'd like to make it absolutely clear that the "dope" was the product sold in small jars for model aircraft; I bought it from 'Hobbies' in Hull. The talcum powder was more of a problem as my mum was not keen on surrendering hers. Fortunately I found a similar white powder in small silver packets tucked away at the back of the garden shed. When the resultant mix was sanded the model looked fantastic. Just like the real thing and almost as big! Wierd effect ...6 points
-
Instructions? What are those? Everyone knows that real modellers never read the instructions!6 points
-
While fossicking around in my stash I found this sad old beast sitting looking sad having languished for almost 2 years. I did a bit of sanding of the seams, and while it is not great, I think it's at least worth finishing. When I last worked on it I had completed the undercarriage, I took the opportunity to add some detail left over from a long dismantled Tamiya kit (dismantled by my then 18 month old son). The nacelles took a bit of convincing to go together. A quck dry fit check to see how it looks. Ok, now I am feeling a little more enthusiastic. Attaching the nacelles and external fuel tanks to the wings was fun, they seem to fit only where they touch with plenty of gaps left for filling! I will need to find my old tube of Tamiya filler, I think this is a job beyond Mr Surfacer....6 points
-
6 points
-
Both up and down are fun, so I do both. I fell upon the idea of nation or squadron themed stands some time ago (1990s).6 points
-
Evening folk's,just a quick update glossing done and main decal's on I took off the towbar and went with the standard fitting,now after a few more decals I can weather her.6 points
-
Truly understand this position Miggers. Your obviously in closer contact than most of us, so please just pass on our best wishes. Cheers.. Dave6 points
-
6 points
-
A brief update tonight, and one where the optimism of SH can be found a little wanting in the fixing-procedure for the upper parts of the undercarriage. Looking again at the link struts that go from the triangular torsion box fairing up to pivots in the wheel well, I decided that they would do the job, however a closer look revealed some ugly mould-lines on both sides that needed cleaning up with a scalpel: You can see they almost look like two differently-sized parts sandwiched together. Not great. Also the angle on that 'foot' part isn't quite at the right angle for where it fits onto the triangular bit, as you'll see in a minute. This shows the region of the real thing I'm on about: Sorry it's such a small image but it shows two details I haven't seen in other reference photos - a set of what I believe are three oxygen bottles in the wing root, plus in the recessed part that the torsion box fairing folds up into, there's a hole in the fuselage out of which (or into - I've no idea what it is, the only part I've seen annotated in that area is a mainwheel operating jack?) some kind of pipework goes. So I made the holes too, intending to add some tube later on: This what what 30 minutes' swearing looks like, in plastic form: Two things to say about this. One: the pivot at the top of the strut (where it fixes into the wheel well) is not a secure one - I had to lever the pivot open wider in order to get it to stick. Two: as mentioned above, that 'foot' needs the bottom of it filing to a new angle to orientate correctly to glue onto the torsion box fairing. If you think about it, that angled strut is going to be taking the weight of the whole model. You can see what I mean here: When that poly cement has had overnight to harden, I think I might come back and add a little epoxy as unobtrusively as possible at the back of the pivot in the wheel well, in order to form a stronger bond. I'm not actually blaming SH - the detail as you see it there is pretty faithful to the actual aircraft structure, it's just in reproducing that in plastic it's a problem having a potential weak spot in a load bearing stress point. Looking through the cutaway I have (a reproduction from Air International May 1977) I also noticed earlier that behind the pilot's seat in the Barra is an enigmatic shape labelled 'Incendiary Bomb'! I guess they didn't want it falling into enemy hands in case they copied the 'unique' features of this aircraft. Actually, the torpedo sight was a pretty cutting edge piece of kit wan't it, so maybe that was why? We're promised snow tomorrow, as are a lot of people. Be a pity to get snowbound and have to spend a day at the bench wouldn't it? Tony6 points
-
Airfix kits! You were lucky! My character-forming exercise was to carve the X-3, Cutlass, MiG 15 etc out of balsa, using half a broken Gillette razor blade. Scars I bear today ... Instructions!! All we had was a plan and lung problems from breathing dope and talcum powder.6 points
-
Thank you gentlemen,I will indeed pass on your good wishes and thoughts to Debs. What I can tell you is that she'll be pretty chuffed that you're all thinking of her.5 points
-
first, your eyesight goes, followed quickly by the follicles on top of your head migrating in a downwards direction to your nose, your eyebrows, your ears and other miscellaneous extremities, then (I hear) you need to start taking little blue pills and it's all downhill from there. I'm really shocked no-one else fell for that bait !5 points
-
It's an old basement by American standards (the house was built in 1921 -- and the basement got a concrete floor in 1929!) but thanks to my little radiator, it's the warmest part of the basement, very cozy. The main part (the basement is divided into a large main room with the washer and dryer, the room with the heater, chimney, and so forth, and my grotto) drops to about 50 degrees F (10 C) in the winter now, because we can't put up insulating plastic over any windows thanks to Winston, The Unmaker. I was never going to get the nicest room in the house for modelling, not as long as we have Mrs P's worthless birds, who, like her mother, can't die soon enough for my tastes, but one of the reasons I liked our house to begin with was the workroom with worktable. I only have a few built, and I think I gave some away -- two Hobbyboss Lynxes (corrected the rotor height) and an Italeri Merlin. So on most cell phone cameras, and probably on digital ones too (I don't normally, by which I mean ever, use a regular camera), there's a contrast setting. You know how so many professional model photos show assembled kits that seem to almost glow, against a semi-luminescent white background that looks like it's maybe a table in a particularly well-lit area of the TARDIS in a classic Who episode? Those people aren't any better at building models than you or me (indeed, some of them may be rather worse), but they just crank up the contrast setting to make their whites whiter, a bit like South Africa or the US south under the ancien regime. Some of them also use Photoshop to clean up the backgrounds even more. I kinda think it's cheating, but I also kinda wanted in on it. Maybe I can write for SAMI. (Probably not.) Top tip! I was able to sand it back in this case, happily.5 points
-
I have to agree on a few things 'yellow' here. It is a sw*ne of a colour. I did some experimentation with different brands, types (acrylic, laquer, enamel) yellows around mid last year (along with reds and purples) for the 'tricolor' on the ruddah of Spanish Republican aircraft. The Humbrol is almost mustard in colour, and texture. It didn't cut the mustard with me. I'm sure in decades gone by it was smoother and a more 'buttercup' shade? I quite liked a Testors yellow, not the lemon one. Agama and Lifecolor were nice I also liked the Tamiya, but agree it is a little too lemon for lots if uses, I like the suggestion of a tiny addition of red. Putting some sort of white down first seems essential for all of the various yellows. Also most reds too. Have a try with Lifecolor if you've got it Ced, although I wouldn't recommend their primer. The latter is just about the only product I've tried by them that I wouldn't recommmend. Also, with many coats, all their paints go on beautifully with the old (or young) hairy stick, Good to hear Mrs. B is up and about. PS: is it a photographic artifact, or does the prop blade at the far right have a sink mark at the base? Once black it probably wouldn't show up if it is one. Blob of Mr. Surfacer? Ignore it and throw rotten fruit at me for mentioning it? Prop blades trouble me. It's irrational. I keep my appointments and the Dr. tells me to just keep saying to myself "Everything will be alright, everything will be alright..." whilst chomping peanut brittle . Great progress, hairy stick is good! All the best TonyT 🐯5 points
-
Tamiya Flat Yellow here too - not by brush. For that, I use Lifecolor Matt Yellow. If I may expand a bit more on what I do for yellow, I always spray a white or off-white coat first, as the covering power of yellow paint (at least the ones I use) is close to null. Even more so if I'm going to spray/brush paint on top of a dark coat (unless you're looking for some sort of filter effect). Another thing is that I find Tamiya Flat Yellow to be sort of pale (although the final aspect of it depends also on the kind of clear varnishes you normally use); probably good enough for blade tips, but you may want to add a tad of red to the mix to have a warmer and slightly darker color. HTH Ciao5 points
-
Ascoteer should come back. There is a hole in the knowledge bank.5 points
-
My wife does not agree. I am a bad influence on my children.... I suspect it was really because whatever they were hiding in those mystery holes in the wing roots was so secret that we don't even know what it is to this day! Cheers Ian. The wheels actually look pretty OK on this kit and there seem to be two types. I'll post some close-ups later. The mere thought of it transports me back to being a kid and getting the day off school because the buses couldn't get through...5 points
-
Thankyou all for the comments, I'm happy to report that I am back on this. Got really busy recently, but thing have settled down enough that i was able to begin thinking about finishing this. I have to build a structure around the schnorkel:I build a side baffle wall for the recess, also behind it is the mounting for the deleted deck gun.Here's the baffle work under the deck, with forward torpedo loading hatch.Some 3D printed hatch lids for the ammo containers came in, also the rear lamp.Messing with rigging. My 3D printed isolators have bent a bit, i might try to straighten them ib warm water. I think I will use EZ-line for the rigging, to keep the wholw thing in tension. I a pain though.Cheers!5 points
This leaderboard is set to London/GMT+01:00






.thumb.jpg.3c5b41eb004e624ff9bdf837868ecbb6.jpg)


