
Leaderboard


Popular Content
Showing content with the highest reputation on 10/01/17 in all areas
-
Hi, Here is the Airfix Canberra PR9 in 1/72. It's built OOB. I had the kit in the stash for while and built it as I was hankering after a Airfix Meteor F8 and this was the nearest thing I had to that being British and twin engined and from a similar era. The Airfix kit benefits from careful construction. I had to do a bit of sanding on the wing tips to get them flush with the rest of the wing. The rest of it was ok if I could use one word about the kit it would be chunky. It's pained in Gunze colours I added a few post shaded tones to the upper surface to make it less uniform. Same on the underside. Kit decals which went on ok but are not that crisp.. No real weathering as from a few looks at online references they were pretty well looked after and clean. Let me know what you think.. Thanks Plasto..26 points
-
Here I present my attempt at the Special Hobby Bristol Beaufort. It was quite a challenging build, and its a bit rough in places but overall I am pretty happy with it. Brush painted with Tamiya and Italeri Acrylics. Finished as an aircraft from 217 Squadron RAF based at Luqa, Malta 1942. According to the markings information with the kit, this aircraft was shot down by a Ju 88 on June 20th 1942. Thanks to all those who followed the build and gave me support and advice. Build thread can be found here. Thanks for looking. There is a map and lamp in there!25 points
-
Hi all Some pics of my first completed build for 2017, Hasegawa 1/48 Desert Snake Stuka. Only modifications were plastic wedges on ailerons replaced with actuators in brass plus Eduard seatbelts & gunsight. The mould has been reboxed many times and is showing it's age a bit now with more flash to be removed but still well worth the effort in the long run. Thanks for looking20 points
-
Airfix P51D new tool ki built almost OOB with just a couple of tweeks. - Drop tanks in this kit do not have the characteristic seam line so the were made from 0.3mm Plastruct square rod. - One tank corrected so both have the filling point on the left. - 0.3mm round rod used as the actuator in the radiator cooling duct. - Tamiya tape harness. - Arial in the kit was so badly moulded it was replace with one made with plastic strip. - Upper engine access panel centre line was scribed with its screws marked in. - The red nose decal was discarded and a mask cut on a Silhouette cutter traced from a scan of the decal sheet, same with the yellow wing stripes. - Painted in Humbrol enamel with the paint numbers given by the kit except Alclad 106 White aluminium used for the NMF with the shade altered on some panels by mixing it with gloss black enamel. - Flap retraction areas were finished using chrome baremetal foil. - Underwing lights made by adding a little CA into the recess allowing it to set in a concave shape. aluminium foil was then glued into the recess and finished with blob of appropriate Tamiya clear colour. - Decals applied with MicroSol & MicroSet. - Flory Black & grime Washes. - Model was given a coat of Humbrol Gloss Cote prior to decals, washes and oil dot weathering then matted with Humbrol Matt Cote. - Intention was to use no aftermarket however after the landing light was lost to the carpet monster a Little lights replacement had to be used. A very nice kit that fits together very well and required virtually no filler except just a few spots of disolved sprue in just a few places. Did you spot the damaged bit?....No?....Good. Thanks for looking CT14 points
-
Here's the fourth aircraft built by a friend of mine (modeller's "code name" : GWR). He's an AFV modeller (severals posts of his dioramas in the AFV section) but sometimes he's building planes, just for fun and building / paint trials. Tamiya's 1/72 kit and scratchbuilt display base.13 points
-
As mentioned in this thread http://www.britmodeller.com/forums/index.php?/topic/235007688-a-silver-172-airfix-spitfire-xix/, I did an 81 squadron Spitfire PR21 some years back but was unable to load the photos. Well, finally(!), here they are! Cobbled together from a homecast resin copy of the Ventura Spitfire F22 wing and radiators copied from the Aeroteam Spitfire F21, with everything else being Airfix PR19. Initially, she was in overall PRU Blue but languished as I couldn't remember what whiff role she was meant to have. Then I had a brainwave - respray her silver but as a lacquer and have bits of her earlier scheme showing throw having been washed off in a tropical storm. I'd seen photos of Mosquitos and Hornets with similar effects so knew it would work.13 points
-
#1/2017 So, finally also my dad has finished his first model in the new year, continuing the Near/Middle East theme with an IAF Meteor that fought during the Suez Crisis in 1956. The Meteors were Israel´s first jet aircraft, therefore they served in the No.117 Squadron, also called the "First Jet Squadron". Airfix kit, Isradecals, Vallejo Metal Color Aluminium, antennas on spine are scratch. DSC_0001 by Reinhard Spreitzhofer, auf Flickr DSC_0003 by Reinhard Spreitzhofer, auf Flickr DSC_0004 by Reinhard Spreitzhofer, auf Flickr DSC_0005 by Reinhard Spreitzhofer, auf Flickr DSC_0006 by Reinhard Spreitzhofer, auf Flickr DSC_0007 by Reinhard Spreitzhofer, auf Flickr DSC_0008 by Reinhard Spreitzhofer, auf Flickr DSC_0009 by Reinhard Spreitzhofer, auf Flickr DSC_0010 by Reinhard Spreitzhofer, auf Flickr DSC_0011 by Reinhard Spreitzhofer, auf Flickr DSC_0012 by Reinhard Spreitzhofer, auf Flickr DSC_0013 by Reinhard Spreitzhofer, auf Flickr DSC_0014 by Reinhard Spreitzhofer, auf Flickr DSC_0015 by Reinhard Spreitzhofer, auf Flickr DSC_0016 by Reinhard Spreitzhofer, auf Flickr DSC_0017 by Reinhard Spreitzhofer, auf Flickr DSC_0018 by Reinhard Spreitzhofer, auf Flickr DSC_0019 by Reinhard Spreitzhofer, auf Flickr DSC_0020 by Reinhard Spreitzhofer, auf Flickr12 points
-
.11 points
-
This is my only build for the year. It took me ~ 450 hours to finish it. I finished it the morning of Christmas Eve, and delivered it to him that afternoon. My modelling friend had volunteered to build a 1/72 C-130H for a friend who was a TSgt in the USAF Reserve, and a Flight Engineer on a C-130H at Maxwell Reserve Base. Because of my friend's Parkinsons, I stepped in to build it. I used Italeri's 1/72 C-130E/H as the basis, and used the following aftermarket items: Attack Squadron Engine Nacelles & Props and their Wheel Well Extensions and Brengun's PE Flare/Chaff dispensers. I used portions of decals from Vince Maddux decals (Thank you Vince!), Authentic Decals and Warbirds Decals. All the chaff "buckets were scratch-built, as were all the antennas on the nose, tail and Top & bottom of the aircraft. The static discharge wicks were made from Econoflex .014" 7-stranded beading wire. Paint was ModelMaster Air Mobility Command Gray. I also used the Eduard canopy masks (first try, very nice stuff). Some of the windows had to be filled in and new ones made in the correct locations. Measurements for scratchbuilding were based on loads of photos I took as well as online pics. i haven't had time to resize my WIP pics and upload them to Photobucket, so I only have a few pics to show. The base is a poster frame, with an official USAF map of Qatar, which is where TSgt Gross flew out of. (P.S. I know the flags on the tail are backwards. I didn't figure it out until the morning of delivery, and the customer wasn't concerned about it.) Larry11 points
-
First of all Happy New Year! Here my first build for 2017: Eduard`s MC.202 Folgore in 1:48. Nice old Hasegawa Kit with some Eduard update sets. Add further the great Brassin wheel bay. Hope you like it.10 points
-
Finally another model is finished! The last one was a 1/24 Typhoon 6 months ago... Well, here it is, in all it's splendid jungle colors. Almost OOTB with the exception for some Eduard belts in the cockpit, rigging wire from Uschi Van Der Rosten and scratched fuse wires for the rockets. Here are the pictures: //Christer10 points
-
Hi Folks Another F102 from the Monogram stable of Century fighters. Finished with Xtracolor paint and Superscale decals,I really like this series, easy to build and finish. Cheers Ian10 points
-
Good afternoon you lovely lot. After receiving the plan Drawings from Dave this morning I set about building the parts in 3D Studio Max this dinner time. Got them printed this afternoon and here we are. 250kg bomb in 2 halves. fins to fit later. (Plasticard) The etc 500 rack with holes. and the test one without holes I've just smathered in Mr S 500 to see what it finishes like. its a tad lumpy bumpy but that'll sand and I can scribe it too. I'll scratch the holding legs afterward. Overall I'm rather happy with that. I must say a BIG thankyou to everyone for nudging me into doing this and a special thanks to Dave for supplying the blue print. I would have totally got the wrong shape without em. thoughts? I'll try and get the bomb together and post some more later. thanks for popping in. Happy Modelling you lot. Johnny bomb btw here's the parts being printed. Good eh.10 points
-
Hi Folks ! This is my first finished model since 2 years. I had to fight against flipping cancer. So, this is the first step back to the workbench. The kit is the well known Tamiya Aggressor adversary. My Viper was built out of the box and fully painted with tamiya colours. And now some images. Outdoor pictures will follow when i'm back from rehabilitation.9 points
-
1/72 Italeri/ESCI Harrier GR3 XZ989 I’ve wanted to do a Falklands Harrier for ages but could never decide on what one. XZ989 caught my eye after reading the account of the crash in which Wg Cdr Pete Squire decided to ‘get out and walk’ after an engine failure at Port San Carlos Forward Operating Base. Quote “As a result of the rate of descent and the fact that I am pointing directly at a Rapier FU, I elect not to eject and the aircraft hits the ground very hard”. The kit’s been knocking around for years, but I still feel it’s one of the better 1/72 Harriers. It does have a few silly faults such as the vents on the outer wings being slightly out, the bulges underneath where the outer pylons attach, dodgy looking pitot etc. However it was a fairly fuss free build, with only the fit of the front canopy giving me a bit of a palaver. As seems to be my current habit, I’ve detailed up the cockpit a bit, and then stuck the bleeding pilot in hiding all my work! Reworked the oversized lower air brake ‘hole’. Opened up the blow in doors on the intake, stuck some fine mesh in the upper wing and made a new pitot and various aerials, stretched the undercarriage a bit to suggest it’s not under load. Homebrew wash of watercolour/artists gouache. Worms! Dirty boy! I’ve forgotten to fit the wind vane in front of the canopy, and the rocket pods I’ve fitted are the wrong ones (and I’m dubious about the attached pylons). They should be RN 2” types not RAF ones. I fitted them with PVA more as place holders until I get the correct ones (as well as being a good excuse for getting the new Airfix Phantom). I’ve also cocked up on the camouflage demarcation lines. Plenty of photos are knocking about of this airframe, and I followed a mix of the kits and Xtradecals instructions rather than the actual aircraft. Doh! A few other mistakes, but in all honestly, I don’t think I’ve ever made a 100% perfect kit. Not entirely happy with the base either (3mm MDF and static grass), which looks a bit too ‘manicured lawn’ rather than Port San Carlos Airstrip. Decals are from Xtradecals Falklands Harrier sheet, which allows you to build any aircraft from the conflict. It too has a couple of minor faults despite being produced with the aid of the Harrier SIG, i.e. the ‘0’ on the ‘07’ stencil on the tail should be split top/bottom rather than left/right, and the ‘Danger Ejection Seat’ markings are worded wrong. Easily fixed if you’re that worried about it, but still an outstanding decal sheet. C&C more than welcome. Mart9 points
-
Hello all, It's taken many month's for me to complete my BAe 146 model, problems having time to spray it was one thing, but some other problems came about through it's whole process. Originally this was for the group build. I picked up the Revell BAe 146 TNT kit at the Yeovilton model show with the plan to use the supplied TNT decals. It was then pointed out to me that the TNT decals are for the 146-200, and having looked up their fleet, they only had -200's and -300's. I then put it aside to await other decal's, and then sometime later fumbling through my decal book I found some Air Baltic RJ70 decal's! I then ordered the DACO BAe 146/Avro RJ stenciling set and made it into Air Baltic's RJ70 YL-BAL It was slightly tricky, the only real major problem was the wheels, it wasn't right until the end that I found I had knackered the undercarriage, it wasn't straight and made putting the wheel's in very difficult. In the end it was decided to shove the carriage door's on in the closed position, cut a hole and stick it on a spare Airfix stand, and it works perfectly, and can be displayed banking left or right, perfect! The Air Baltic decals are from Flightpath, yes I know when I built the EasyJet 737-200 I recall saying on here that I'll never use Flight Path again. Yes I had some trouble with these, not as much as last time though, I've learnt that lot's of water and being EXTREMELY careful does work, but being extremely careful isn't always easy, they fold the moment your concentration drops for a nanosecond. Would I use them again? I probably would actually because they do some different and classic stuff that usually you can't find elsewhere. And I can only pick the decal's up at show's as they are hard to come by secondhand online. Anyway here is the final outcome: DSC_0040 DSC_0037 DSC_0035 DSC_0034 DSC_0032 Thanks for looking9 points
-
Stay tuned for part two! I have a lot of Spitfires to build. I already had my first good news of 2017 that was clearly attributable to Spitfire builds, and all of you in the UK are welcome. I shall keep it up, like Moses at Rephidim, for as long as I can. Anyway, I dug out another kit for some best practice testing, because these wingtips and ailerons are irritating me. So, the wingtips share a continuous panel line with the rest of the wing. Those of us who've built a few AZ Spitfires probably assumed that it took a jog there, but no, no it doesn't. If you put it on after you close up the wings on the Eduard kit, you stand a good chance of getting the jog again. So put it on before putting the top part of the wing on the lower piece: 20170109_223115 by Edward IX, on Flickr There's still a slight jog on the underside: 20170109_224400 by Edward IX, on Flickr With the ailerons, the little tab that goes into the wing to situate them is too tall and a trifle too long. The important part is to lower its height, like so: 20170109_223831 by Edward IX, on Flickr The top one is a sanded-down one, the bottom one is the ordinary unmodified part. This still needs some sanding down to make it fit better. Anyway, filler has been left to dry on my two right now: 20170109_222558 by Edward IX, on Flickr 20170109_222604 by Edward IX, on Flickr These were the roughest areas for me. The upper cowl, fuel tank in front of the cockpit, and the spine will likely need varying degrees of glooping too.9 points
-
Finished just before I go back to work tomorrow - Christmas break well spent I think. This is the Modelsvit 1/72 Beriev Be-12, finished as a firebomber using decals from Begemot. I've been fascinated by the Be-12 ever since I first saw photos of it. I remember contemplating a Revell boxing of the VEB Be-6 in the model shop on Deansgate in Manchester, must be more than 20 years ago now, and wondering whether it could be converted to a Be-12 - clearly not, they're completely different aircraft, good thing I left it on the shelf. I love the unique, distinctive shape, although I wouldn't call it beautiful. It's proportions look all wrong - the wing seems to be in the wrong place, there's way too much fuselage in front of it. But then they must have done something right as it's given 50-ish years of service now (although there aren't many left). I love this kit - by no means shake and bake, it's short run and shows it - for example there are no locating pins and the fuselage is in four pieces (six if you count the nose glazing) - but it goes together well if treated with care. Definitely a case of slow and steady wins the race. Surface detail is very nice and I managed not to obliterate much of it! I was impressed with the undercarriage - it's a complex structure but goes together well and is pretty sturdy. The only bits that gave me any trouble were the clear parts, which weren't the best fit ever but also not the worst. I'd definitely build another. The Begemot set includes 20 or so options, most of them very similar grey maritime patrol aircraft but with two different firebombers - this one and one with yellow panels and blue trim. I was tempted by the Egyptian option, but in the end couldn't resist this firebomber. The set included masks for the red panels on the fuselage - which was nice, but the masks for the top of the fuselage weren't flexible enough to follow the complex curves around the wing roots or around the observer's blister window, and the decals for the white trim weren't the same length as the masks - fortunately they were longer so they could be trimmed back. The decals performed well but were challenging in a couple of places - particularly around the observer's blister, where I had to fix it up with some xtradecal white stripe (which was more opaque than the Begemot white stripes, so doesn't look great close up). I'm not normally much into weathering but had to do some this time - photos of Be-12s, particularly this one, without filthy tail fins are pretty rare, so couldn't not add the exhaust stains to the tail fins. Back when I used to work on combustor aerodynamics for a living I'd have been pretty horrified at this - that much soot shows they clearly didn't manage the temperature inside the can very well, but since the engine is a 60 year old design I'll cut them some slack! On to the photos:8 points
-
Hi hope you like my Bergepanther, I replaced the winch with real wire and used various weathering products. Filters, oils, tamiya Earth, oil spills etc. cheers for now8 points
-
After seeing Rogue One, and seeing all the cameos, I knew I just HAD to build a Red Leader tribute. Lo and behold, Bandai to the rescue! This is a specia boxing of the X-wing with an additional 1/144 kit. What was lacking in the kit was research! The instructions called for all sorts of decals that aren't on the leader at Scarif or Yavin IV. So I went with what I refs I had. MTFBWY Drewe Henley, aka Garven Dreis, aka Red Leader.8 points
-
Hey guys, Made a bit of progress on the Harrier. Got some stencils on, amid some debate about whether white wash covered over markings but I saw a couple photos where they were visible, and also, they'd be easy enough to spray over so I fired them on. I'm in the process of making a video for this build, I'll upload it to my youtube channel, MURRODELS I also painted a couple roundels on, I'll need to paint the ones on the sides on next. I wanted to paint them because the decals that come with the kit, although very nice, would look too bright and glossy for this scheme I think. What do you's think? Making the roundels... Cheers!8 points
-
Greetings everyone. Recently joined the group here, glad to be a part. Since about a year ago I've been off-and-on on this 1/48 Academy P-38L. My first Academy kit I've been less than impressed. Lot of little flaws here and there with moderate fit quality. I take some blame for putting in the aftermarket cockpit, which snowballed into other fitting issues in the nose. Here's how it started.. Apologies for some of the crummy photos Aires cockpit was hell on earth getting to fit but looked pretty good after all the sanding, filling and grinding Eduard gear bay detail set was pretty nice This was my first NMF endeavor so I approached it pretty cautiously, alclad Aluminum 101 under smooth finish Mr Surfacer 1000 / tamiya fine primer coat. I thought it looked a little too matte and bland so began adding post shading / hi lighting and panel shade variation. ie polished aluminum on leading edges and accenting various panels, along w tamiya smoke for post shading I sanded the body pretty smooth with micromesh pads and decided to go without a top coat on the alclad. I was convinced a clear coat would mar the metallic sheen that Id built up. Decals just recently applied and locally clear coated w Alclad Aqua gloss. it is now that I realize I probably could have coated the whole model with this stuff. It's pretty awesome and goes down smooth The Kagero Cartograf decals are amazing but did not include the stencils and insignias so I was forced to use the kit decals for those. As i went along i realized how horrid the Academy decals are. Thick and completely unresponsive to solvaset and micro sol. I made the mistake of not trimming off the carrier film of the smaller insignias and they have silvered quite nicely, UGH! In addition they look out of register.. total crap (academy decal on left, cartograf on the right) I'm wondering if I should remove and replace them. I applied a small amount of clear coat locally over them so Im not sure what collateral damage I'll take when removing them. Any thoughts or suggestions?8 points
-
My father is one of seven, but it's such a large number of children to me, it's practically an algebraic variable; you might as well say "I'm one of X children," where you're literally saying "X". Not a lot tonight, just putting on the ailerons and fixing some wingtip droop. I really am not a fan of these engineering choices. 20170109_194119 by Edward IX, on Flickr Even after a bit of sanding on the second ones I did, they still fit proud. I had the same problem on the Fw190, and while I'm generally willing to take the blame for modelling issues, this one is all on Eduard. Nobody needs poseable ailerons. 20170109_194124 by Edward IX, on Flickr Nobody. No, you don't either, I'm sorry. We checked. I also did some clamping to close up a gap: 20170109_200528 by Edward IX, on Flickr But it would seem I don't know my own strength. 20170109_200345 by Edward IX, on Flickr Incredibly, the kit was undamaged. The bulkhead and spacer forward of the instrument panel are great engineering choices, credit when credit is due.8 points
-
I was taking some photos of older builds while I was cleaning and dusting the display cases today. I thought this one came out well and I'd share a build from when I could still see well enough to work in 1/48 scale. Totally fictitious markings as I stuffed the kit ones up. Nice little kit which was very fun to build. I hope you like it. Dan7 points
-
Cheers Tomo! He sounds like the same guy that serviced my old Corolla several years back; I drove home to find he'd left all the filler caps off oil, brake fluid, power-steering reservoirs and everything else that could be unscrewed! Is torque simply another description of this action Ian? I'm not an engineer so these things easily confuse me... Actually I think you're right Keith. It's the same look people wear coming down a rollercoaster. Presumably once it gained cruising altitude the expression would turn to a frown of 'efffin RATOG'...... I'm right glad you sis-in-law got her moggie back - I hate to think of people losing their beloved creatures. You won't be disappointed with the SH canopy btw - it's a really nice moulding that captures the necessary details. Don't talk daft man. Where's the fun in that. Besides, I purchased it for three fundamentally sound reasons: 1. It has, as you say, a beautiful piece of period box art, that may yet get to grace the bathroom wall if I can convince Mrs. B. 2. I've always wanted one. 3. It was extremely cheap. Like me. That said the decals appear to have turned to Stilton in the photograph I saw of the contents, so some decal shopping is required. I'm going to have a shufti at the Warpaint volume to see what catches me eye. Sage words T.Tiger! I avoided Blu-Tac as I hate the smeary deposits it leaves all over the transparencies - though you are right about avoiding pressure (as I now know...) I need to have a squint at RB's stuff as I believe they have some rivetting gizomos too. You have to wonder at the developmental cycle of the aircraft being so extended that a bit like us modellers, the design teamat Fairey got carried away on the details. Not helped of course by the multi-role nature the Barracuda was expected to perform - where have we heard that before in the aircraft industry... He's one of a number of war artists I'm only just discovering. John Platt is another: Convoy Arriving off St-Anthony's Lighthouse, Falmouth (painted 1942) It's after researching some of these painters that I came across Brian Foss': which I've just blown the January's disposable income on from Abebooks. That cultural period in Britain fascinates me: slap-bang in the middle of the Modernist period the world catches fire and part of the British psyche decides in the midst of everything else, that it is important to have artists reflecting the experience back to the population. Also Myra Hess' wartime concerts at the National Gallery, or the 'who are we?' poetics of Powell and Pressburger's film A Canterbury Tale....There's a defiance and insistence on certain values lying behind those instincts that despite the multitude of flaws in the nation, are things of immeasurable value. An unfortunate choice of phrase considering I'm hoping it will stay glued-on! Cheers Rob - you dignify my 'What if' approach by referring to it as anything so logical as a plan... There's something of a film-poster approach in Eurich's work isn't there, like the way the Bruneval canvas conflates the various stages of the raid into a single image.... What is it they say about owners looking like their dogs? In my case it might be also true in relation to looking like their kits! Hear hear sir! I too was a good moulding once. Thank God that medical science now provides a range of aftermarket options... This has got a bit long due to my rambling so I'll stick the update in a following post....7 points
-
Hi, here's my latest, done as a relaxing build over the hols to take my mind off certain crap that's going on in my life at present. No doubt there are a few missing aerials/intakes but it looks like a JP to me!Kit: AirfixAccessories: Pavla ej seats plus some scratch built aerialsPaint: GunzeWeathering: Flory washDecals: Xtradecal - 79(R) Sqn TWU 1984 (I think that the camo should wrap around below the wings, though Xtradecals crappy instructions don't show thisThanks for looking Untitled by bryn robinson, on Flickr Untitled by bryn robinson, on Flickr Untitled by bryn robinson, on Flickr Untitled by bryn robinson, on Flickr Untitled by bryn robinson, on Flickr Untitled by bryn robinson, on Flickr7 points
-
At last, I've finished up the little Eduard Spitfire. This build began as part of the Mediterranean GB on this site, but got stalled midway through when I dropped the kit and had the PE instrument panel and control stick fly off into the ether. I replaced the PE with a decal, but never did find the control column, or gunsight. I replaced both with inferior pieces from an Airfix Mk.I which I culled from the herd. Butterfingers aside, Its a great kit. Not without its challenges (As Eduard would claim via its needlessly snarky youtube video), but what challenges are there, are easy enough to address. After withdrawing from the GB, I built my model as a machine flown by Slovak ace, Otto Smik, who flew with no. 312 (Czechoslovakian) squadron. Smik escaped Czechoslovakia in early 1940 and made his way to Iran, and eventually England. He began his training in late 1941 (in Canada), and began combat operations in January of 1943. He would go on to destroy 11 nazi aircraft, and three V-1 rockets. Smik was shot down in November of 1944 by AA fire while on a ground attack mission over the Dutch town of Zwolle. He was only 22 years old. The kit was painted with Tamiya paints. The fading effect in this photos looks far more harsh and stark than in real life. Could be due to the photography being done in bright morning sun. Thanks for looking.6 points
-
Sorry chaps, been a bit crock lately. Normal service (fnaar fnaar) will be resumed soon when I'm feeling myself again6 points
-
A little work this afternoon. Why oh why I wonder did SH find it necessary to have the arrestor hook region of the underside as a separate component? That just means some extra filling and sanding now for no obvious reason.... Rather absent-mindedly I picked up the port wing earlier. Not so flush at the join in the raw state: But after sanding and test-fitting, what do you know? After two months I actually stuck a wing on! A whole one! I'm a bit surprised myself tbh, I'd only really picked the wing up for a quick look-see and without thinking started gluing it on. My brute force solution to making sure it doesn't droop whilst curing: I call this one 'Barracuda Assaulted by Polo Mint and Lead Bluebottle'. You'll have noticed in the above shots that I snapped the headrest off of the pilot's seat? This was deliberate as I thought it better to mount it upright again later than to lose it over the course of the build and only notice it missing at the end - it's still attached by the shoulder harness so I'll just leave it folded into the seat for now. That's it for now. The undercarriage is up for scrutiny next. I'm going to leave the wheels and oleos off until after paint, and only mount that lower triangular slab and arms of the undercarriage at this. If you have a look at the kit mouldings, the triangles: ...leave something to be desired when compared to the real thing: The oleos and wheels look very good however, but the upper arm section of the kit is rather on the thick side for my liking (parts 19& 20): A bit of detailing needed on a few bits there before installing onto the fuselage then. The radar (Yagi?) arrays don't look too bad either but I forgot to photograph these to show you. One final thing you guys might be able to help me with. The kit comes with racks for underwing loadouts, however as I'm building this as a 1600lb loadout from the Tirpitz raids (the bomb won't actually be attached of course if this is in maintenance with the engine out), does anyone know if the wing racks were a permanent fixture, or were they removed according to the weapon load-out for the mission concerned? Evenin' all. Tony6 points
-
Babushka is coming along..big day masking, another big day of masking tomorrow! to achieve something like this..still playing with it6 points
-
Happy Birthday Keith! Sixty is the new forty they tell me, whatever that means... What sort of casting resin do you use Keith? I might get some to try out. I've had a couple of bouts of 'post viral fatigue' and it really is a pain, I sympathise. For me the worse part is the 'brain freeze' - lying around would be more bearable if you could read, or watch something... I had several sets of DVDs bought for me during one six-month bout and I still can't remember what happened - slept through bits. Horrid. Luckily a session of excessive smoking and drinking in Prague seemed to cure it, but my Consultant wouldn't give me a prescription or fund any research... some people eh, no sense of adventure6 points
-
This time last year I started off a year of droid builds with BB-8, so I thought I'd get my first build of the year going in a similar way, this time with the unquestionable star of Rogue One; K-2SO Before I cut any plastic, I'll show a quick run through of the sprues, which won't take long as there's only two (okay, three if you count the base). You don't get the usual large sprue of vinyl joints either, just six small ball joints, as K2's limbs don't really suit that type of connection. First up sprue A. The multi-coloured one for this kit, with black for the body parts, gunmetal grey for the joints, Light grey for the shoulders and clear for the eyes and the round pins that are used to reinforce the elbows and knees Sprue B. All black, with the legs, head, hands and other smaller parts The standard figure base. You also get an optional support rod (the long piece on the left side of sprue A), one end of which clips into the base, and the other into a hole in his back The small set of vinyl joints for the hips, shoulders, neck and waist Some close-up shots: Chest and back panels Hips Legs Head dome This is a nice one piece slide moulding. There's a seam across the top that will need cleaning up, but it's nothing major. A quick swipe with a sanding stick will deal with it. Eyes Hands No finger articulation, as Bandai sometimes do with their Gundam kits, but that would have probably made them over scale anyway. These look fine to me Shoulders These are fully engraved, so you won't have to use the decals, which is just as well as the decals are the usual Bandai type with dotty, half-tone printing Elbow and Knee joints These have some nice tooth detail on the insides. On the 'real' droid the joints are fully open through the centre, but Bandai have included some clear inserts to strengthen the joint. I'll be leaving these out if possible, but I'll probably have to glue the limbs in one position Standard decal/sticker choice Regular Bandai instruction booklet more soon Andy5 points
-
Years ago I bought a 1/72 Contrail MYA "Bison" on ebay. I dont really know why except it is such a mean looking aeroplane. I opened the box and studied the vacuform kit many times over the years shook my head and pushed it back. About 18 months ago I pulled it out again and cut the bits out of the formed sheets, tried to match the bits together, shook my head and pushed it back again. Then I tried to sell it, hell I tried to give it away but no, everyone is smarter than me. My missus left for a 4 week visit to the UK 10 days ago and I thought I would do a model marathon and pulled this bugger out again, sanding filling cutting adjusting swearing and repeat ad nauseam. I have now primed it and loosely attached all the bits together.. jeez it is big, really, really big! Now I wanted to make it as easy as possible for me, at the end of the day I just want a nice looking model, I have no AMS at the best of times and this one will not pay service to scale accuracy..and I am not really interested in the boring VVS scheme, so something unheard of for me, it gonna be a wiffer.. "Air Forski One" no less. I have come to the realisation it is gonna take a hell of a lot of paint! It is so big it is going to be awkward to mask and paint I will have to build some sort of paint jig to do it. I thought I could paint the sub assembles and put them together but is not going to work, the bits dont fit well enough to go that option.. any way I am still thinking while the primer hardens [5 points
-
I'm sure there are a few F-4 lovers out there. I have posted these elsewhere. ..... Martin5 points
-
Hello, The one and only kit I've managed to finish this year. 1/72 Saab J35J Draken: kit by Revell, photoetched by Eduard, Maestro Models pitot tube, Vallejo paints. Decals are from the kit with the exception of the large numbers on wings that were painted with home made masks. Thanks for your comments.5 points
-
That putty looks very much like siligum; http://www.cooksongold.com/Precious-Metal-Clay/Gedeo-Siligum-Moulding-Compound---100g-prcode-870-300?p=gs&gclid=CM-Ew_mgttECFYIL0wodpD4A4Q I bought some (rather cheaper) from our local 'The Range' store & think it's great for making quick & dirty moulds. I often mix up small amounts of casting resin to use in it & it works nicely. Getting supplies of similar stuff free from the missus is a proper bonus! And don't talk to me about fatique & no stamina, I really know how hateful they are. For reasons unknown to the medical profession, in 2007 I succumbed to something called Myasthenia Gravis - no, I'd never heard of it either! Two of the main symptoms are chronic fatique & lack of stamina to carry out any prolonged physical activity (oh, & the now almost complete lack of an immune system so I catch every cold & infection going!) It got so bad it eventually led to medical retirement from the Civil Service (& getting blood from a stone is easier than that these days!), so I now have all the time in the world to get on with serious stash reduction, but no energy to do so - frustrating is not the word!! Apologies for being so maudling Ced - I've just realised why - it's just turned midnight & I've just turned 60.....aaaarrrgh!!! Keith5 points
-
The good old Revell kit. Gunsight added, and lowered the flaps, otherwise very oob. Thanks for hosting this event!! Alex5 points
-
Morning all, Last time I updated you I showed you how I was modifying the Lancaster wing, sparring it all to keep it nice and strong as well as extending the wing tips: There's been a bit of progress since then, with the top and bottom halves now being joined, as well as the tip extensions being more or less done, bar a few blemishes to sort. The rear skins of the new tips could be skinned with plastic card laminates, and when dry were sanded to an aerofoil shape. The forward, leading edge sections were more difficult, with the more pronounced aerofoil shape needing to be replicated. I did plan to use my trusty plastic card plank method, but when rummaging in the spares box I found some spare 1/32nd scale Revell Beaufighter stabilisers, which when re-shaped slightly and cut down, fitted the tips perfectly. The remaining gap was then plugged with more plastic card and skimmed with P38, which allowed me to blend the contours of the new wing seamlessly: The new wing now captures the shape of the outer Shackleton wing reasonably well to my eye: The spar stubs have been positioned to interlock with the inner wing section when the two are joined: The only real challenge of this whole process was a very warped trailing edge to the Lancaster kit parts on the upper port wing. Despite hot water treatment and lots of bending and clamping, it just wouldn't straighten out. The only option was to remove the section and replace it with some new plastic card sheet: A few blemishes to sort and some final sanding here and there, but I can soon think about mating these to the inner wing sections: So, until next time, Tom5 points
-
So, cowl stains sealed with some satin varnish. Next the Exhaust stain was applied. Tried to match pic with top the curve starting from the middle-ish above the pipes. I used the new slovakian Mr Paint, very fine pigments. A mix of black white and brown (bought a few basic colors to try out) to make a dirty grey. Added some tamiya flat base to mix, thinned with mr color levelling thinner. Nice contrast with the flat stain and sheen of the panels. With what was left in the airbrush cup I did some general post shading here and there too, mainly on undersides and from guns. Next is a rust wash on the pipes, and a light 'lead' drybrushing on the tips. Then some fresher 'wet' oil and fuel stains to contrast on the cowl grime.5 points
-
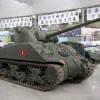
After a 6 month build on the Revell Corvette, it's time to return to my more familiar habit of AFVs. Although after seeing so much inspiring work here on aircraft I rather think I'll commit to the modelling equivalent of Triathlon and go for an aircraft after this And so, onwards to the kit which has been well reviewed elsewhere and provides a modern alternative to the elderly Dragon/Zvezda offering. I've taken quite a like to these recent Soviet bloc Trumpeter kits. They are relatively cheap and reasonably detailed. This comes with vinyl one piece tracks which I'll replace with MasterClub resin versions I aim to build a rather attractive and colourful machine - decals curtesy of Echelon Fine Details... However, I can find No photographic representation of this on T'internet which is a shame. My single reference remains this adequate Concord offering (and shame and despair that they seem to haves stopped publishing) The hull tub is nicely moulded.. Deck fit is perfect The original idea was to go for a straight build but you know how it is - there is a partial interior so on reflection I'll probably have some hatches open. More soon Thanks for looking Rob4 points
-
Hello guys This is my latest work, a Russian T-55AM made from Takom box. The kit is very beautiful, it allows to reproduce a Russian built T-55 with all main details of this version. In the box there are all PE parts you need, i added some light wires, new copper tow cables and Friulmodel tracks. To fit the metal tracks is necessary use the Friulmodel drive sprockets or replacement pairs from Tamiya T-55A kit. The fitting is good, but need careful in some areas because there are some little parts. Painted with Tamiya acrylics, weathered with Maimeri oils and various AK products The numbers are painted using home-made stencils As always criticism, comments and suggestions for future works are welcome. Cheers4 points
-
A couple (or so) from Mitiga in 2007 .....4 points
-
Hi I don't make many jet models, unless V Bombers, but here's the second of my Lightnings which I have just completed. This was a part started kit I got off Wolfpack (Member here not the company) It has a KMC resin cockpit but otherwise out of the box. Painted with Xtracrylic and Halfords paint. The markings are out of the kit with the exception of the top wing roundels, I remember from a third kit I nearly finished that they are out of register and would stand out on a camo scheme so replaced them from my spares. I like this kit, it fits well and any faults with it were my own doing. and finally both my Lightning together Regards Paul4 points
-
Yeah, I see why they did it, but (speaking from my armchair with no knowledge of tooling processes) it seems like making the carbuerator, postwar wheel bulges and cannon bulges separate parts with skinned-over holes in the wing surface, they could have ended up with the same number of wing toolings (VIII, IXe, IXc, IXe clipped) with far less fiddiliness. Oh, and no separate ailerons. So frickin' dumb. I like where this is heading. I just grabbed two late-wing XVI overtrees. Anything for the Union. I very briefly dated (and I'm sorry to say treated very badly) a young woman of Polish descent who'd been a schoolfriend when I was twenty. Her Polish grandparents had both been slaves of the Nazis during the war -- her grandmother worked for Volkswagen. It was interesting to hear their stories, especially as that was the same year I interviewed an unrepentant former officer of the Waffen-SS's Liebstandarte Adolf Hitler. Quite a bit of contrast between one of the enemies of humanity and some of the people they'd worked so hard to erase.4 points
-
Pity, at this moment, my mail was not sent to La Sicilia. I tried to contact them by Whatsapp, but no reply by this way up to now. This evening, I sent this message to the Director of the Rev's institute library, library that was closed when I visited the museum last 31/12: Hello, I am Olivier Pansieri, dental surgeon in the south of France, but also model maker (I wrote my first article in Tamyia Model Magazine french edition about the Chevy Bel Air Convertible 1957 about 1 year ago, and it should soon be published in the english edition). A few months ago, I decided to buy the Italeri kit of the Fiat 806. As I was looking for docs about this car I didn’t know, I saw there were very few docs on the car, because her life had been very short. In the same time, I discovered on the net a very interesting thread in which modelers tried to improve the kit, quite poor and not accurate. I signed in, and began to post in this thread. It was the Fiat 806 Gangshow (in which, pity, some photos have been cancelled). But, gradually, a problem has appeared because the first members of this thread looked unfavorably our efforts (mine but also other modelers ones) to really be as near as possible from truth about this car. With a little group of incentive modelers, we decided to create a new thread, called « Fiat 806: research and scratchbuild » (scratchbuild means in modelers vocabulary that you modify deeply the kit, create pieces etc, instead of just making it straight from the box), that you can see easily on internet. As my kit was the most advanced, I was especially working on scratchbuild aspects, while others, like Roy, Nick, for example, were more working on the research aspects, using 3D, through others, and trying to find new infos, docs on this legendary car. In a few weeks, we found many very incredible things, and discovered that I would be the first (the other modellers will follow soon) to give back to that car her real shapes. The historic context was too very important for us. On this, I have had the opportunity to visit the wonderful Rev’s institute, while I was in holiday with my family in Florida, and in particular at Fort Myers Beach, where American patients of me, who also have a villa on the french Riviera, had invited us. On this, I have been very very lucky, because I didn’t know the institute, but Elisabeth, my host, who knew my passion for model making cars (I am also an aircraft modeler) told me there was a private museum at Naples. Now, I arrive to my asking: Sebastien Faures Fustel de Coulanges, the author of an excellent book, Fiat en Grand Prix 1920- 1930, told me you probably wouldn’t have in your library anything for us we don’t ever have. But nothing ventured, nothing gained, I decided to come in contact with you, as the library was closed when we visited the institute, last 31/12. I saw several very kind volunteers, like Troy, to whom I explained my (our) quest. I intend to write a long article on all that research, findings and scratchbuild. In my opinion, the short form is not very well adapted to all what is to say (even if, compared with the 2 threads, a big synthesis work will be necessary), but I won’t find an editor interested in publishing a book on such a narrow subject… Well, if you could try to find in your library any info, doc, drawing, article, photo of the Fiat 806, I would be very grateful to you to send me what you have. All the best Olivier Pansieri And there, good surprise, 1 hour only after this sending, I got this reply: Dear Mr. Pansieri: What a wonderful project. I will try to help you this search. I will get back to you as soon as I can. For instance, I have avoided inserting names of my correspondents, until they give me authorization to put them on the thread.4 points
-
I think they whip the plastic before injecting it to make it go farther... at least, that would help explain the constantly breaking cheap plastic clamps our hobby is lousy with. I'm with you on the Ailerons. I don't need them. But, I do need all that rivet detail and that feature will make any other spit in my case look obsolete and unworthy. That is why I can never have one.4 points
-
Uh-oh. Math jokes.4 points
-
Hi everyone Tonight I've concentrated on finishing painting the roundels and codes. TBH I'm not totally happy with the results, but they are fixable it will just take more time. Again you're seeing the model with in minutes of the masks being removed.. I'm gonna let everything dry for a full 24 hours before I start the tidy up. Cheers Iain4 points
-
Sank you, sank you ver' mush John old boy. I'm currently writing this and watching a bid on Ebay simultaneously. What can possibly go wrong? Really only a 'suits-you sir' fitting session to update you with this evening, in order to iron out any final decision on what sections of the canopy to utilize. After due deliberation here's my choice - laid out in closed position first just to get an idea of the placement of the varied sections in relation to each other: And now with the intended sections opened up. Rear quarter: Front quarter: I thought you might appreciate an annotated version indicated the respective parts of the two canopies used: The Falcon element for the TAG's tilting section at the rear is currently languishing upside down on the cockpit floor whilst I work out how to retrieve the blighter without scratching it. I decided that overall the superior clarity and lack of optical distortion in the Falcon canopy warranted most usage. The SH section for the TAG tilting bit to go into into I'm keeping, so that the observer's sliding hood can fit back over it, whilst I may just swap out the SH windscreen and use the Falcon one as well. Nothing personal to SH - for a closed cockpit as I'd already mentioned their canopy is absolutely fine OOB in terms of accuracy of profile; I just happen to be a fan of the Falcon stuff in terms of its overall quality if I'm going to have double layers of the stuff where the sections are slid back, and tilted up - I think it'll just look smarter in the end. Don't worry - I haven't ignored how those sliding sections standing up too proud at present when they're slid back over the bits below them, some delicate sanding and micromeshing to thin down profiles should help there later on. Oooh. Notification from the 'bay (E not Biscay) that I now apparently have an Fw200 to add to the stash. (Hopefully being a really really old Revell one the mouldings should be sharper than later re-boxings of it.) Another maritime aircraft I just can't work out why I find them so captivating, though mention anything in a sentence that also contains the phrases 'Western Approaches' or 'North Atlantic' and I'd be hard pushed to resist. At least I can now spend this evening disillusioning myself reading up about all the work it will need to correct it.... I'd recently been looking at the work of Richard Eurich again - he was employed as a war artist by the Admiralty in WWII and doesn't seem as well known as wartime works of the better known Henry Moore, John Piper et. al. Some of his canvasses are quite extraordinarily cinematographic for the time. Withdrawl from Dunkirk (painted 1940): Air Fight over Portland (painted 1940): Raid on Bruneval (Painted 1943) Tony4 points
-
Thanks guys I'll be avoiding all the decals except for the Imperial logos for the arms. Still not sure why bandai can't do a better job with them, but I guess they have to save money somewhere to keep these things cheap From what I've seen of other K2 builds, the limbs are pretty good at supporting the figure if the little clear inserts are added. I want to leave them out to give it the proper look, so gluing probably will be inevitable I ask myself that all the time This one will stay as the real K2, but if when I get another one, who knows? I've got a bit of work done on the head. I've given most of the bits a base coat of gloss black ready for the metallic coat I'll be using for the paint chips. The parts for his mouth, which will stay in a polished metal finish, have then had a coat of AK Polished Aluminium There isn't that much chipping on his paint, so I could probably have done it by painting the chips over the base coat, but I've decided to do it with hairspray. I won't be doing it the usual way, rubbing the surface with a wet brush, as the chips will be far too big. I'm just going to use a sharp cocktail stick and keep the chips as small as possible. I wasn't sure what colour to use for the undercoat, as the chips on his paintwork aren't obviously metallic. I did consider using a pale grey, but I thought the resulting chips might be a little too dull, so I've gone with Alclad aluminium, but I'll tone it down with some matt varnish before I add the top coat The lower half of the head builds from two side pieces the fit around a central block that holds the vinyl joint for the neck, and also holds the mouth parts. When these bits are together it does have a slightly 'Vader' look with that mouth grill Because this is built up from two halves, there is a join on the back edge, but the fit is very tight. I ran a bit of glue into the join and it's closed up pretty well. I'll give it a sand, and a smear of Mr Surfacer if needed, but it should look fine in the end The eyes are made from a single clear insert. Bandai have included silver decals/stickers to add some reflectivity to them, but since the decals would go on the back of the eyes the silver side would be facing into the head. I'm not quite sure what Bandai had in mind there It wouldn't really work anyway, as only the centre of K2's eyes are lit. The outer rims of the eyes are dark Fortunately Bandai do seem to have thought of that as they've moulded a small hole in the back of each eye which corresponds to the lit centre. All I really need to do is paint that hole in white, then paint the surrounding rim in a darker colour. You could also use the hole to hold a strand of fibre optic or a small LED I've just ordered some dark grey paint for the top coat and, while I'm waiting for that to be delivered, I'll get the other body parts together and base coated. Andy4 points


.thumb.jpg.76f12b87ce9ca9929c9aabdcf8f9d2dd.jpg)


.thumb.jpg.b4a5069fd2c2dd5708ce1694345c5b11.jpg)


This leaderboard is set to London/GMT+01:00